
Peblar Integration Guide
How installers and operators commission a Peblar or OK Connected charging station and connect it to Monta.
Updated 18 November 2026
When you connect your charging station to Monta, Monta becomes the operator and controls the charging process.
1. Notes
This guide covers Peblar charging stations and the OK Connected charging station.
Before you start, have the commissioning label that ships with the charging station at hand. It contains the device password needed to access the web interface.
White-label charging stations: the commissioning label on white-label units does not include the OCPP authentication password. If you need it, contact the manufacturer.
2. Open the commissioning wizard
- Power on the charging station.
- Connect to the charging station's Wi-Fi hotspot (SSID) using the hotspot password on the commissioning label.
- In your browser, enter the hotspot URL shown on the commissioning label.
- Log in with the device password from the commissioning label.
3. Firmware
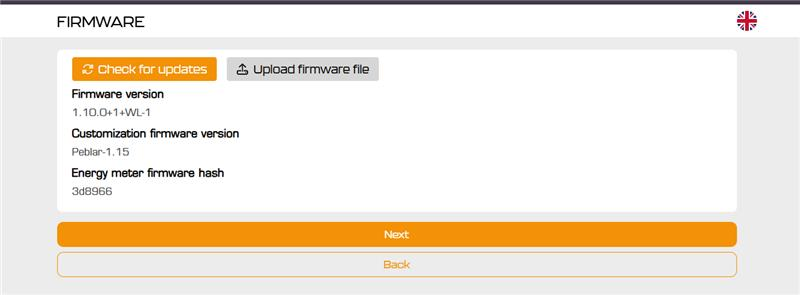
Click Check for updates and install the latest firmware if one is available, then click Next.
4. Network
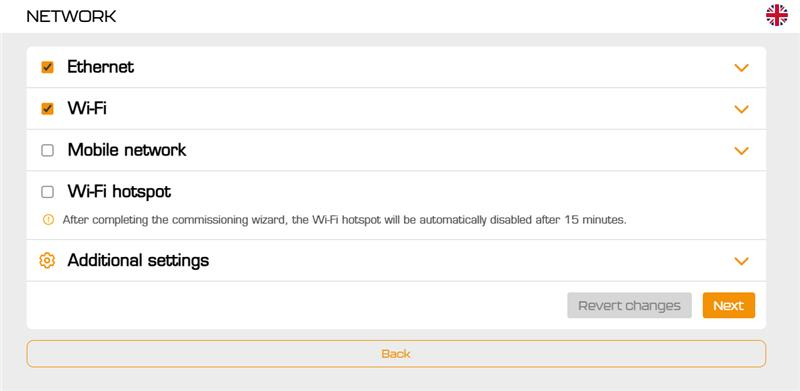
Select how the charging station connects to the internet. You can enable more than one option:
- Ethernet
- Wi-Fi: enter the on-site Wi-Fi network and password.
- Mobile network: for charging stations with a SIM card.
The Wi-Fi hotspot is disabled automatically 15 minutes after the commissioning wizard is completed. Click Next.
5. Authorisation: select Monta
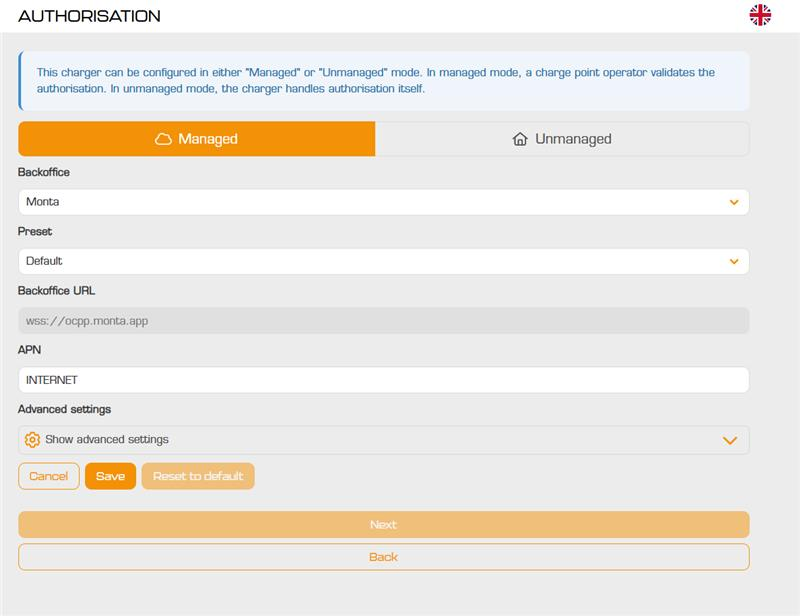
- Select Managed mode.
- Backoffice: Monta
- Preset: Default
- Backoffice URL: filled in automatically as
wss://ocpp.monta.app - APN: see below.
- Click Save, then Next.
The Default preset works with every connection type:
- Monta SIM: no changes needed. The preset uses the Monta SIM settings.
- Wi-Fi or Ethernet: no changes needed. The APN setting is ignored.
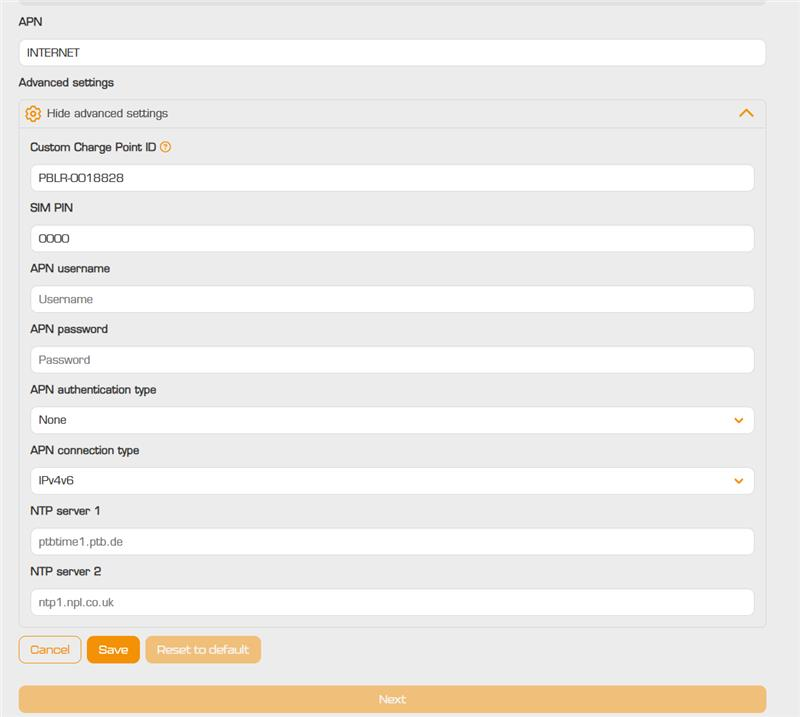
- Your own SIM: enter your provider's APN. Under Show advanced settings, set the SIM PIN, APN username, APN password and APN authentication type if your provider requires them.
Under Advanced settings, the Custom Charge Point ID is pre-filled with the charging station's ID (for example PBLR-0018828). Leave it as it is. You need this ID when you add the charging station to Monta.
Complete the wizard. The charging station should connect to Monta.
6. Add the charging station to Monta
To add the charging station to your Monta account, follow How do I connect my charge point to Monta? When asked for the charge point identifier, enter the Custom Charge Point ID from step 5. The OCPP URL is already set, so nothing needs to change on the charging station.
Moving a charging station from another backend to Monta
If the charging station is currently managed by another backend (CSMS), you can move it to Monta in one of two ways:
- Recommission via the web interface: log in with the device password from the commissioning label, run the commissioning wizard again and select Monta with the Default preset as described above.
- Remotely via OCPP: ask your current backend operator to change the charging station's OCPP backend URL to
wss://ocpp.monta.app.
Note: if the charging station uses a SIM card supplied by your previous operator, that SIM may be deactivated when you leave them. Connect the charging station via Wi-Fi or Ethernet, or insert your own SIM and set the APN as described in step 5.