Skip to content

Raedian Gemini Installation Guide

1. Set Up the Charger To begin, download the RAEDIAN Install app from the Apple App Store or Google Play Store. Once installed, open the app and follow the setup instructions. 2. Configure the OCPP Profile 3. Connect the Charger to the Internet Your charge point connects to the internet through 4G cellular or wired … Continued

Author avatar
Written by Damian Pupczyk
Last updated 10 November, 2025

1. Set Up the Charger

To begin, download the RAEDIAN Install app from the Apple App Store or Google Play Store.

Once installed, open the app and follow the setup instructions.

2. Configure the OCPP Profile

  • In the RAEDIAN Install app, go to OCPP Profile.
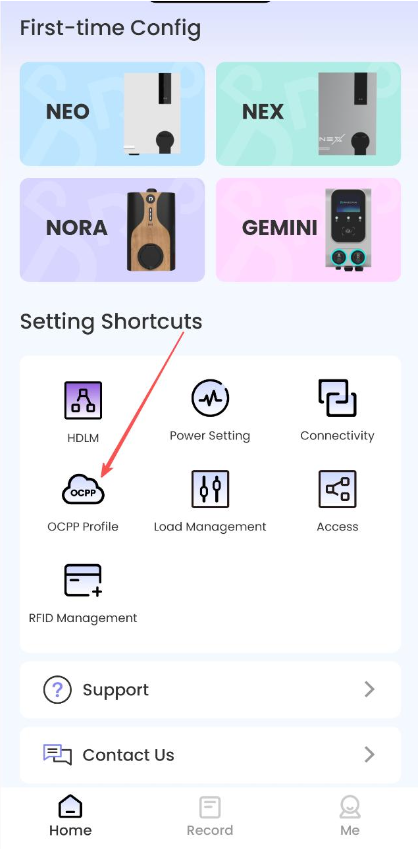
    User interface screen for the Raedian Gemini Installation Guide, featuring buttons for configuration, settings, and support, with icons and a modern layout.
    • Select GEMINI.
      Product selection screen showing four options: NEO, NEX, NORA, and GEMINI, with GEMINI highlighted by an arrow.
      • Proceed to Connect Wallbox — the charger should now appear and connect automatically via Bluetooth.
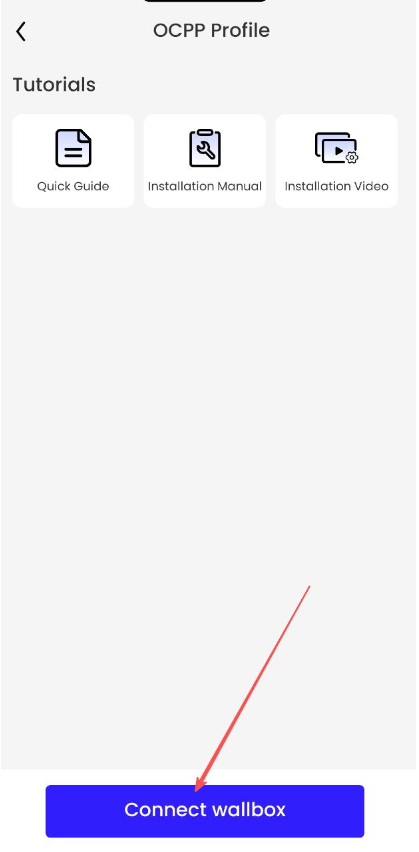
        User interface showing an OCPP Profile with options for a Quick Guide, Installation Manual, and Installation Video. A prominent blue button labelled "Connect wallbox" is highlighted.

        3. Connect the Charger to the Internet

        Your charge point connects to the internet through 4G cellular or wired Ethernet.
        No additional configuration is required for this step.

        4. Connect the Charger to Monta

        • After adding the charge point, click Go to setting.
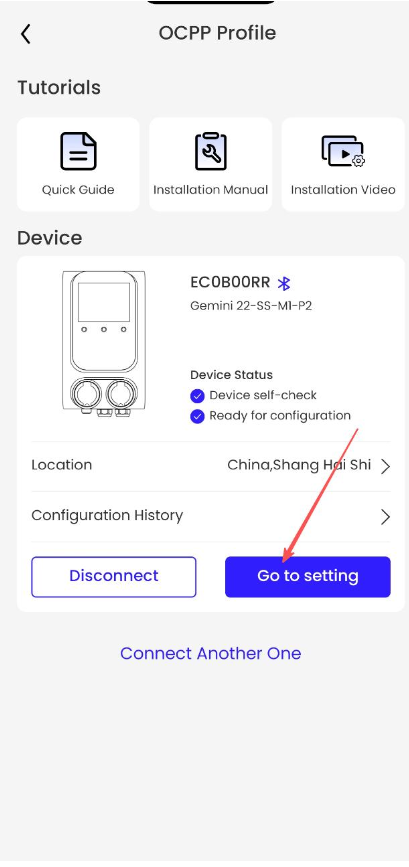
          OCPP profile interface displaying a device status for Gemini 22-SS-MI-P2, with options for tutorials and a highlighted "Go to setting" button.
          • Select the Monta profile if it already exists, or create a new one by tapping the + icon in the top right corner.
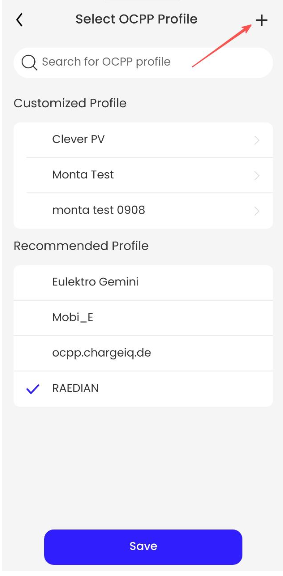
          A user interface displaying 'Select OCPP Profile' with a list of profiles, a search bar, and a '+' icon for adding profiles.
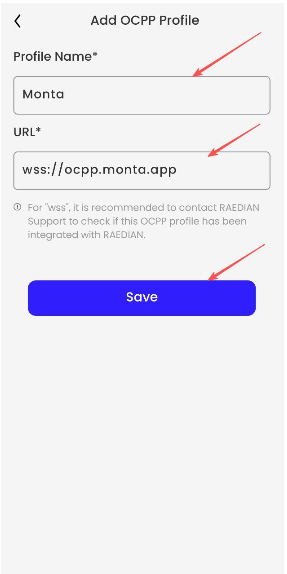
          • Enter the following details:
            • Profile Name: Monta
            • URL: wss://ocpp.monta.app
          Form for adding an OCPP profile, featuring fields for Profile Name, URL, and a prominent blue 'Save' button.
          • Select the newly created profile Monta.
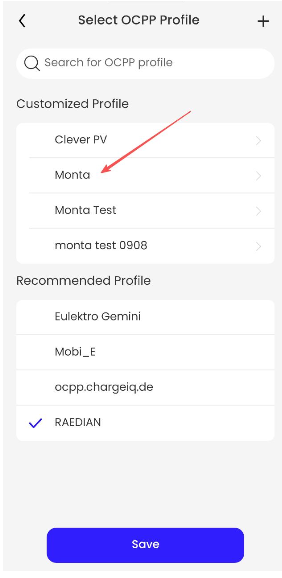
          Dropdown menu for selecting an OCPP profile, highlighting "Monta" with a red arrow, featuring a clean, white background and various options.
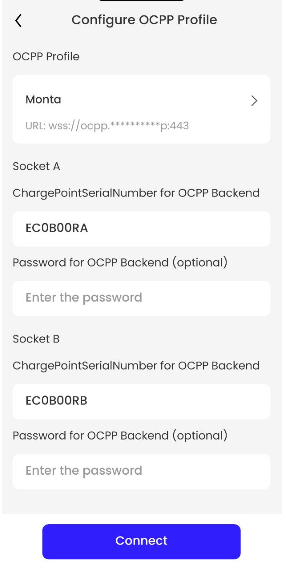
          • In the ChargePointSerialNumber field under OCPP Backend, enter the charger’s serial number for both Socket A and Socket B.
            • ¨Add an “A” or “B” at the end of each serial number to identify the socket (e.g., 12345A, 12345B).
          • Click Connect.
          Configuration interface for OCPP Profile with fields for socket details, including serial numbers and password inputs, on a light background.

            5. Complete the Integration

            Your charge point is now connected to Monta.
            You can manage and integrate it using the Monta Charge App or Monta Hub.

            User interface showing OCPP Profile with connection details. Includes "Monta" URL, two accepted socket statuses, and buttons at the bottom.
            Need to talk to a specialist?

            Contact our support team

            Platform status:
            All Systems Operational

            Private users

            Start a chat in the Monta app on your mobile device of choice.
            Open Monta app
            Open hours: 24/7, 365
            First reply time: < 5 minutes

            Business customers

            Sign in to Monta Hub and create a support ticket.
            Sign in
            Open hours: 07:00 - 23:00 CET
            First reply time: < 3 business days

            Certified installers

            If you're a certified installer, you can book a guided call with a Monta integration specialist.
            Book integration call
            Open: Mon - Fri 09:00 - 17:00 CET