1. Connect to the charger
- Connect your computer to the charge point with an ethernet cable
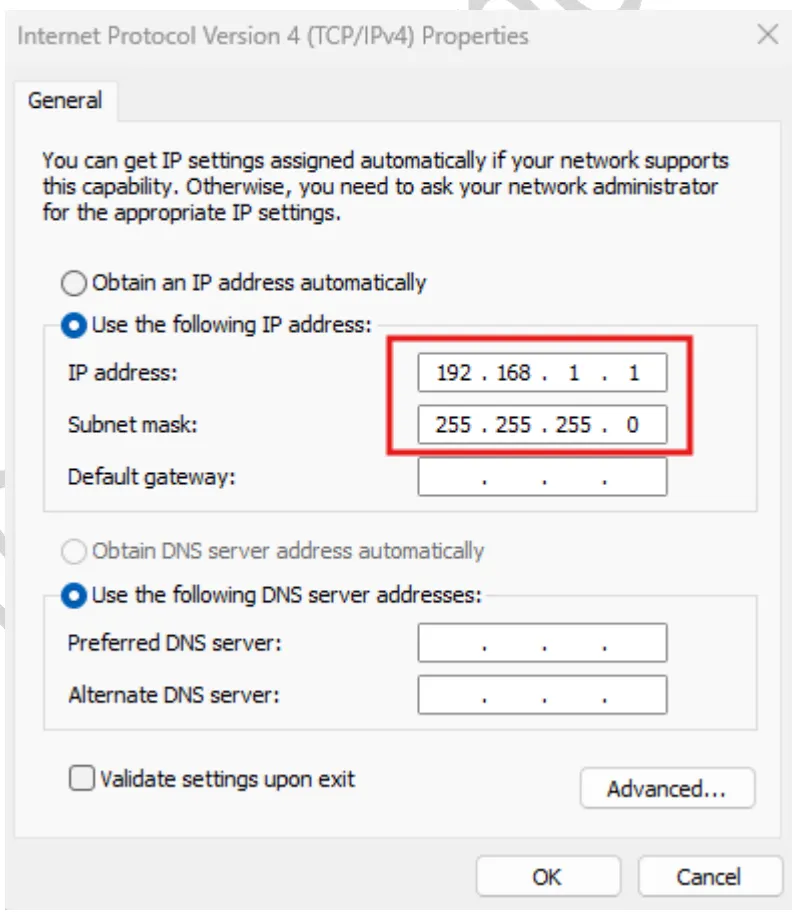
- Set the following properties:
- IP address: 192.168.1.1
- Subnet mask: 255.255.255.0
- Default Gateway should be left blank

- Open a web browser and enter URL: https://192.168.1.10/
- A login page should appear, where you can use the following credentials:
- firmware versions 0.78 and above:
- Username: zerova
- Password: t6sji4j83
- firmware versions earlier than 0.78
- Username: admin
- Password: 1231231238
- firmware versions 0.78 and above:
2. Connect the charger to the internet
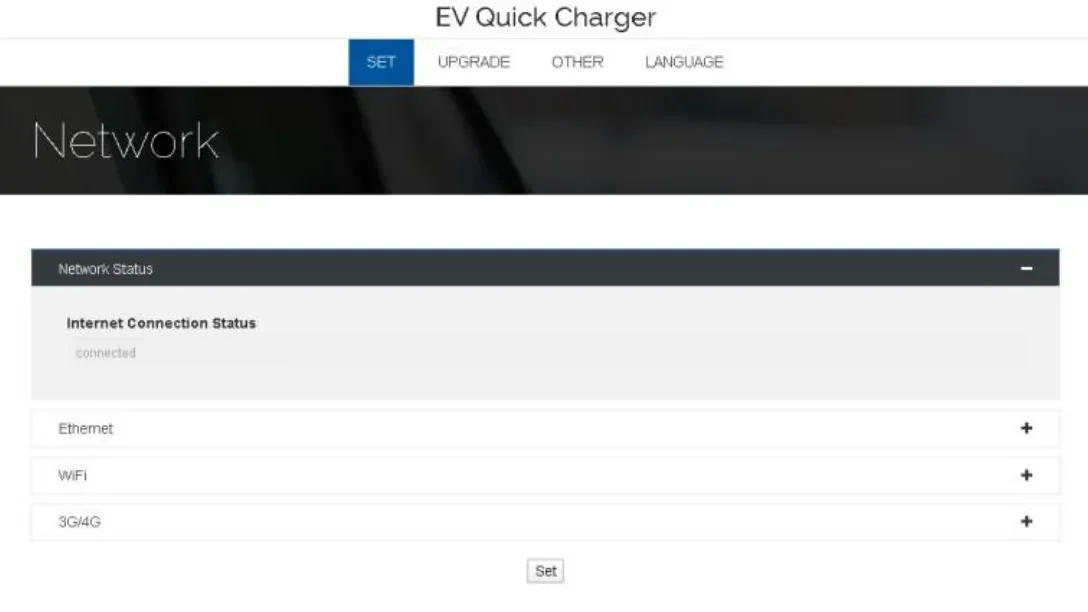
- In the webpage, go to the SET menu and open the Network Status section

- Choose your preferred connection method: Ethernet, WiFi or 3G/4G
- Enter the details necessary details to use that connection method
3. Connect the charger to Monta
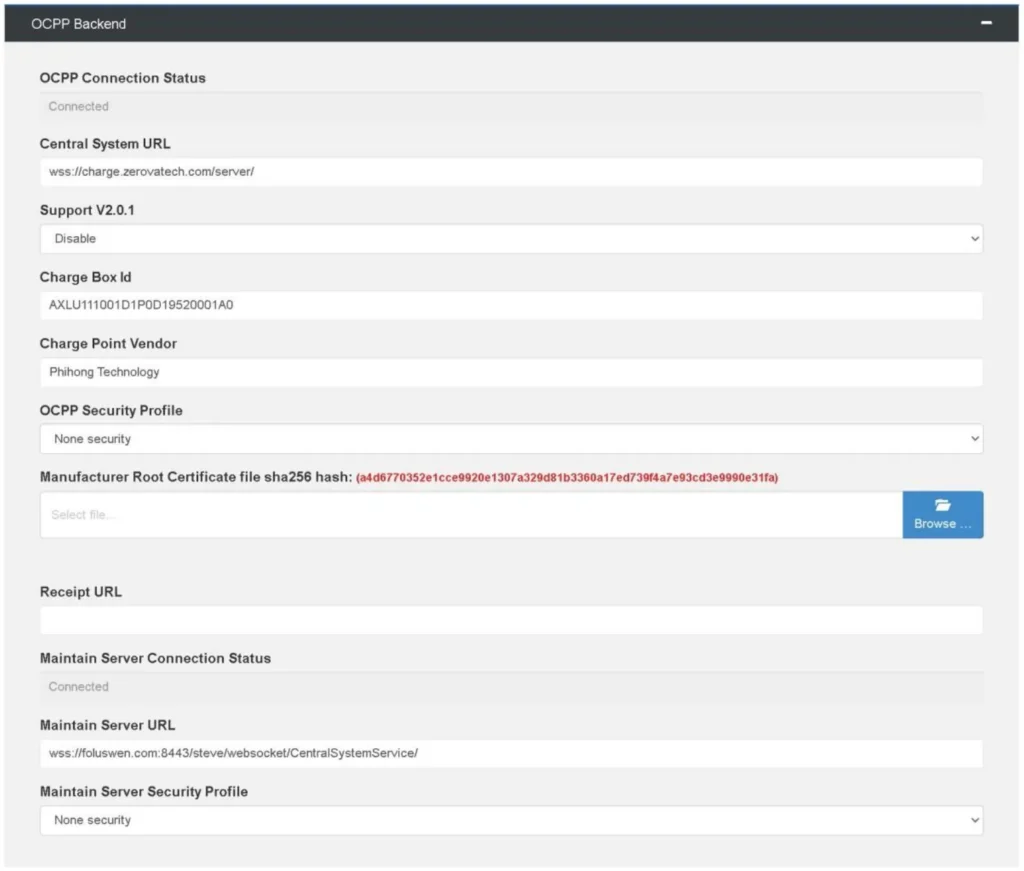
- In the SET menu, open the OCPP Backend section

- Set the following properties:
- Central System URL: wss://ocpp.monta.app/
- Support V2.0.1: Disable
- Receipt URL: leave blank
- OCPP Security Profile:
- if the security certificate for AWS is installed, the select the TLS with basic Authentication
- otherwise, select Unsecured Transport with Basic Authentication
- The Root Certificate can be found here: https://www.amazontrust.com/repository/AmazonRootCA1.pem
- Maintain Server URL: leave blank
- Load Management:
- If Local Load Balancing is used, fill out the Local Load Balancing section with relevant info. This is not associated with Montas Load Balancing functionality and therefore Monta cannot support on this matter
- If Montas Load Management functionality is used, Disable the Local Load Balancing
- Copy and save the Charge Box Id as this is used when creating the charge point in Monta’s system
- When everything is inserted, use the SET button at the bottom of the page to save the configuration
