Disclaimer:
This guide is only applicable for IC32 model. The IP address for the local Web Interface and login credentials will be different on other LiteOn models. Ensure to collect the required information for your chargers from the manufacturer.
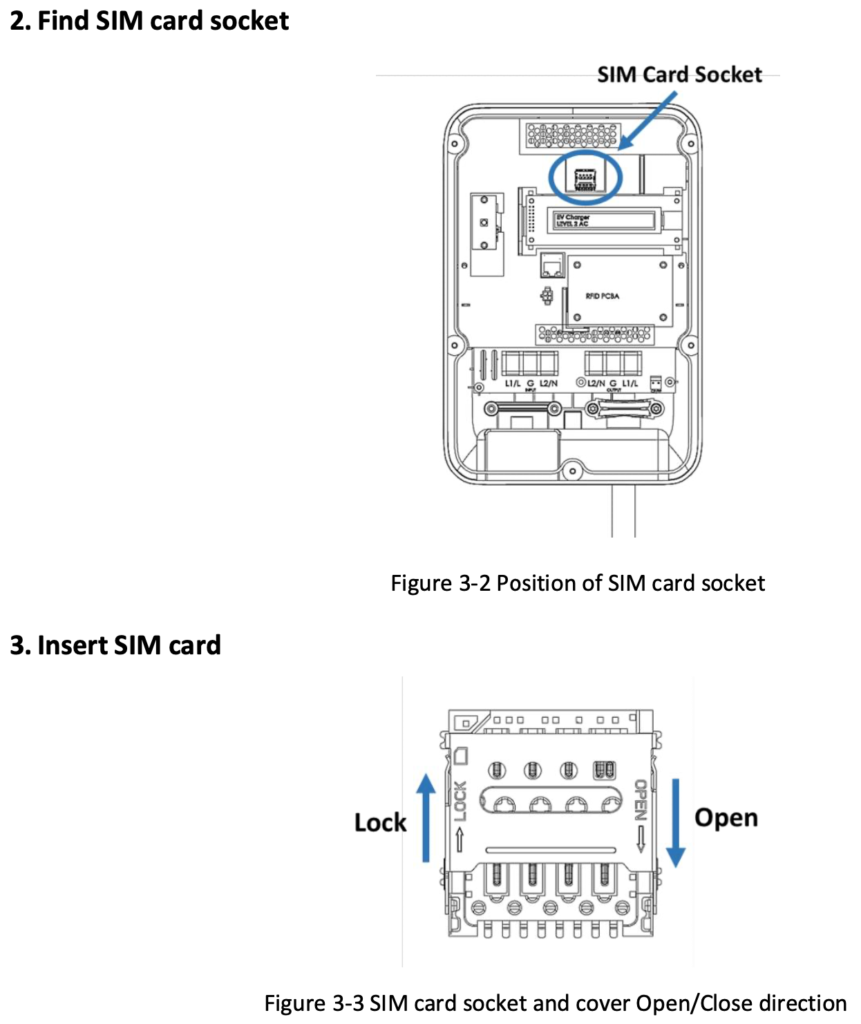
1. Insert SIM card when using Cellular connectivity
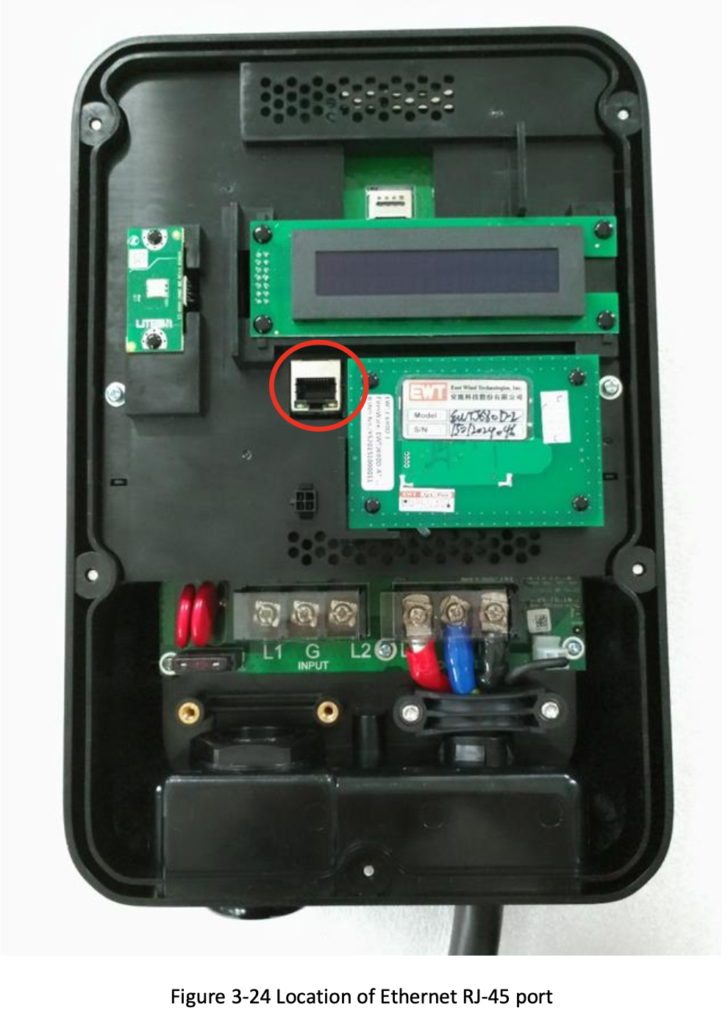
2. Connect to the charger with an ethernet cable
Connect a computer with an ethernet cable to the RJ45 port in the charger.
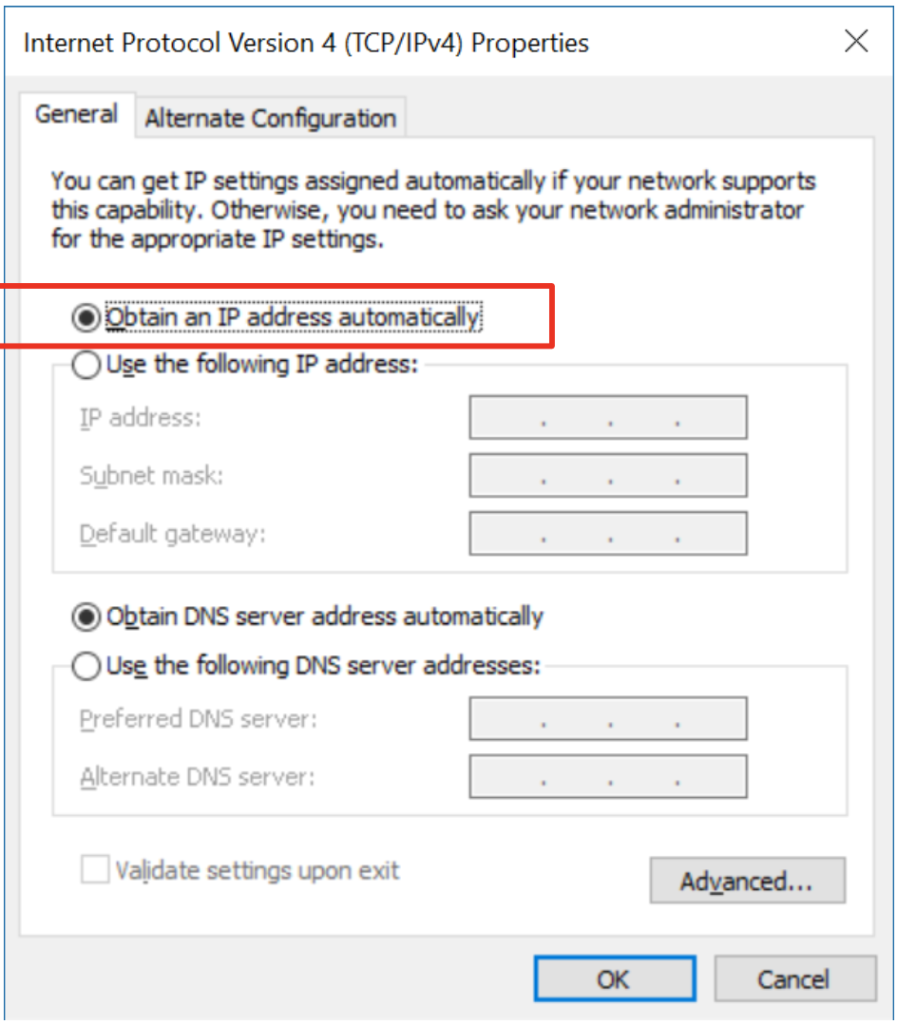
3. Update the Internet Protocol Version on your computer
Open your computer’s Network & Internet Settings → Change adapter options → Ethernet adapter → Properties → Internet Protocol Version 4 (TCP/iPv4) → Properties
Turn on automatically obtaining IP-address.
4. Open a browser to login
Open a browser and enter URL: http://192.168.199.1, if this does not work, try http://192.168.100.1.
A login prompt should appear.

Default login credentials:
User Name: admin
Password: howru2RU2IC3
5. Connect the charger to the internet
WIFI SETUP:
Go to Configuration → Communication Settings and scroll down to Wi-Fi Settings.
Set the Station only to ON.

If Station Only is OFF, the charger will go to AP Mode and transmit its own Wi-Fi network if it can’t connect to the selected Wi-Fi network in the settings after 5 retries.
Cellular Setup:
Go to Configuration → Communication Settings and scroll down to Cellular Settings
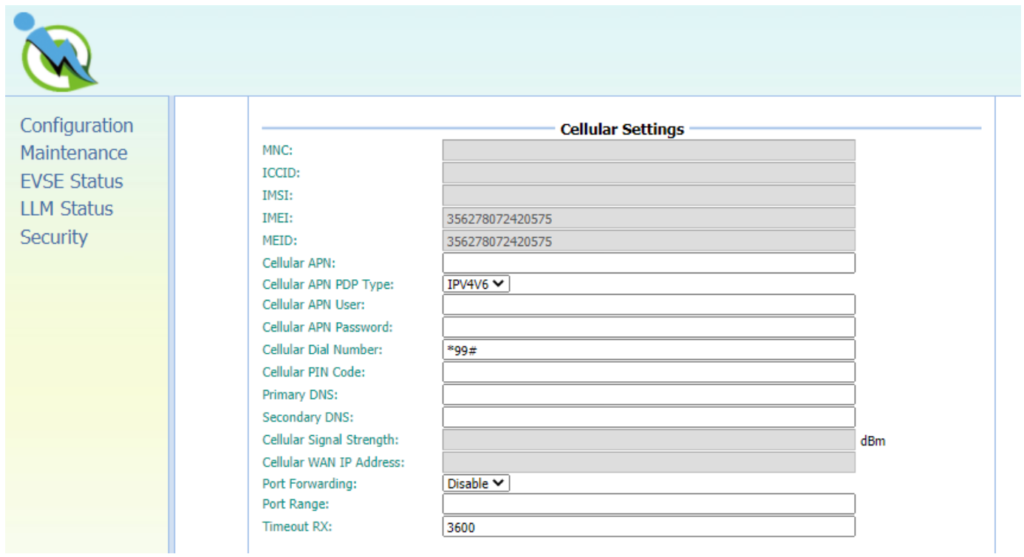
Fill out fields if necessary (PIN Code, APN etc.). Contact cellular service provider if in doubt.
💡Cellular APN – This is the gateway for all cellular traffic. Contact your cellular operator for information about this.
For AT&T and Verizon LTE service, just leave it blank since the APN name is built-in in the modem.
6. Connect the charger to Monta
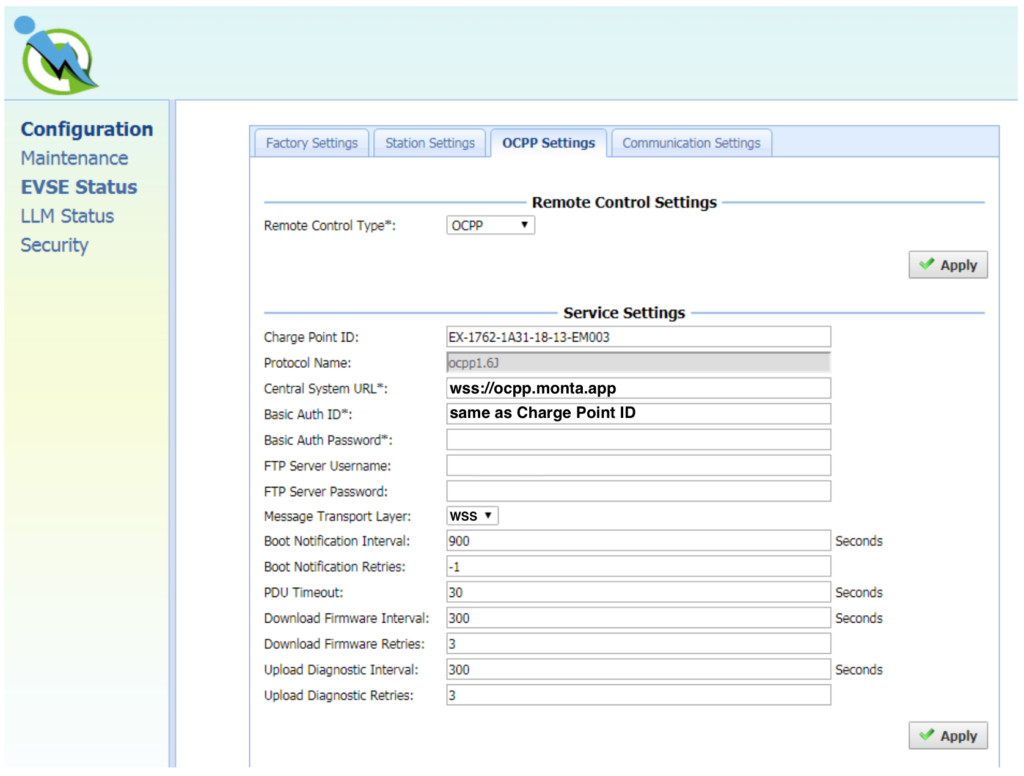
Go to Configuration → OCPP Settings.
Change the following settings:
- Remote Control Type* – select OCPP and hiton the right.
- Central System URL* – Enter wss://ocpp.monta.app
- Basic Auth ID – Insert the Charge Point ID
- Message Transport Layer – select WSS
- Hit ✅ Apply on the right.
7. Change login credential of charger
For extra security change the username/password to access the charge point settings:
Go to Security → Change Password. Change and hit apply.
8. Connecting the charge point to your Monta account
Now you need to add and connect your charge point to your Monta account.
You can do this through either Monta Charge or Monta Hub.