This is a guide that shows how to install Monta on your charge point. If you want to connect your charge point to your Monta account, please follow the steps in the end of the guide.
Please note that when you connect your charge point to Monta, we become the operator of the charge point. This means that you need to use Monta to control the charging process.
1. Notes
This guide is only applicable to Malmbergs EVON models.
If you have any other Malmbergs model, this guide is not applicable.
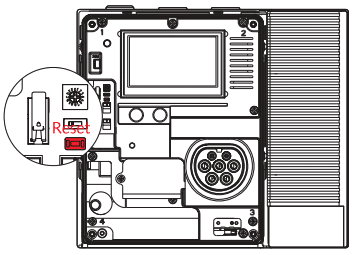
For the EVON Pro, the hotspot of the charge point will only be active for 30 minutes after turning on the charge point. The hotspot can be reactivated by either restarting the charge point (remove the electric supply from the charge point) or pressing the reset button for 2 seconds. IF YOU HOLD FOR MORE THAN 5 SECONDS, THE CHARGE POINT WILL FACTORY RESET.

2. Connect to charge point’s Hot-Spot
Turn on or reboot the charge point and make sure the light indicator is flashing green.
Open mobile device’s or computer’s Wi-Fi settings and find a Hot-Spot with the name of your charge point’s serial number as follows “SN100…”
The 8-digit password can be found on the last page of the manual or on the RCBO inside the charging station. The password is unique to the device and case sensitive.
3. Access the Web Configuration at 192.168.4.1
Now open a browser with the same device and enter this IP address 192.168.4.1 and open it.
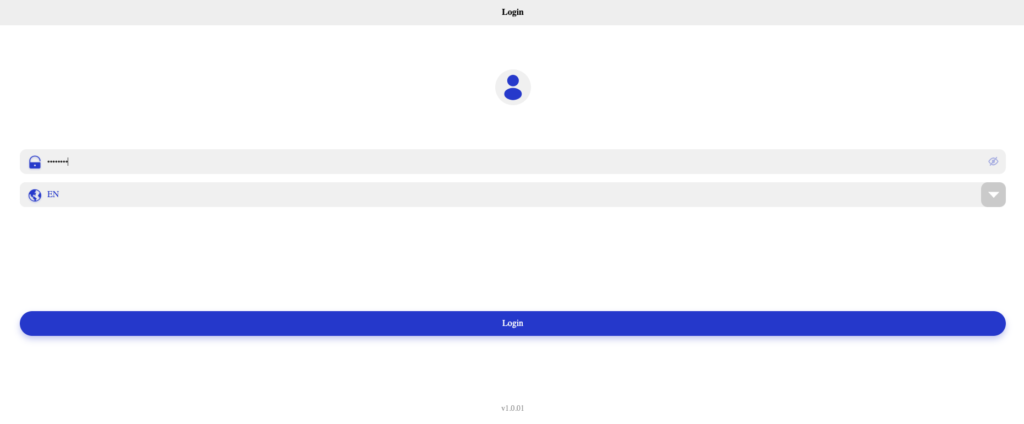
To login, enter the 4-digit network pin. The PlN number can be found on the last page of the manual.

4. Change the network configuration
After logging in to the web configuration click on “Network Setup” or “Network Settings”, depending on the version.

In the “Network Setup” menu, select WiFi or 4G depending on your connection method as the internet connection method.
If WiFi is chosen, click on the drop-down menu and find the WiFi that you want to connect to. Enter the WiFi password in the third field.
If 4G is chosen, fill out APN information if needed by your carrier.
Make sure that the URL is set to Monta’s system: wss://ocpp.monta.app:433[CPID], where the [CPID] is automatically filled out with the serial number of the charge point.
Then click Confirm.
Now the charge point will reboot automatically and will connect to Monta servers.

5. Connect the charge point to your Monta account
Now you need to add and connect your charge point to your Monta account.
Monta Charge
You can add and connect your charge point by using the Powered by Monta flow.
Powered by Monta is an easy to follow flow, which Monta has developed with an exclusive set of manufacturers. Click here to read how you can use the flow via your phone.
Monta Hub
You can also add and connect your charge point via Monta Hub.
