Powered by Monta is an easy to follow flow to connect your charge point to Monta, which we have developed with an exclusive set of manufacturers.
If your charge point is Powered by Monta, this will be indicated in the documentation which you have received when you have purchased it. There, you will locate a flyer with a QR code.
Before you can proceed with the flow, make sure that you have configured the charge point correctly, so it can establish a connection with Monta.
1. Point your phone at the QR code
Open the charge point box and find the QR sticker inside.
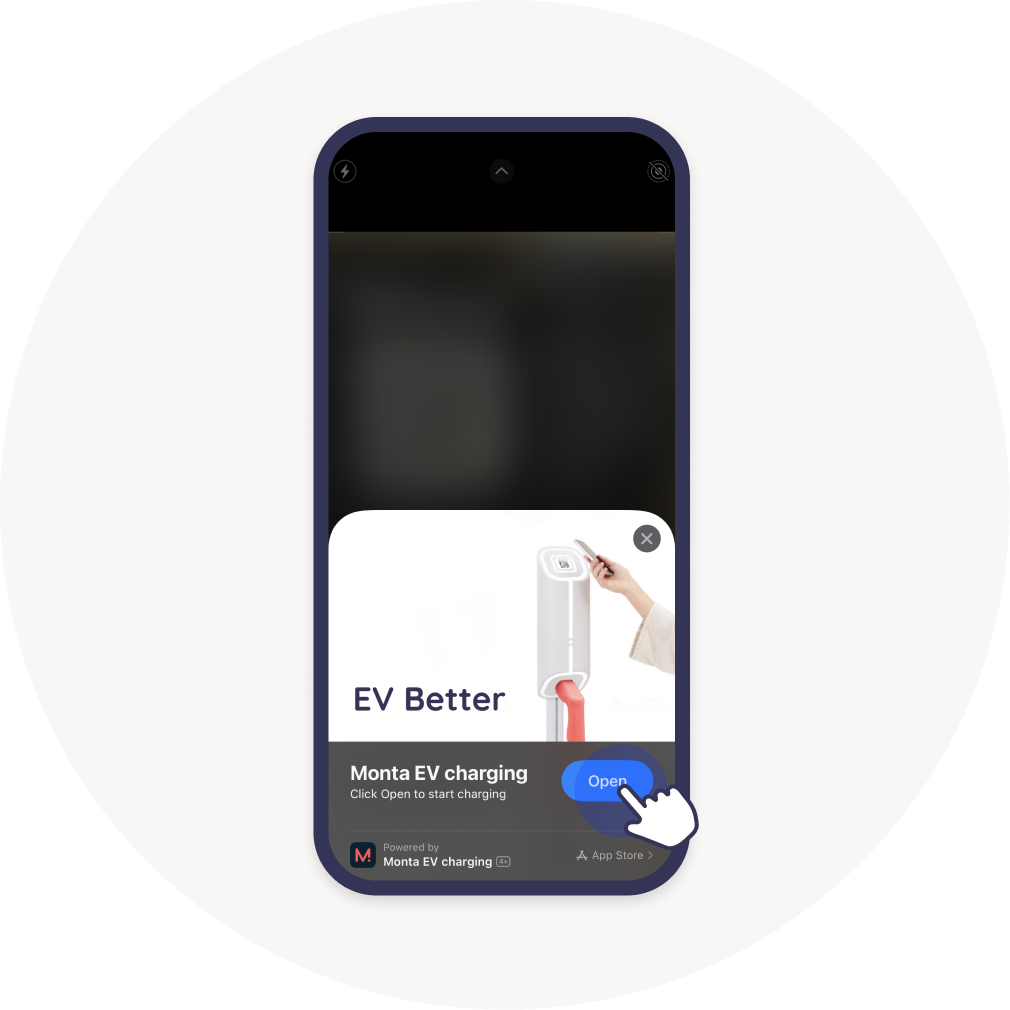
Point the camera of your phone at the Monta QR sticker and scan it.
When you scan the QR code on the charge point, you will be prompted to open Monta Charge. If you do not have the app yet, you will see how to download it.
Click on the "Open" button.

2. Fill in the charge point details
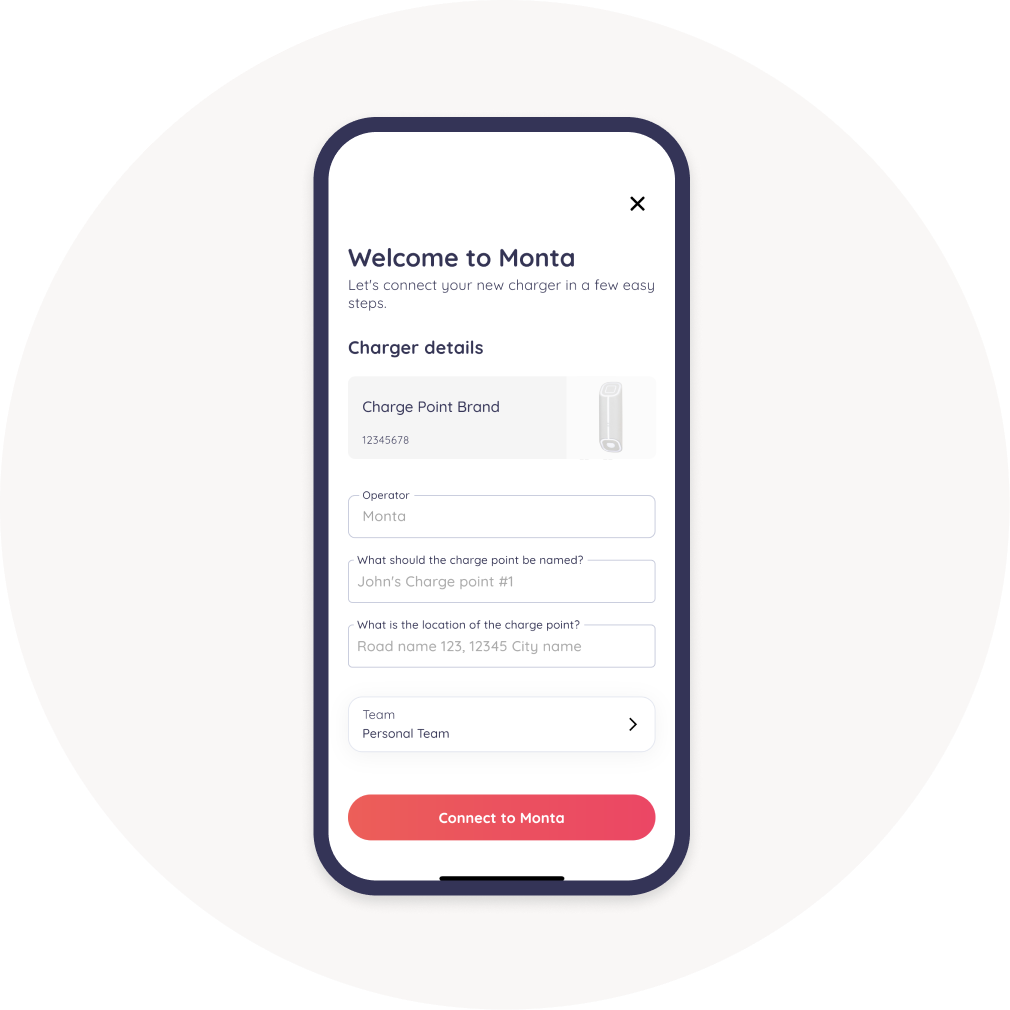
After scanning the QR code on the charge point, the Monta system has already recognized the charge point brand, model and serial number.
Enter the name and location of your charge point and select which Team you want to register it in.

If your charge point has 2 connectors, just enter the names in the fields.

Then click on "Connect to Monta".
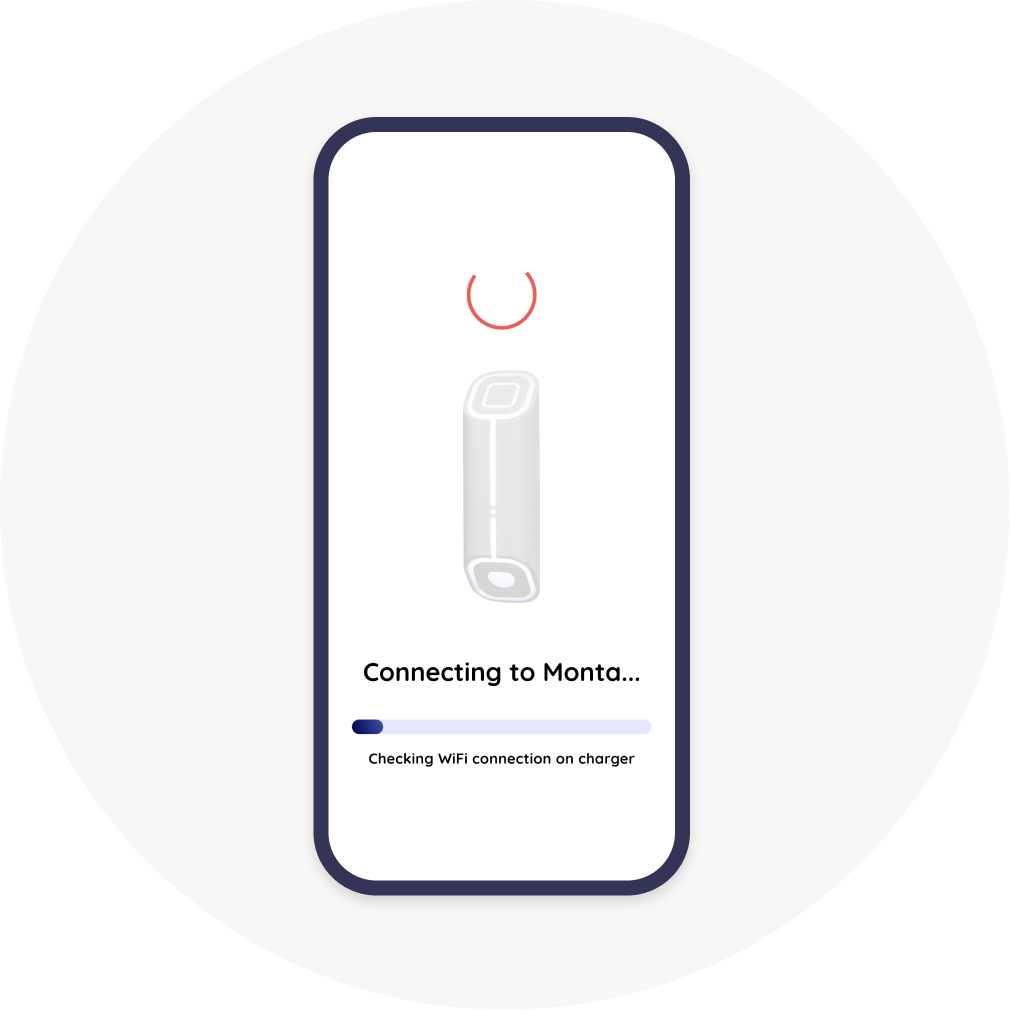
3. Wait to connect
Here, our system is checking if your charge point is online and is trying to connect to it.

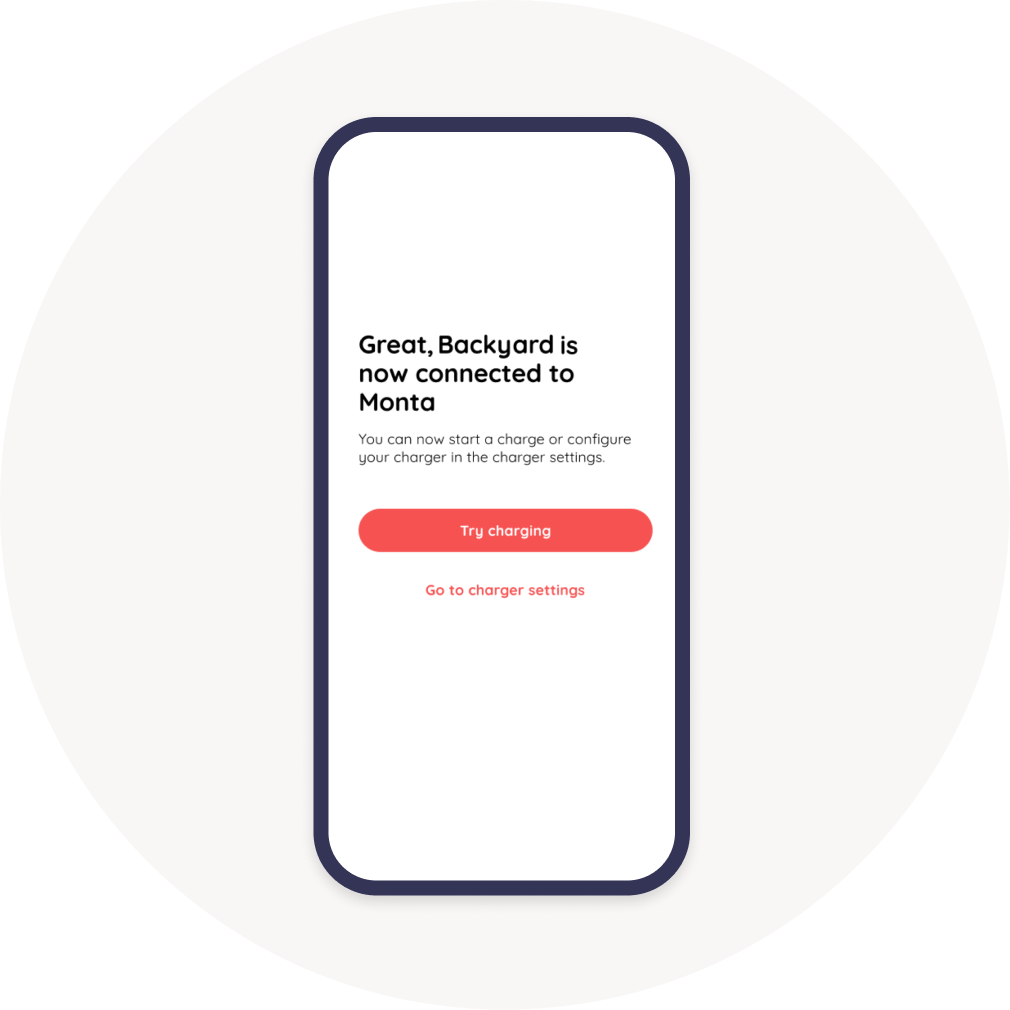
4. Congrats, you have connected your charge point to Monta!
You have successfully connected your charge point with Monta.

5. What's next?
There are so many things you can do now that your charge point is connected to Monta!
Here are some suggestions:
- Perform your first charge with Monta.
- Set up Charging rules
- Enable SmartCharge
- Make your charge point Public, so others can charge on it.
- Invite your friends and neighbours to use your charge point.
