1. Connecting to charge point webUI
- The controller has a webUI that can be accessed from a browser.
- Connect your computer directly to the controller RJ45 LAN port using a cable.
- Go to address 169.254.12.53
If above does not work, you must change your IPv4 settings for the network card, which will described below:
- Here you need to change the network settings of your computer, according to the charge point's local IP.
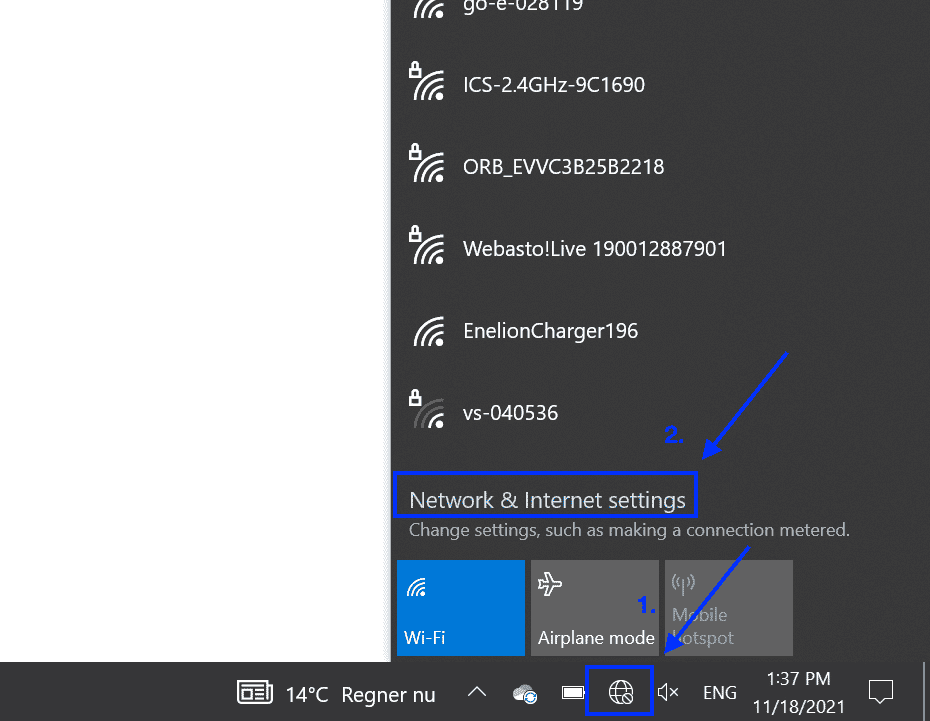
- To do so, click on the Internet icon in the bottom-right corner of your computer screen. From there, open the "Network & Internet Settings" of your device.

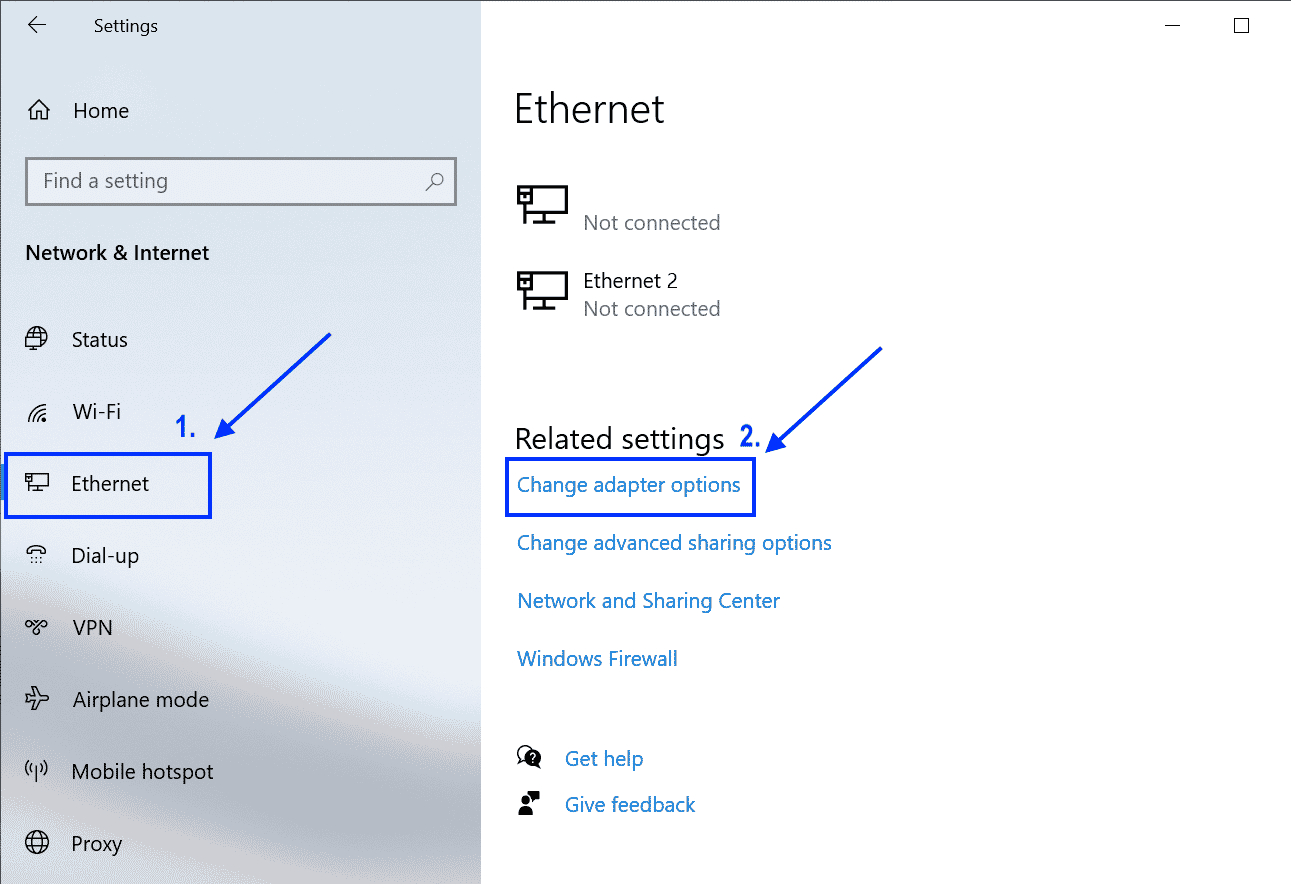
- From the left panel, select the option "Ethernet".
- Then on the left side click on "Change adapter options".

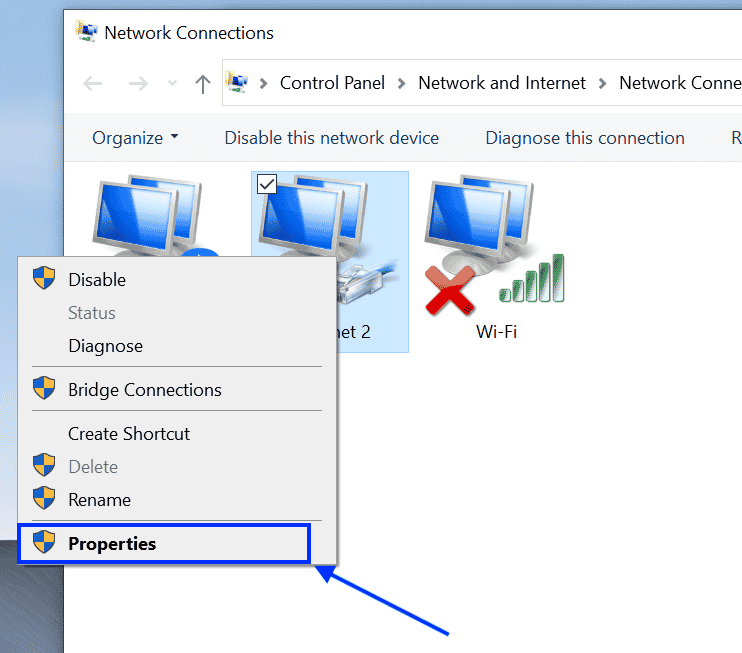
- Select the Ethernet adapter to configure, then do a right-button click on it and select “Properties”.

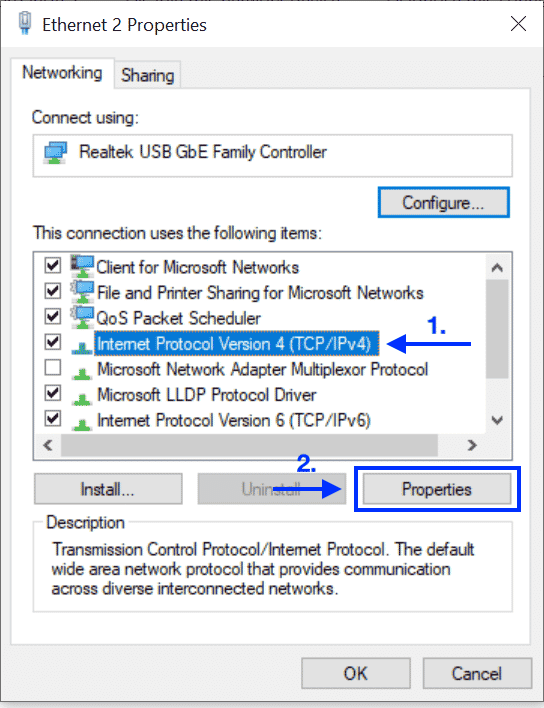
- In "Ethernet Properties", find the Internet Protocol Version 4 (TCP/iPv4), click on it, and press "Properties".

Once you are there, select "Use the following IP addresses", if not selected, and enter the values as following:
Enter the following info:
- Select “Use the following IP address”
- IP address: 169.254.12.1
- Subnet mask: 255.255.255.0
- No info in other fields
Now you should be able to access 169.254.12.53
If the device is already connected to a router with DHCP enabled, it is also possible to access the device using its assigned IP address. The IP can usually be obtained from the router management interface, and then you get to the webUI using the assigned IP.
The webUI front page looks like this:
2. Internet connection
- The device supports wired LAN and cellular connection. The cellular modem in the device received for the test does not match the modem used in the manual, so configuration of cellular has been omitted.
- Go the the “Configuration” tab in the webUI
- In the “Network options” field, configure according to your network setup. In most cases, it will be sufficient to put a checkmark in the “DHCP” field and leave all others blank. Then the controller will obtain an IP address from your router.
- Press “Save and reboot” button to save changes
3. Connecting to Monta OCPP server
- Go to the “Configuration” tab in the webUI
- In the “OCPP options” field put a checkmark in “OCPP” “Enable”
- In the URI/CPID field enter monta OCPP URL in format ws://ocpp.monta.app/{customID}
- You MUST enter a custom ID, we recommend using the charge point serial number
- Leave all other settings blank, unless needed for cellular connection
- Under “Global options” make sure that “External control” - “Enable Heartbeat” has a checkmark
- Press “Save and reboot” button to save changes
Additional notes
- Be aware the charge point seems to treat the minimum current set in “Global options” as the max current allowed. In order to charge with more than 6A (the default), it should be changed to the maximum value allowed by the installation. The value cannot be changed through OCPP, so it must be set locally.
- Here is default:
- Here set to allow 32A charging:
4. Connecting your charge point to your Monta account
Now you need to add and connect your charge point to your Monta account.
You can do this through either Monta Charge or Monta Hub.
