Please note that when you connect your charge point to Monta, we become the operator of the charge point. This means that you need to use Monta to control the charging process.
1. Prerequisites and notes
In order to successfully set up your Tritium charge point with Monta, you need to do a couple of extra steps before. You need to first make sure that your connection is switched to OCPP.
To switch your charge point to use OCPP connection, you need to send an email to Tritium support and ask them to point your charge point(s) to Monta’s OCPP url: wss://ocpp.monta.app/
Once you receive an answer from Tritium that your charge point has been pointed to Monta, you can proceed with the installation process.
Please note that this guide is an example on how to connect a Tritium charge point using Monta Charge. If you wish to use Monta Hub, please use this guide here.
If you are connecting the charge point through the Monta Portal, select to connect via OCPP method.
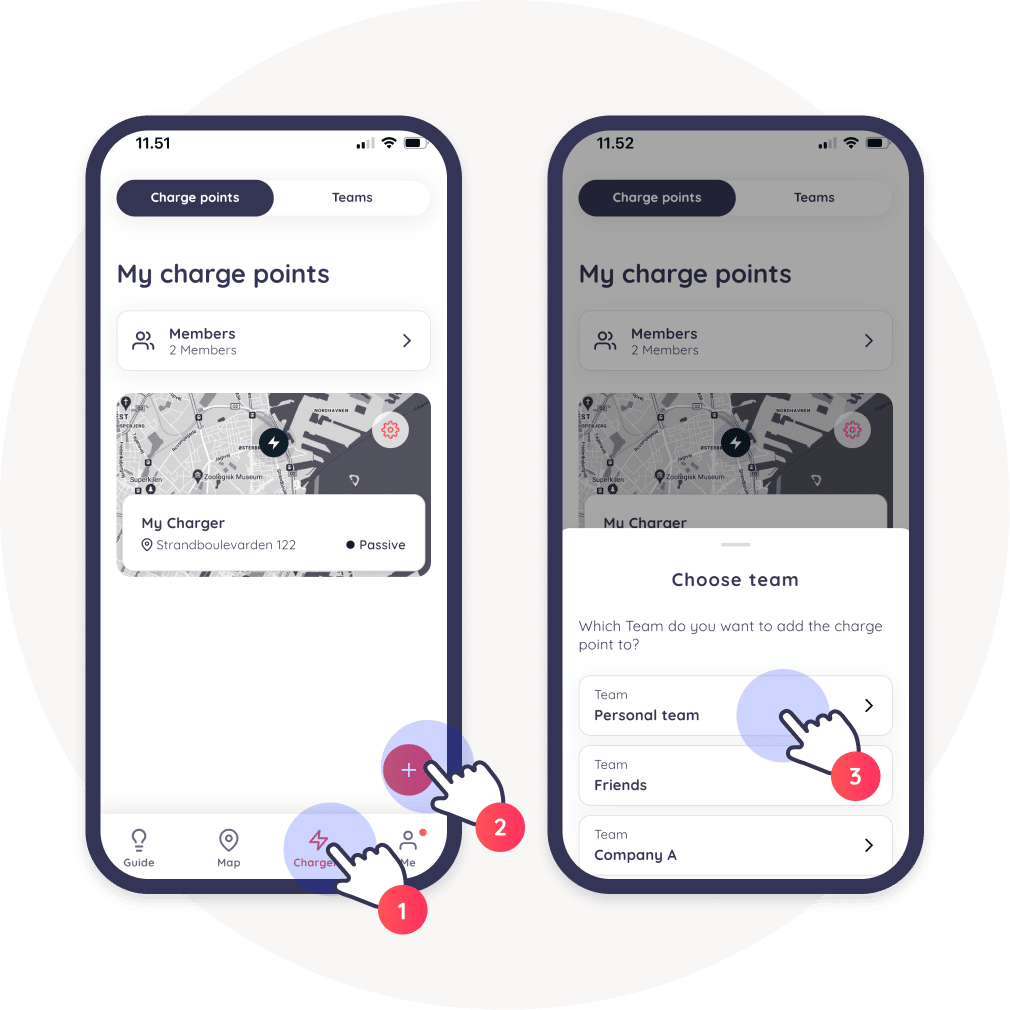
2. Under "Chargers", select "Charge points" tab
There, you will see a "+" sign. Click on it and select the Team, where you want the charge point to be.
In Monta, we use Teams, so you can easily differentiate between your personal charge points, and the ones you want to share with family, friends or employees. You can read more about Teams and how to create a new one here.
3. Fill out your charge point's details
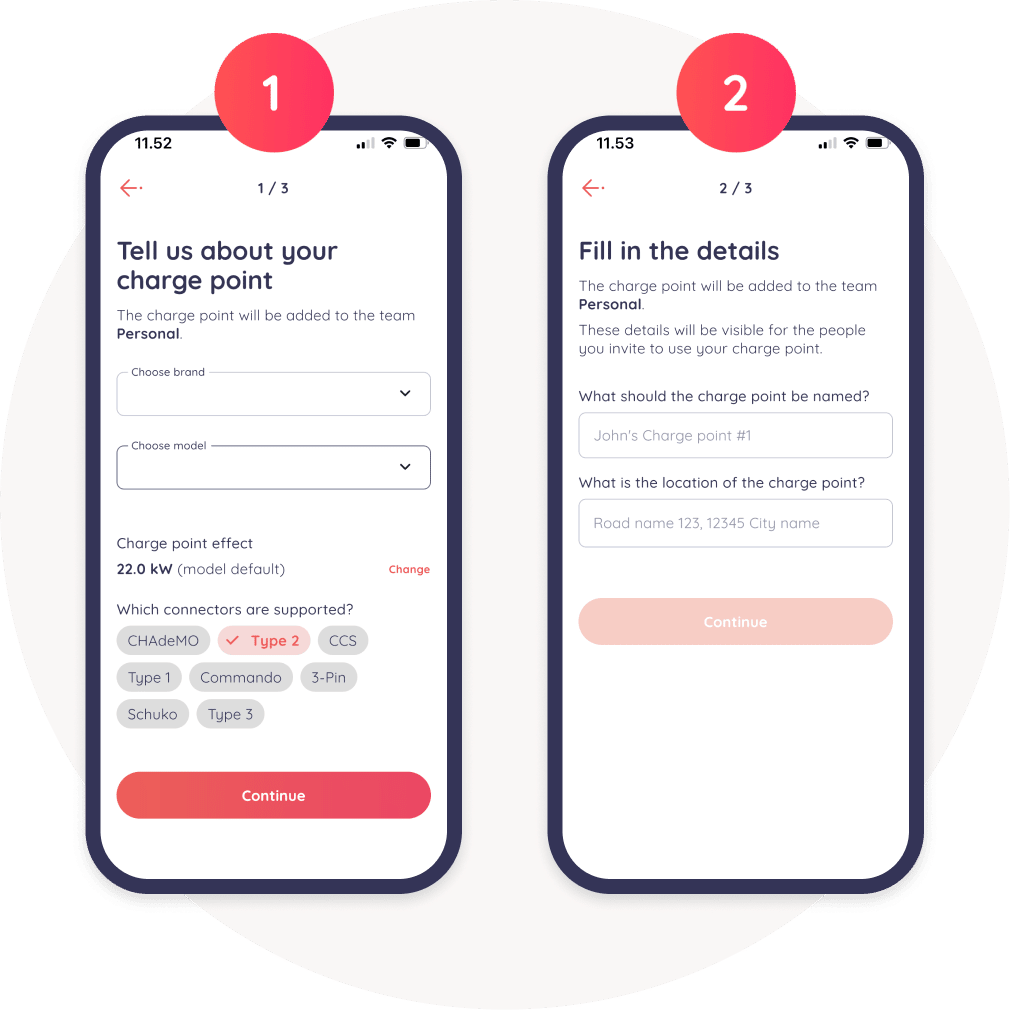
Select the Brand, Model, Charge point effect and Connector type of your charge point.
Give your charge point a name and specify the location.
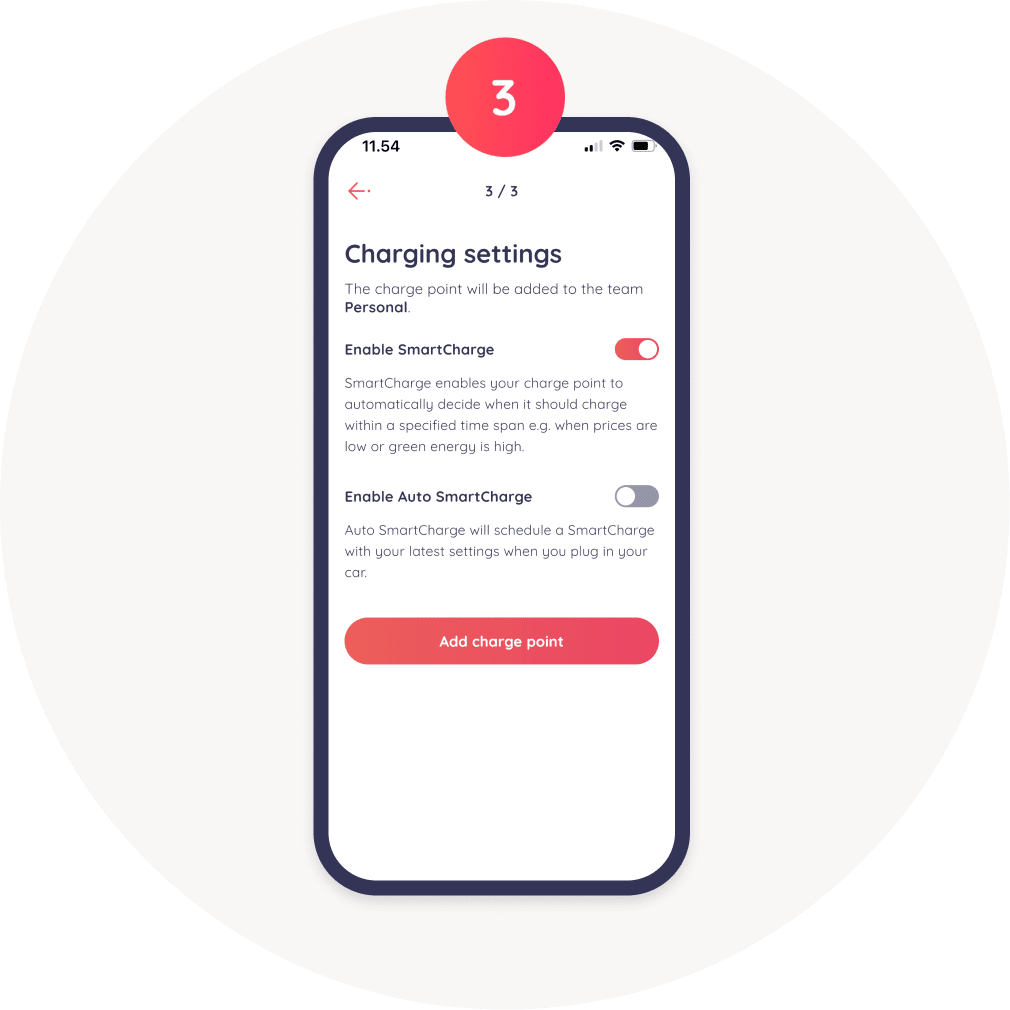
Please note that you can always change these settings and you do not have to make the decision at this point. You are able to proceed by clicking on "Add charge point".
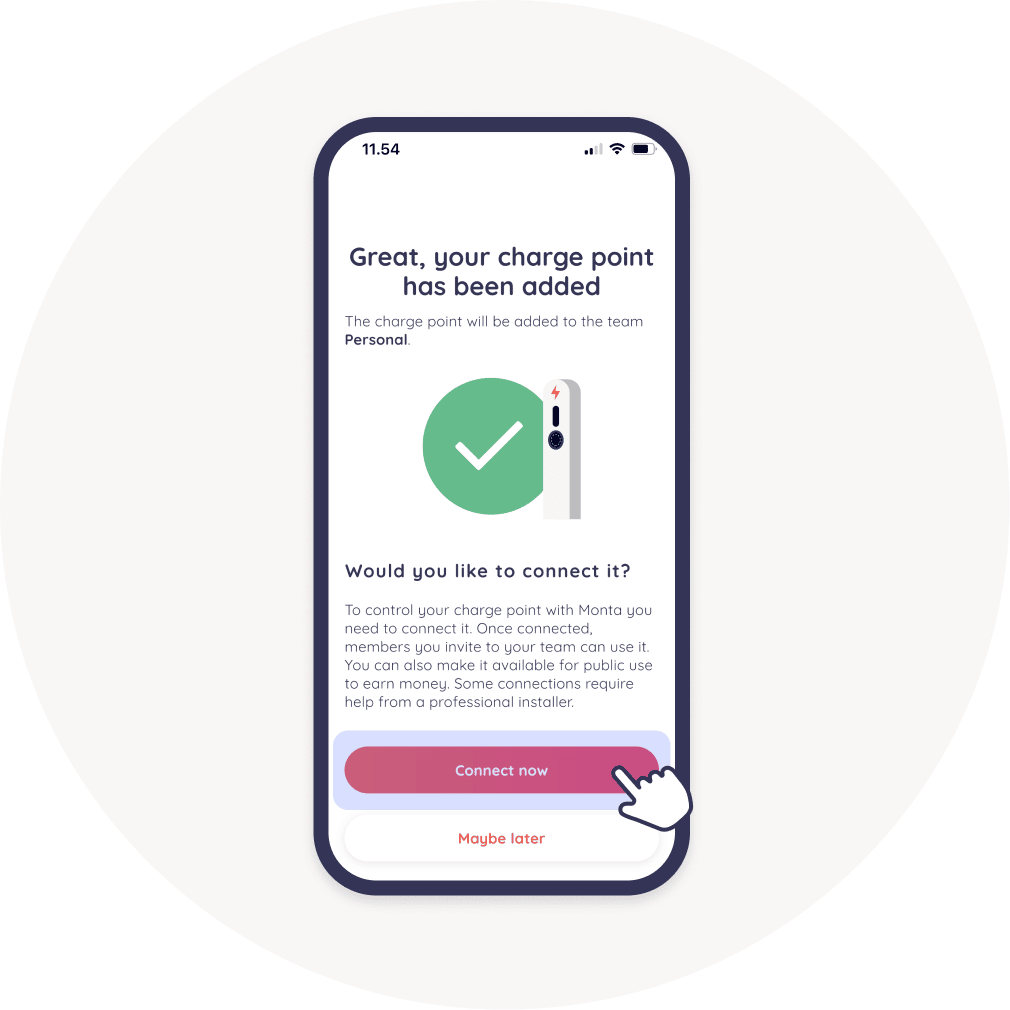
4. Click on "Connect now"
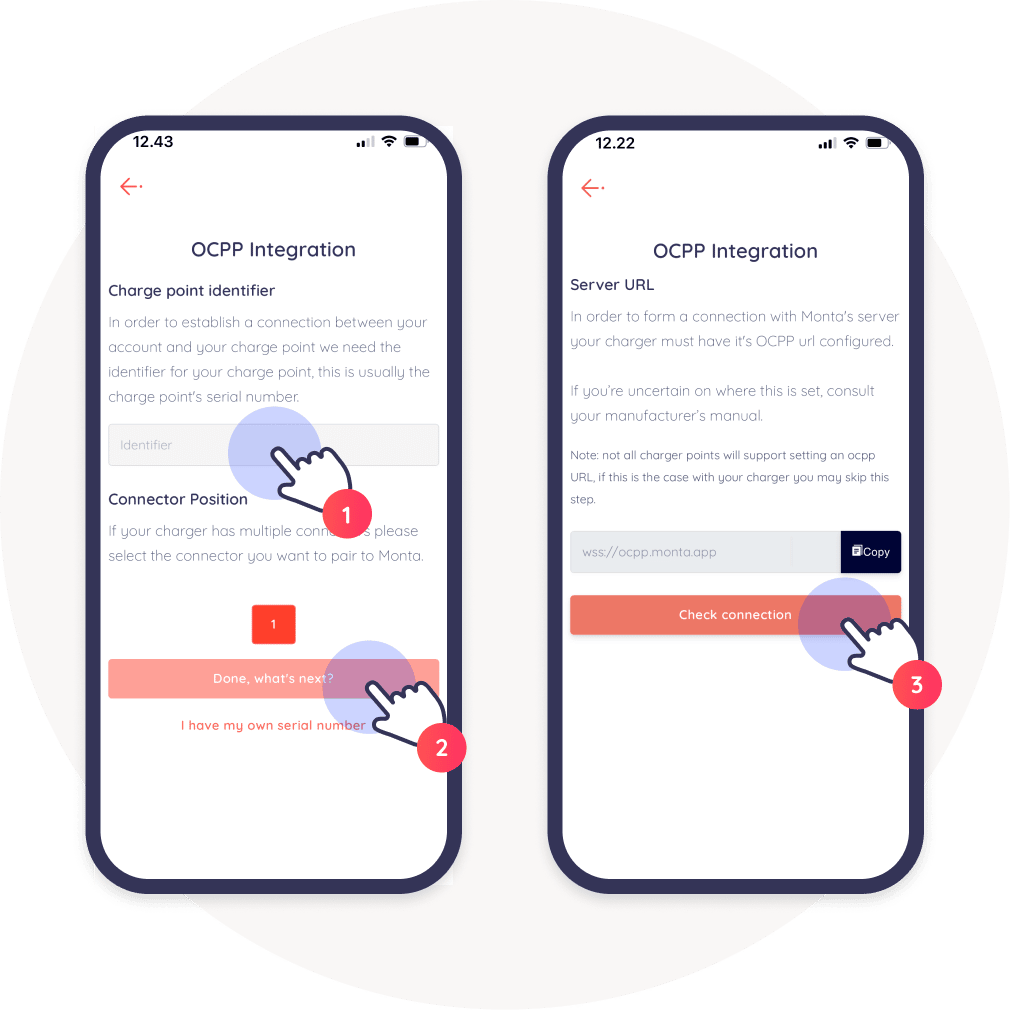
5. Put in the charge point serial number
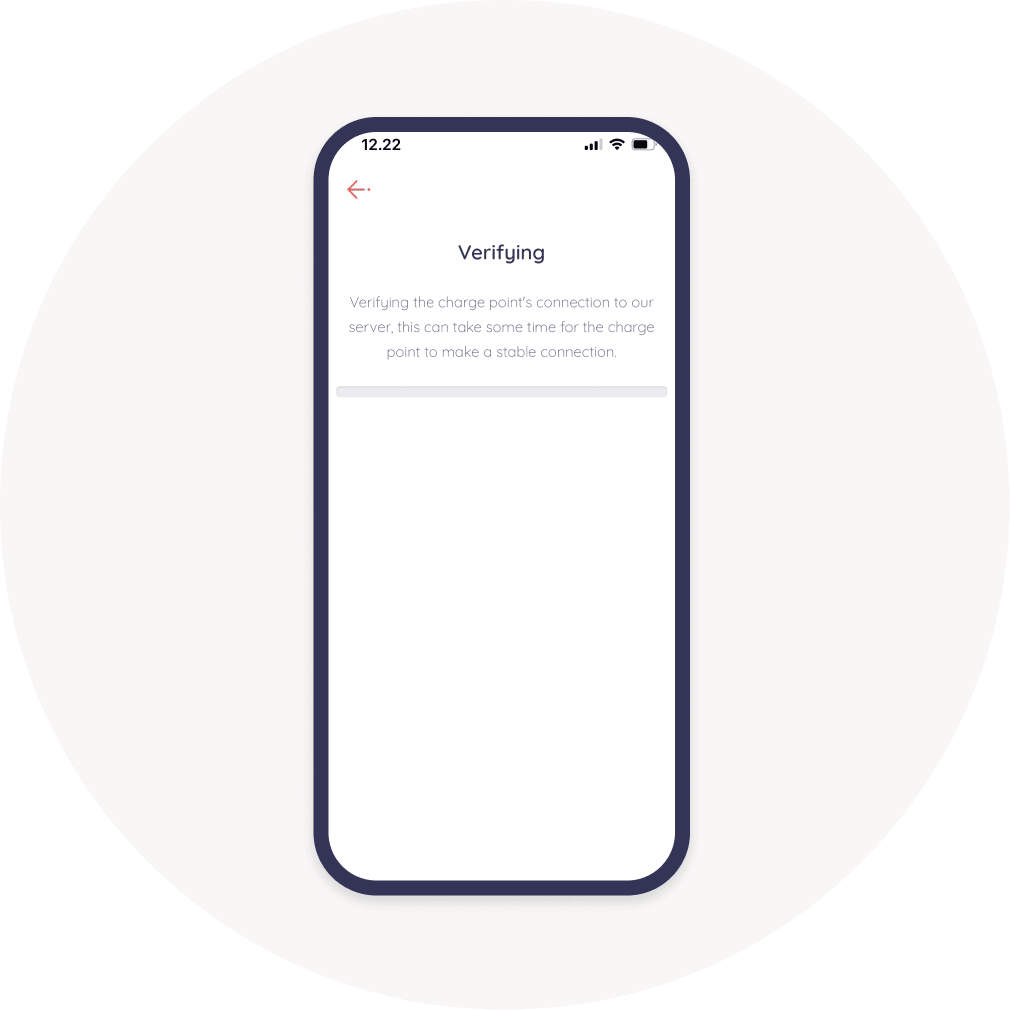
6. Wait for verification
7. Perfecto! You are now connected to Monta!
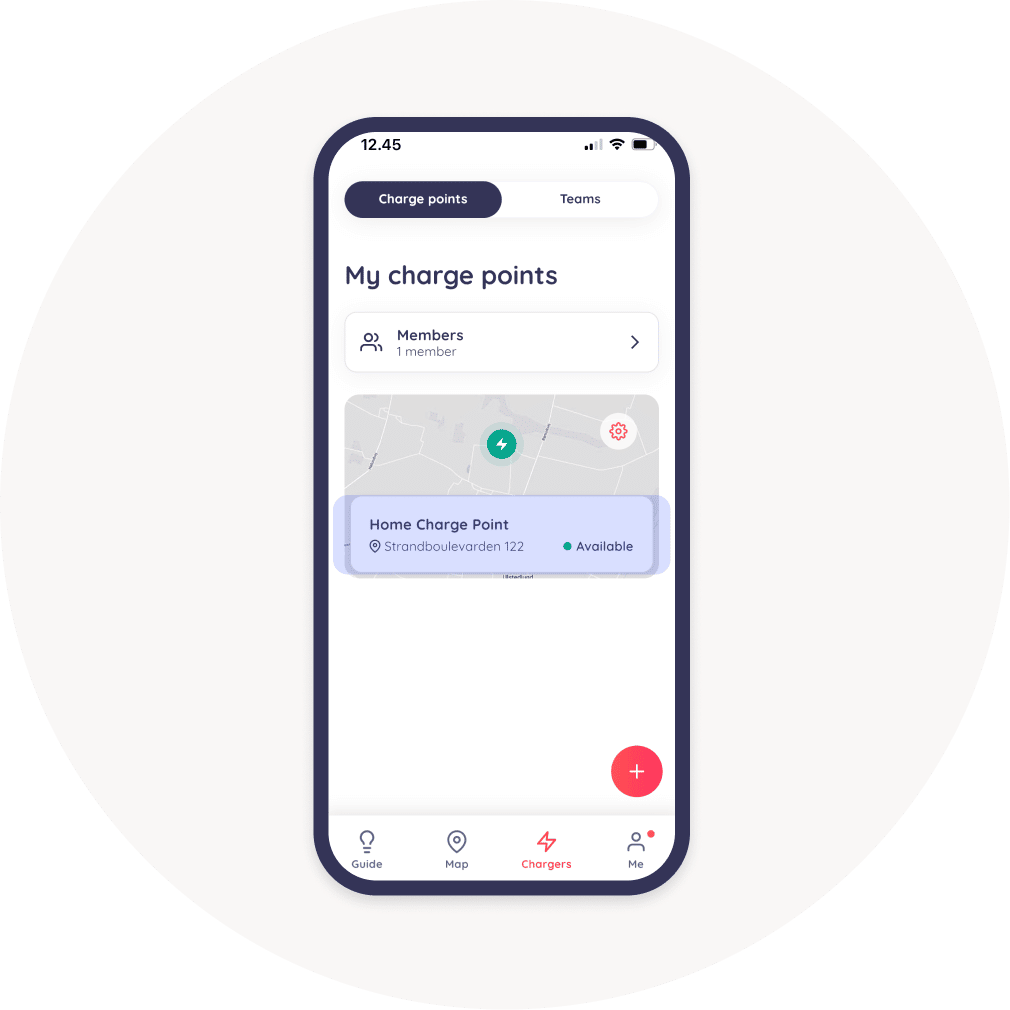
Once you connect your charge point, it will show as "Available".
