This guide covers the Neoom Boxx charge point and walks you through connecting to the local web interface and configuring the network and OCPP settings to connect it to Monta.
Please note that when you connect your charge point to Monta, we become the operator of the charge point. This means that you need to use Monta to control the charging process.
1. Connect your device to your charge point
Using your mobile device or laptop, search for the charge point’s hotspot. It would follow this format: EO-#######
The password to this hotspot will be the numeric portion of the hotspot name.
2. Open a browser to 10.10.10.1
Now when connected to the hotspot, open a browser and enter 10.10.10.1 and hit "Enter".

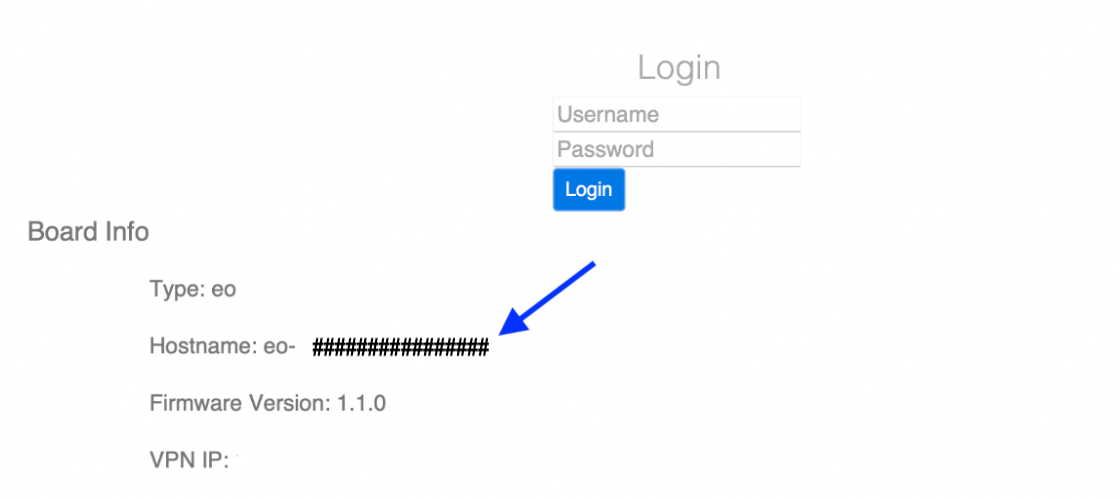
3. Login to the page
Login to the page with these credentials. Please note that the password is the Hostname, which is visible on the login page below.
Login: Installer
Password: numeric portion of the Hostname
4. Edit the CSMS settings
Navigate to the "CSMS" tab on the left side menu.
Change these parameters:
CSMS Server Address: wss://ocpp.monta.app:443
Charger Identity: leave it as default, otherwise use serial number of the charge point
Offline Authorization is disabled.
Default id Tag mode is disabled.
Default ID Tag: 8 capital F’s - "FFFFFFFF"
RFID is enabled. (This is not applicable for EO Mini Pro 3)
Click on "Save".

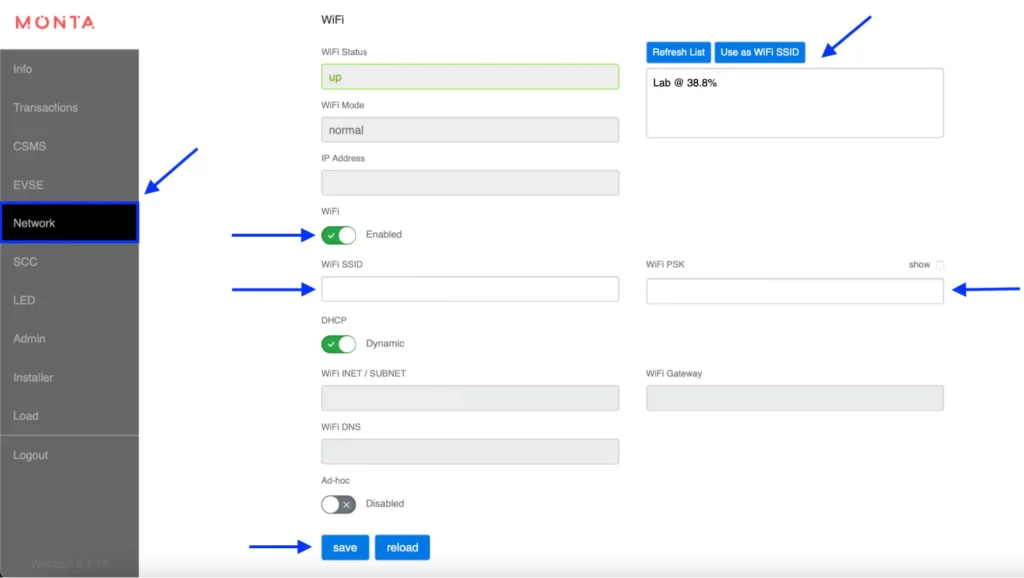
5. Connect the charge point to the internet
Navigate to the "Network" tab on the left side menu.
In this example, we are connecting the charge point to the internet via WiFi.
Enable WiFi, using the toggle. Here you can either manually enter your WiFi credentials or scan for an available network.
Manually enter credentials
WiFi SSID: *your WiFi name*
WiFi PSK: *your WiFi password*
Scan for an available network
Click on the "Refresh List" button, located in the upper right corner of the screen.
Your WiFi network should appear. Select it and click on "Use as WiFi SSID".
Enter your WiFi password manually.
Click on "Save".
6. Enter the "Admin" tab
Navigate to the "Admin" tab on the left side menu.
Click on "Restart" under the SCC client. Afterwards restart the EVSE.
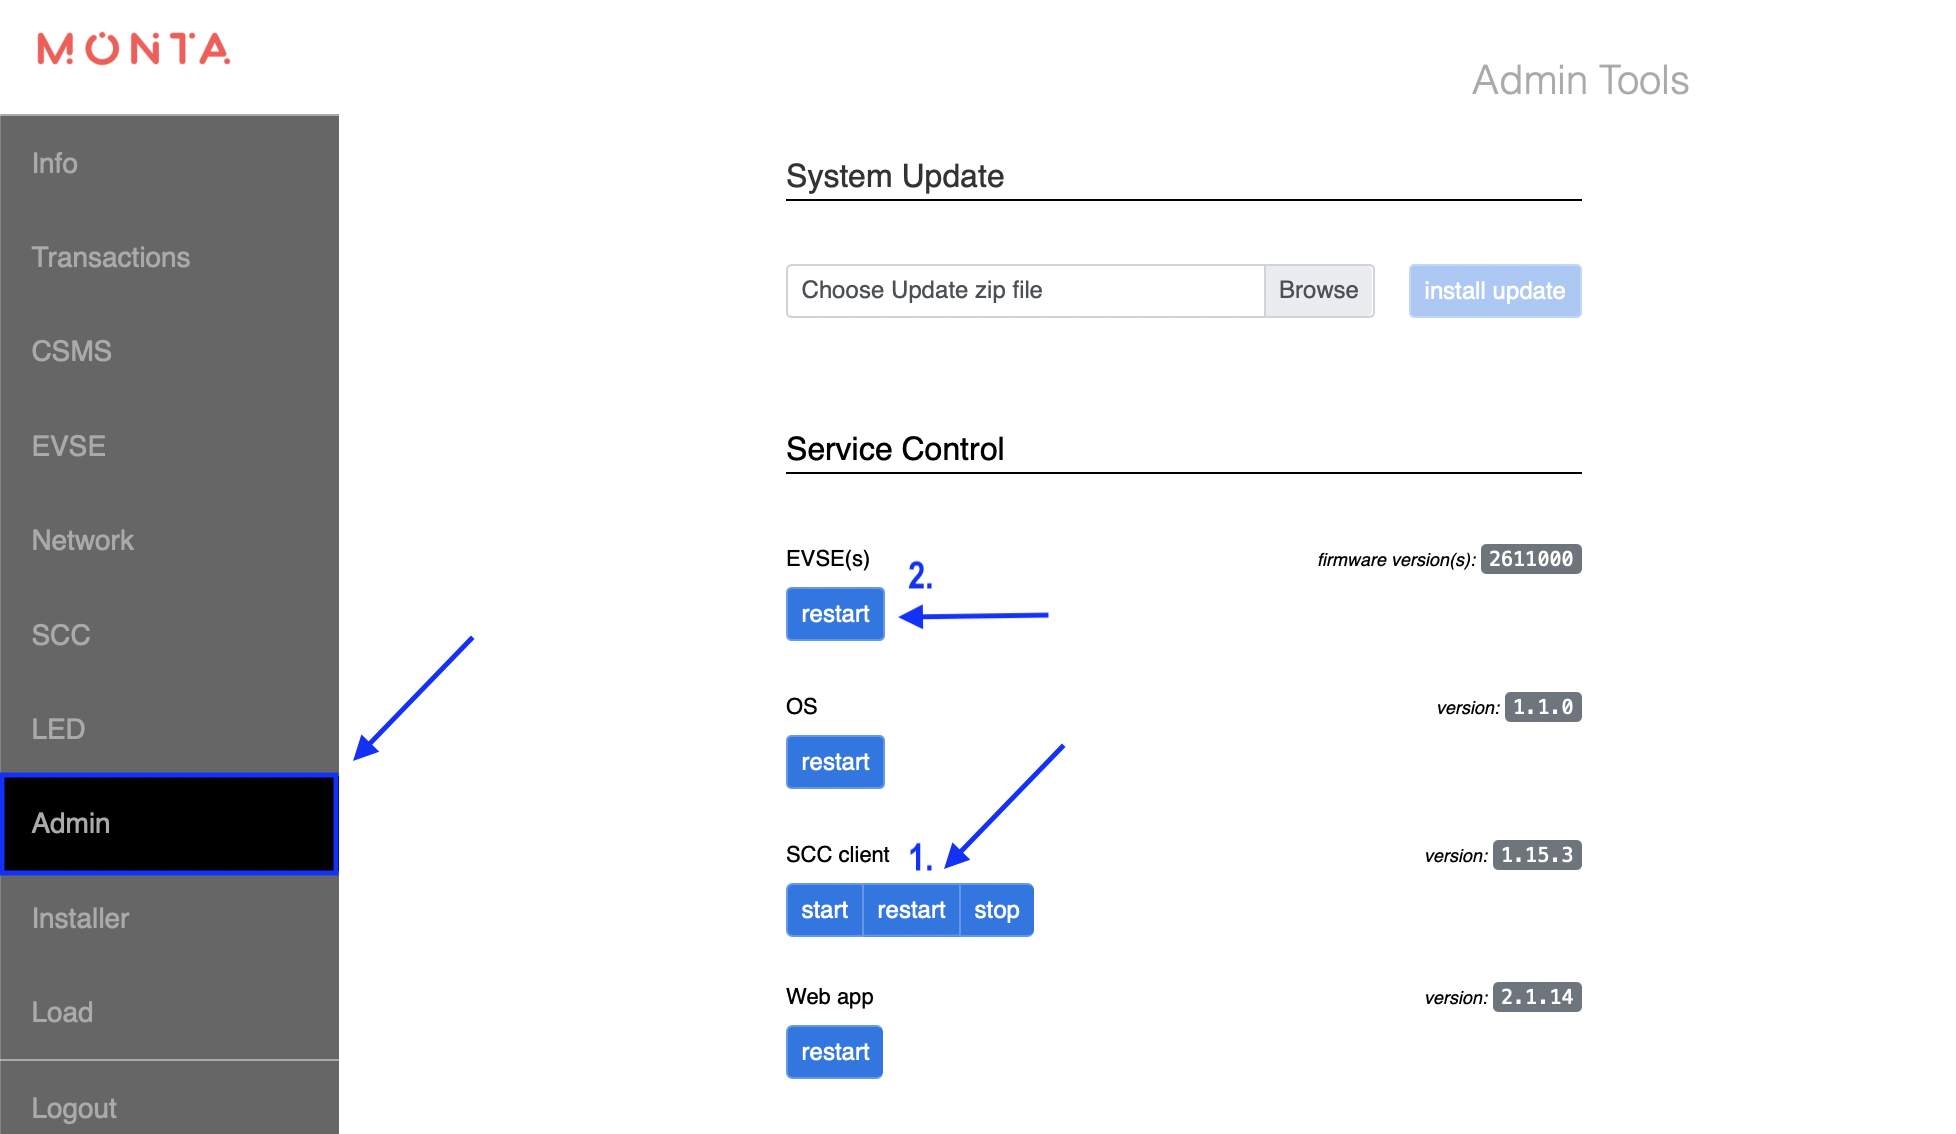
Once the charge point has rebooted, you can continue to connect the charge point to Monta.
Please prepare the serial number of the charge point, as you will need it in the next steps.
7. Connecting the charge point to your Monta account
Now you need to add and connect your charge point to your Monta account.
You can do this through either Monta Charge or Monta Hub.