Integration guide for Tesida charge points. Covers accessing the on-screen settings, configuring a Wi-Fi connection, and connecting the unit to Monta.
Please note that when you connect your charge point to Monta, we become the operator of the charge point. This means that you need to use Monta to control the charging process.
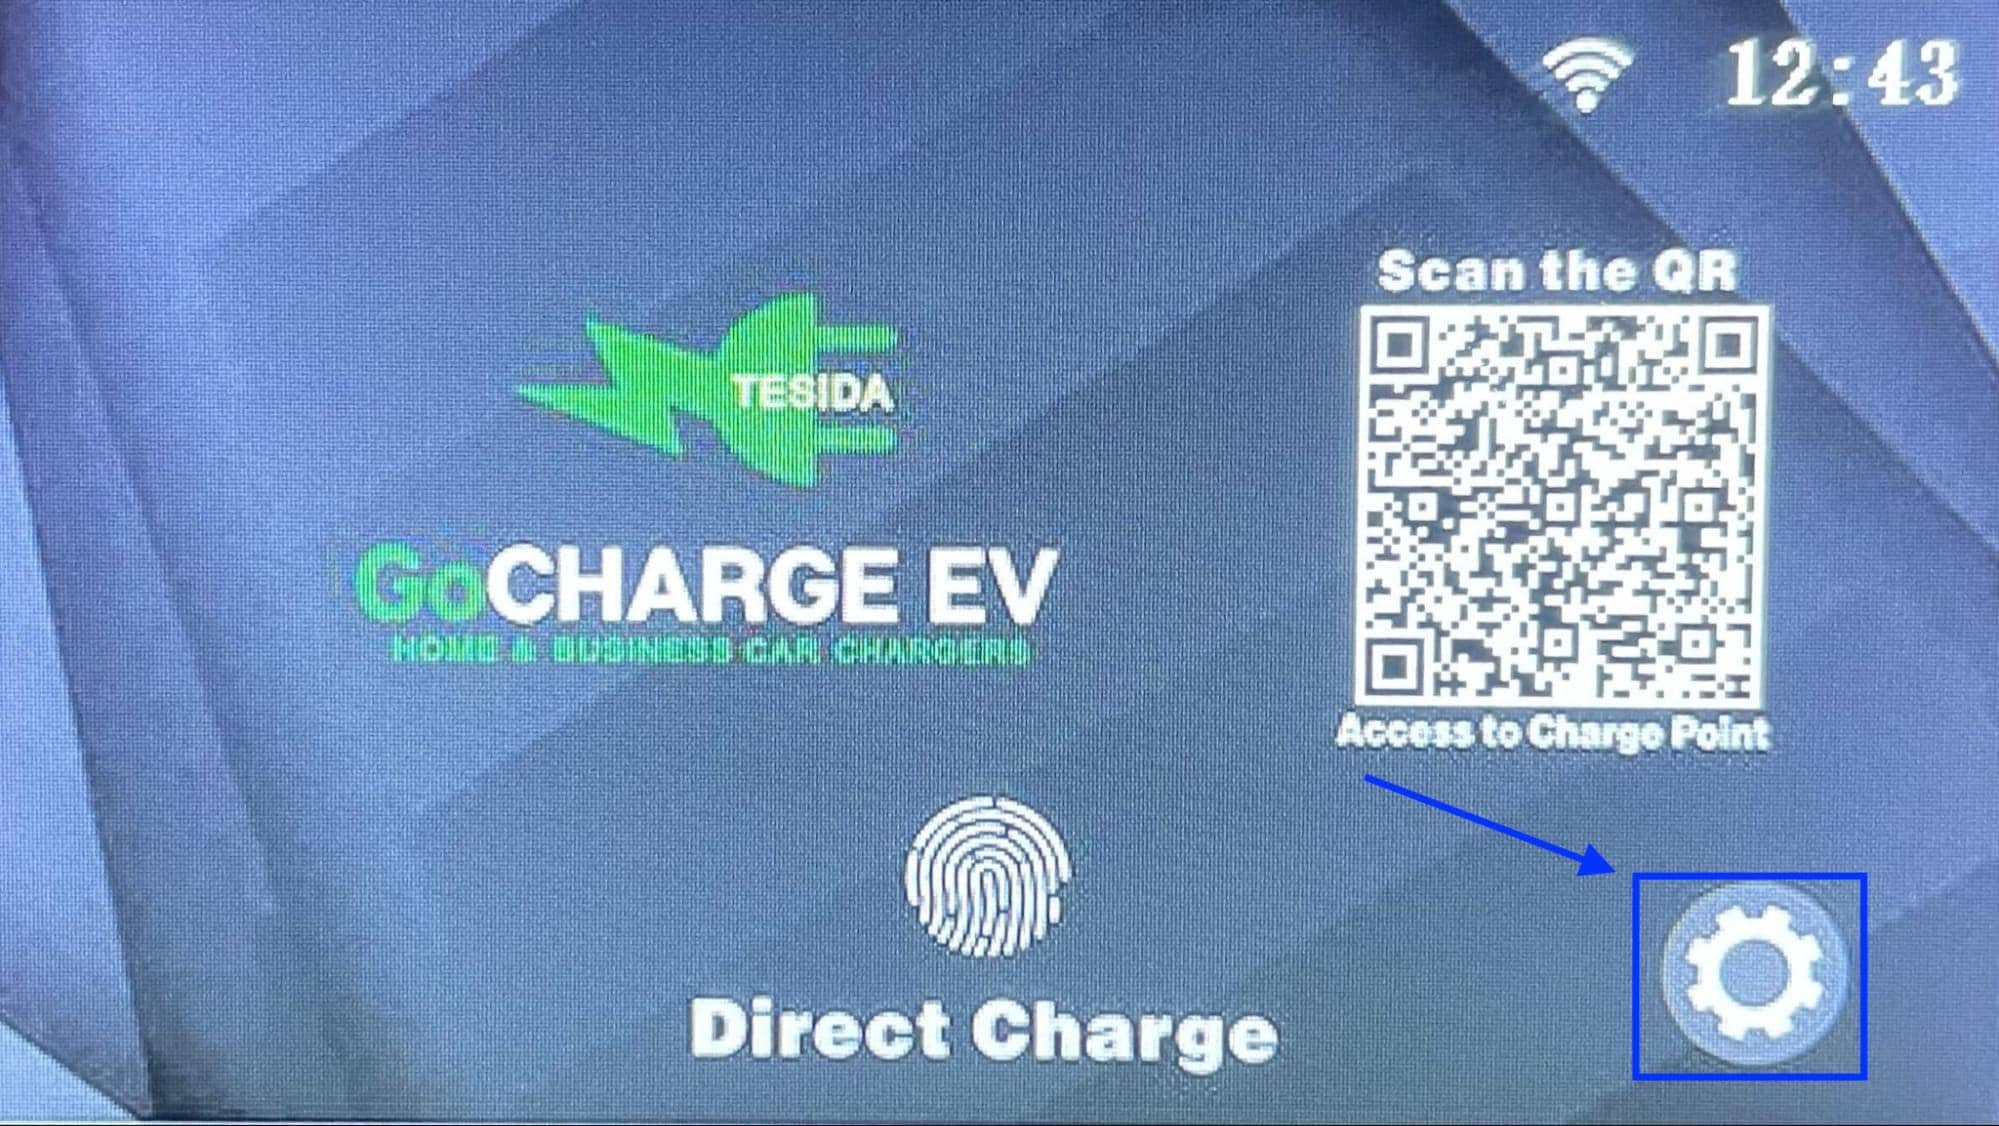
1. Power up the charge point
Tesida charge points can be connected to the internet using the built-in screen.
Power up the charge point and wait for it to boot. After it's booted, press on the settings icon on the bottom right corner of the screen.
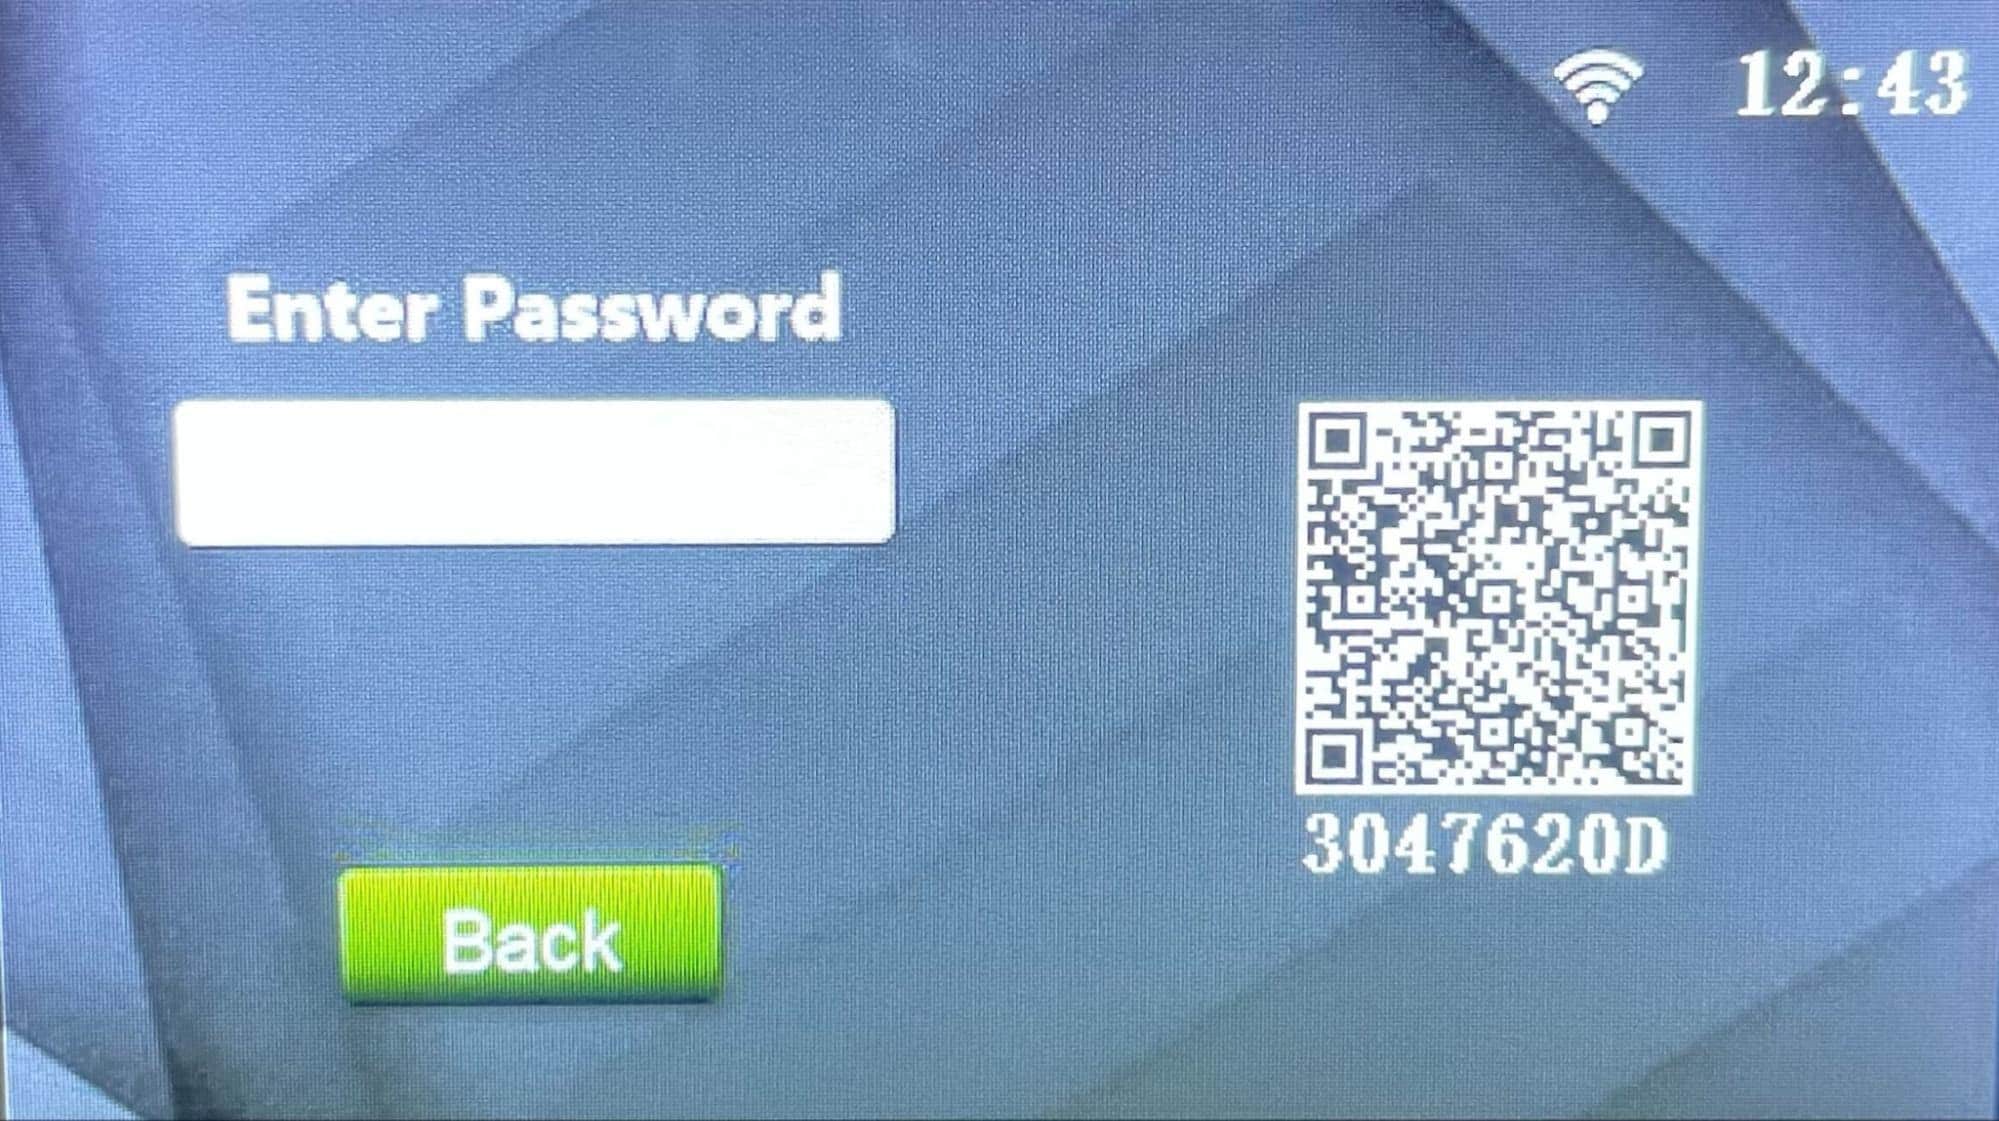
2. Enter the password
Here, you will be prompted to enter the password.
The default password is: 000000
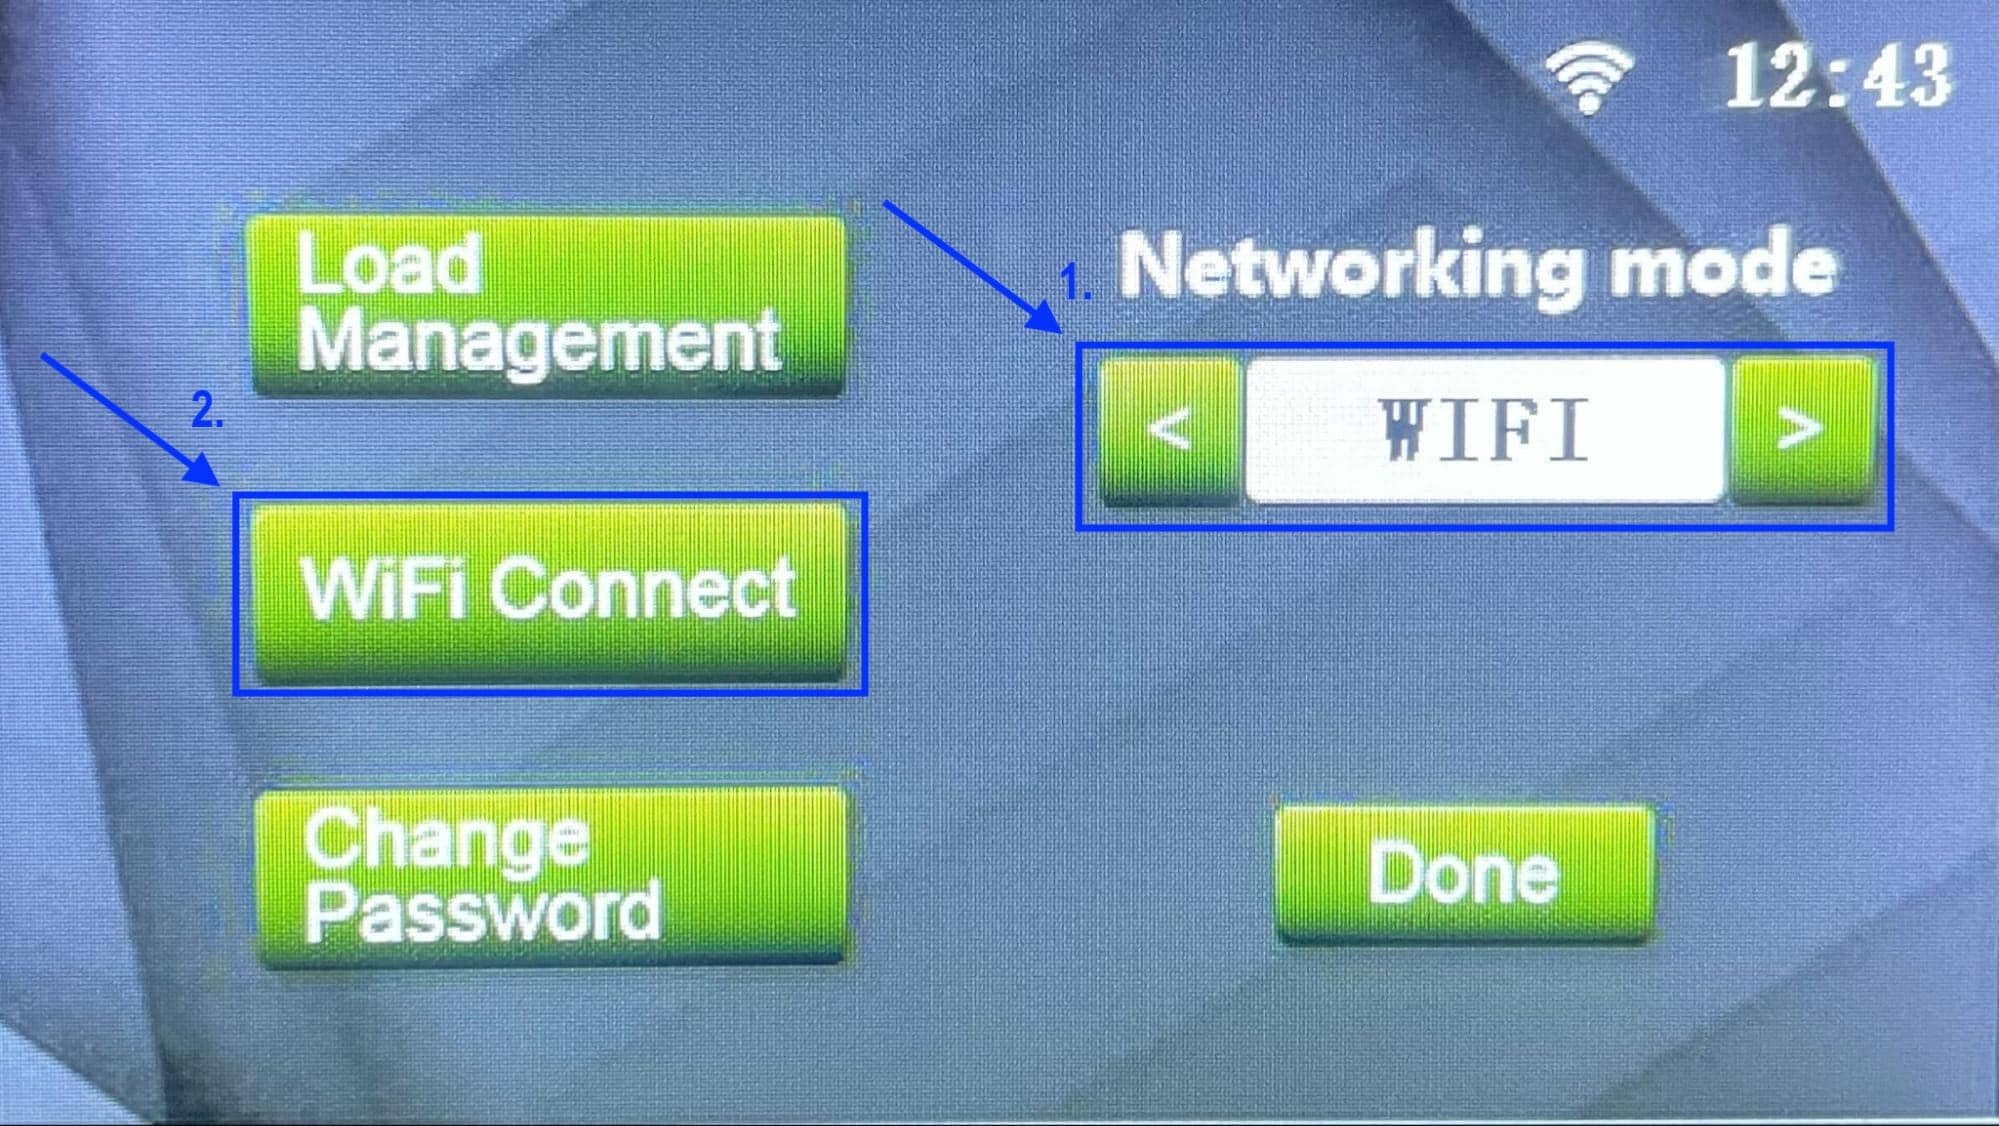
3. Select WiFi connection
Now in the main menu, select networking mode as "WIFI" and click on "WiFi connect".
4. Enter your WiFi credentials
In the following screen enter your WiFi credentials.
WIFI SSID: *your exact WiFi name*
Password: *your WiFi password*
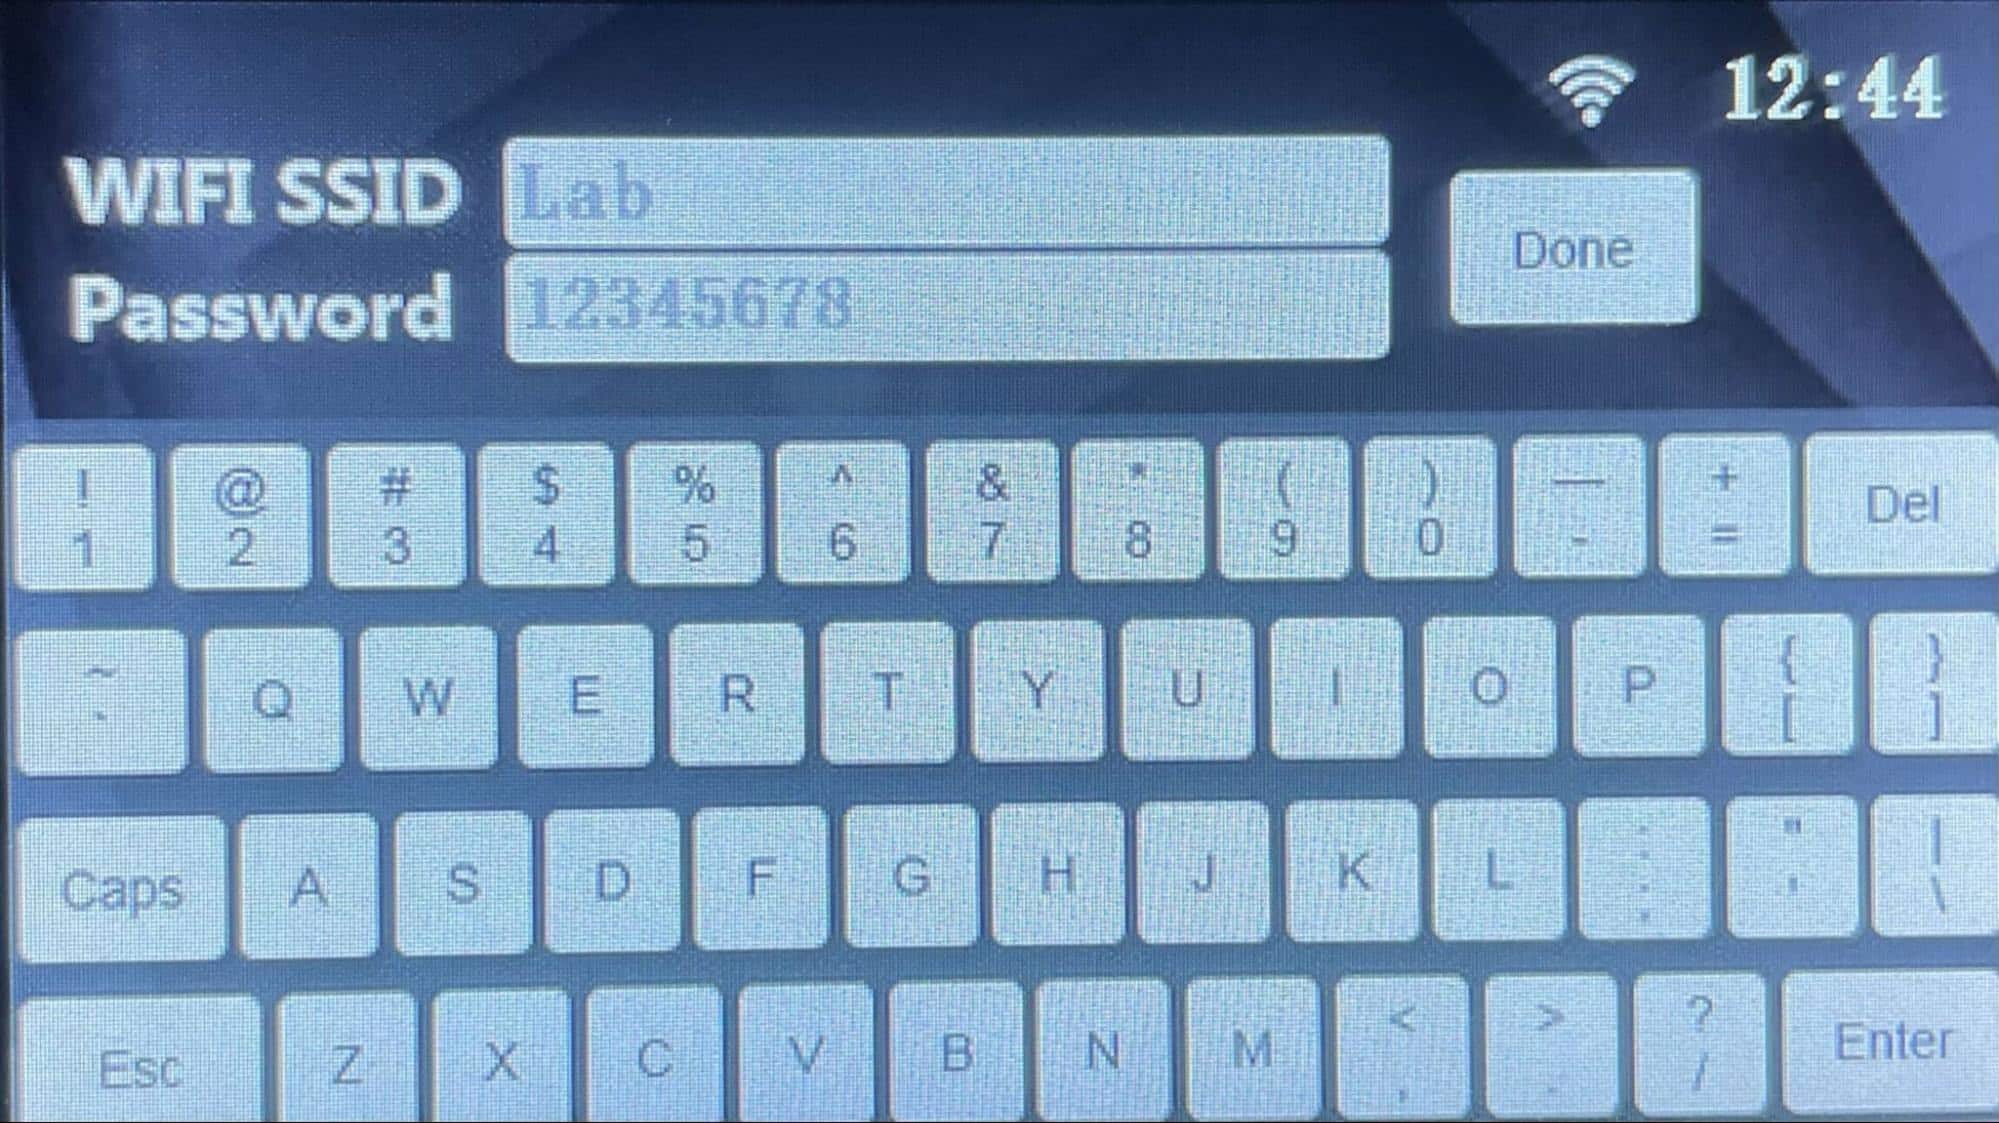
Click "Done".
5. Connecting the charge point to your Monta account
Now you need to add and connect your charge point to your Monta account.
You can do this through either Monta Charge or Monta Hub.