Integration guide for the Weidmüller EV charge point. Covers accessing the web user interface via Ethernet, configuring the network, disabling free mode, and setting up the Open Charge Point Protocol (OCPP) cloud connection to Monta.
Please note that when you connect your charge point to Monta, we become the operator of the charge point. This means that you need to use Monta to control the charging process.
1. Access the WebUI and configure network
If the charge point is already configured to obtain a IP address via DHCP, obtain the address assigned to the device (via a router for example) and navigate to it using a web browser.
If the charge point is not configured for DHCP, connect a PC directly to the charge point RJ45 jack and change your IP v4 setting to the following:
- Enter an IP address between 192.168.0.2 and 192.168.0.254 (except for 192.168.0.8).
- Enter 255.255.255.0 as the subnet mask.
- Navigate to http://192.168.0.8 using a web browser
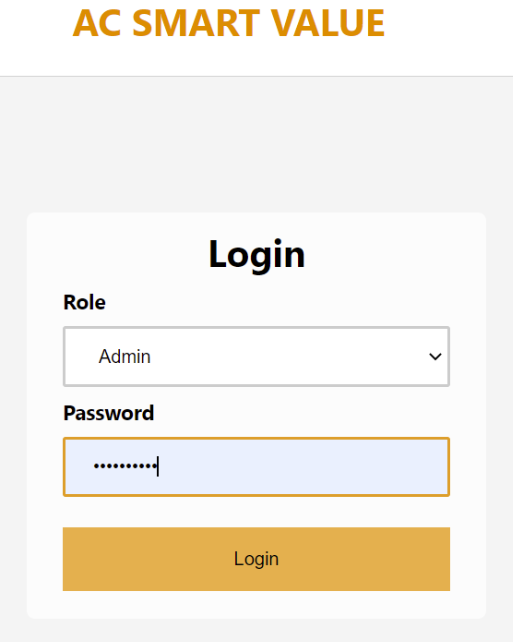
Log in to the WebUI with the following credentials:
- Role: Admin
- Password: zyVt45Nv0y
Go to the menu item “Network” on the left side of the WebUI
Configure wired (local) or wireless (Wi-Fi) connection according to your installation.
2. OCPP settings
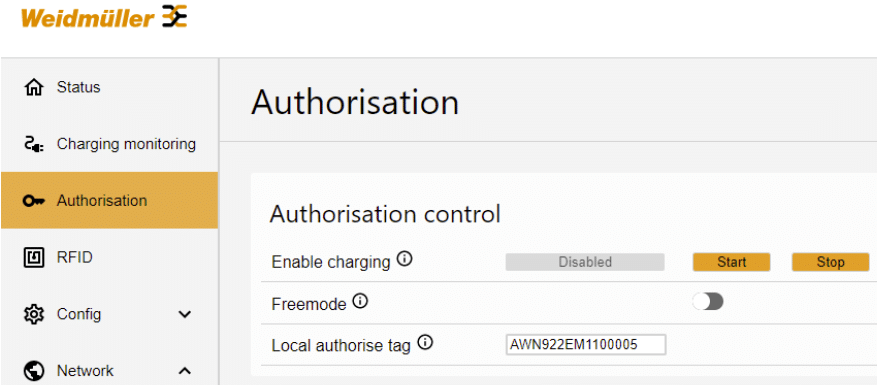
Go to menu item “Authorisation”
Make sure that “Freemode” is disabled
Go the menu item “Network”, then “Cloud” on the left side in the WebUI
Press “Enable OCPP”
Select “Interface” Ethernet or Wi-Fi according to your settings in step 2
Configure the following:
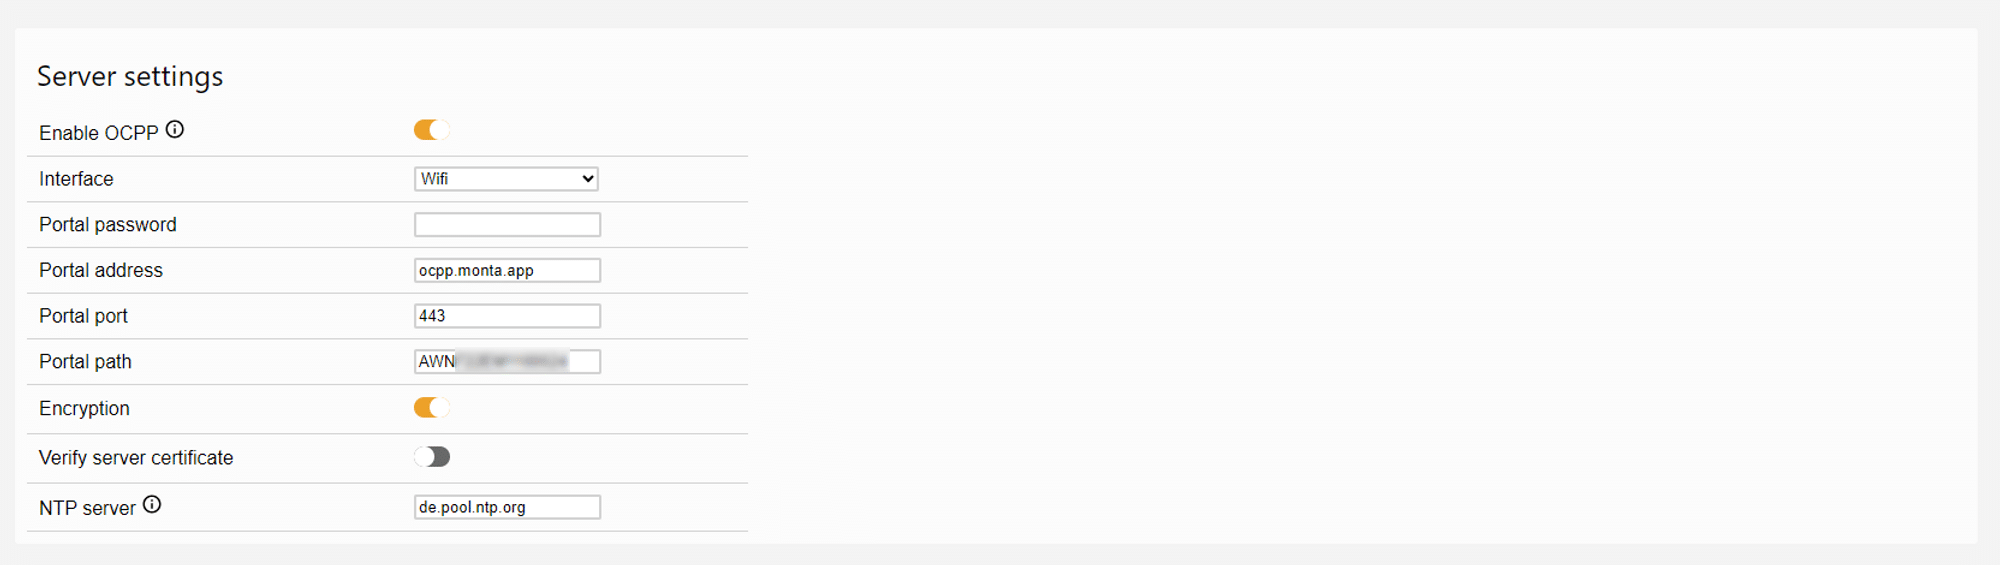
- Leave “Portal password” blank
- Enter “Portal address” ocpp.monta.app
- Enter “Portal port” 443
- Enter “Portal path” as "/" and then your the charge point serial number, which can be found under menu item “Status”. Format will be for example /AWN922EMXXXXXXX
- Press “Encryption” to enable secure websockets
- Leave "Verify server certificate" off
- Leave NTP server as default
Go to the bottom of the page, press first “Save”, then “Restart”.
Charge point will restart, and should now be connected to Monta
3. Connecting the charge point to your Monta account
Now you need to add and connect your charge point to your Monta account.
You can do this through either Monta Charge or Monta Hub.