This guide covers the Powerhubb charge point and walks you through configuring the network and OCPP settings via the My Teison app to connect it to Monta.
Please note that when you connect your charge point to Monta, we become the operator of the charge point. This means that you need to use Monta to control the charging process.
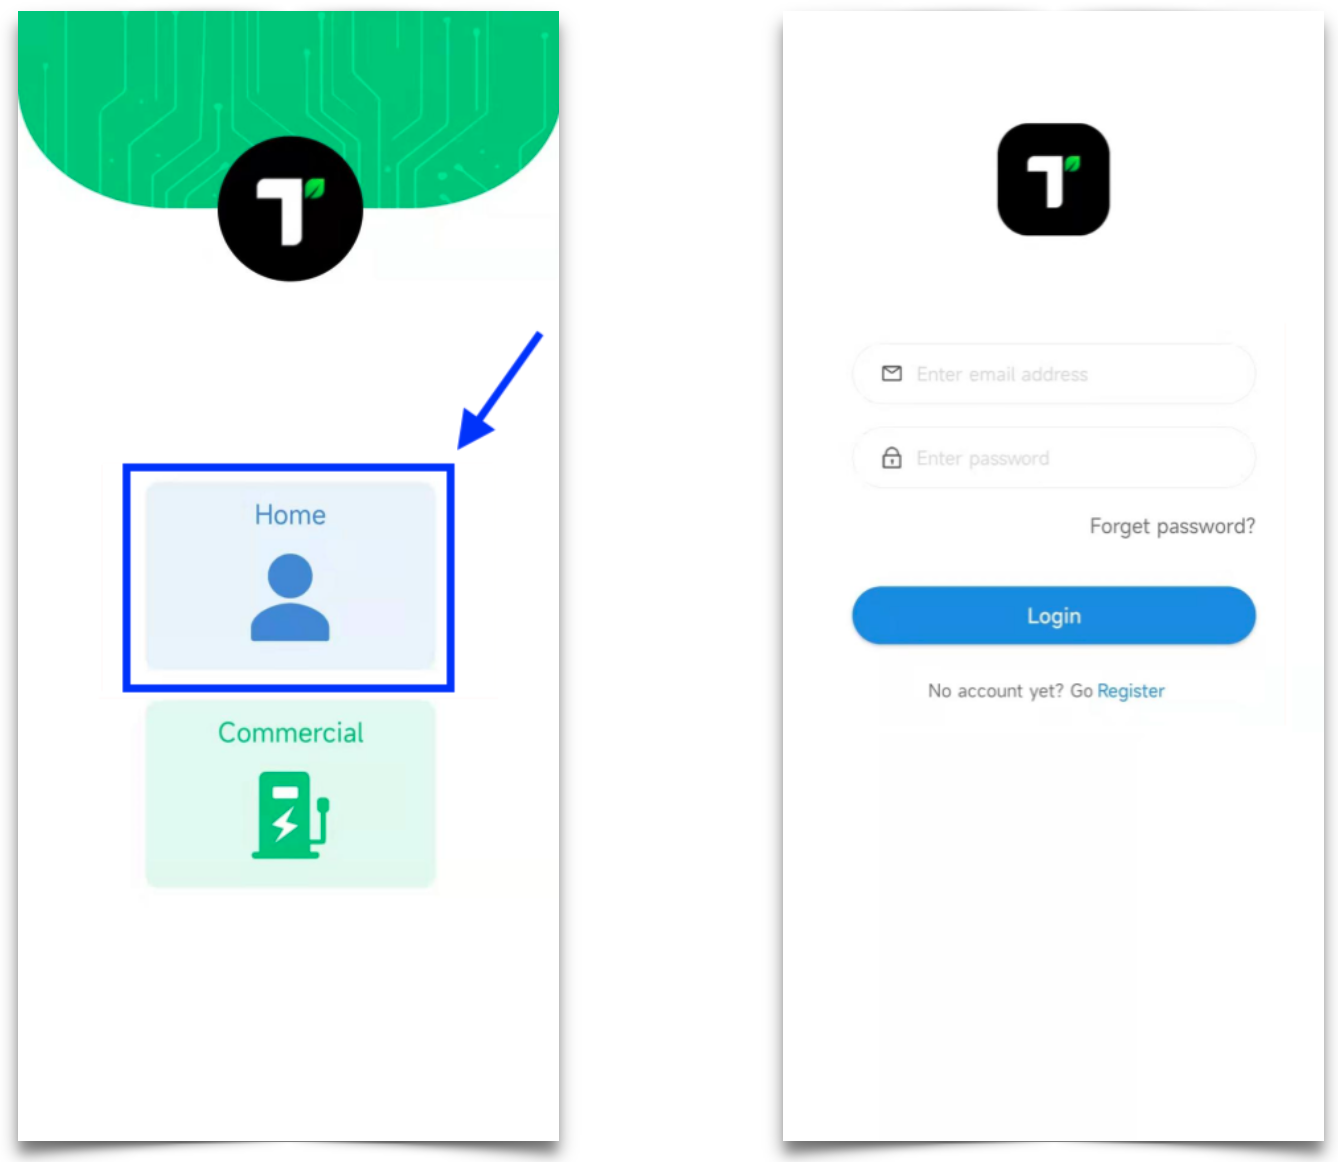
1. Download the Teison app and login
Download My Teison from Apple Store or Google Play.
On the first screen select Home and then login.
Once you are in, turn on your Bluetooth to locate the charging pile list.
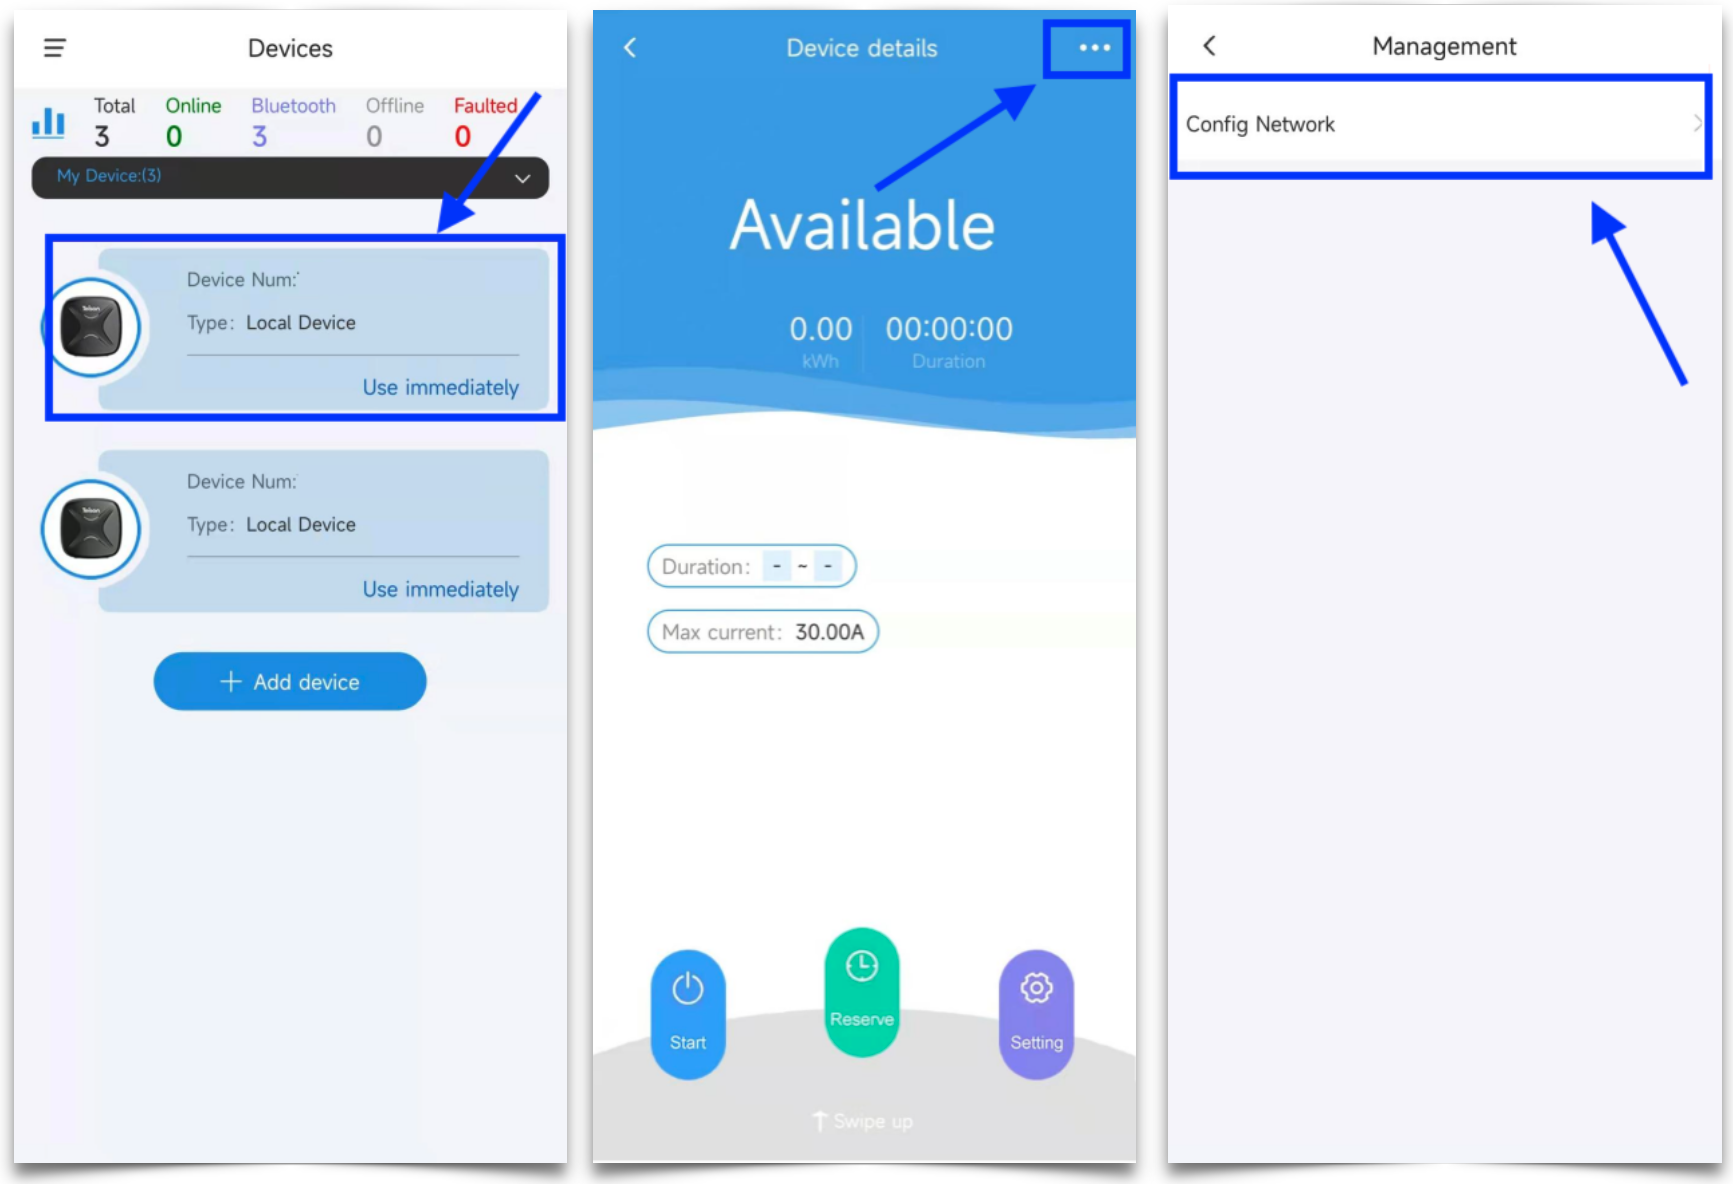
2. Open the network settings
Select a charging pile by clicking on it.
Open the network settings by clicking on the three dots "..." in the upper right corner and then click on "Config Network".
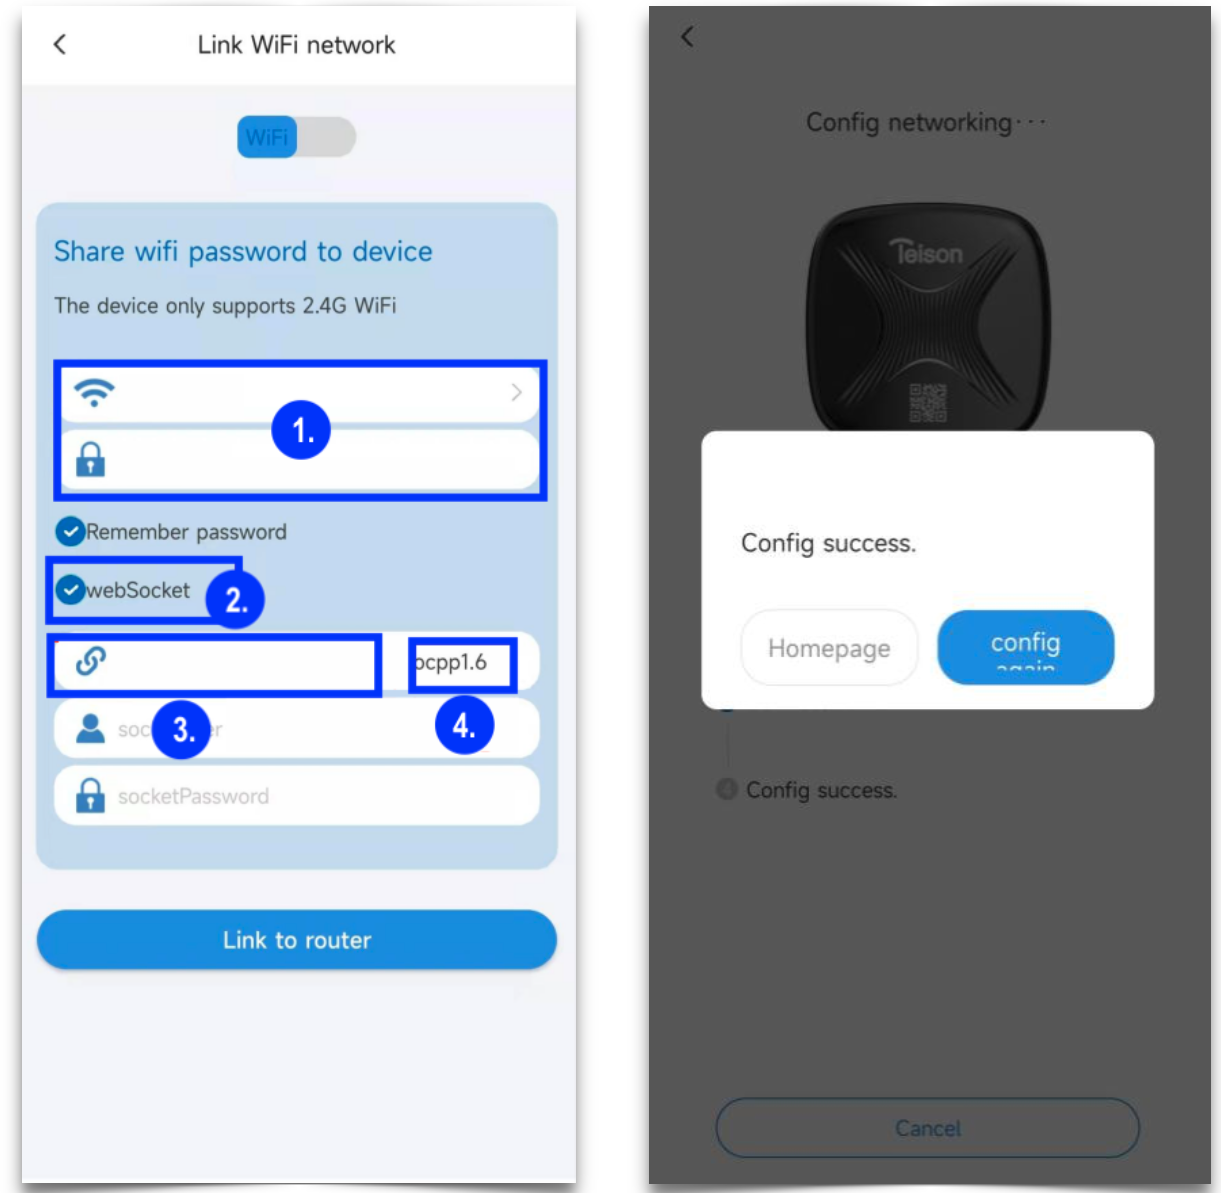
3. Configure network
Select 2.4GB WiFi.
1. Enter your WiFi name and password.
2. Click on webSocket
3. Enter socket URL: ocpp.monta.app:443
4. Enter socket port: ocpp1.6
Finish by clicking on "Link to router".
4. Connecting the charge point to your Monta account
Now you need to add and connect your charge point to your Monta account.
You can do this through either Monta Charge or Monta Hub.