Integration guide for Smappee EV charge points. Covers configuring the charge management system (CMS) URL via the Smappee Dashboard and connecting the unit to Monta.
Please note that when you connect your charge point to Monta, we become the operator of the charge point. This means that you need to use Monta to control the charging process.
1. Login to the Smappee Dashboard
Open the Smappee Dashboard: https://dashboard.smappee.net/login
Log in using the username and password that you’ve used when installing the charge point.
2. Find your charge point
Use the search field on the right side of the screen to search for your charge point.

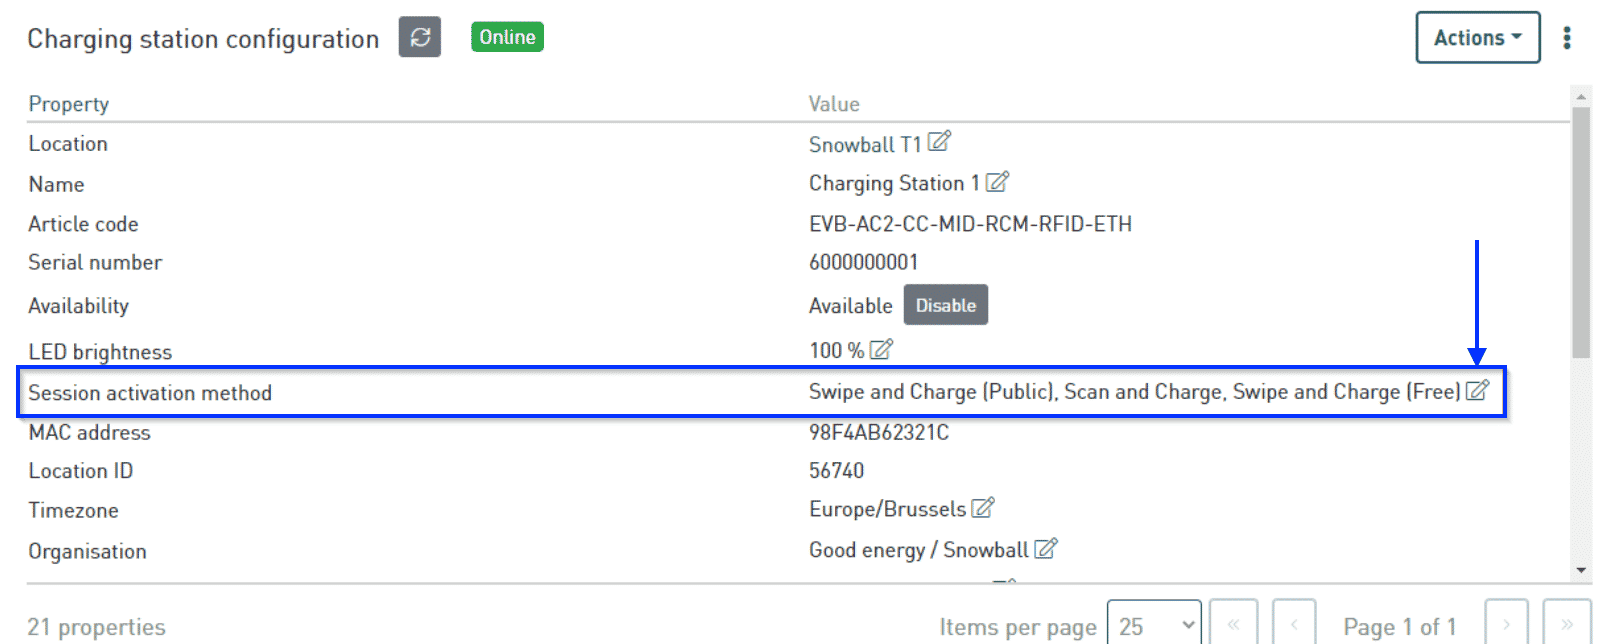
3. Configure the charge point
Select the "Session activation method" field. Click on the "edit" icon on the right side of the field.
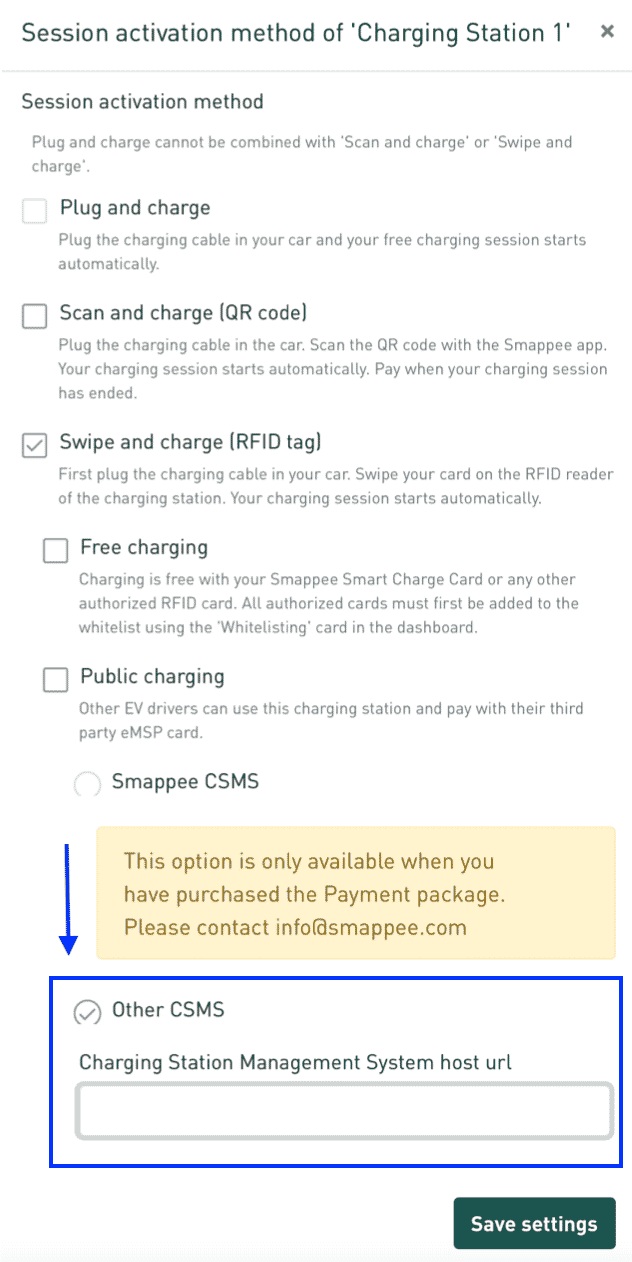
4. Place in the Monta url
Scroll down and select "Other CSMS". In the field bellow, place in the Monta url address: wss://ocpp.monta.app
5. Save settings and reboot
After you have saved the settings, please reboot the charge point.
6. Connecting the charge point to your Monta account
Now you need to add and connect your charge point to your Monta account.
You can do this through either Monta Charge or Monta Hub.
Important note! When you are connecting the charge point to your Monta account, you need to insert the serial number of the charge point. When you are inserting the serial number you have to add "SMP_" before the number. Example: SMP_1111111111