Please note that when you connect your charge point to Monta, we become the operator of the charge point. This means that you need to use Monta to control the charging process.
1. Login to ABB configuration WebUI
This guide assumes you have already connected your ABB DC charger to the internet.
Go to https://chargers.evcharging.abb.com/Account/Login?fw=%2f
Login with your installer credentials, which you can receive from your local ABB office.
You will arrive at the "Chargers" section, as seen below:

The unit you are configuring will show up in the list.
Click on the charge point you would to configure.
Click on "Charger settings".
2. Authorization settings
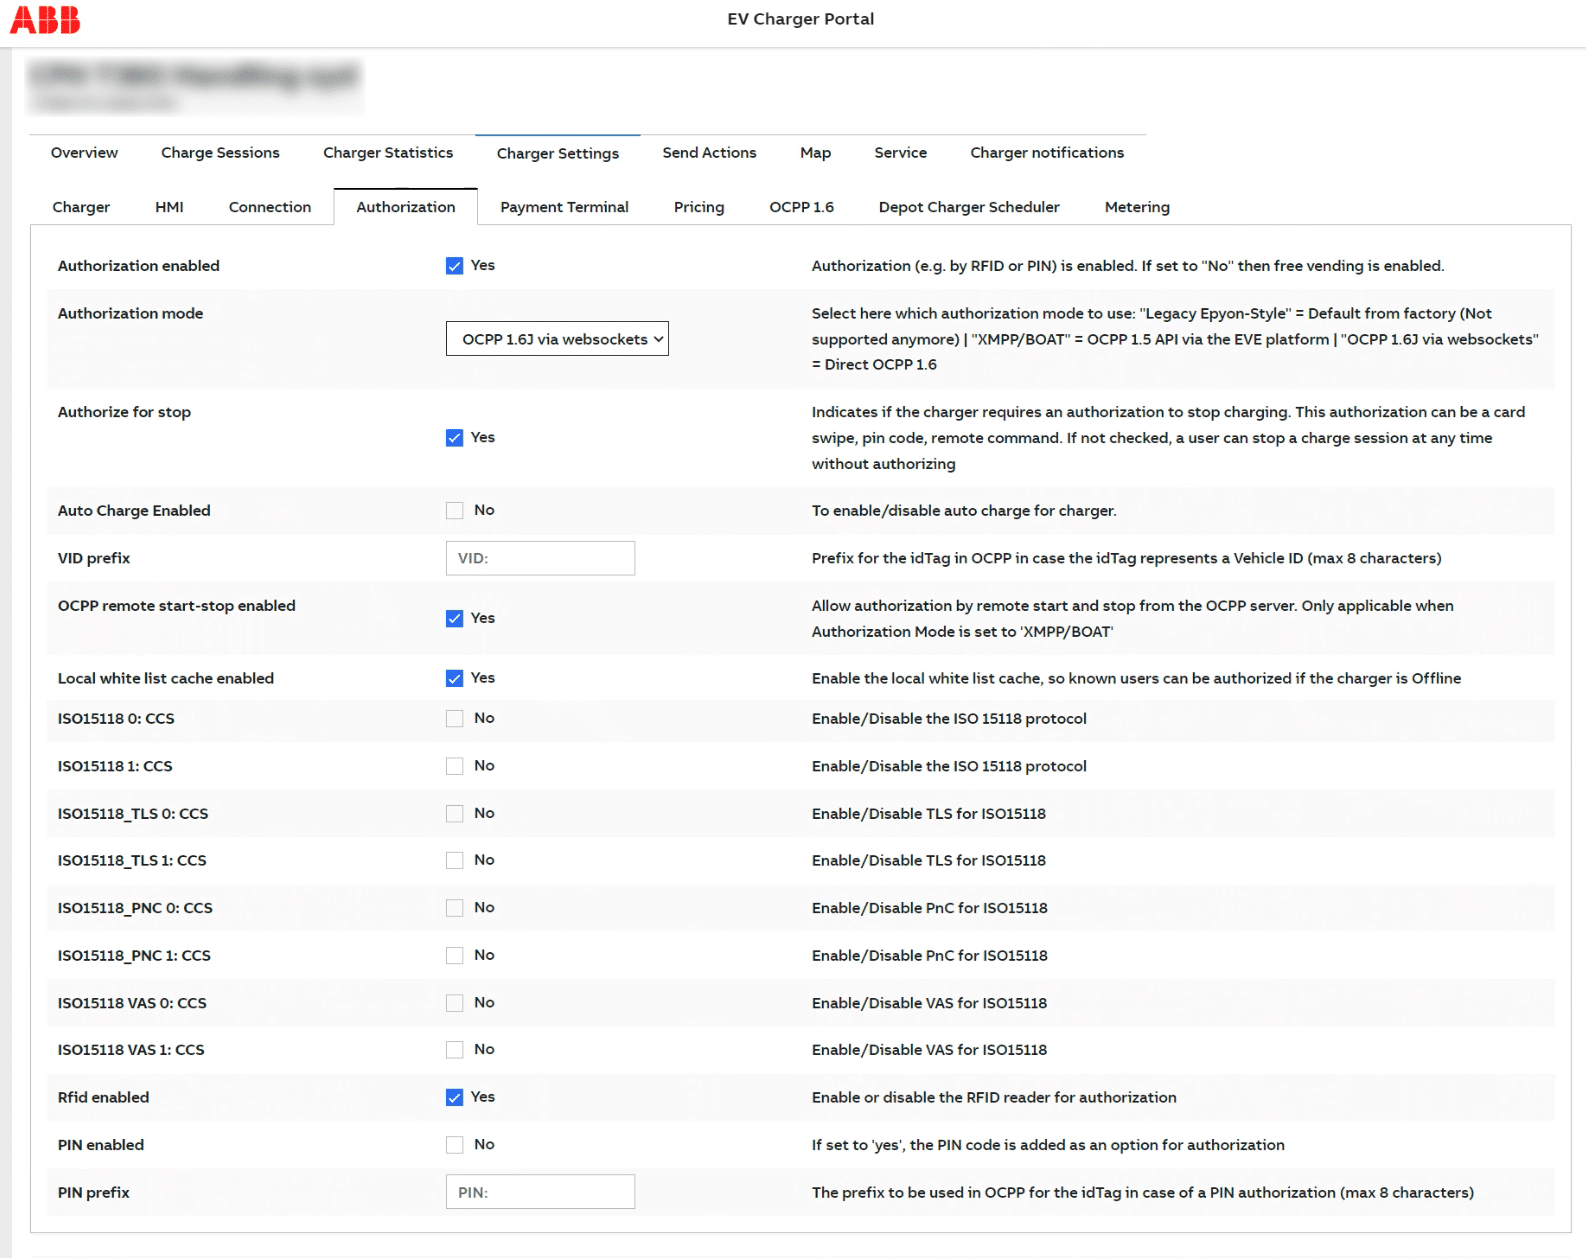
Click on “Authorization” tab.
Enable the following settings, while keeping the rest of the settings disabled:
- Authorization enabled: Yes
- Authorization mode: OCPP 1.6J via websockets
- Authorize for stop: Yes
- OCPP remote start-stop enabled: Yes
- Local white list cache enabled: Yes
- RFID enabled: Yes

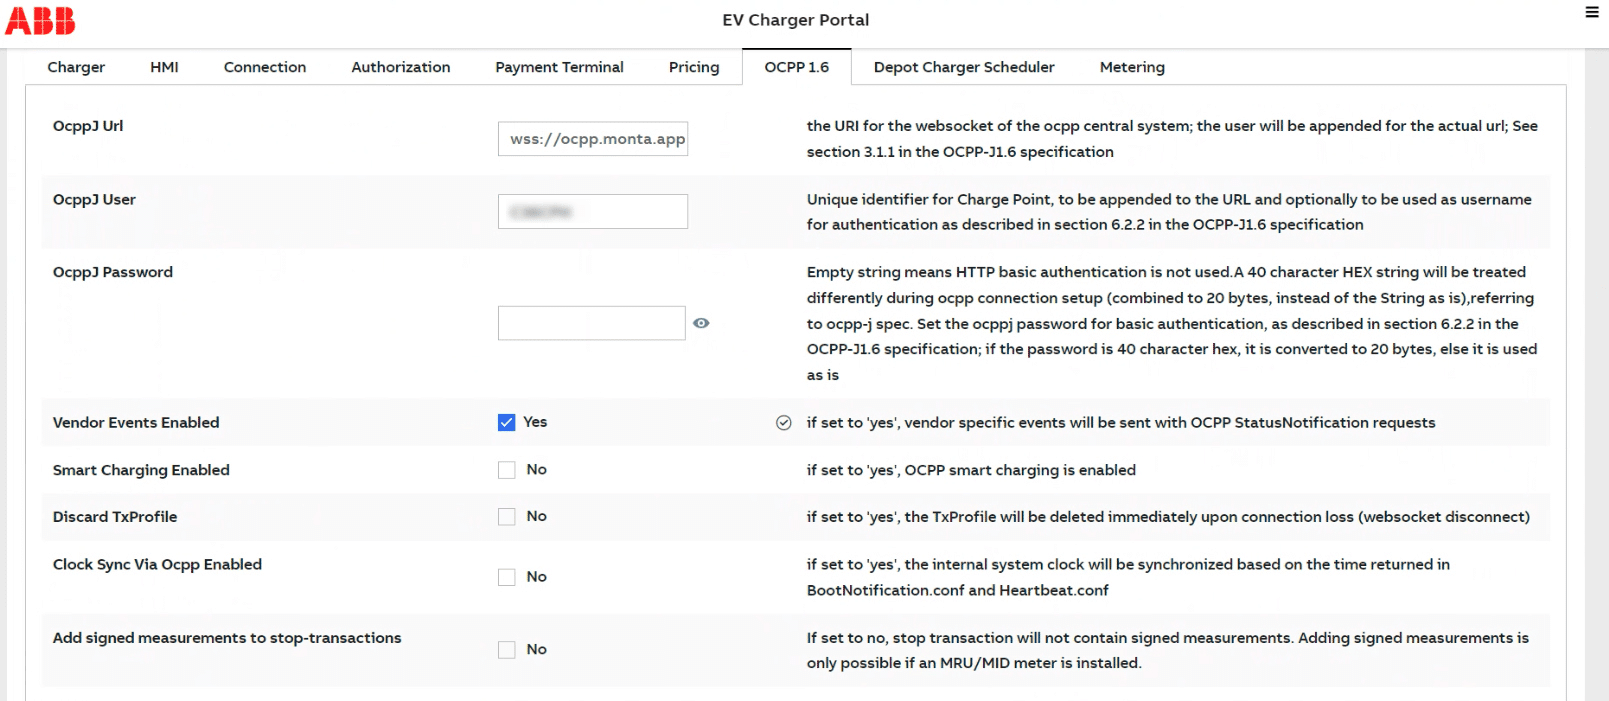
3. OCPP 1.6 settings
Enter wss://ocpp.monta.app in OCPPJUrl.
Enter a *unique identifier* as "OcppJ user" (should be S/N of charger).
Leave "OCPPJ Password" blank.
Enable "Vendor Events Enabled".

(3. b) Enable Vehicle ID for Auto Charge
Go to Charger -> Charger settings
Enable "Include Vehicle ID"

4. Restart the charge point
Restart the charge point from the WebUI or physically. It should connect within 5-10 minutes.
5. Connect the charge point to your Monta Account
Now you need to add and connect your charge point to your Monta account.
You can do this through either Monta Charge or Monta Hub.
