Configuration guide for ABB AC chargers (TerraAC series), covering firmware update, internet connection, and Open Charge Point Protocol (OCPP) setup with Monta.
Please note that when you connect your charge point to Monta, we become the operator of the charge point. This means that you need to use Monta to control the charging process.
This guide only applies for ABB AC chargers.
1. Set up and connect to the charger
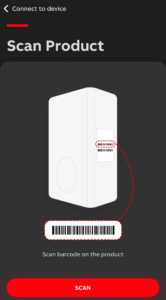
1. Install the TerraConfig App:
Note: You must be within 10 feet of your device in order to connect to Bluetooth for configuration
2. Open the app and Login with your ABB TerraConfig account. If you do not have one, create a new one.

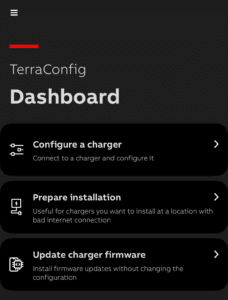
2. Connect the charger to the internet
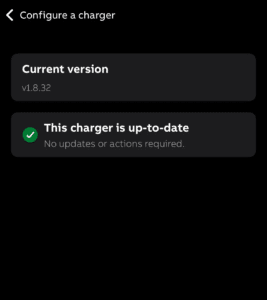
1. Update firmware
Get the charge point on the latest Firmware version - click on the Firmware button, the app will check if the charger is on the latest Firmware version, if not, update the Firmware.
2. Connect to the internet
Click on Connections and choose your desired internet connectivity method. You can choose between WiFi, Ethernet and Cellular. Enter all necessary information to establish the internet connection.
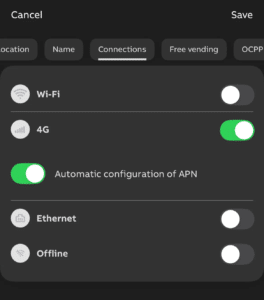
Once this is done go the bottom of the page and click Confirm Configuration, the app will send the data to the Charge Point and validate that everything was received correctly.
3. Connect the charger to Monta
1. From the TerraConfig Dashboard, connect to the Charge Point again
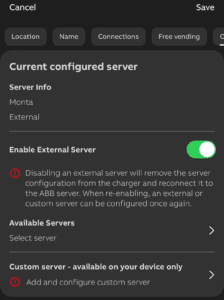
2. Select Monta OCPP server:
- Go to OCPP Server and click on Available Services
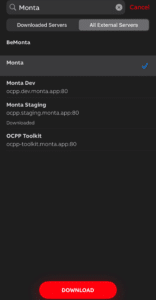
- Search for Monta, select it, and click Download
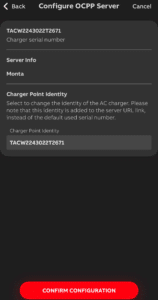
- Click Confirm Configuration
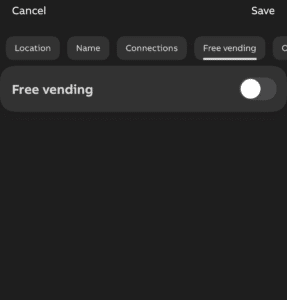
3. Disable Free Vending Mode:
- Go to Free vending and deactivate it. Click Save.
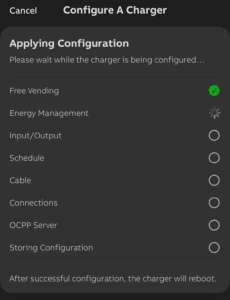
4. Save the configuration:
- Go to the bottom of the page and click Confirm Configuration. The app will send the configuration and validate that everything has been received by the charge point.
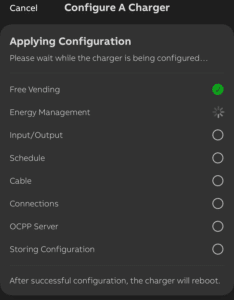
- If everything gets the approved, then the charge point is ready to be added via the Monta tools
5. Add and connect your charge point to your Monta account
You can do this through either Monta Charge or Monta Hub.