This is a guide that shows how to install Monta on your charge point. If you want to connect your charge point to your Monta account, please follow the steps in the end of the guide.
Please note that when you connect your charge point to Monta, we become the operator of the charge point. This means that you need to use Monta to control the charging process.
1. Change your network settings
Start by connecting your charge point to your computer. You can do this by connecting them via an Ethernet cable or connecting to the same network.
You need to change the network settings of your computer, according to the charge point's local IP.
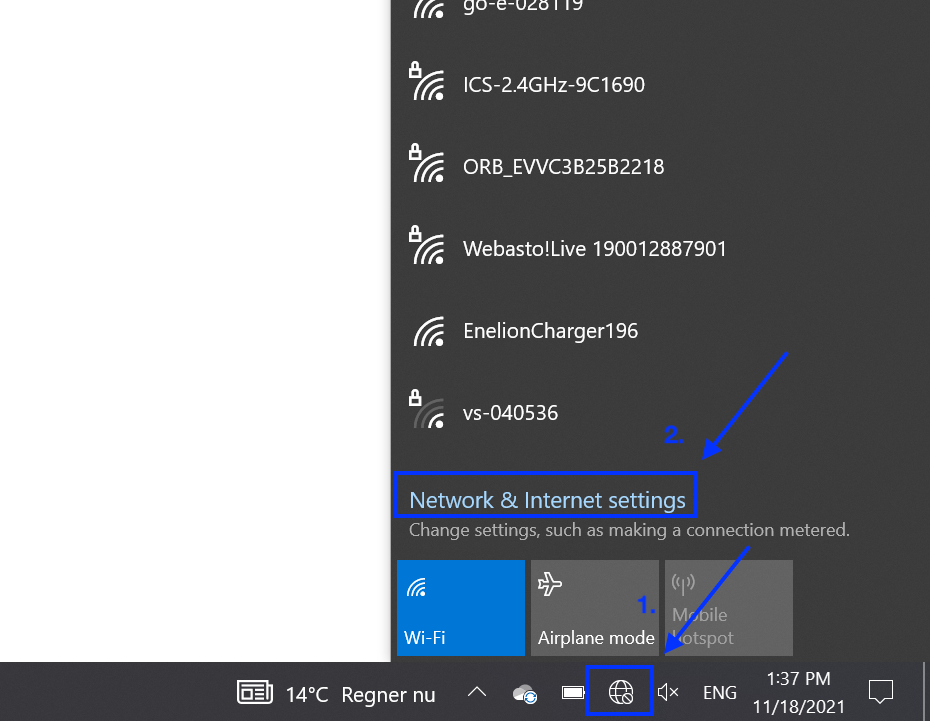
To do so, click on the Internet icon in the bottom-right corner of your computer screen. From there, open the "Network & Internet Settings" of your device.
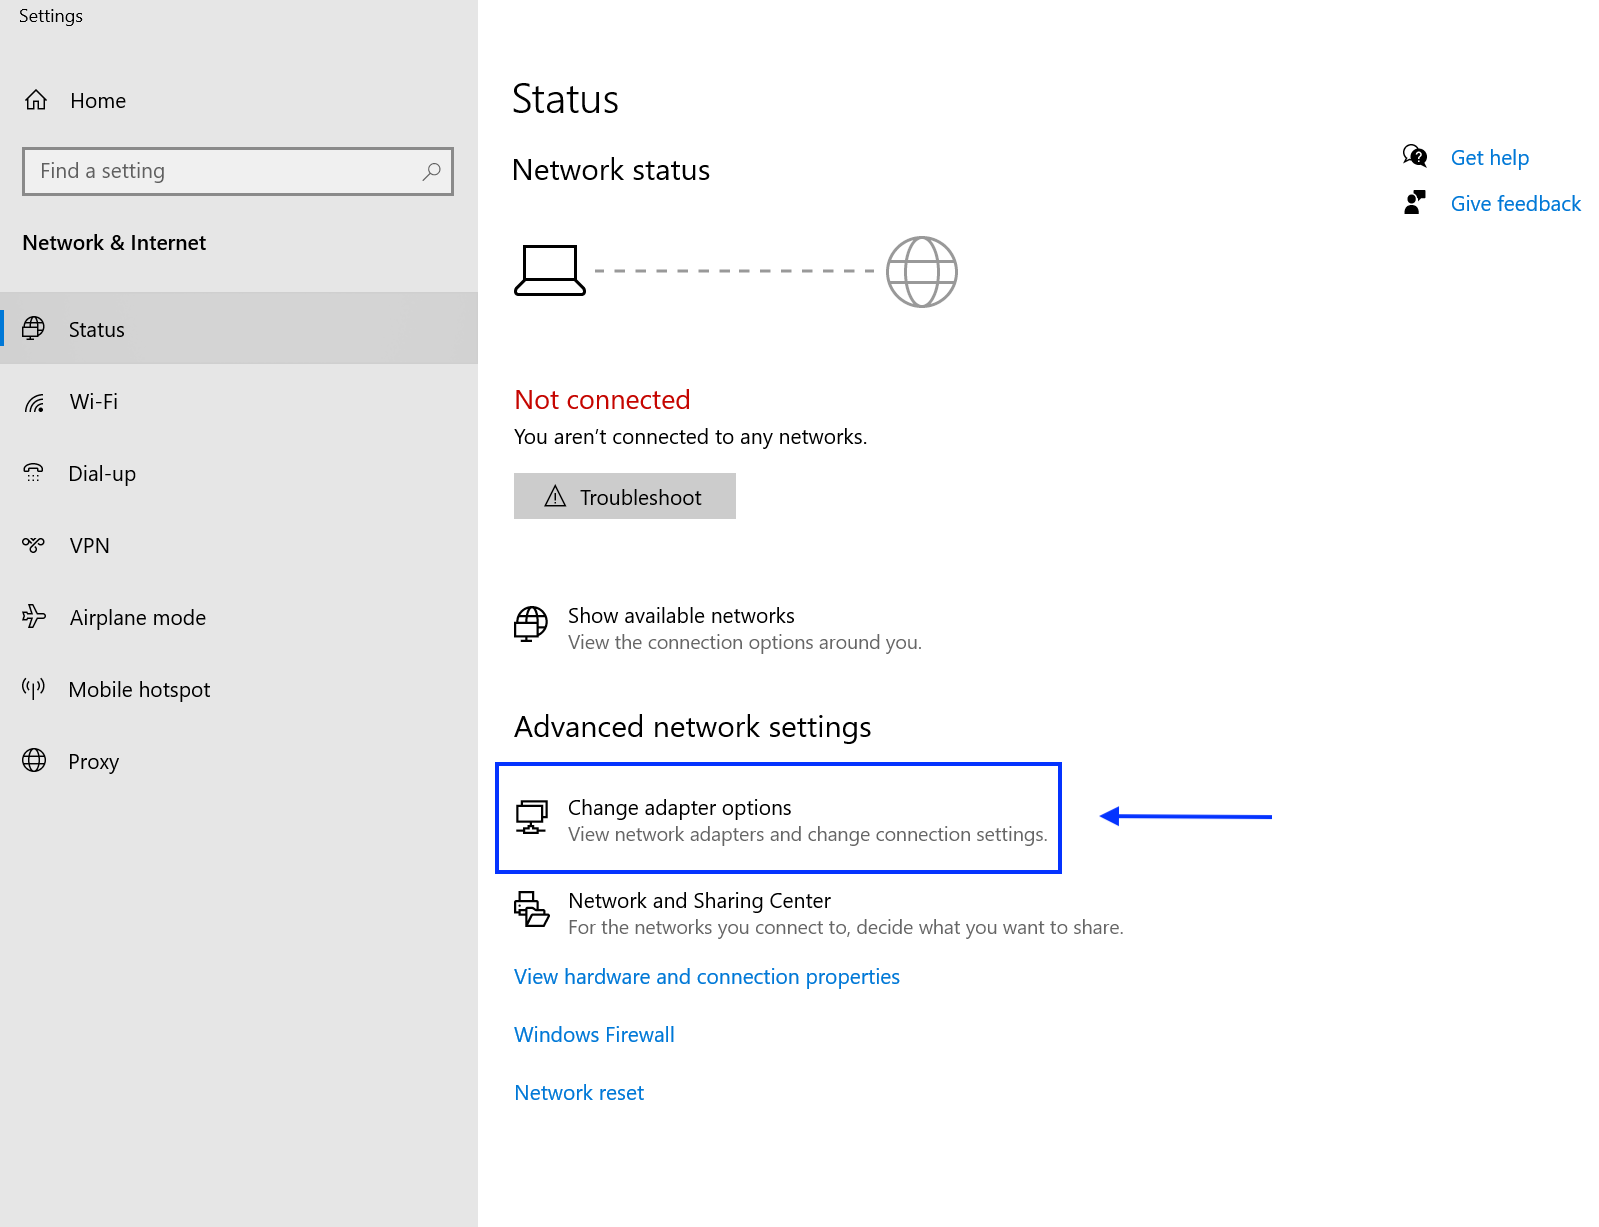
2. Select "Change adapter options"
Select "Change adapter options", located in the Advanced networks settings.
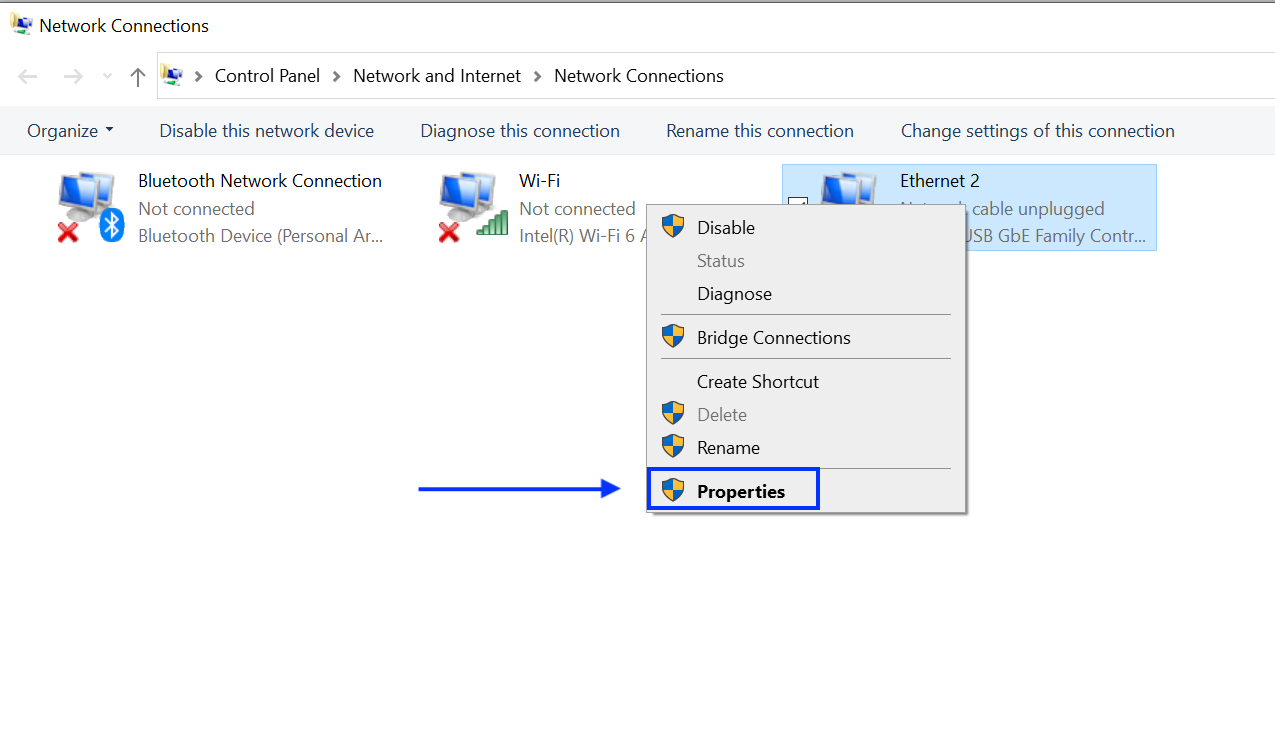
3. Right-click on "Ethernet adapter" and select "Properties"
Once you enter the "Change adapter options", find the Ethernet adapter, right-click on it, and select "Properties".
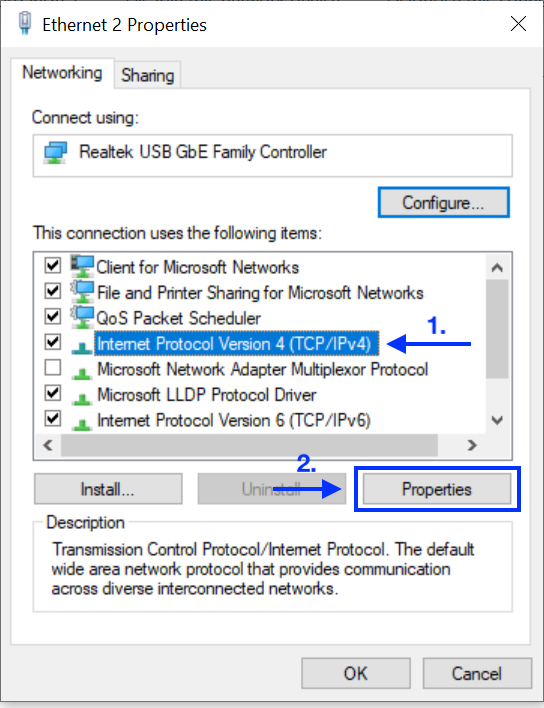
4. Find and select "Internet Protocol Version 4 (TCP/iPv4)"
In "Ethernet Properties", find the Internet Protocol Version 4 (TCP/iPv4), click on it, and press "Properties".
5. Select and fill out "Use the following IP addresses"
Once you are there, select "Use the following IP addresses", if not selected, and enter the values as following:
IP address: 169.254.1.2.
*Please note that x can be any value between 1 and 249. This can be seen in the example below, where the value of x is the number 2.
Subnet Mask: 255.255.255.0

6. Open your browser to 169.254.1.1:8300
Open a browser on your computer, type 169.254.1.1:8300 and hit "Enter".
This will open a web interface of the charge point configuration.
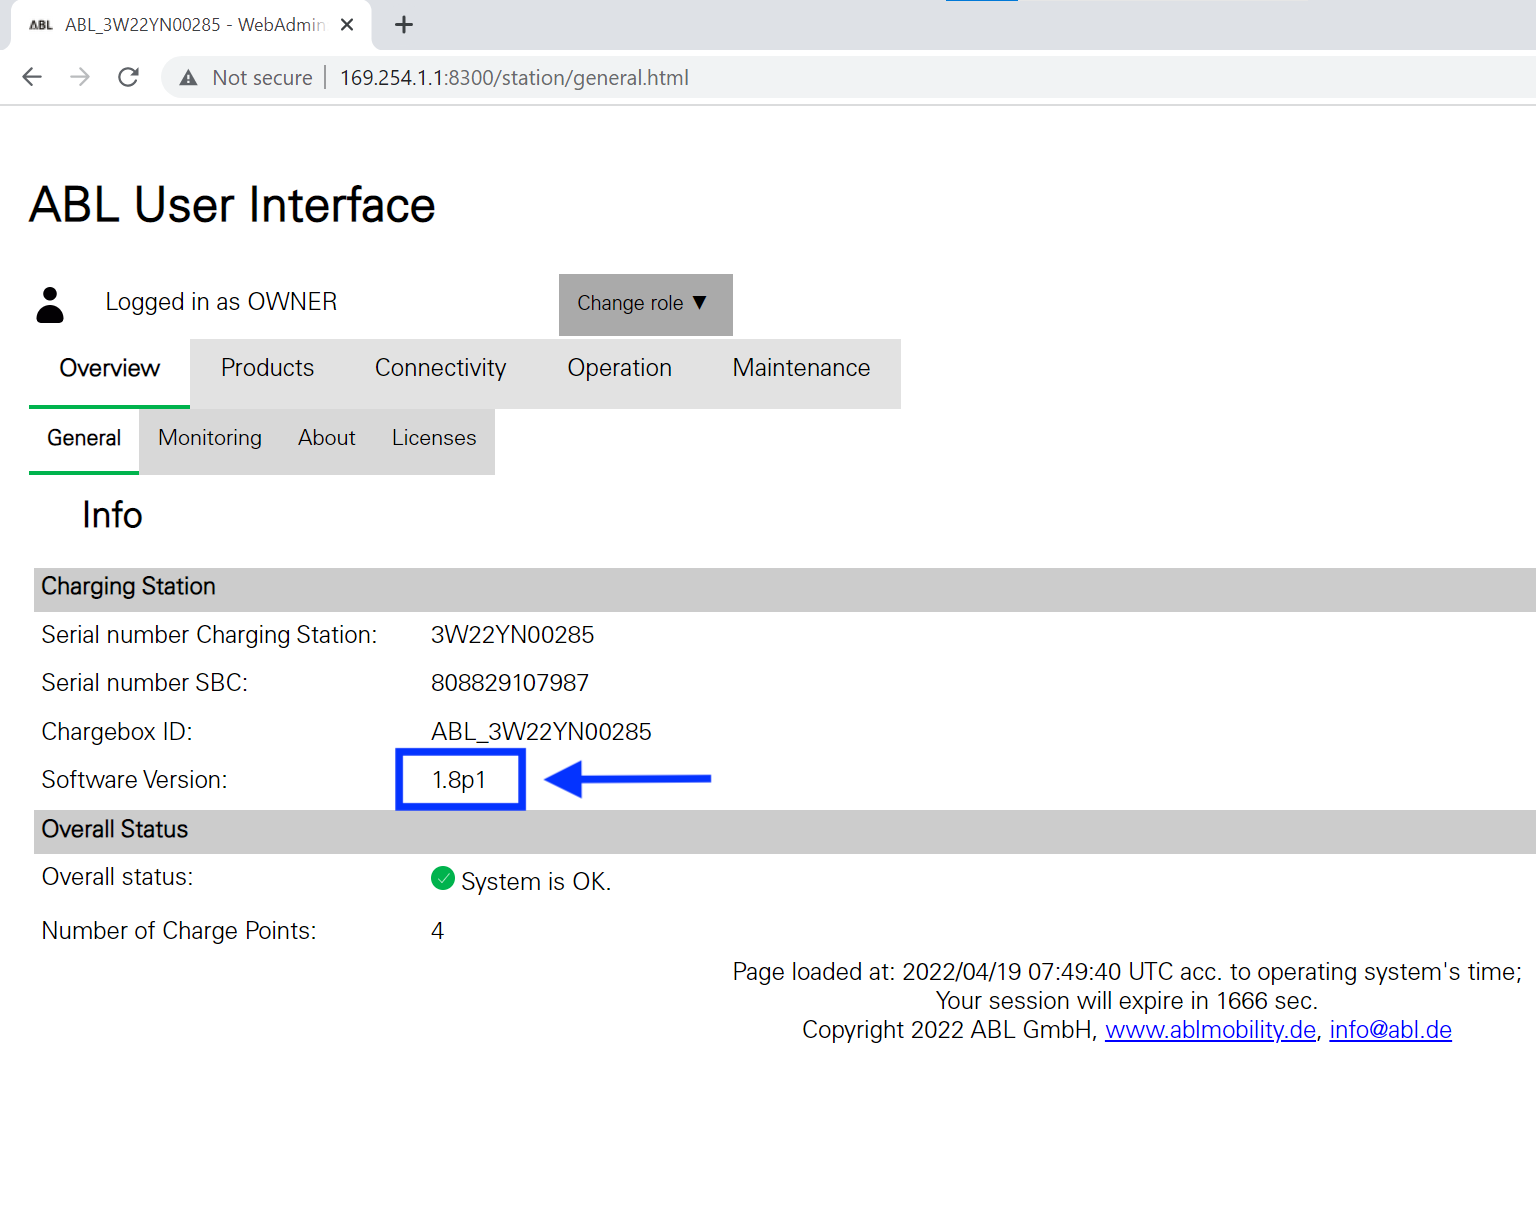
Here, you can check the firmware version of the charge point. In order to successfully connect to Monta it needs to be 1.8p1 or newer.
The installers manual and newest firmware can be downloaded from:
https://www.ablmobility.de/en/service/downloads.php.
7. Connect the charge point to the internet
7.a. Connect using a SIM card (3G/4G)
Navigate to "Connectivity" and then click on "Cellular".
The APN, Username and Password are provided with the SIM card or by the SIM card provider.
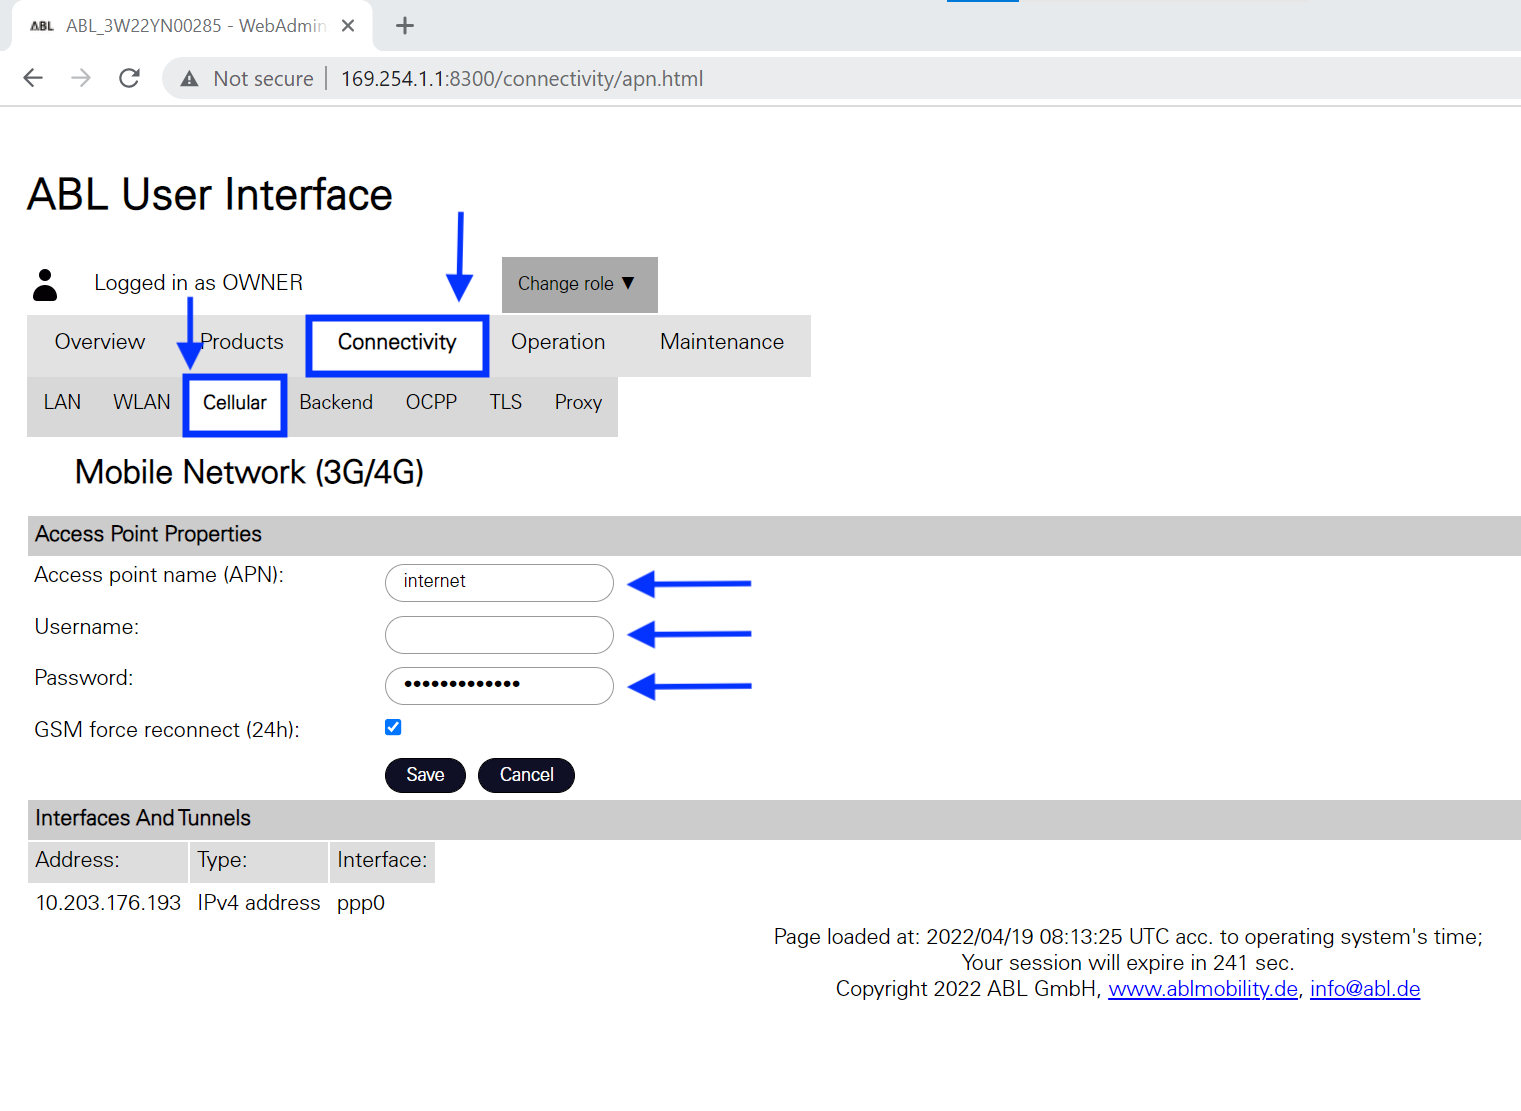
Click on "Save" and continue to setting up the OCPP configuration.
7.b. Connect via WiFi
Navigate to "Connectivity" and then click on "WLAN".
Fill in your WiFi credentials, such as WiFi name and password.
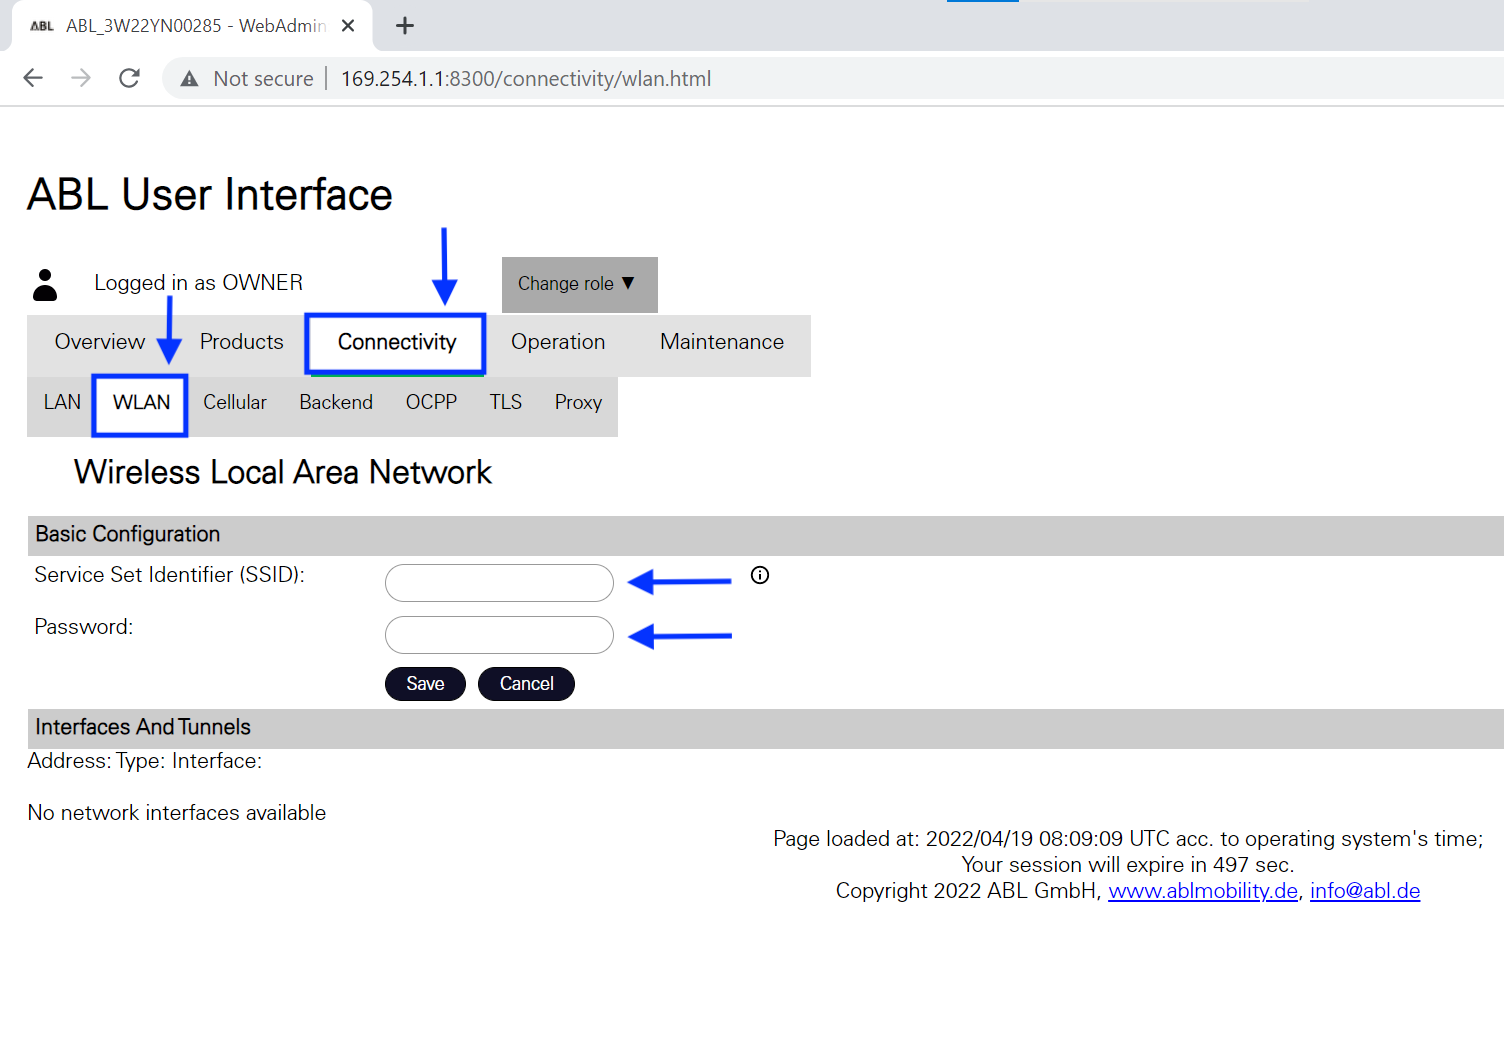
Click "Save" and proceed with next step.
8. Open OCPP settings
Navigate to "Connectivity" and then click on "OCPP".
In the "Central system address (URL)" paste the Monta address: ws://ocpp.monta.app
The Chargebox ID will be filled out automatically.
! IMPORTANT! Do not change the Chargebox ID.
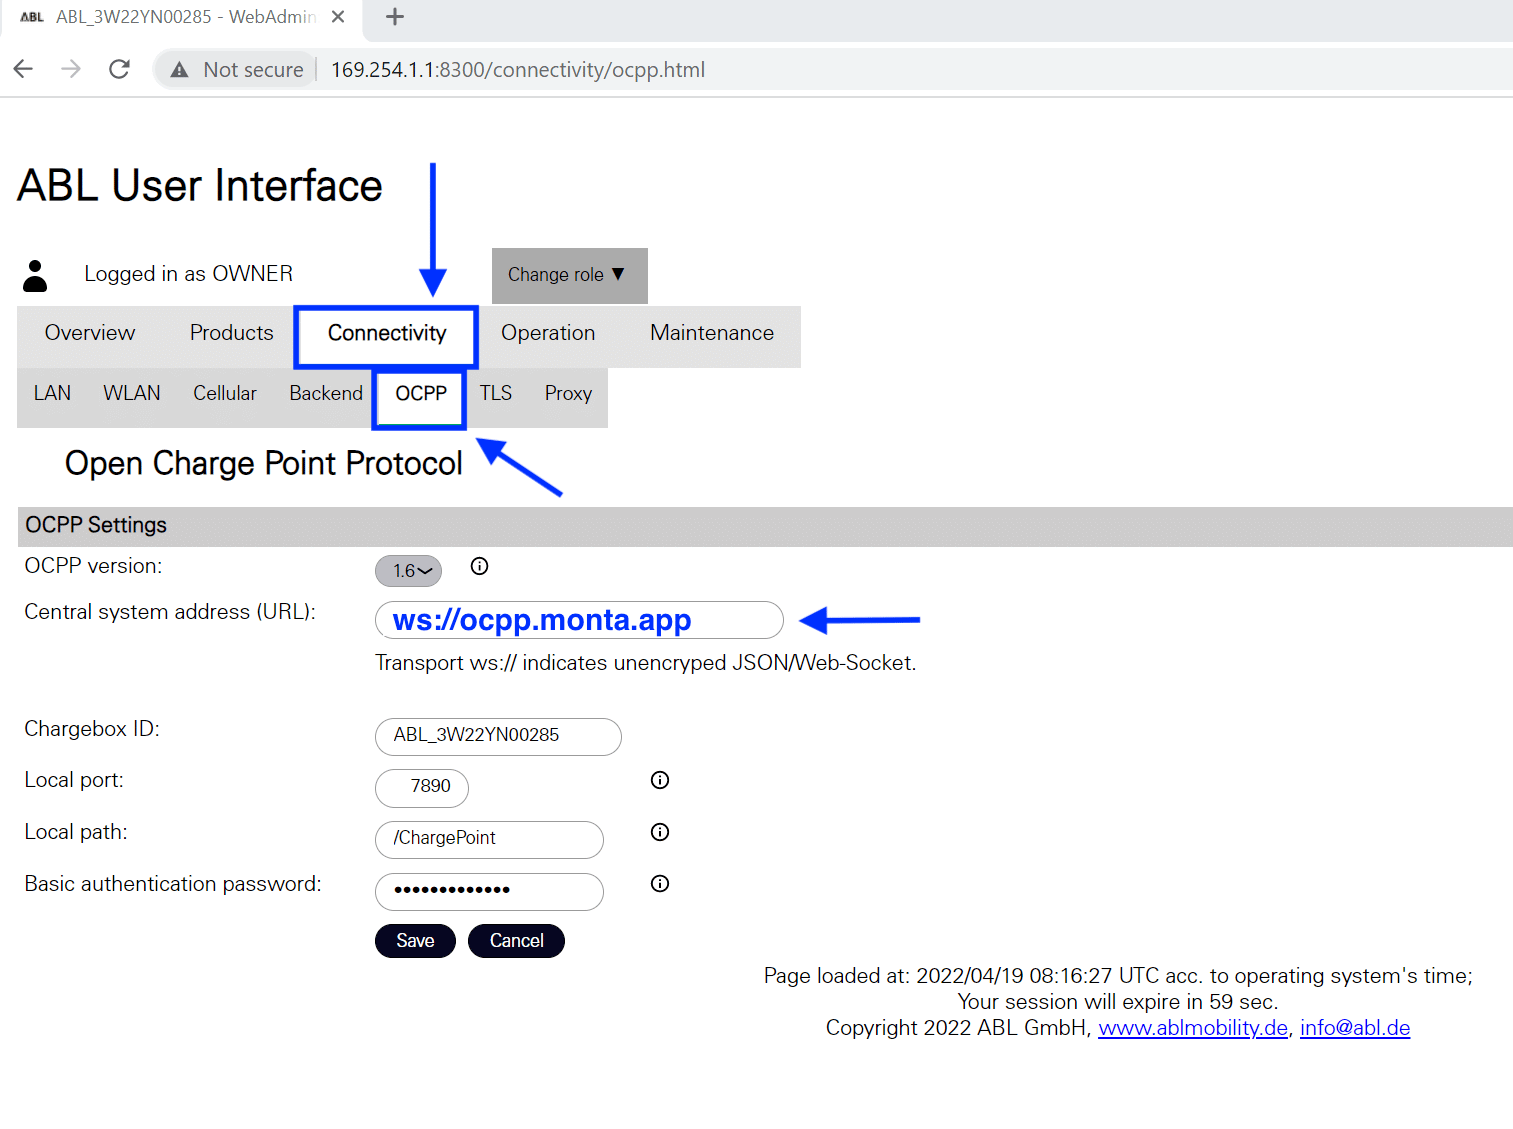
Click on "Save" and continue with rebooting the charge point.
9. Reboot the charge point
After changing the parameters above, navigate to the "Maintenance" tab and go to "System" parameters.
There, click on "Hard Reset", which will reboot the system and apply the parameters.
10. Connecting the charge point to your Monta account
Now you need to add and connect your charge point to your Monta account.
You can do this through either Monta Charge or Monta Hub.
