This is a guide that shows how to install Monta on your charge point. If you want to connect your charge point to your Monta account, please follow the steps in the end of the guide.
Please note that when you connect your charge point to Monta, we become the operator of the charge point. This means that you need to use Monta to control the charging process.
This is an installation that must be performed by a licensed installer.
1. Connect to the charge point
Connect to the charge point locally to open the configuration interface on your device. To access the user interface, please refer to the manual that came with the charge point.
2. Internet connection of the charge point
Begin by connecting your charge point to the internet. In this guide we have used SIM connection as an example.
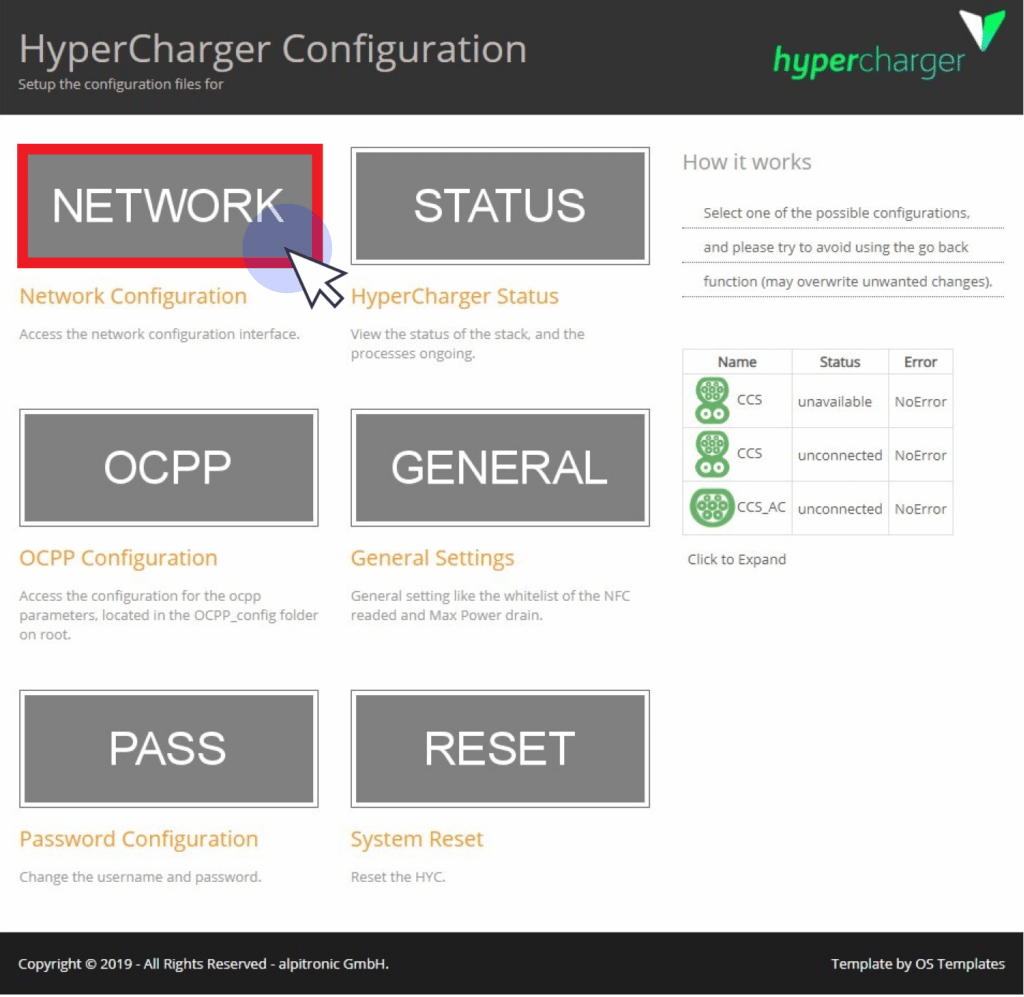
Click on "Network".
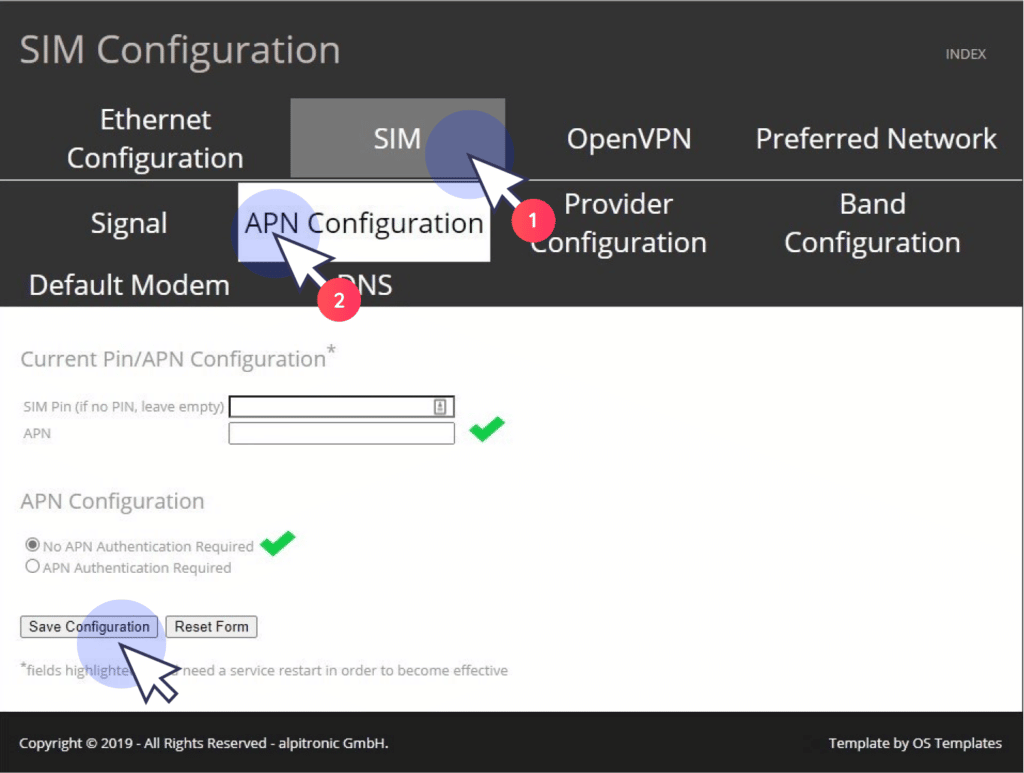
Select "SIM", followed by "APN Configuration".
In marked fields, enter the APN data from the SIM card you are using.
Check the field "No APN Authentication Required".
Finish by clicking on "Save Configuration".
3. Select Preferred Network
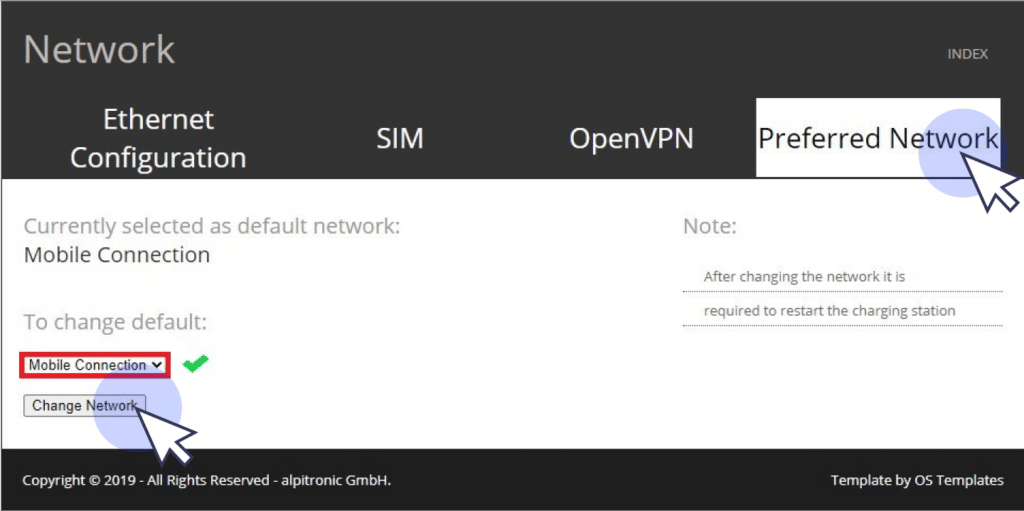
Click on the tab "Preferred Network".
For connection with Sim cards, select "Mobile Connections" and click on "Change Network" to save the changes.
4. OCPP configuration
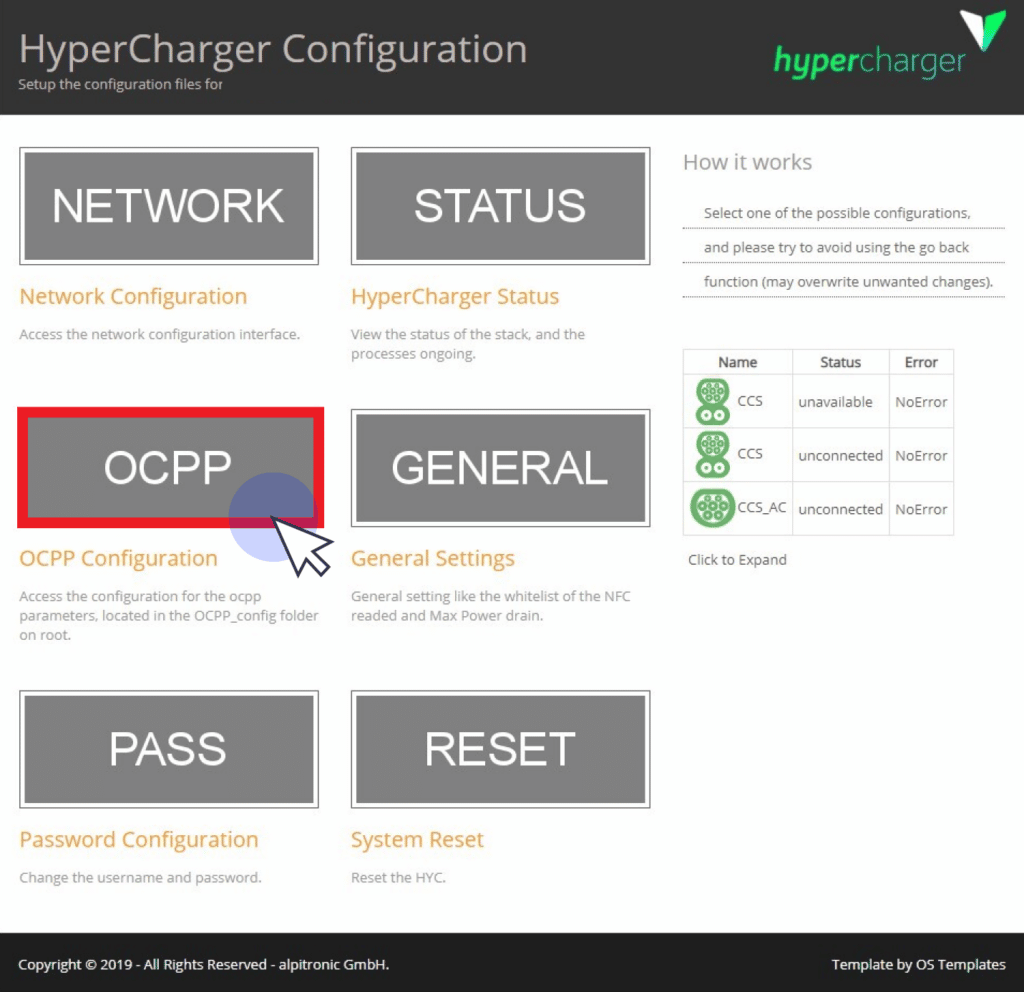
Click on "Index" in the upper right corner of the screen to navigate back to the main menu.
Select "OCPP".
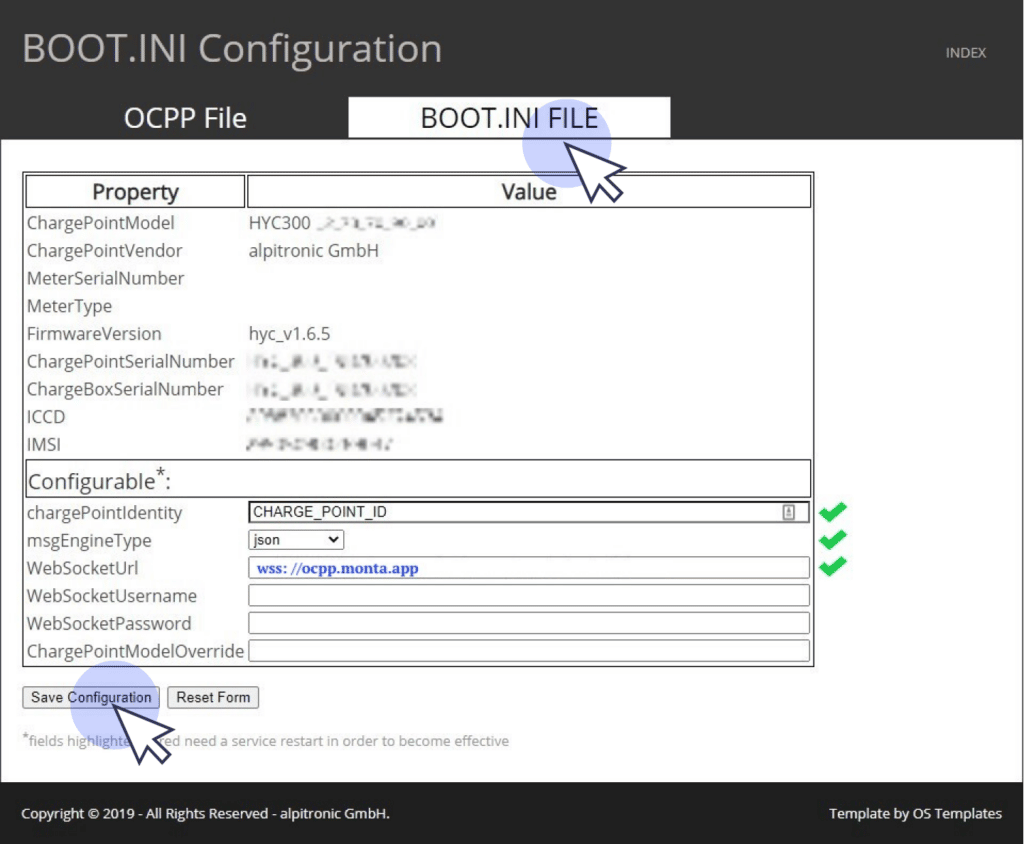
Select the "BOOT.INI FILE" tab.
chargePointIdentity: Insert the charge point serial number
msgEngineType: json
WebSocketUrl: wss://ocpp.monta.app
Finish by clicking on "Save Configuration".
5. Reboot the charge point
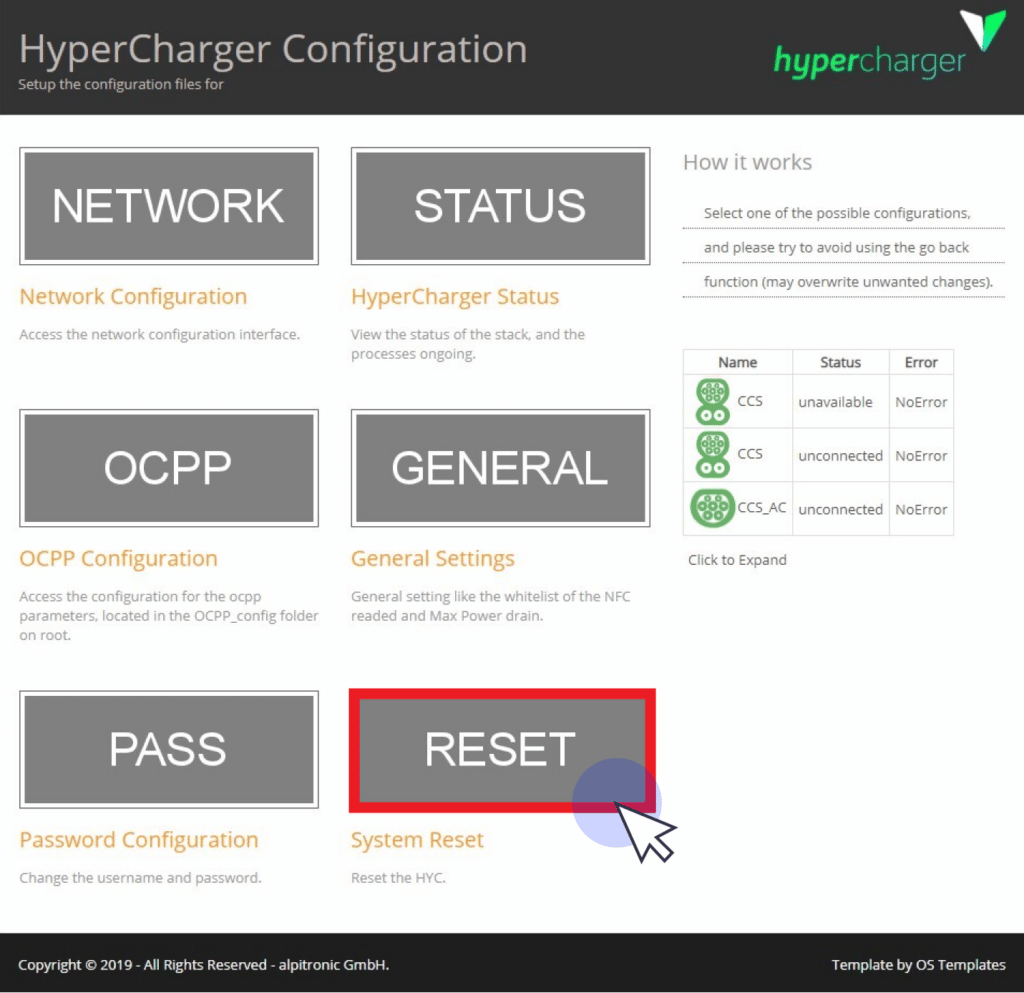
From the main menu, click on "Reset".
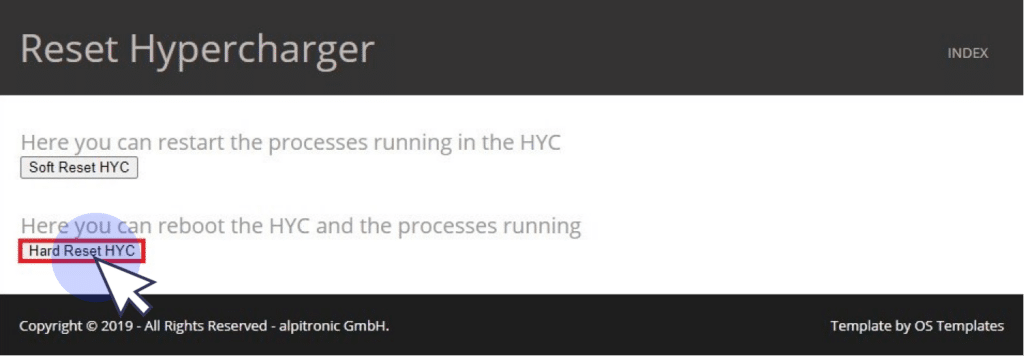
Click on the button "Hard Reset HYC".
6. Connecting the charge point to your Monta account
Now you need to add and connect your charge point to your Monta account.
You can do this through either Monta Charge or Monta Hub.
