1. Access to the WebUI
Connection via USB
- Plug the cable into the PC and into the Config USB port of the master controller (left controller). Remove the current plug if necessary (reconnect the USB plug after the configuration is finished)
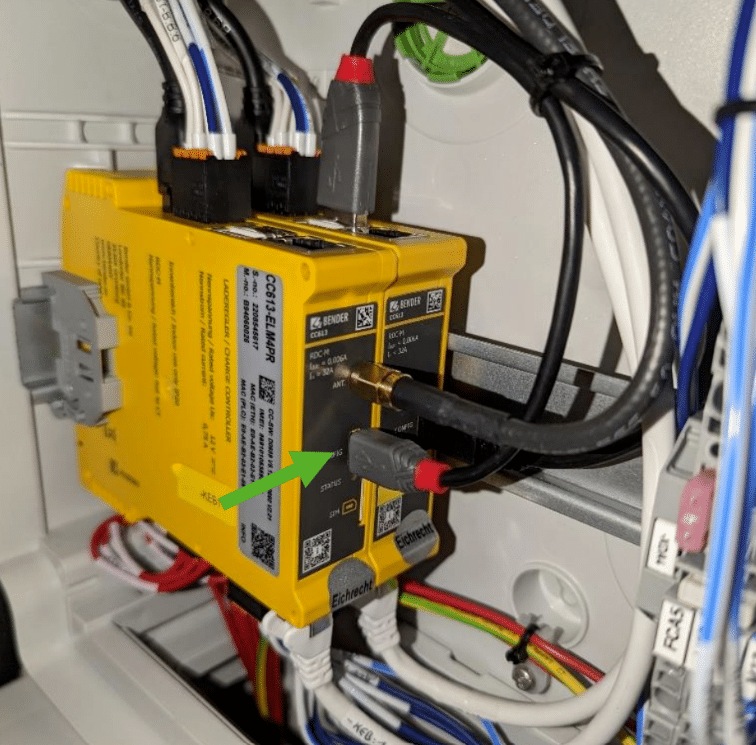
- Note: Make sure that Java is installed on your laptop.
- You can now enter the following in the address bar of your browser: http://192.168.123.123/operator
Access via Ethernet
- Connect the cable to the Ethernet port of the master controller (left controller). You can now enter the following in the address bar of your browser: http://192.168.124.123/operator
2. Login to the WebUI
Username: operator
Password: yellow_zone
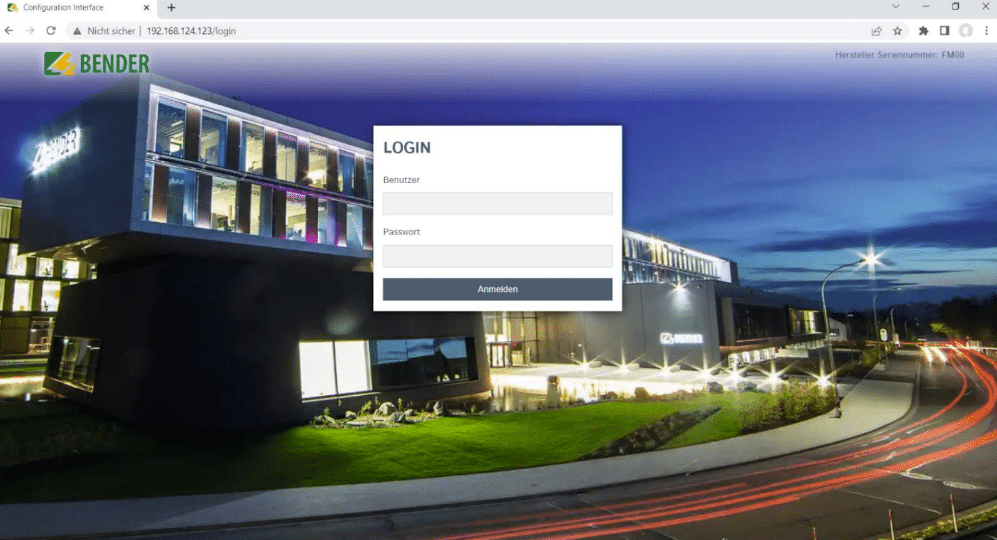
3. Connect to the internet
You can use Ethernet, GSM or WLAN.
Click “Network” -> “LAN” then configure as DHCP if needed or manual configuration
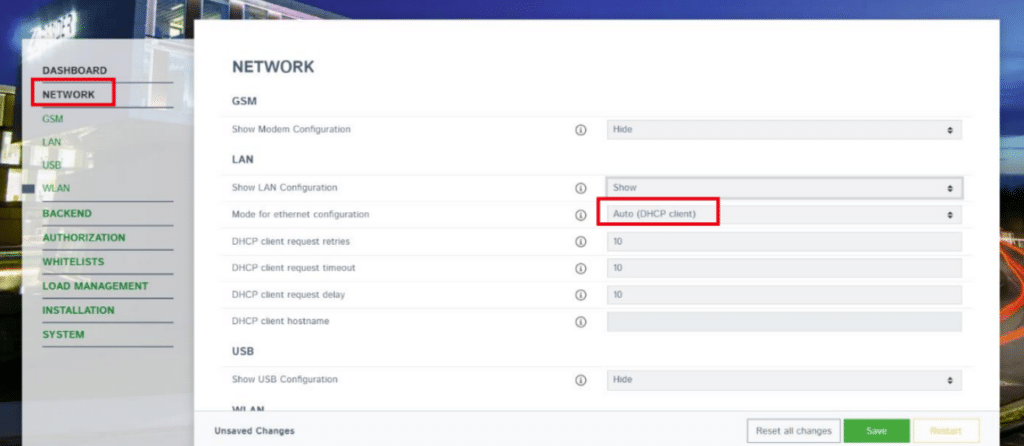
If using GSM, Click “GSM”, then configure SIM as required:
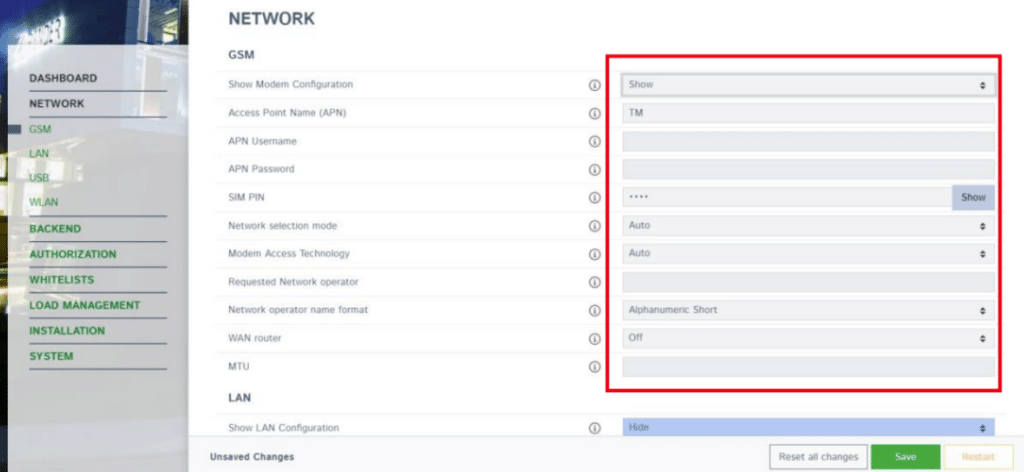
If using WiFI, then click WLAN and configure the settings from there
Go to “Authorization”, and make sure FreeCharging is turned off and that charger is authorizing against backend
4. OCPP configuration
Click “Backend”
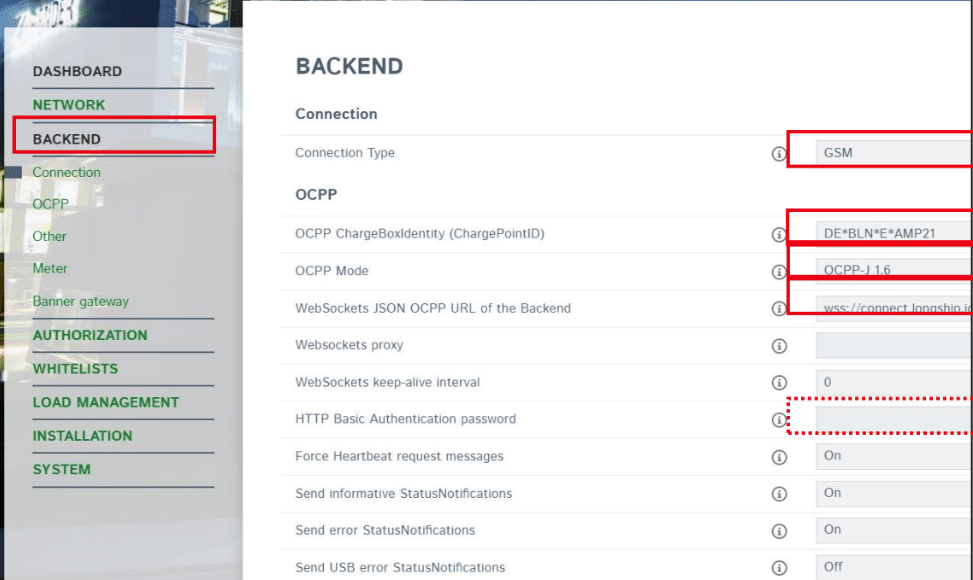
- Connection type: What you use to connect to the internet
- OCPP ChargeBoxIdentity: Serial no. of charge pont
- OCPP Mode: OCPP-J 1.6
- Websockets JSON OCPP URL: wss://ocpp.monta.app
- HTTP Basic Authentication password: leave blank
5. Connecting your charge point to your Monta account
Now you need to add and connect your charge point to your Monta account.
You can do this through either Monta Charge or Monta Hub.
