This is a guide that shows how to install Monta on your charge point. If you want to connect your charge point to your Monta account, please follow the steps in the end of the guide.
Please note that when you connect your charge point to Monta, we become the operator of the charge point. This means that you need to use Monta to control the charging process.
1. Enter the Configuration mode:
- Simultaneously, press the DC Leakage Button and Emergency Stop Button while the charge point is powered OFF.
- Power ON the charge point.
- Release the buttons after you hear the beep.

2. Connect to the charge point’s WiFi network
On your laptop or mobile phone, search for the EVSE Network under your Wi-Fi settings.
Wi-Fi name: EVSE XXXXXXXXXXXX
Wi-Fi password: 12345678

3. Access the charge point via WebUI
Open a browser and enter 192.168.1.1
Google Chrome is recommended for better compatibility.

Now go to the configuration page to see available settings.

4. User Configuration settings
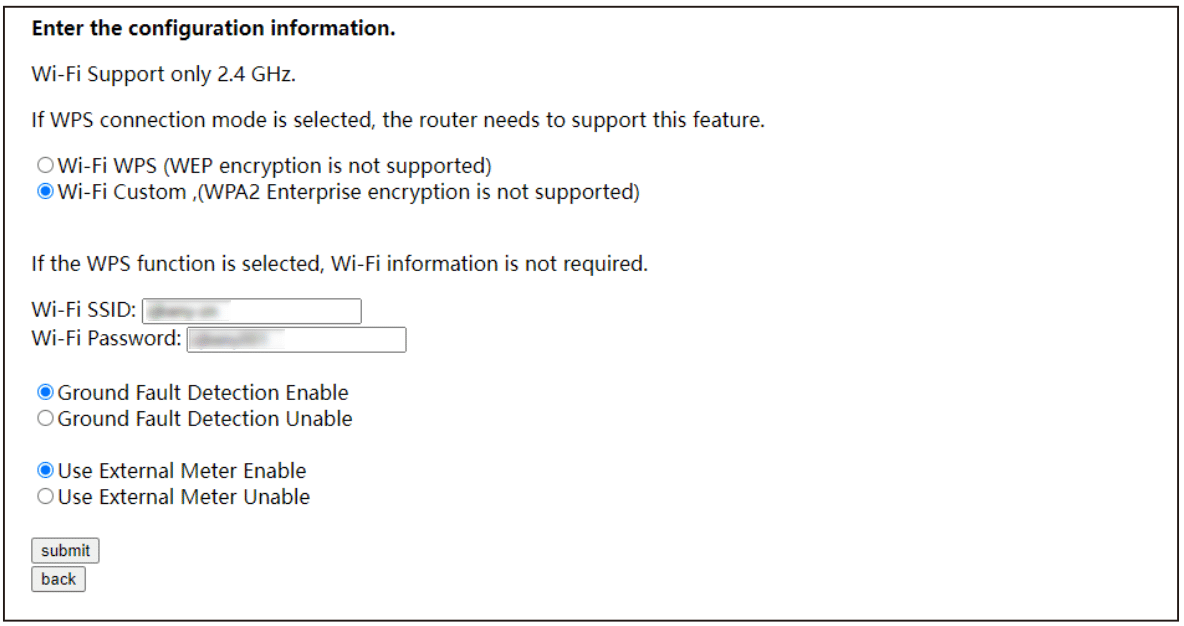
In user configuration settings there are two ways of setting up the WiFi connection.
Wi-Fi WPS method:
1. Enter the WEB configuration mode and set the Wi-Fi WPS connection.
2. Exit WEB configuration mode.
3. Press and hold the leakage test button for 5S until you hear a beep from the EV charger.
4. Start the WPS function of the router within 120 seconds. The green indicator at the top flashes quickly during the WPS pairing process.
5. WPS pairing is successful, and the green indicator at the top of the LED light bar is always on.
6. WPS pairing times out, the green indicator at the top of the LED light bar flashes slowly, you need to perform steps 3-4 again to pair.
Wi-Fi Custom:
Enter the WiFi SSID (name) and WiFi password manually and click "Submit".

5. Server Configuration settings
Fill in the boxes below with the correct information for the OCPP platform.
Select "SSL Unable"
Central System Hostname: ocpp.monta.app
Central System Port: 443
Charge Point Identity: Use the serial number of the charge point.
Charge Point Path: leave this field blank
Select "HTTP Basic Authentication Unable"
Charge Point Model: Amstel
Charge Point Vendor: BadgerEV
Click on "Submit".

6. OCPP connection
In the main configuration screen select option 5. Exit the Wi-Fi AP mode.
The EV charge point will start to connect with the OCPP server after all the steps above are complete.
If the connection is successful, you will hear one beep sound.
If the connection is unsuccessful, you will hear two beeps. In this case, please go back and check above steps or settings.
7. Connecting the charge point to your Monta account
Now you need to add and connect your charge point to your Monta account.
You can do this through either Monta Charge or Monta Hub.
