Please note that when you connect your charge point to Monta, we become the operator of the charge point. This means that you need to use Monta to control the charging process.
1. Prerequisites
1.a. OCPP 1.6 license
In order to connect the charge point to Monta, you need to use OCPP 1.6 backend connection. To obtain that, you need a license.
To get the license file, please contact CIRCONTROL Post Sales Department at ps-support@circontrol.com, prior to installing Monta on the charge point.
1.b. Computer setup
To configure a Circontrol charge point, you will need:
-
Windows computer
-
LAN cable
-
IPSetup software
First download the IPSetup.exe and install it on your Windows computer.
Then find the MAC address that is on the communications board, inside the charge point.
2. Change the IP address of the charge point
Connecting a computer directly to the charge point needs to be done via a static IP address. The computer and the charge point must be in the same network and in the same range.
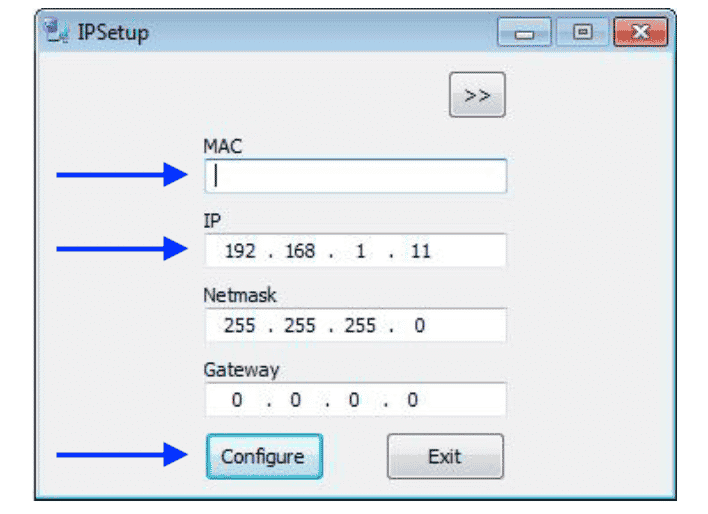
In order to change the IP of the charge point, use “IP Setup”.
-
Enter the MAC of the device (can be found inside the charger, on the communications board).
-
Enter the desired IP Address.
Click on “Configure”.
3. Login to the charge point WebUI
The Setup Webpage is opened automatically on the default web browser.
If not, to access the Setup Webpage, open a web browser and enter the IP address the you configured in the previous step.
If login credentials are required, use these credentials:
username: admin
password: 1234
4. Enable DHCP
In this example, we use Ethernet connection.
Navigate to the "Network" section and enable "DHCP" from the on/off toggle.
This will allow the charge point to obtain an IP address automatically when connected to the router/network switch.
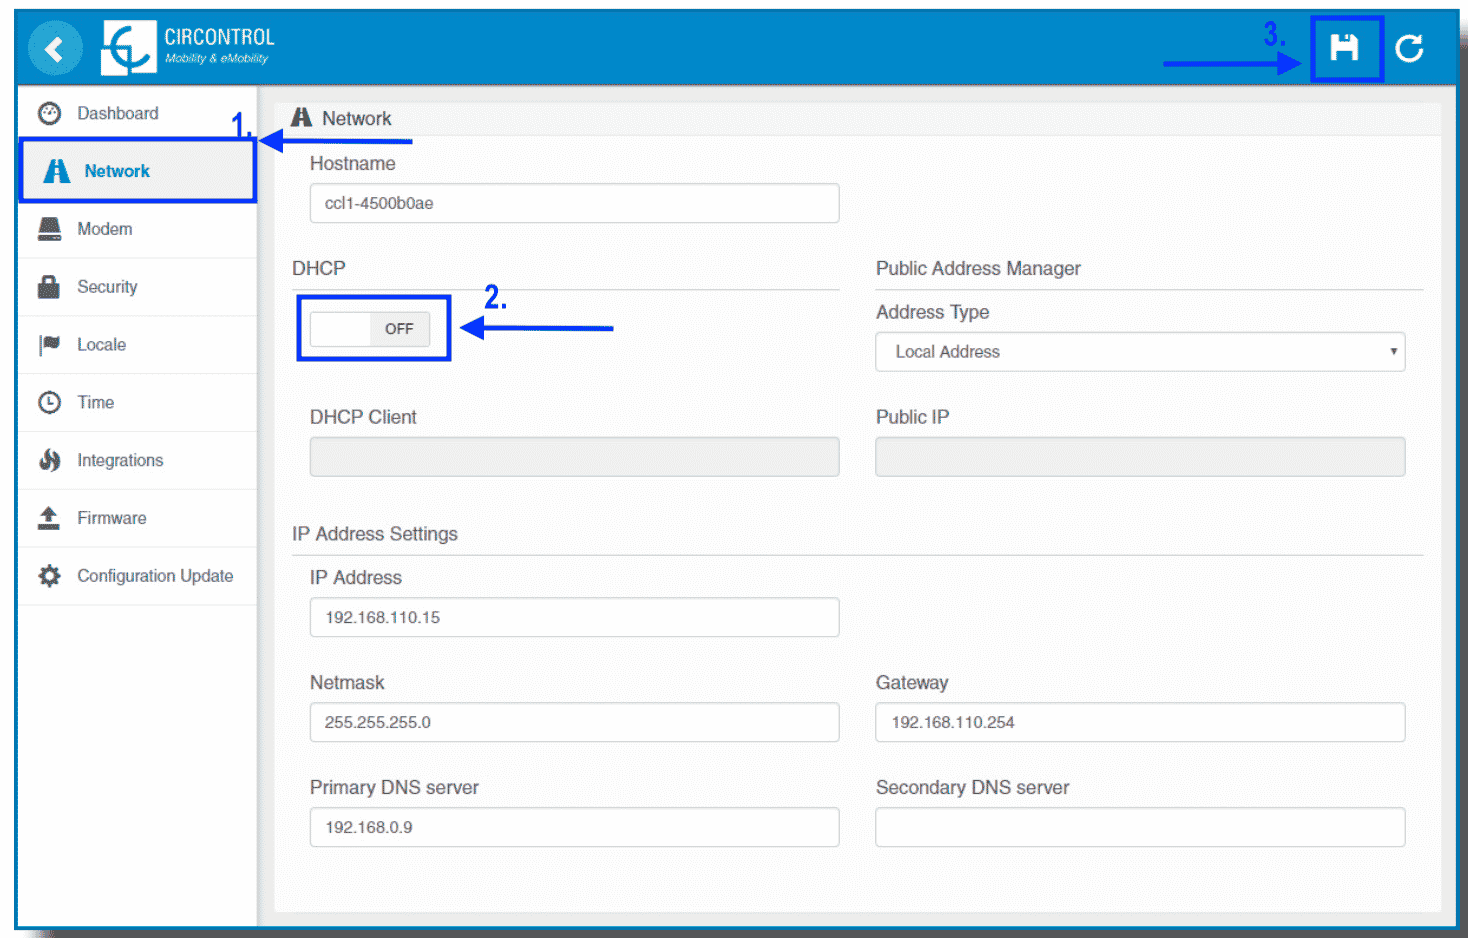
Click on the "Save" icon in the right top corner.
5. Select OCPP 1.6 integration
Navigate to the "Integrations" section and select "OCPP 1.6" from the drop down menu.
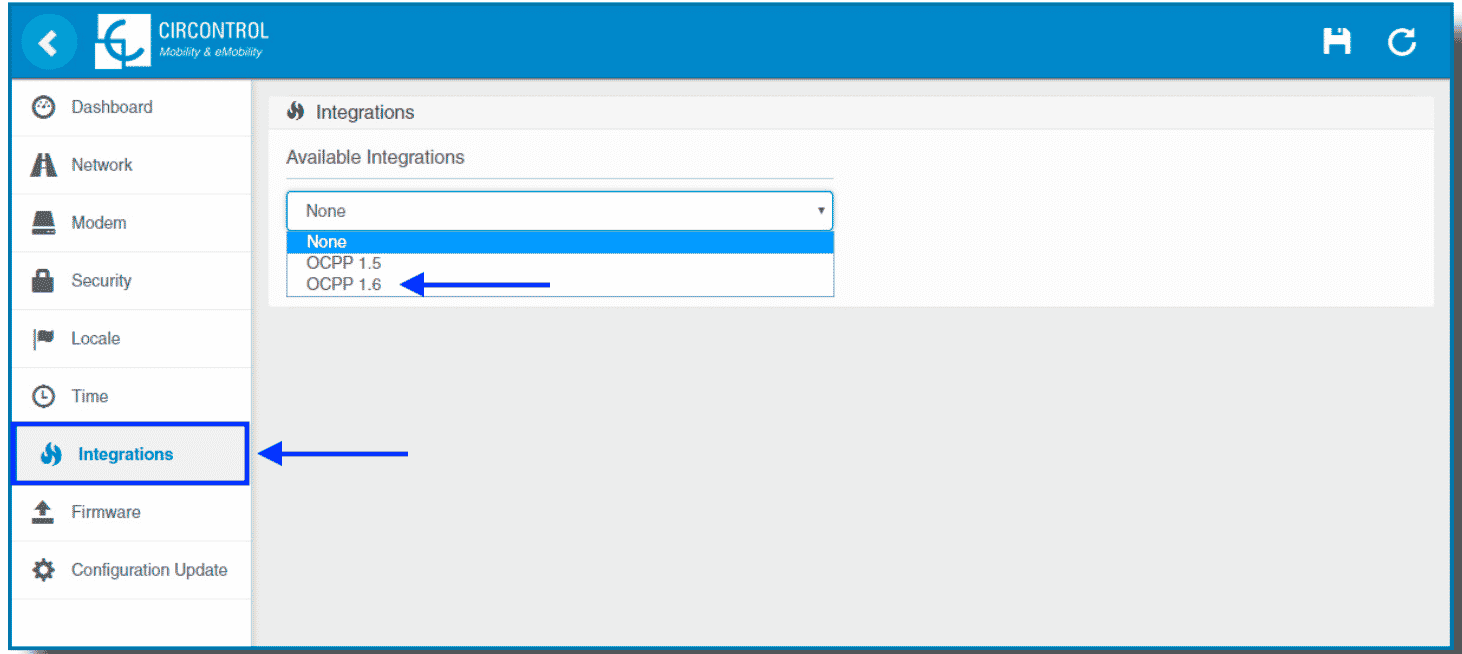
If you are able to select OCPP 1.6, skip to step 6.
If you do not have OCPP 1.6 as an option, the following message will pop up:

To obtain the license file please contact CIRCONTROL Post Sales Department at ps-support@circontrol.com
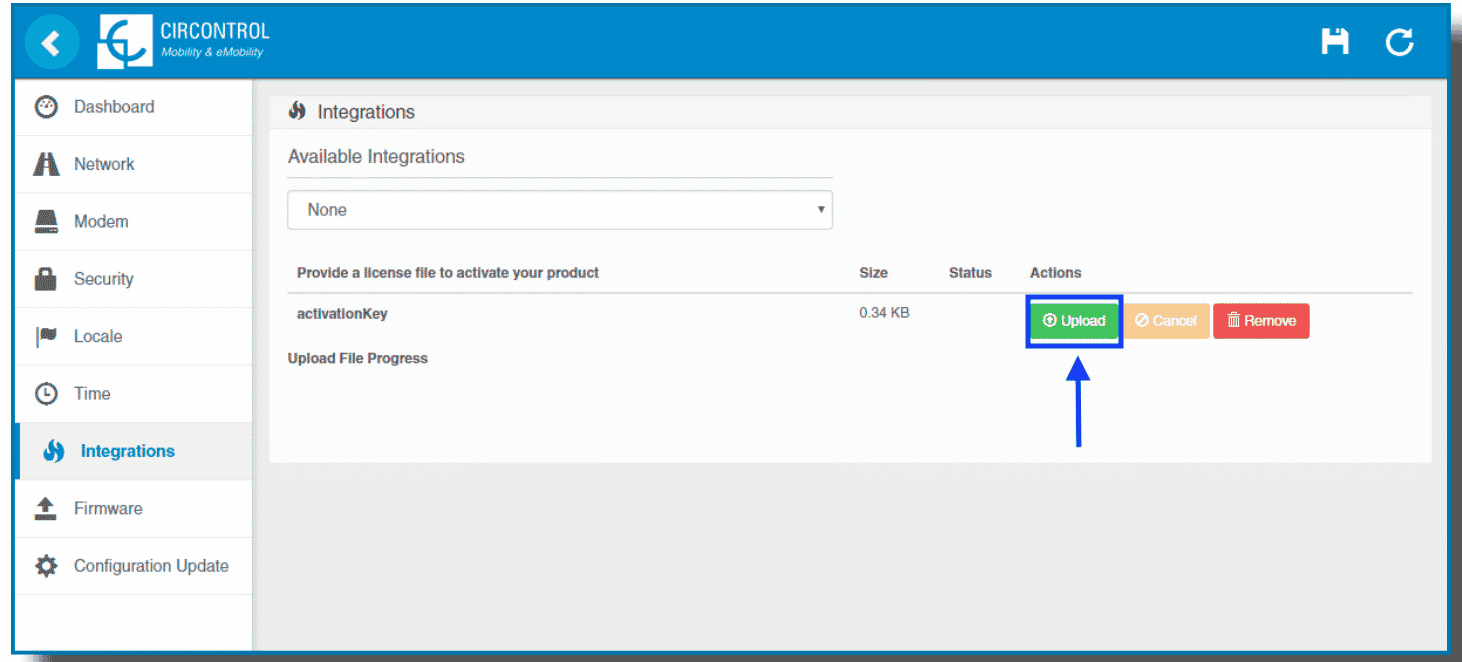
After the license is obtained, you can upload it using the "Select File" button in the integrations section.
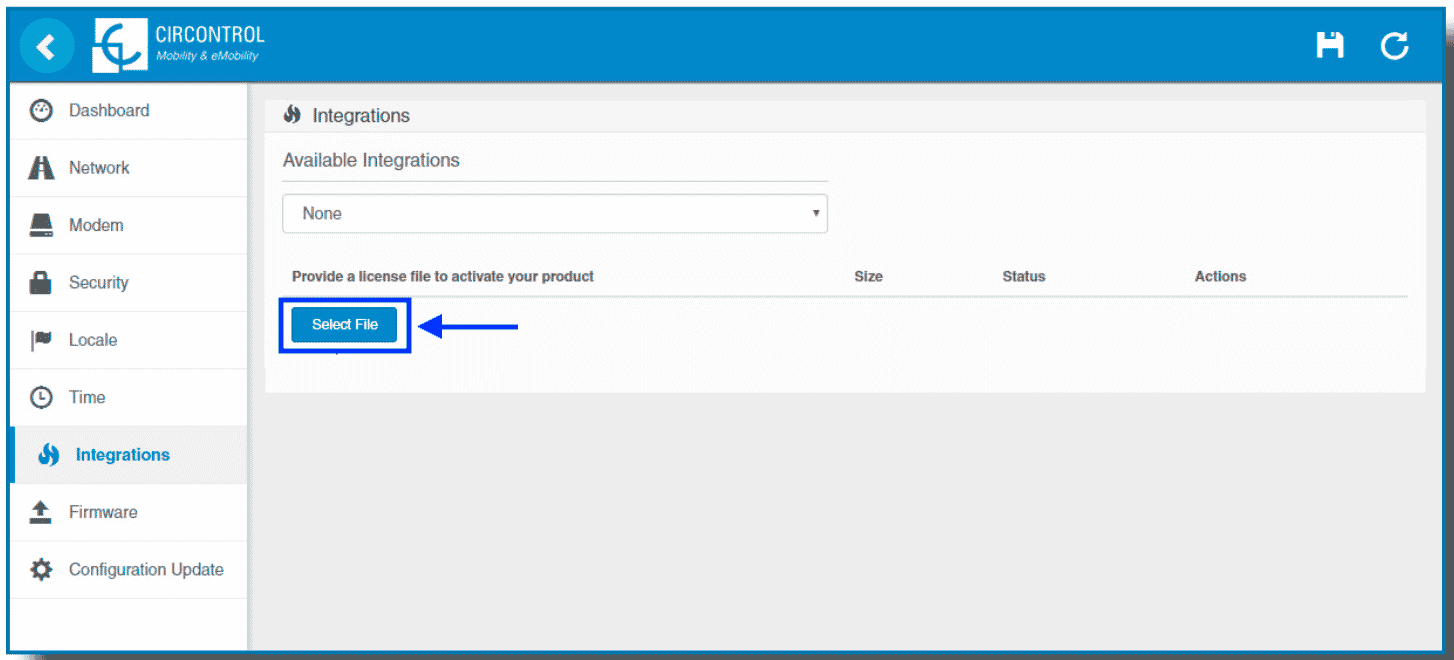
Just choose the file from your computer and upload it.
6. Access the OCPP configuration
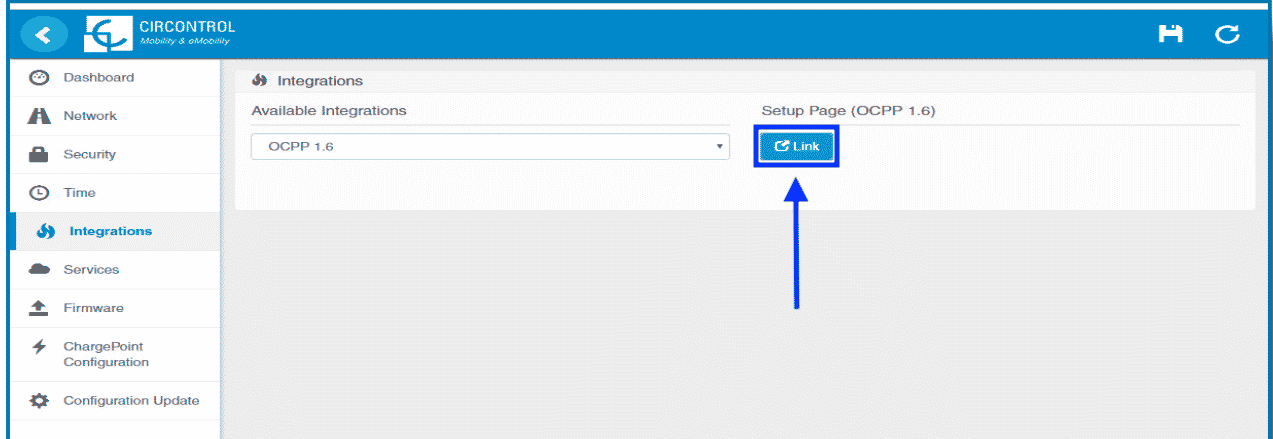
Once OCPP 1.6 option is selected, a link appears allowing access to the OCPP configuration.
Click on the "Link" button.
These tabs require a user identification:
user: admin
password: 1234
7. Change host URL
After logging in to the setup page, navigate to the "Central system" section and change the Host URL to wss://ocpp.monta.app
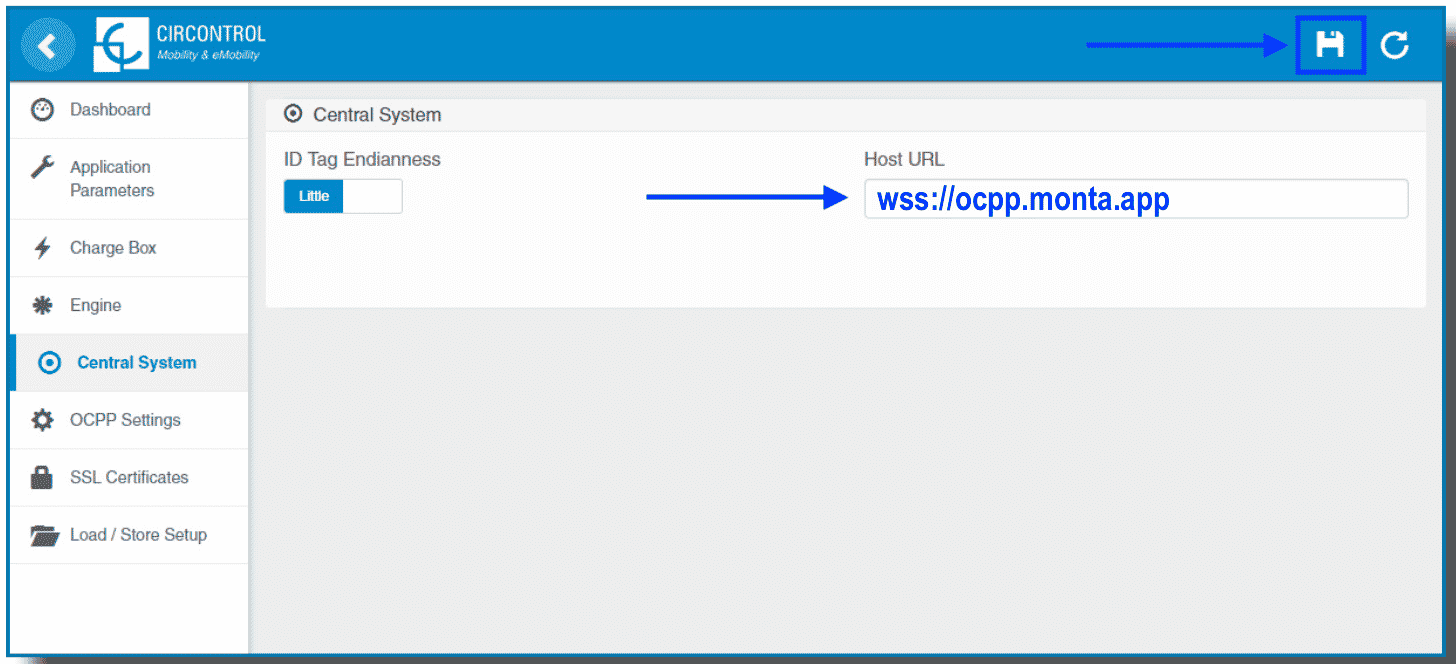
Click on the "Save" icon.
8. Reboot the charge point
Once done, please do not forget to save changes by clicking on the "Save" button in the upper right corner and then reboot with the button to the right.

9. Connecting the charge point to your Monta account
Now you need to add and connect your charge point to your Monta account.
You can do this through either Monta Charge or Monta Hub.
