This is a guide that shows how to install Monta on your charge point. If you want to connect your charge point to your Monta account, please follow the steps in the end of the guide.
Please note that when you connect your charge point to Monta, we become the operator of the charge point. This means that you need to use Monta to control the charging process.
1. Disclaimer
To integrate the charge point you would need to use certified operator account when logging in EVSE Mesh application.
The EVSE Mesh application could have different user interface visually.
2. Download the EVSE Mesh app
On your device, navigate to the AppStore or Google Play and download the EVSE Mesh app to begin the setup of your charge point.
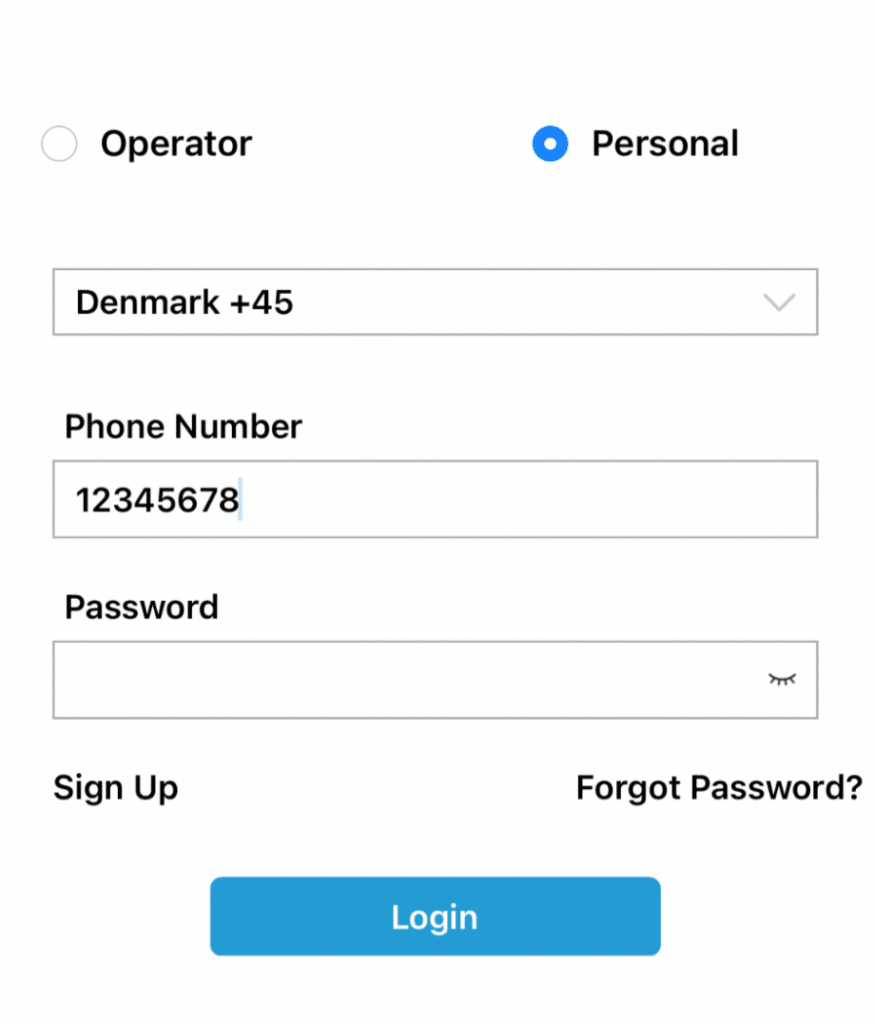
3. Create an account and login
Once you have installed the app, please create an account and login with it.
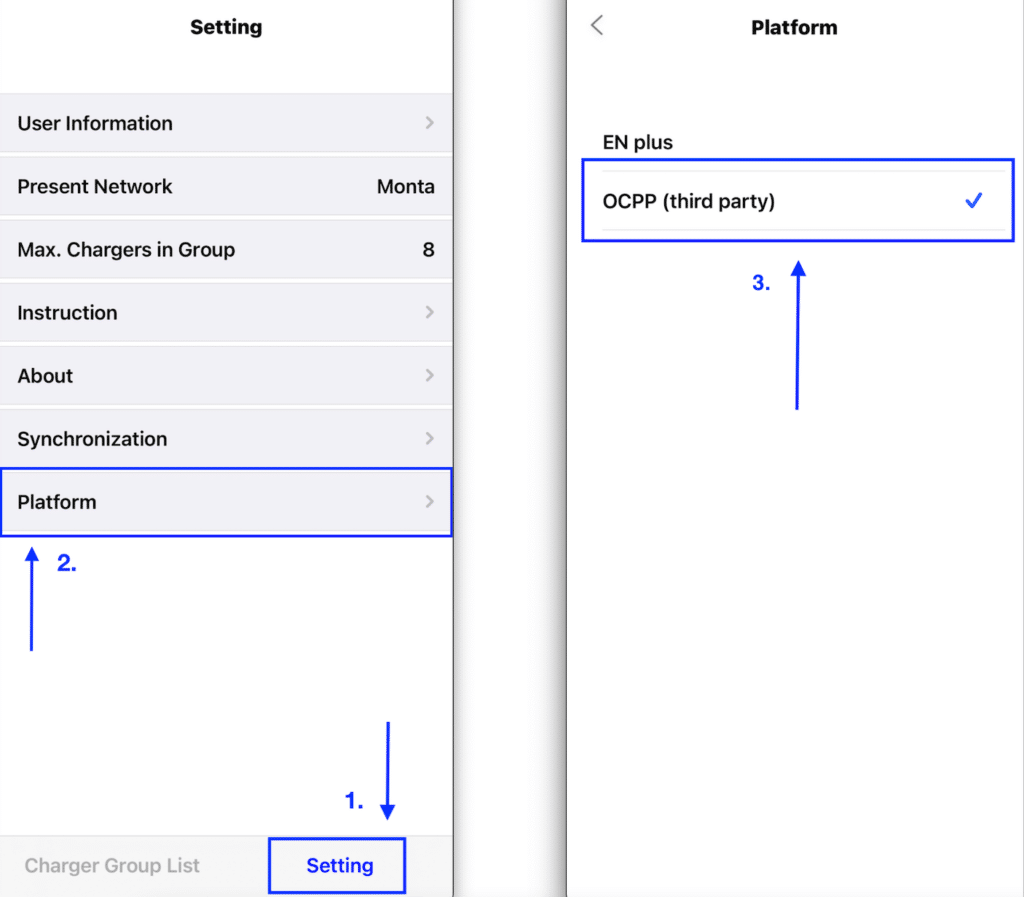
4. Open "Setting" and click on "Platform"
In the bottom right corner, open the "Setting" section and select to open "Platform". Once you have entered the Platform, select "OCPP (third party)".
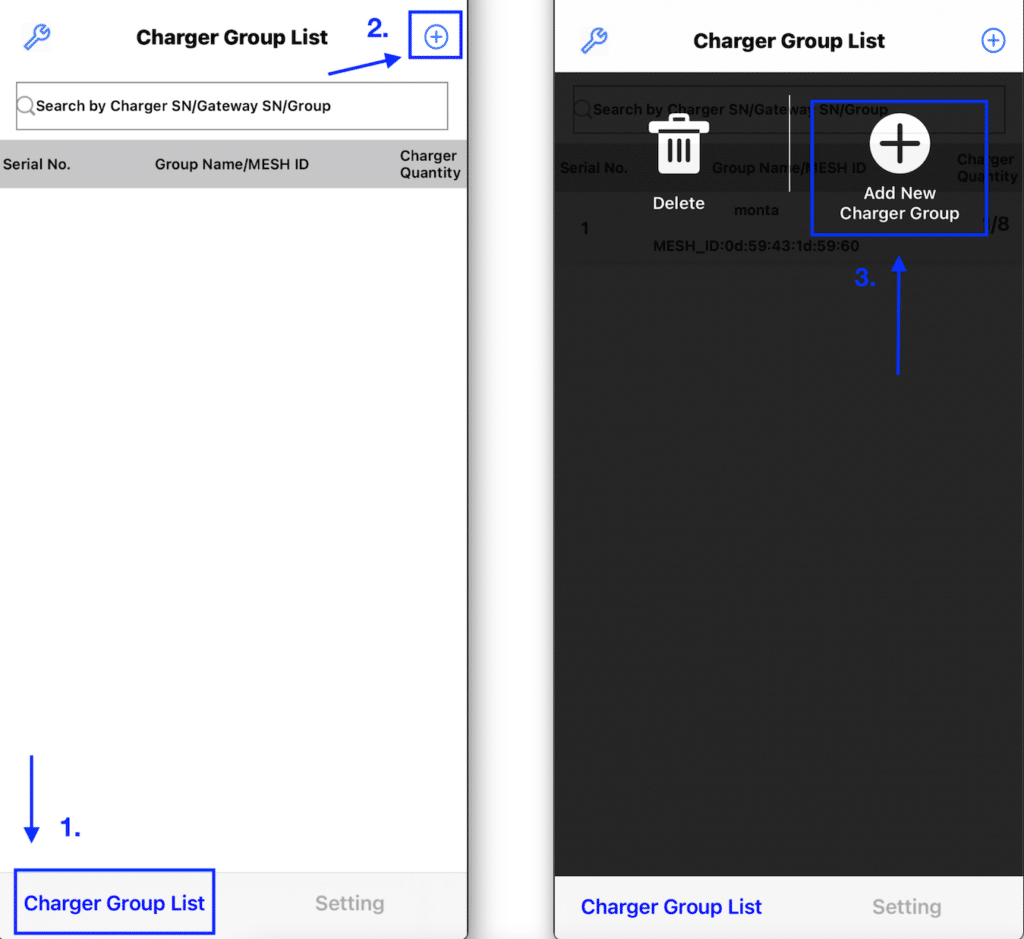
5. Select "Charger Group List"
Go to the Charger Group List section of the menu and press the little circle in the upper right corner of the screen. Afterwards, create a Charger Group by pressing on the "Add New Charger Group" field.
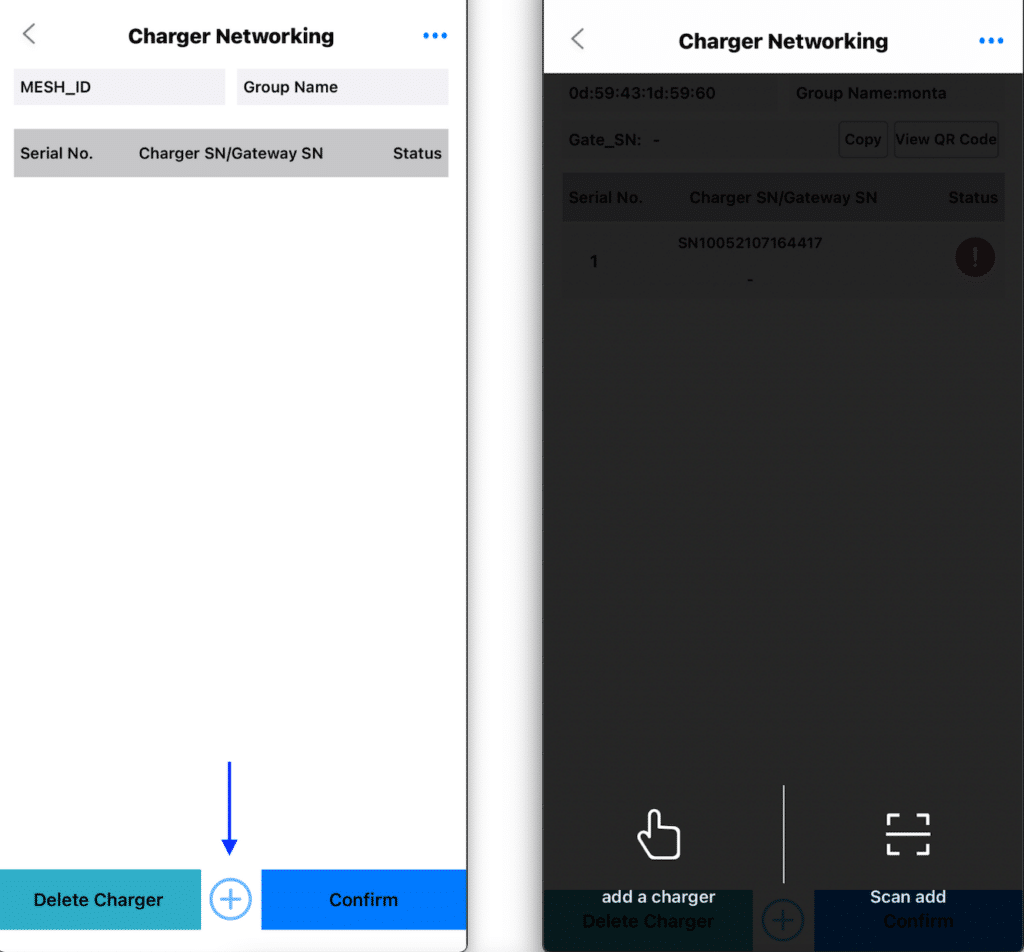
6. In the Charger group press the "+" and add your charge point
!IMPORTANT! Before you continue in this section, please make sure your mobile device is connected to WiFi 2.4Ghz and that your Bluetooth is turned on.
Select the Charger Group you have just created and click on the little "+" sign in the bottom middle part of the screen. Afterwards you proceed to add your charge point.
If you select "add a charger", you need to manually insert the details of your charge point. By selecting "Scan add" you can add your charge point by scanning its QR code.
7. Select the charge point and enter your network details
Now open the charge point you have just entered and click on "Add". After you do that the screen on the right will appear.
There, you need to enter the details of your wifi network. Please enter the name of the wifi network you are using. In the field below that, enter the wifi password. Finally, enter the Group Name that the charger belongs to. After you complete that, press on "Confirm".

8. Access "Server information"
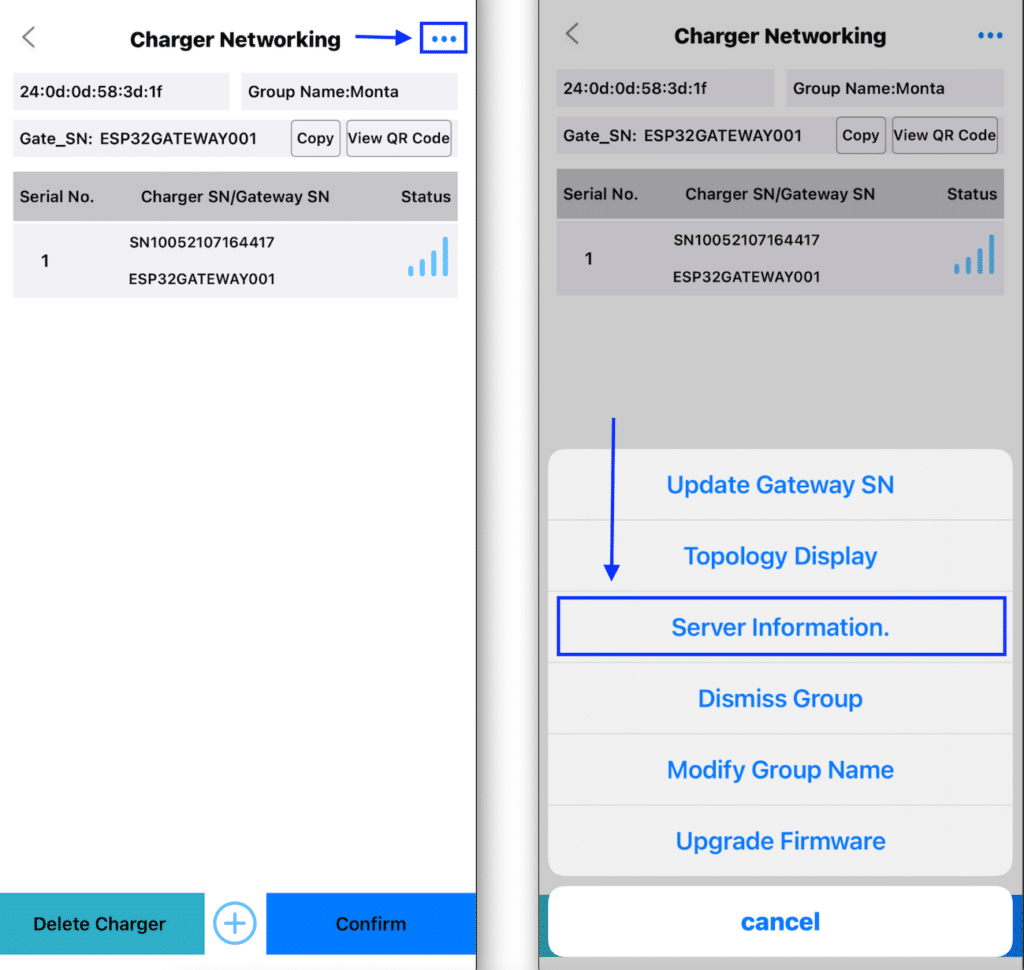
Now you should be prompted to the window on the left. Press the three dots in the upper right corner of the screen. Afterwards, select "Server information.".
9. Enter your Server information details
Once this screen appears, enter the details below. Please leave the "Path" field blank.
IP/Domain: ocpp.monta.app
Port: 443
Path: *leave blank*
Protocol type: WSS

10. Connecting the charge point to your Monta account
Now you need to add and connect your charge point to your Monta account.
You can do this through either Monta Charge or Monta Hub.
