Please note that when you connect your charge point to Monta, we become the operator of the charge point. This means that you need to use Monta to control the charging process.
1. Prerequisites
Before you start, we advise you to write down the WiFi hotspot configuration of your phone, as you will need to change it for this process.
2. Configure the WiFi hotspot on your phone
Turn on the WiFi hotspot on the phone you are going to use for the integration process. You need to go into the hotspot settings of your phone and change the name and the password to the following:
Name: ejoin
Password: 12345678
3. Go to the hotspot and see connected devices
The charge point should automatically connect to your phone.
Go to the hotspot settings, see the connected devices, and look for the IP address of the connected device.
Copy the IP address, as you will need it in the next step.
4. Open the web interface of the charge point
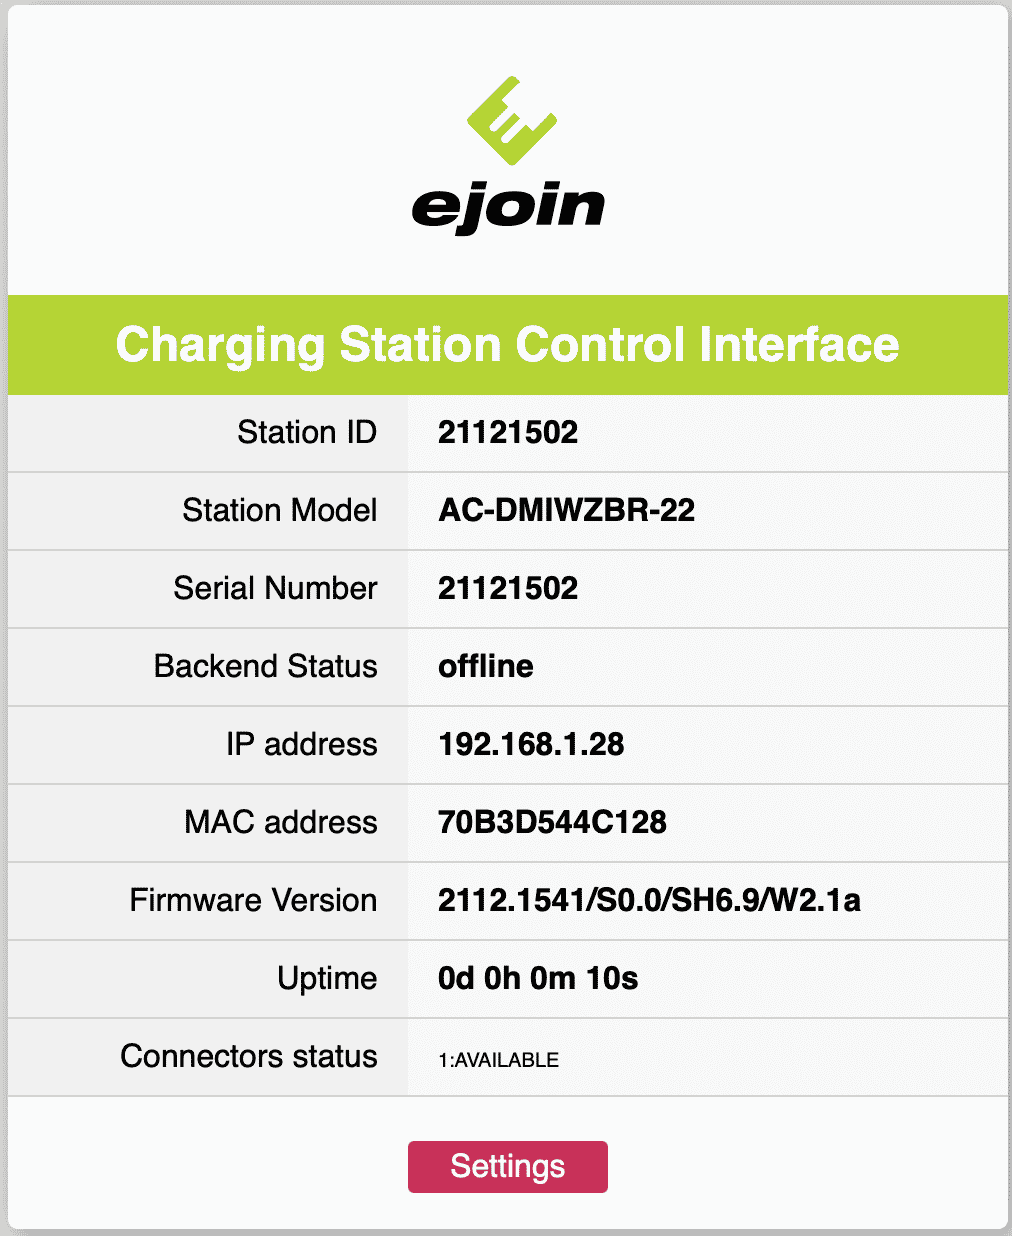
On your phone, open the web browser and enter the IP address of the connected charge point.
You will enter the web interface of the charge point.

5. Click on "Settings"
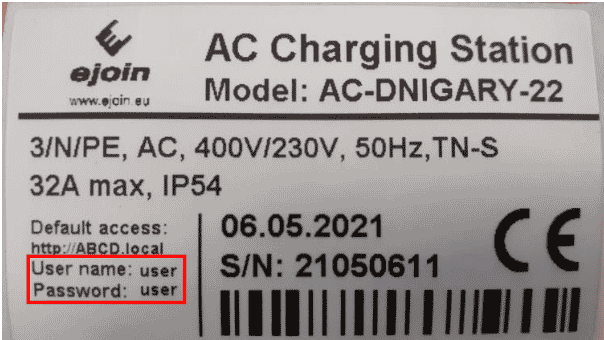
On the page, click on "Settings". You will be asked to enter name and password.
You can find this information on the label, located on the side of the charging box, as well as inside of the box. The label looks like this:

6. Adjust the "Network" settings
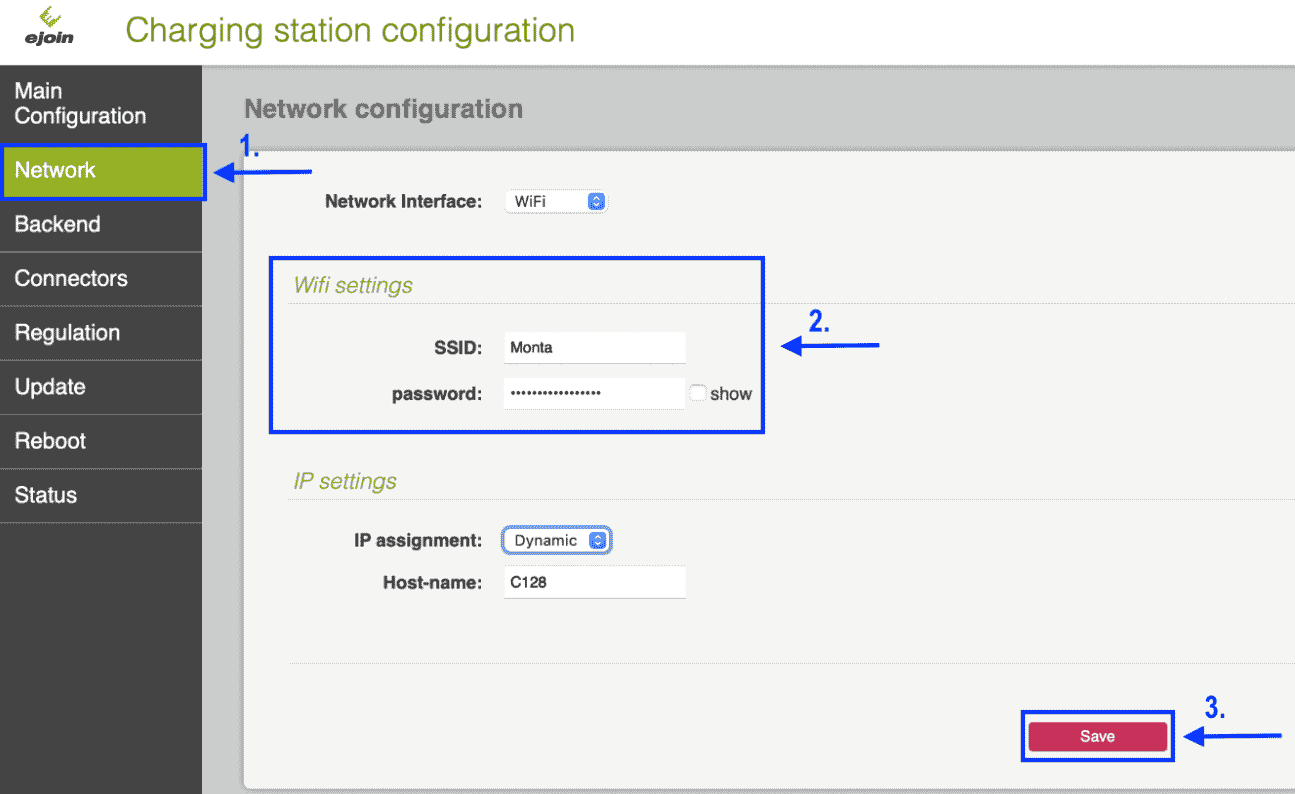
Once you enter the page, click on the "Network" section on the left side menu.
In the WiFi settings, enter the credentials of your home WiFi network.
SSID: *name of your home WiFi network*
password: *password for your home WiFi network*
Click on "Save".

If you see a prompt to reboot the charge point, click on "Back" and continue the configuration of the charge point.
7. Navigate to the "Backend" section
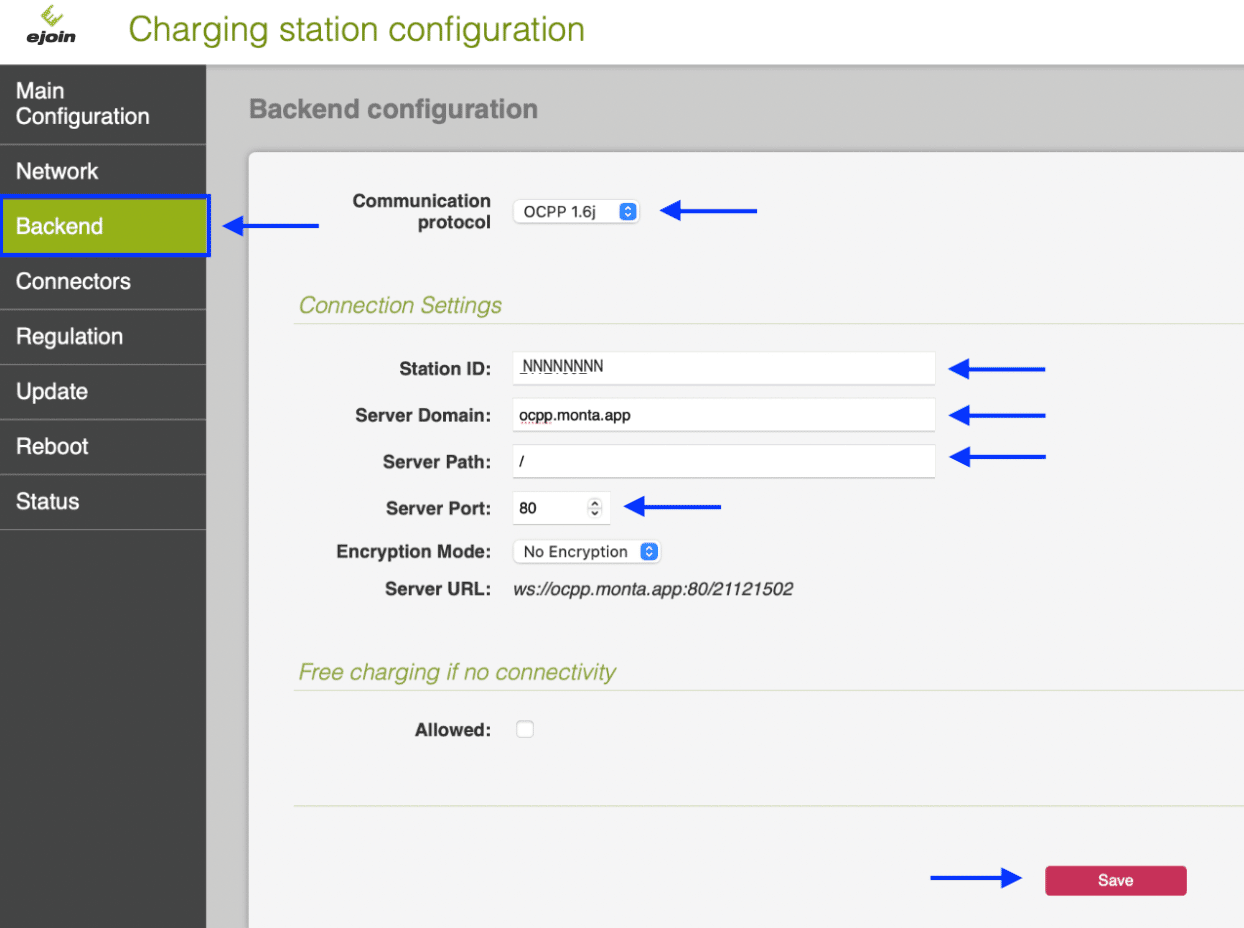
Click on the "Backend" section of the left side menu and change the following settings:

Communication protocol: OCPP 1.6J
Station ID: make sure to use the serial number that you can find on the charge point’s label named as S/N
Server Domain: ocpp.monta.app
Server Path: /
Server Port: 80
After you have set up the settings, click on "Save".
8. Reboot the charge point
A window will pop up, asking you to reboot the charge point. Click on "Reboot".
9. Connecting the charge point to your Monta account
Now you need to add and connect your charge point to your Monta account.
You can do this through either Monta Charge or Monta Hub.
