Please note that when you connect your charge point to Monta, we become the operator of the charge point. This means that you need to use Monta to control the charging process.
1. Connect your computer to the charge point
First, you have to connect your computer to the charge point, using a LAN cable.
The charge point is configured with DHCP service. Therefore it’s possible to reach the web interface without further configuration.
2. Open a browser to 10.100.0.11:8080
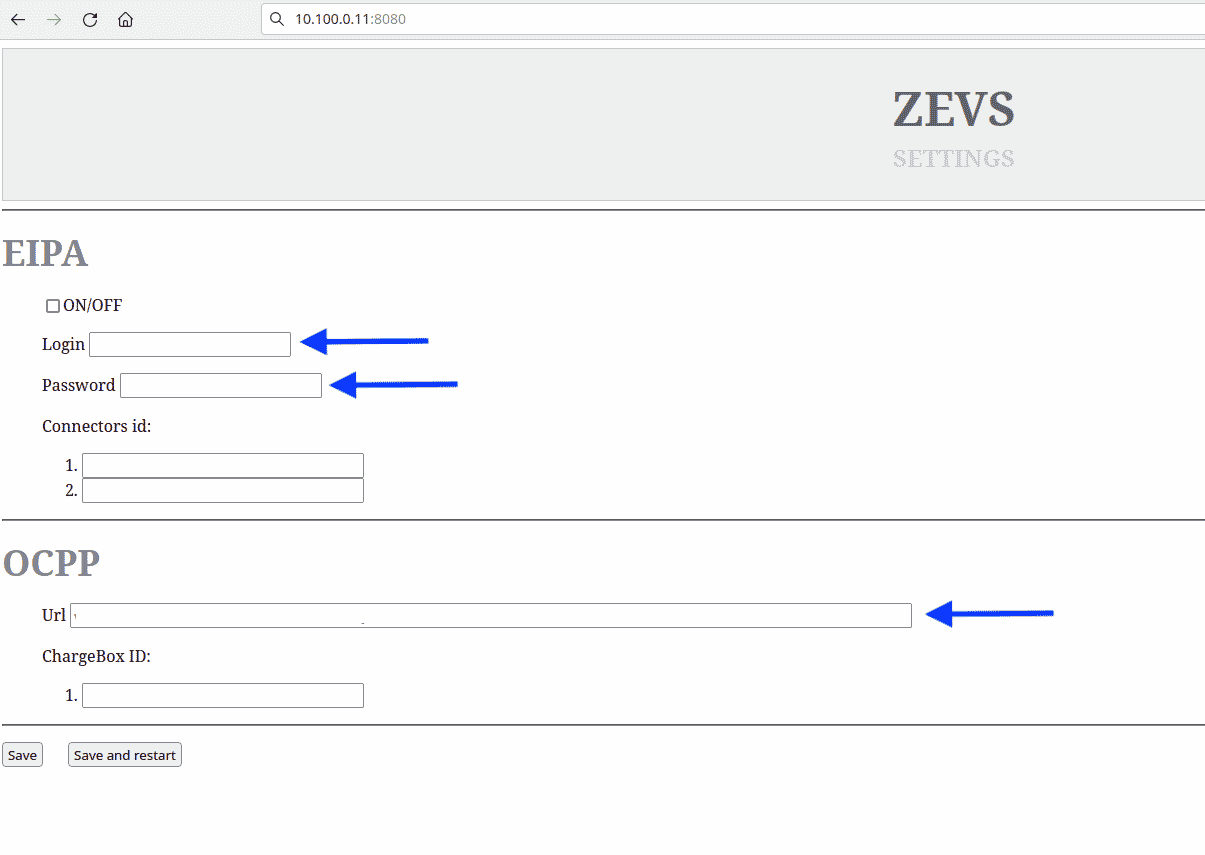
Open a browser on the computer, type 10.100.0.11:8080 and hit "Enter".
Login with the following credentials.
Username: zevs
Password: zevs
URL: ws://ocpp.monta.app
ChargeBox ID: Please leave the default value, otherwise use the serial number of the charge point.
 Click on "Save".
3. Connect your charge point to the internet
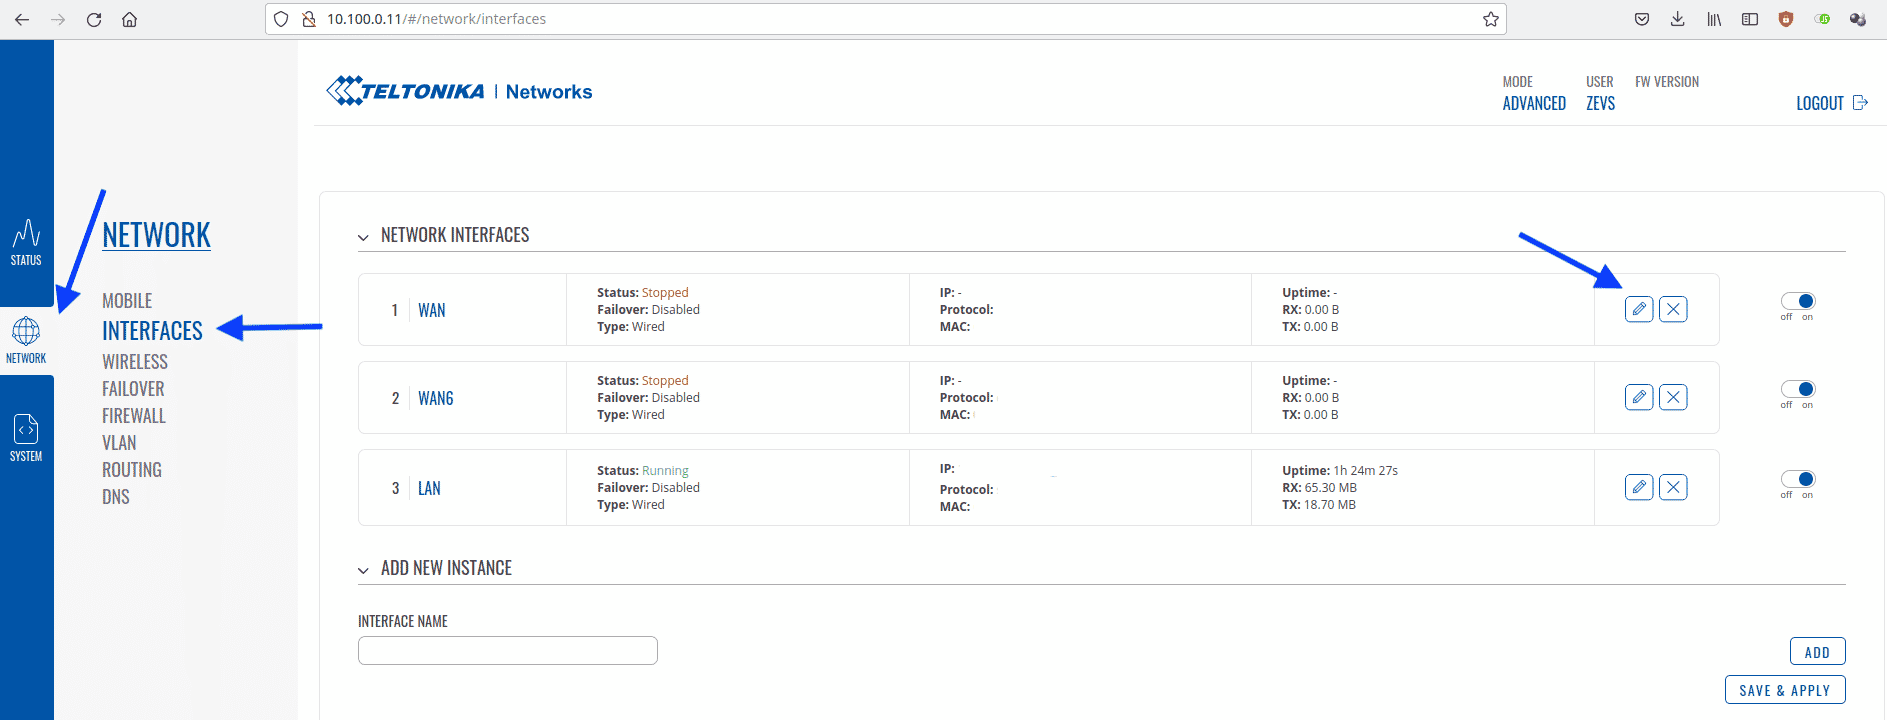
To connect the charge point to the internet, open your browser and type 10.100.0.11. Login again using the same credentials.
Navigate to "Network" on the left side menu, and then select "Interfaces".
Find the type of connection you are going to use for this charge point and click on the small "Edit" icon on the right side of the Interface.
Once you click on the "Edit" icon, a "Scan" button will appear. To configure your Wireless device as a Client press the "Scan" button to scan the surrounding area and attempt to connect to a new wireless access point.

4. Find and connect to your network
After the scan is done, you should be able to see your WiFi network.
Click on "Join Network" and enter your WiFi password.

5. Save, Apply and Reboot
When you are connected to your WiFi network, click on the button "Save & Apply" in the bottom of the screen.

To finish, reboot the charge point.
6. Connecting the charge point to your Monta account
Now you need to add and connect your charge point to your Monta account.
You can do this through either Monta Charge or Monta Hub.
