Please note that when you connect your charge point to Monta, we become the operator of the charge point. This means that you need to use Monta to control the charging process.
1. Connect to your charge point's wifi network “EnelionChargerXXX”
You need to first connect the device you are going to perform the installation on (phone, tablet, computer, etc.), to the wifi network, named after your charge point.
-
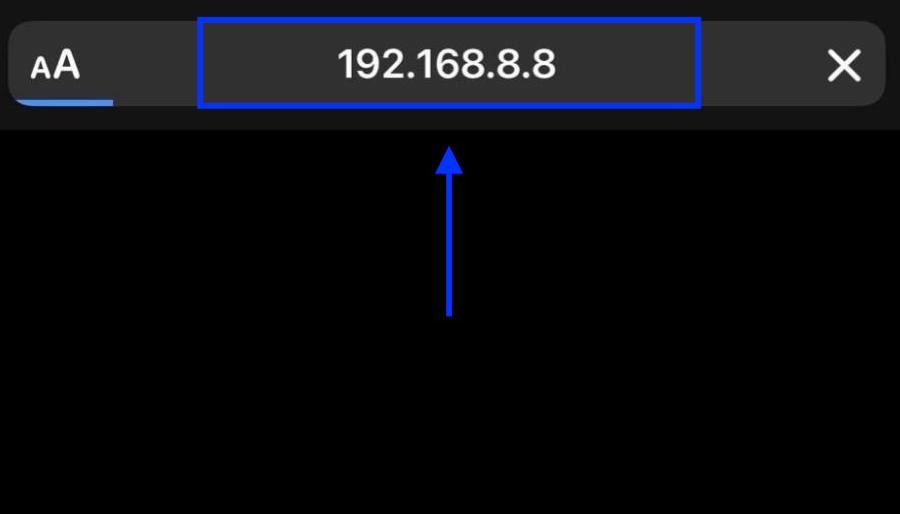
Open up internet browser, type in this IP 192.168.8.8 and hit ‘go’ or ‘enter’
! Please note ! that the following screenshot is an example of a wifi name. Every charge point will have different numbers in the end of the name.
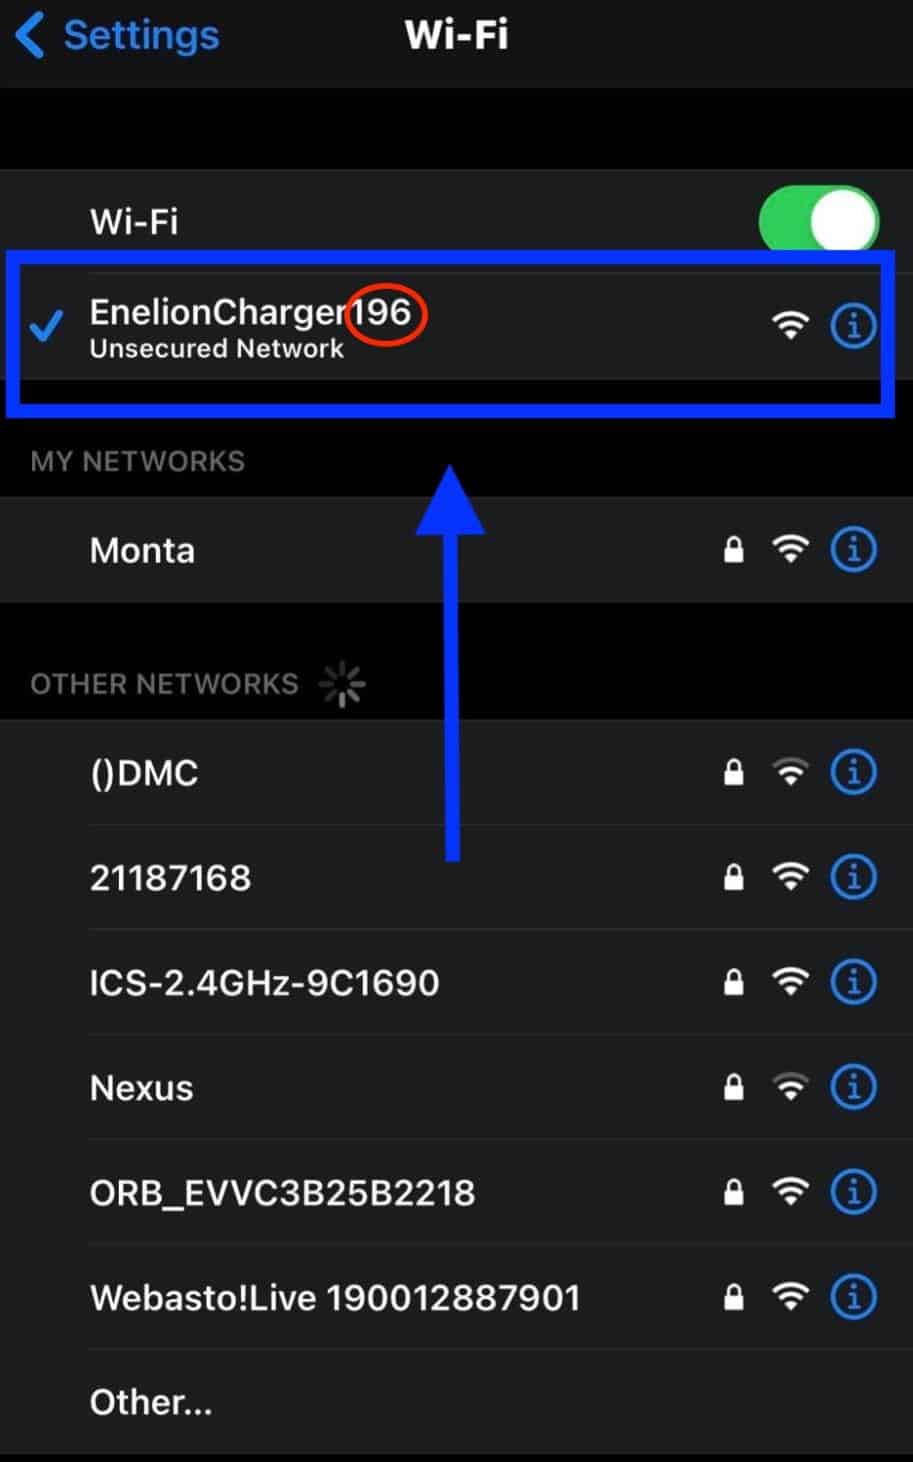
2. Open up internet browser to 192.168.8.8
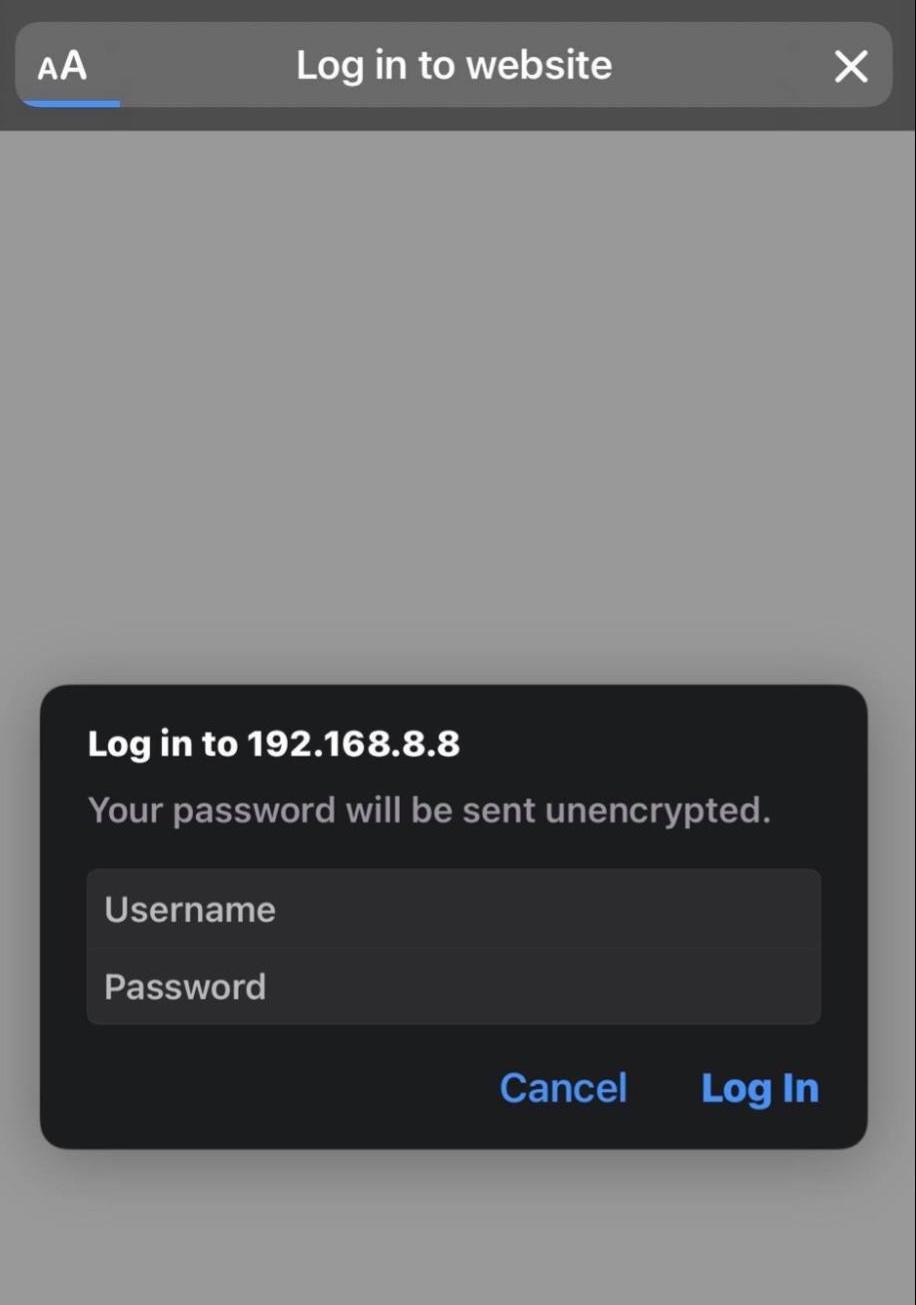
3. Log in to the admin panel
To log in to the admin panel, please use the following credentials.
Username: admin
Password: admin
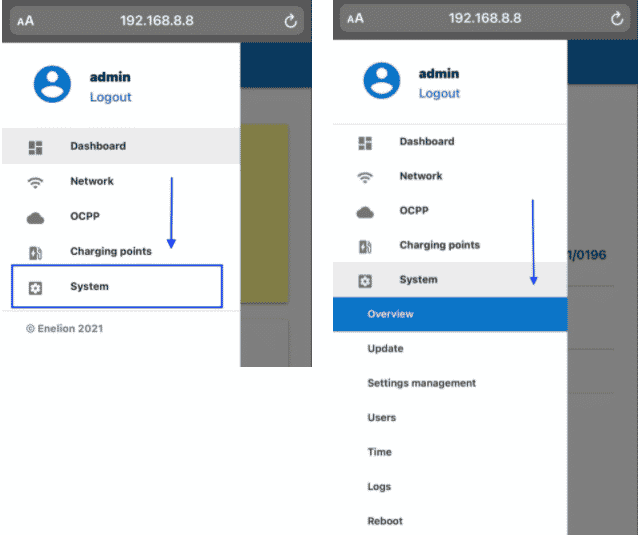
4. Open the side menu, select "System" and then "Overview"

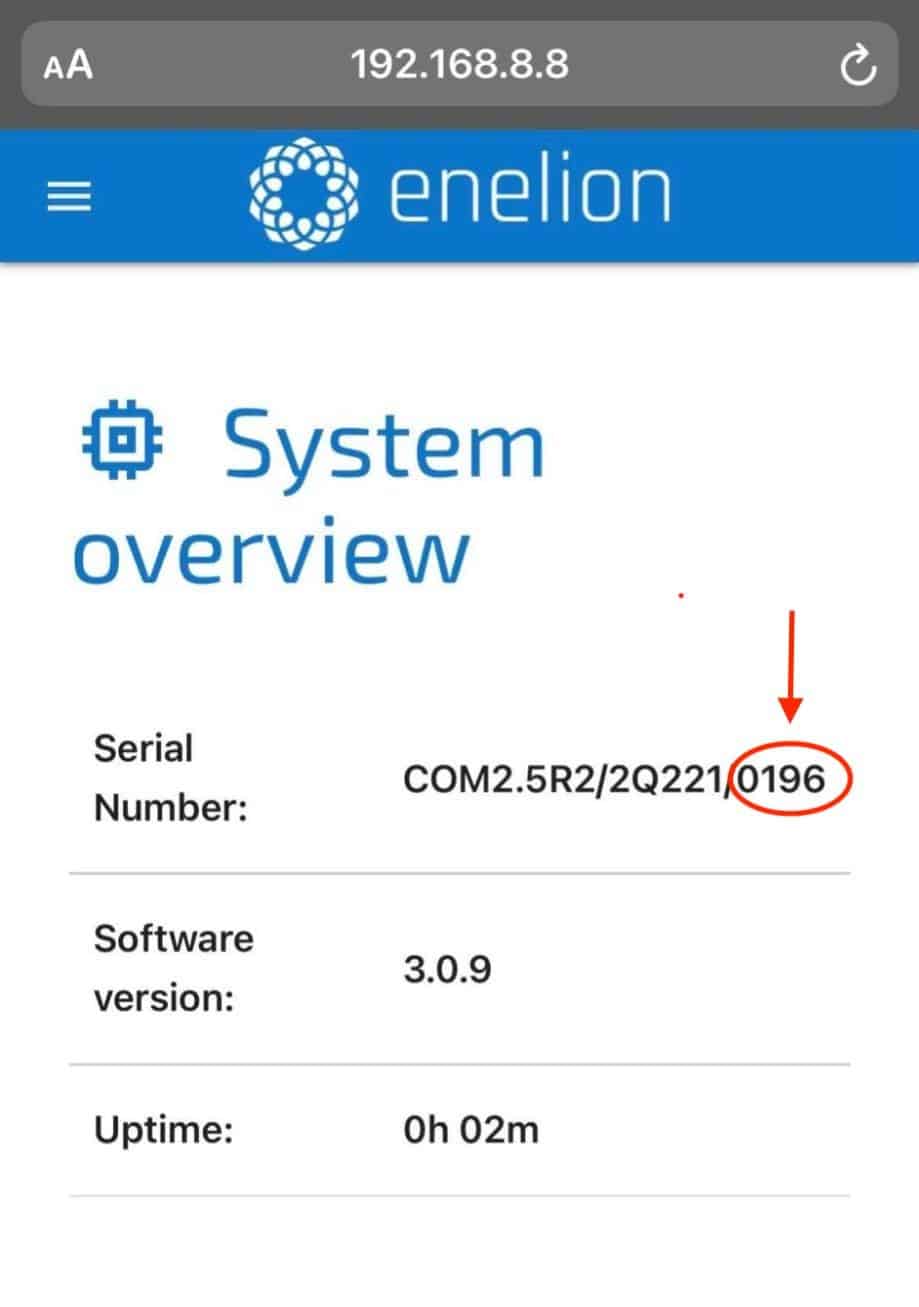
5. Find the serial number and create an identifier
-
From the serial number field, copy only last four digits.
-
Create an identifier (from now on regarded as serial number) by adding the four digits to the word "ENELION"
This is now the serial number for this charge point. In the current example the serial number would be ENELION0196. Write this down, as you will need it in the next steps.
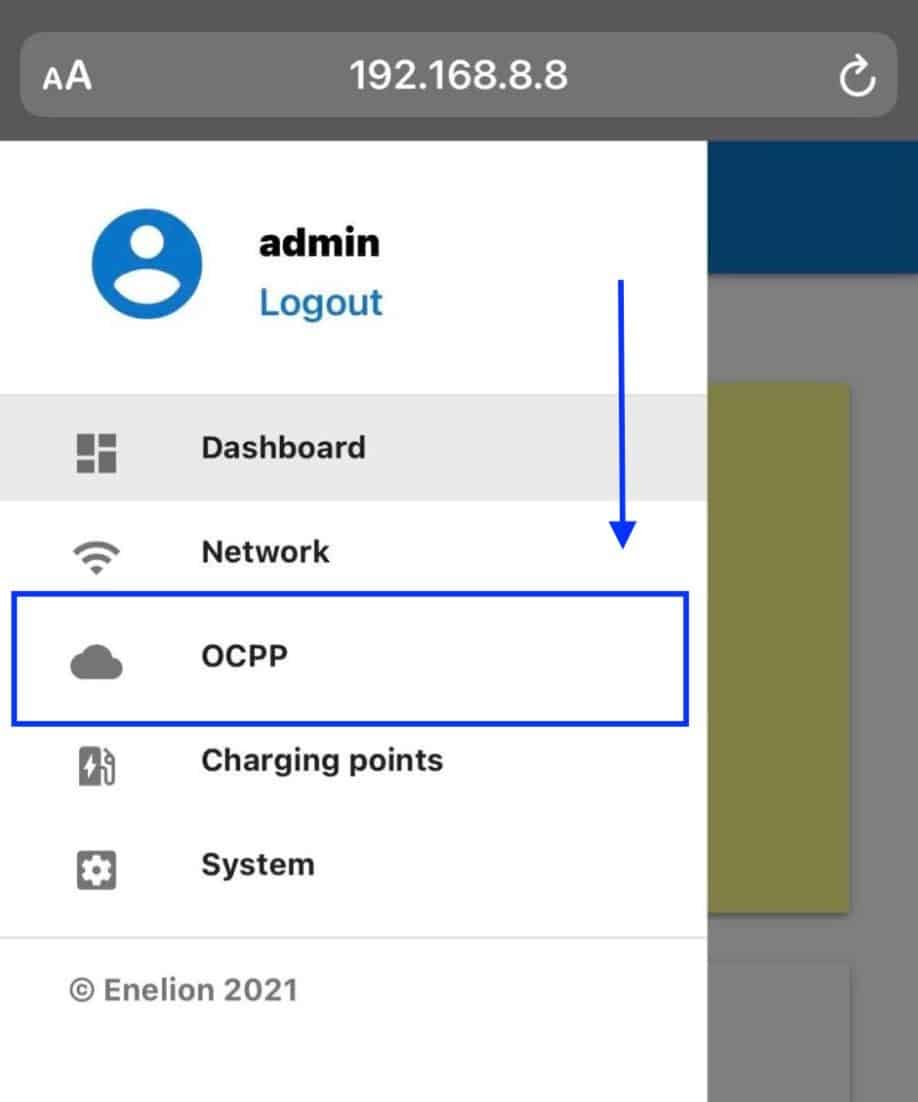
6. Go to the OCPP section
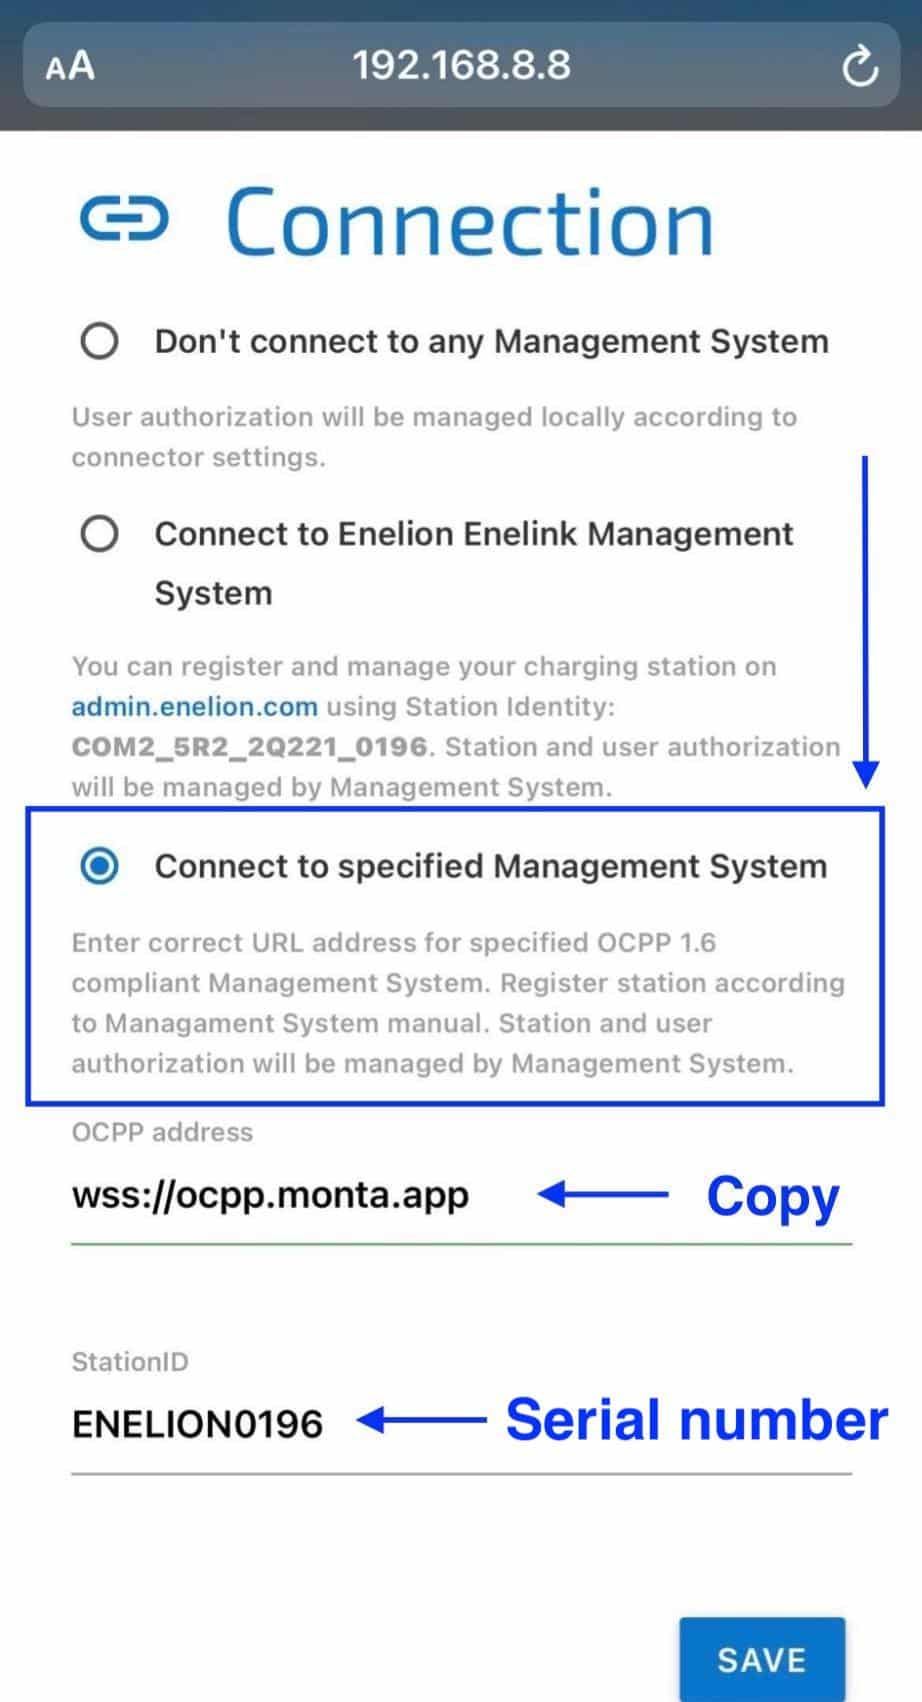
7. Select "Connect to specified management system"
-
In the OCPP address section copy this address: wss://ocpp.monta.app/
-
In the StationID section write the Serial number, which you created in step 5. (ENELIONxxxx)
8. Navigate back to the menu, select "System"
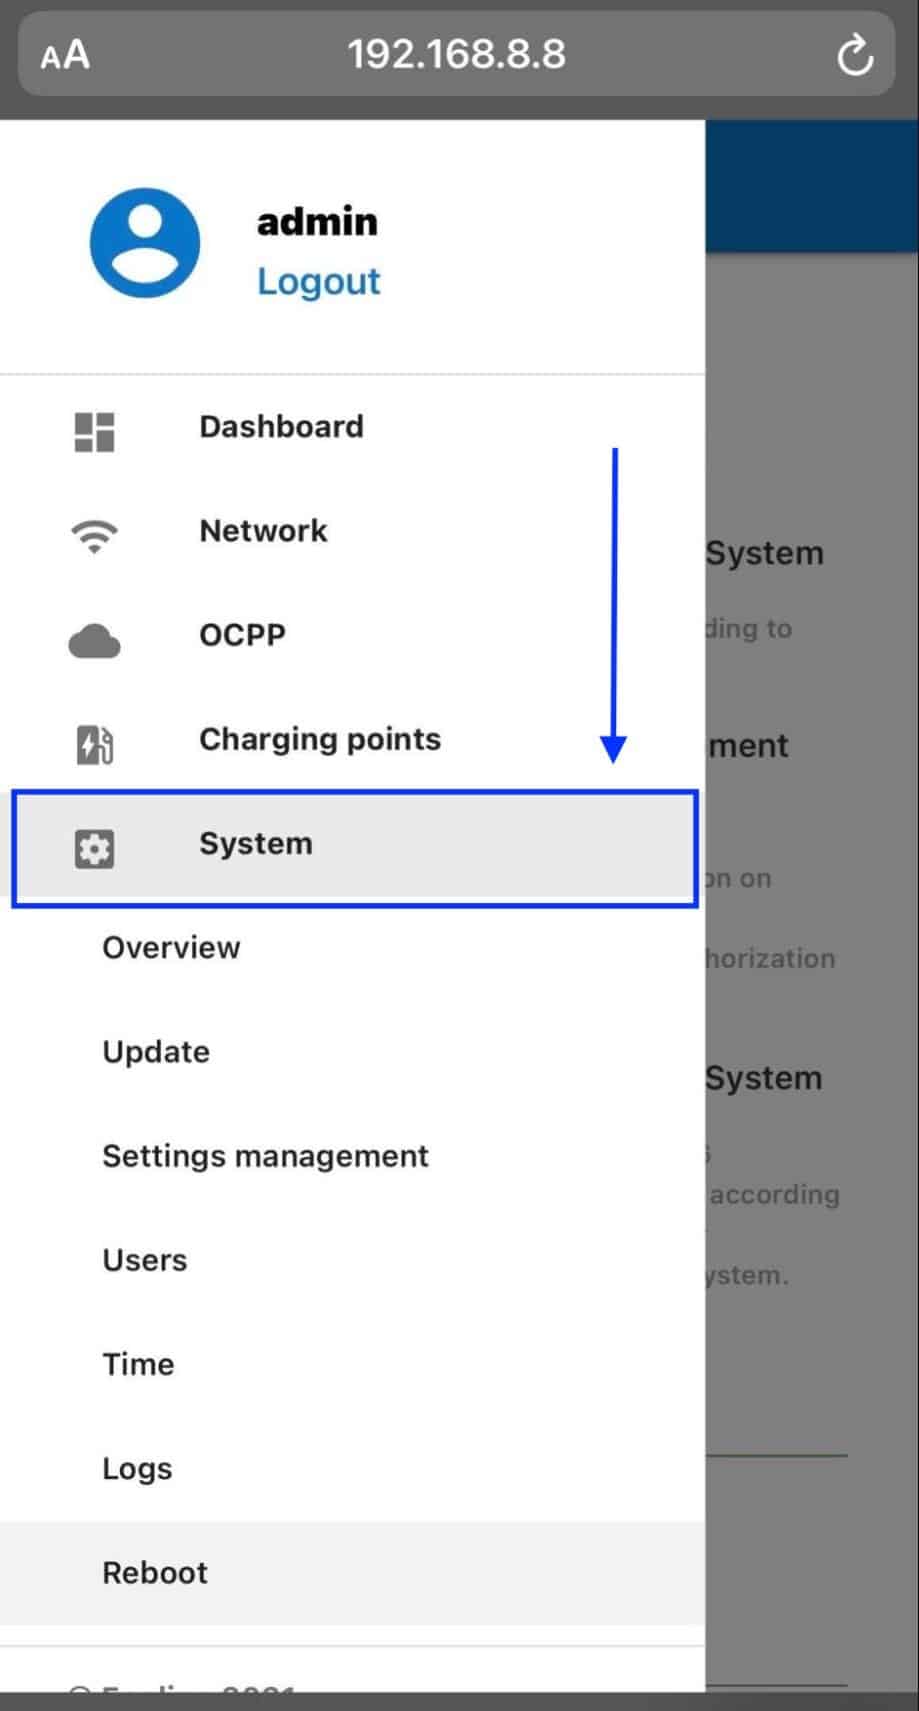
9. Now press "Reboot"
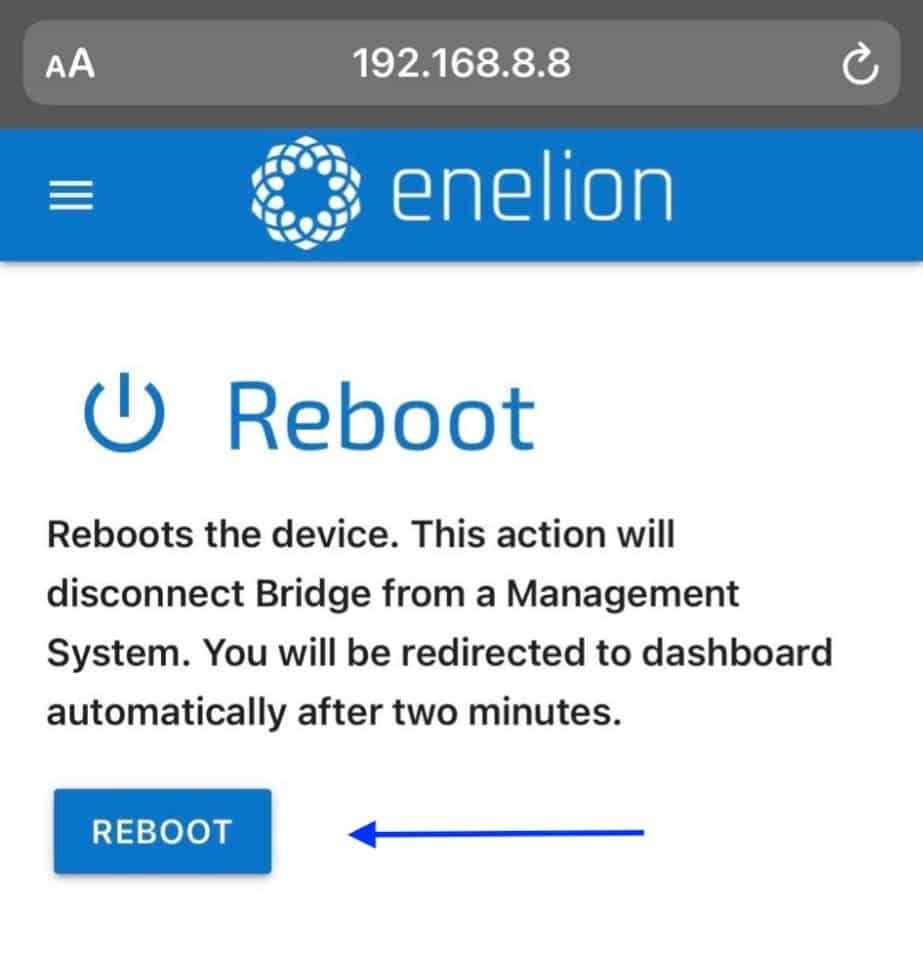
Please note that you have to wait until the reboot has finished. This process can take several minutes.
10. Connecting the charge point to your Monta account
Now you need to add and connect your charge point to your Monta account.
You can do this through either Monta Charge or Monta Hub.
