This is a guide that shows how to install Monta on your charge point. If you want to connect your charge point to your Monta account, please follow the steps in the end of the guide.
Please note that when you connect your charge point to Monta, we become the operator of the charge point. This means that you need to use Monta to control the charging process.
1. Connect your device to the charge point hotspot
Connect your device to the WiFi hotspot from the charge point. The name follow the format Enelion-XXXX-XXXX, where XXX is the serial number of the unit.
Password for this network can be found on the identification sticker placed on the charge point’s head.
2. Enter 192.168.8.8 in your browser
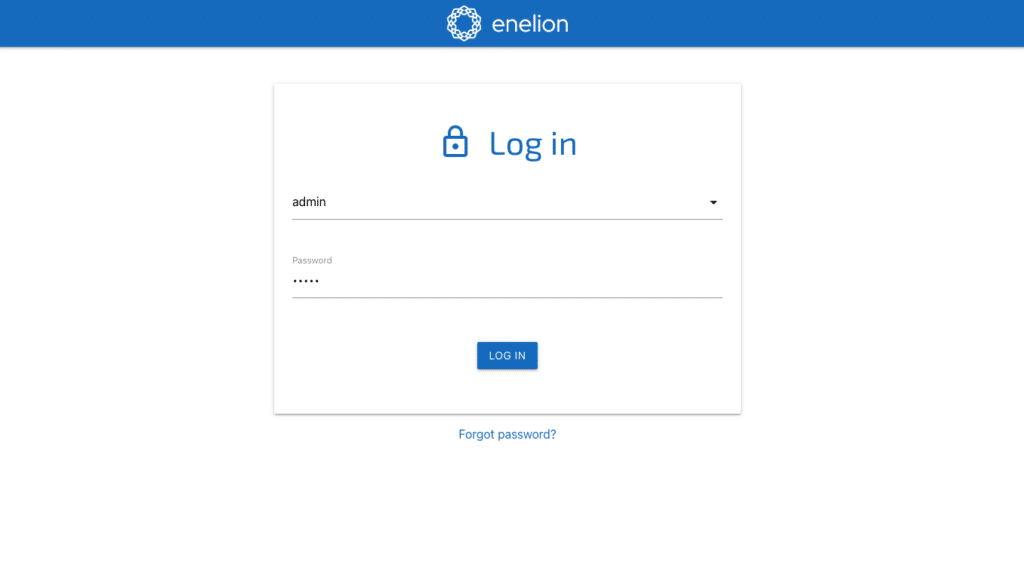
Enter the address 192.168.8.8 in your browser.
Name: admin
Password: admin

3. Select "Network" and continue with your setup
Select "Network" form the side menu. Then you need to click on "WiFi" or "GSM" depending on your setup.
WiFi setup
Select "WiFi" on the side menu. Toggle the "WiFi" on and click on the refresh button to search for your WiFi network.

Select your network and enter the password to connect.

GSM (cellular) setup
For a cellular setup select "GSM" from the side menu. Then fill in the relevant SIM card settings to establish the connection.

4. Enter the Authorization settings
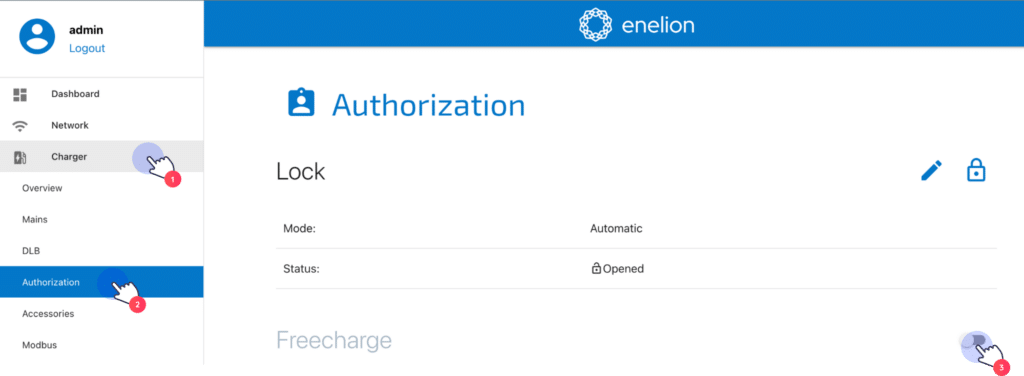
In order to register all charging activity in your Monta account, you need to disable free charging on the charge point. Select "Charger" and then click on "Authorization".
Toggle off "Freecharge".

5. OCPP Configuration
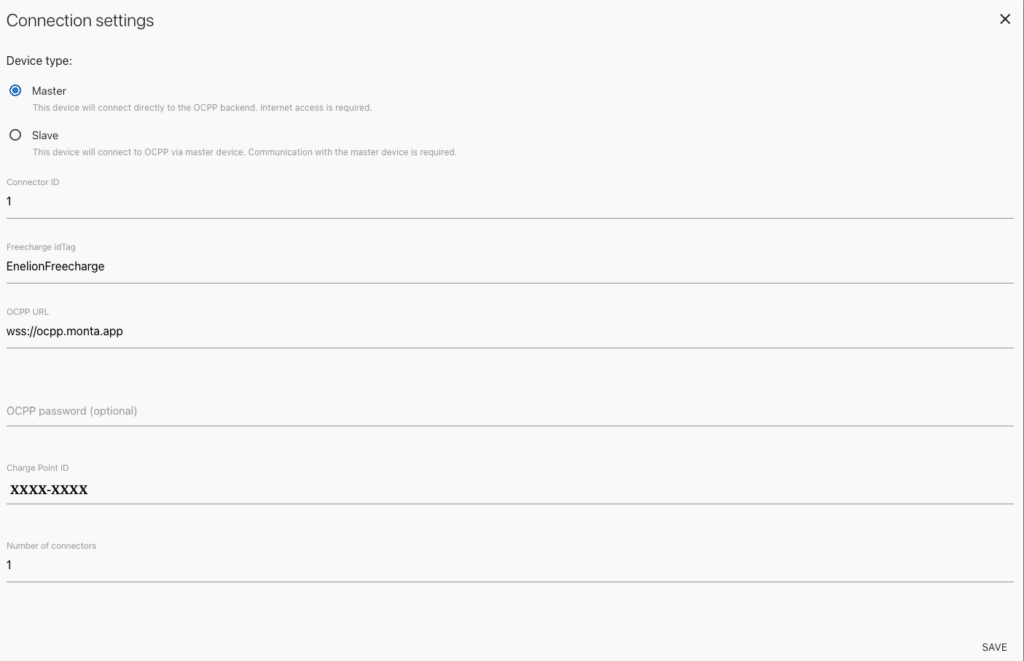
Select “OCCP” in the side bar, enable it, then edit the “Connection settings”.
Device type:
- “Master”, if this is a standalone unit
- “Slave”, if this unit is connected to a master
Connector ID:
- Leave as “1” if Master
- If slave, then designate the specific number in the line of connectors
Freecharge idTag: “FFFFFFFF”
OCPP URL: wss://ocpp.monta.app
OCPP password (optional): *leave empty*
Charge Point ID: Use the Serial number “XXXX-XXXX” of the Lumina Head, found either on the shipping box or under System->Overview
Number of connectors:
- If standalone Master, then “1”
- If Slaves are connected, then specify the total amount of connectors including Master

Now the OCPP connection status should look like this:

6. Connect the charge point to your Monta Account
Now you need to add and connect your charge point to your Monta account.
You can do this through either Monta Charge or Monta Hub.
