Please note, that there are two different types of configurations, depending on which Entratek model you have.
If you have a Power Dot Pro 2, please follow section A.
If you have Wallbox Power Dot Fix or Power Arrow Dual, please follow section B.
Section A: Power Dot Pro 2
1. Download the mobile app
Download the DS Charge mobile app on your device: App Store / Play Store
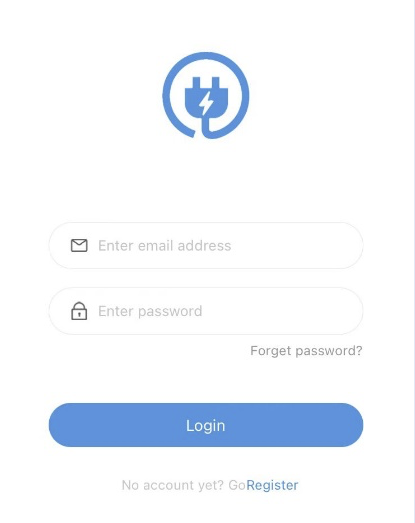
After you have done that you can login to the app with your credentials, or register a new account.
2. Connect to the charge point to your device
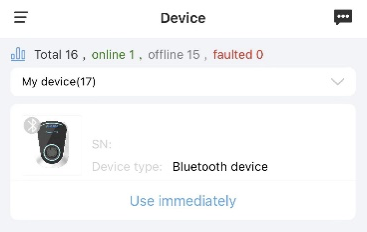
Turn on the Bluetooth of your device. A Bluetooth connection is going to be established between the app and the charge point, so you will see the charge point in the app interface.
Click on the charge point.
3. Click on the three dots (...)
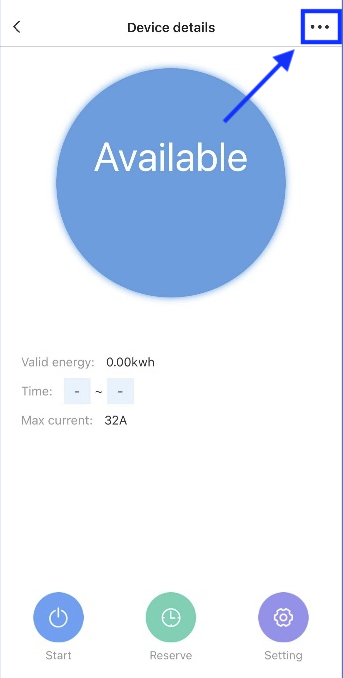
Once here, click on the three dots (...) in the upper right corner of the screen. This will open the internet configuration interface of the charge point.
4. Connect your charge point to the internet
Begin by clicking on the desired configuration network option.
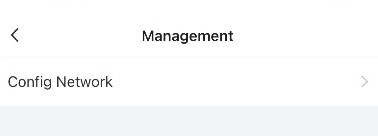
Then follow the prompts on the page to connect to the network. You need to keep the device connected to the available WiFi. The app will directly connect to the WiFi connected to your device.
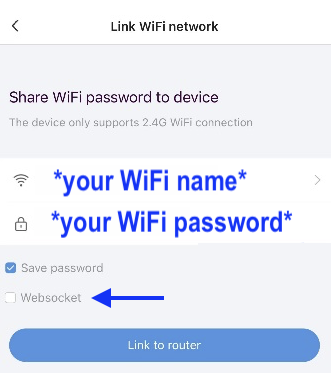
Check the box on "Websocket" to configure it.
5. Configure the Websocket settings
Once the Websocket menu opens, insert Monta's web address:
ocpp.monta.app:433/
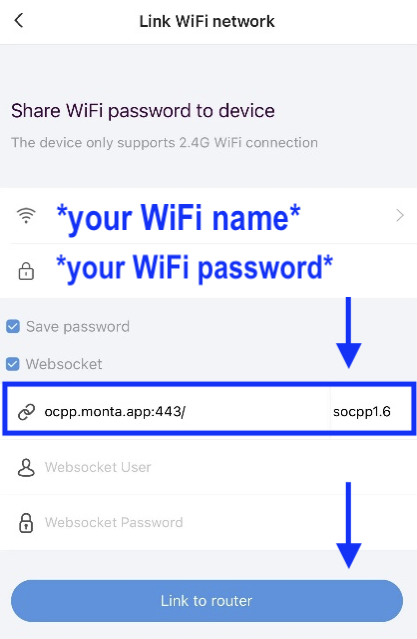
Click on "Link to router".
6. Wait for the configuration to complete
Now you just need to wait for the configuration to complete.
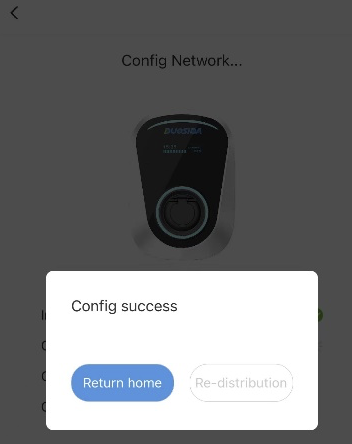
7. Connecting the charge point to your Monta account
Now you need to add and connect your charge point to your Monta account.
You can do this through either the Monta app or Monta Portal.
Here is a guide for the Monta app.
Here is guide for Monta Portal.
Section B: Wallbox Power Dot Fix & Power Arrow Dual
1. Connect to your charge point's hotspot
Turn on your charge point and connect your device (computer, phone, etc.) to your charge point's hotspot.
Hotspot name: IOC-XXXXXX
Hotspot password: IOC12345
2. Login to the webpage
On the connected device, open a browser and type: 192.168.10.1:8080
Use these credentials to log into the page:
Username: installioc
Password: installer123
Click "OK" to proceed.
3. Open the URL settings
Navigate to tab "User" on top of the screen. From the menu, select "Basic".

4. Change the URL
Here, you need to change the URL address to Monta's URL. There, fill in the following:
OCPP Server Domain: ocpp.monta.app
OCPP Server Port: 433
OCPP Server URL: /
OCPP Identity: Insert the serial number of the charge point
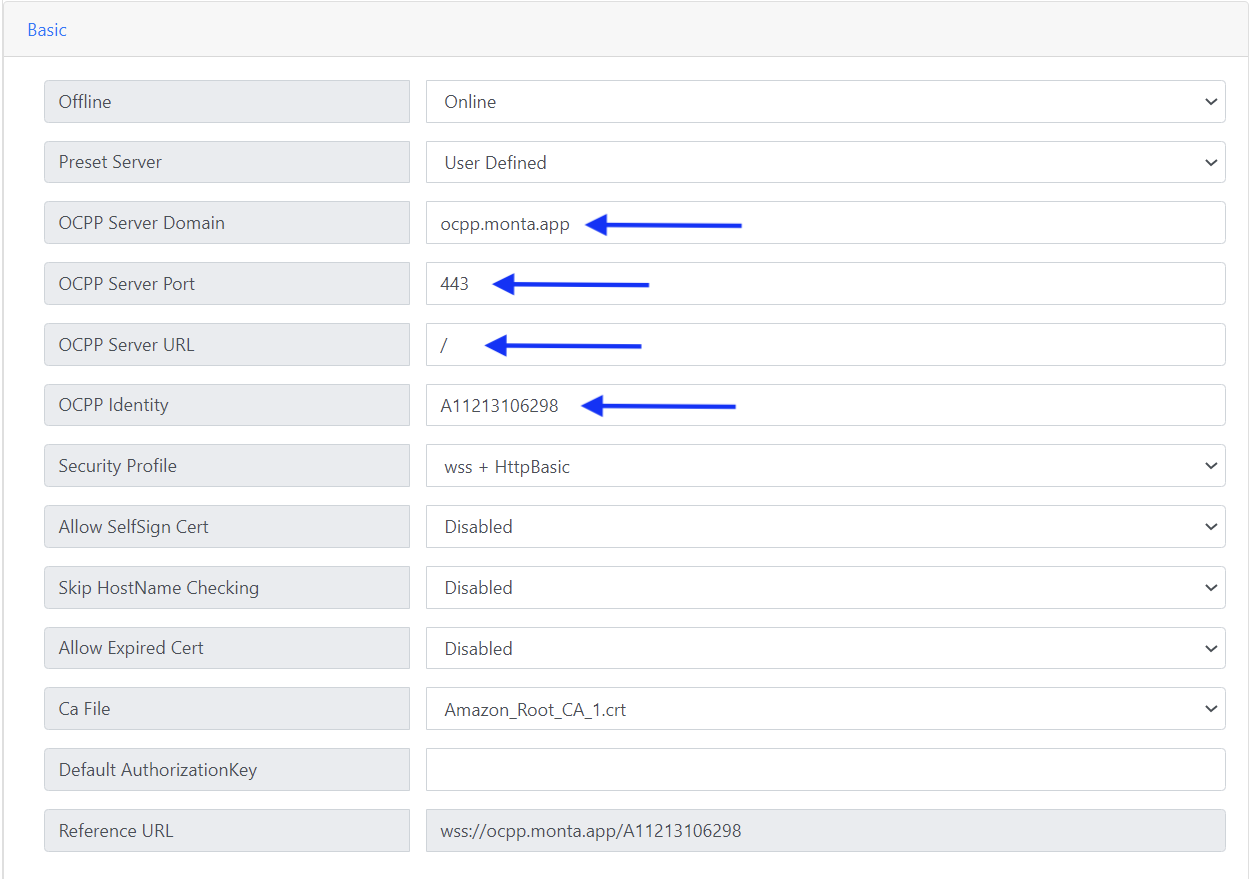
5. Connect the charge point to the internet
Navigate to "User" on the top of the screen. From the menu, select "Network".

Enable internet access by making sure that "Block LAN visit Internet" is on "Allowed".

There are three ways to connect your charge point to the internet: Wi-Fi, Ethernet, 4G
Wi-Fi
If this is the first time you are connecting the charge point to the internet, you have to manually enter the Wi-Fi SSID.
If the charge point has been connected to the internet before, click on "Scan" and select your Wi-Fi network.
After you select the network, fill in your Wi-Fi password.
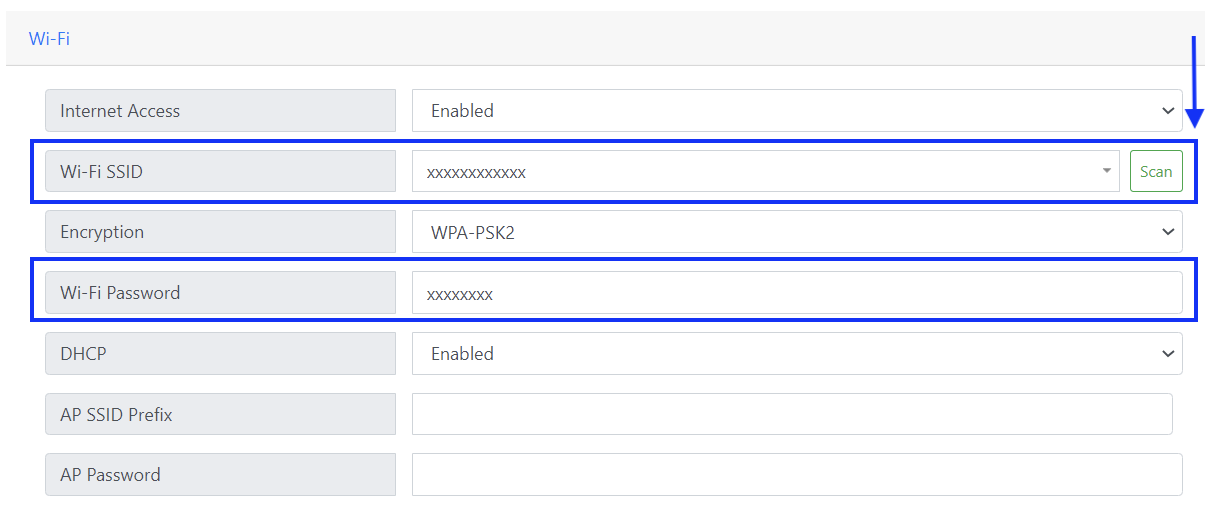
Please note that AP name and password can be changed, but you need to remember them, as it is currently not possible to retrieve a forgotten password.
Ethernet
The Ethernet connection is available with both DHCP and static IP. From the screenshot above, please see the DHCP option. This can be either enabled or disabled.
If you select "Enabled", the addresses will be assigned automatically.
If you select "Disabled", you can manually enter the charge point hotspot's static IP address and other information.
4G
To connect via 4G, APN and Dial number must be given. Please check with the cell phone provider for cell phone connection information.
6. Reboot the charge point
After all changes are submitted, reboot the charge point.
7. Connecting the charge point to Monta
Now you need to add and connect your charge point to your Monta account.
You can do this through either Monta Charge or Monta Hub.
