Please note that when you connect your charge point to Monta, we become the operator of the charge point. This means that you need to use Monta to control the charging process.
Important: if the charge point was connected to the internet using DHCP, you will need to factory reset the charge point by pressing and holding a reset button which is located close to the LAN port in the side opening of the charge point.
1. Change your network settings
Here you need to change the network settings of your computer, according to the charge point's local IP.
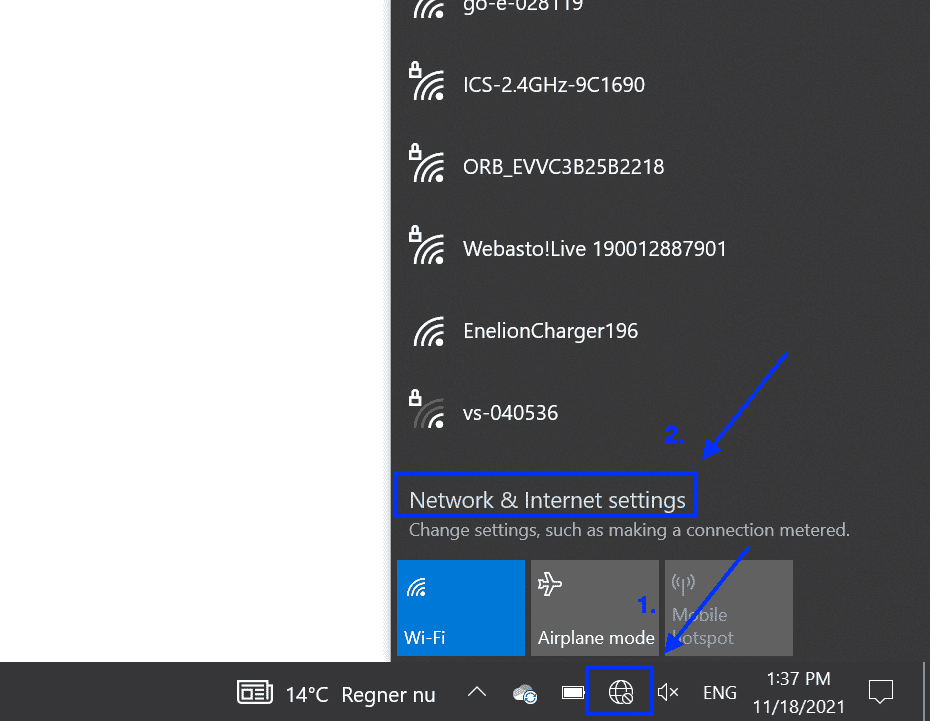
To do so, click on the Internet icon in the bottom-right corner of your computer screen. From there, open the "Network & Internet Settings" of your device.
2. Select "Change adapter options"
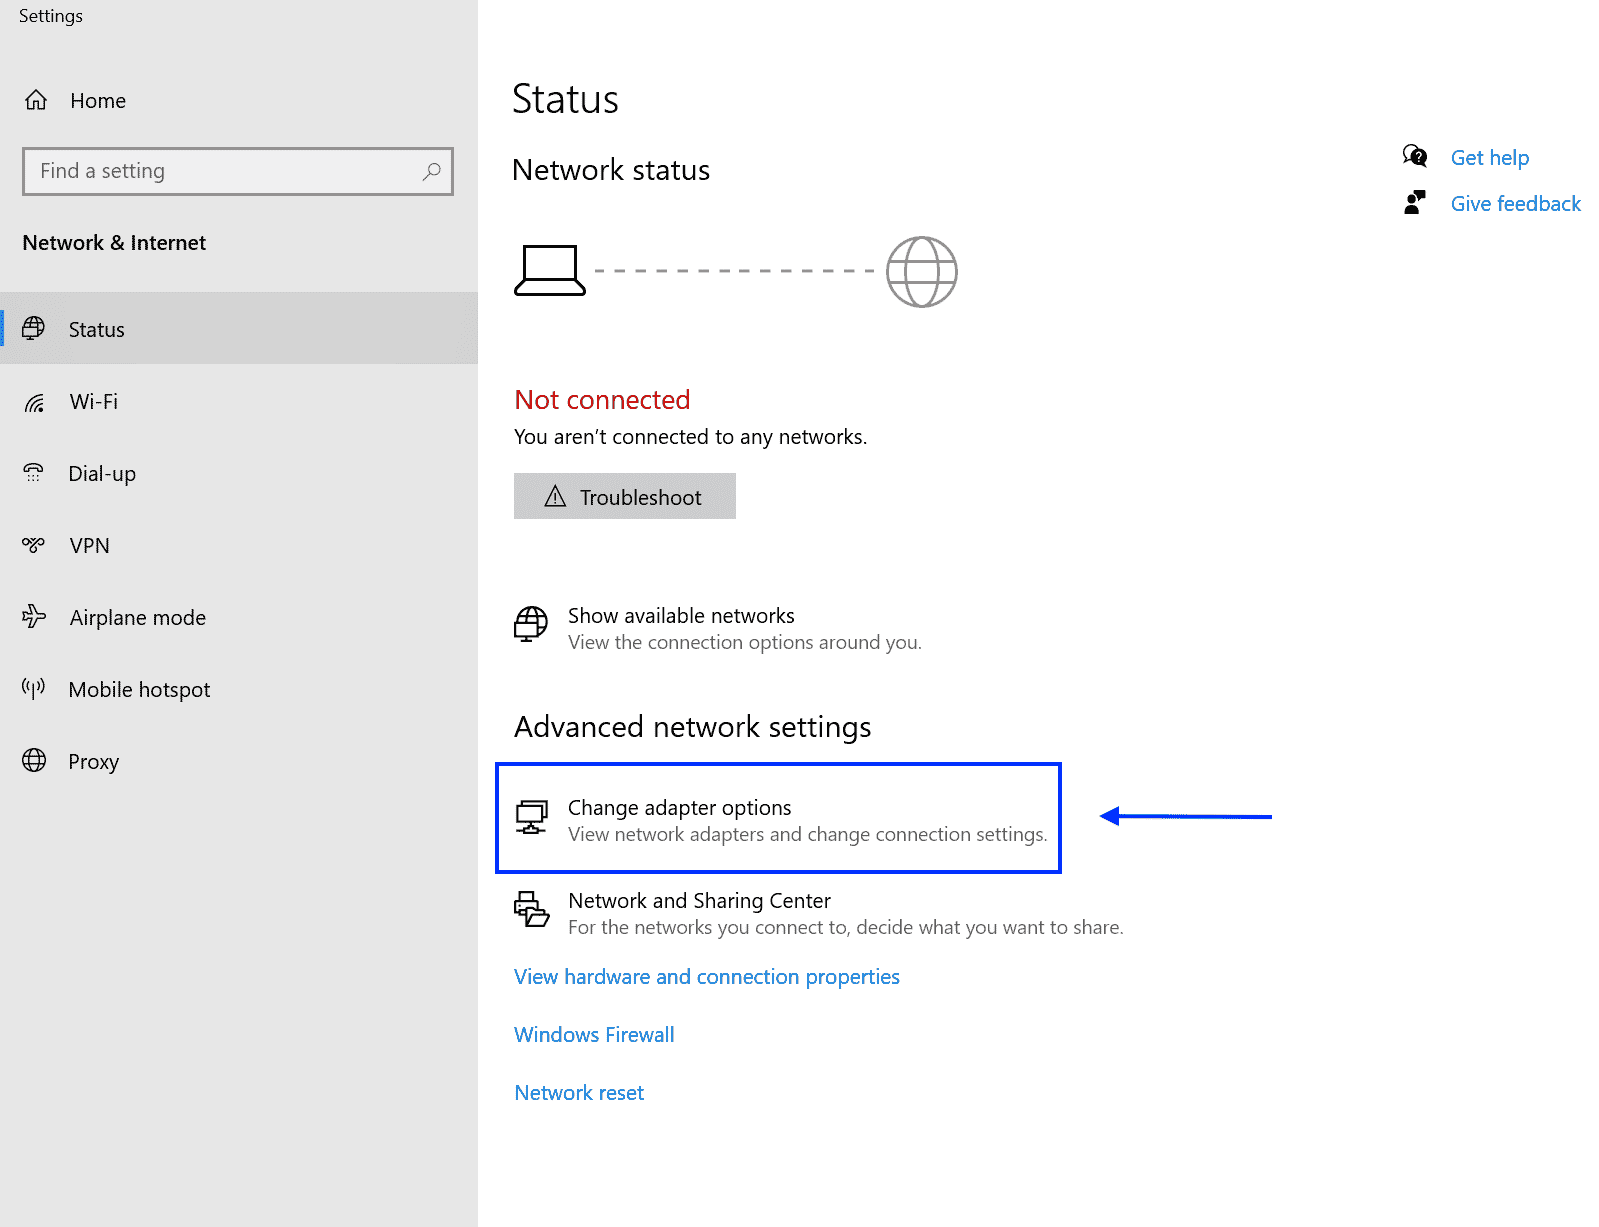
Select "Change adapter options", located in the Advanced networks settings.
3. Right-click on "Ethernet adapter" and select "Properties"
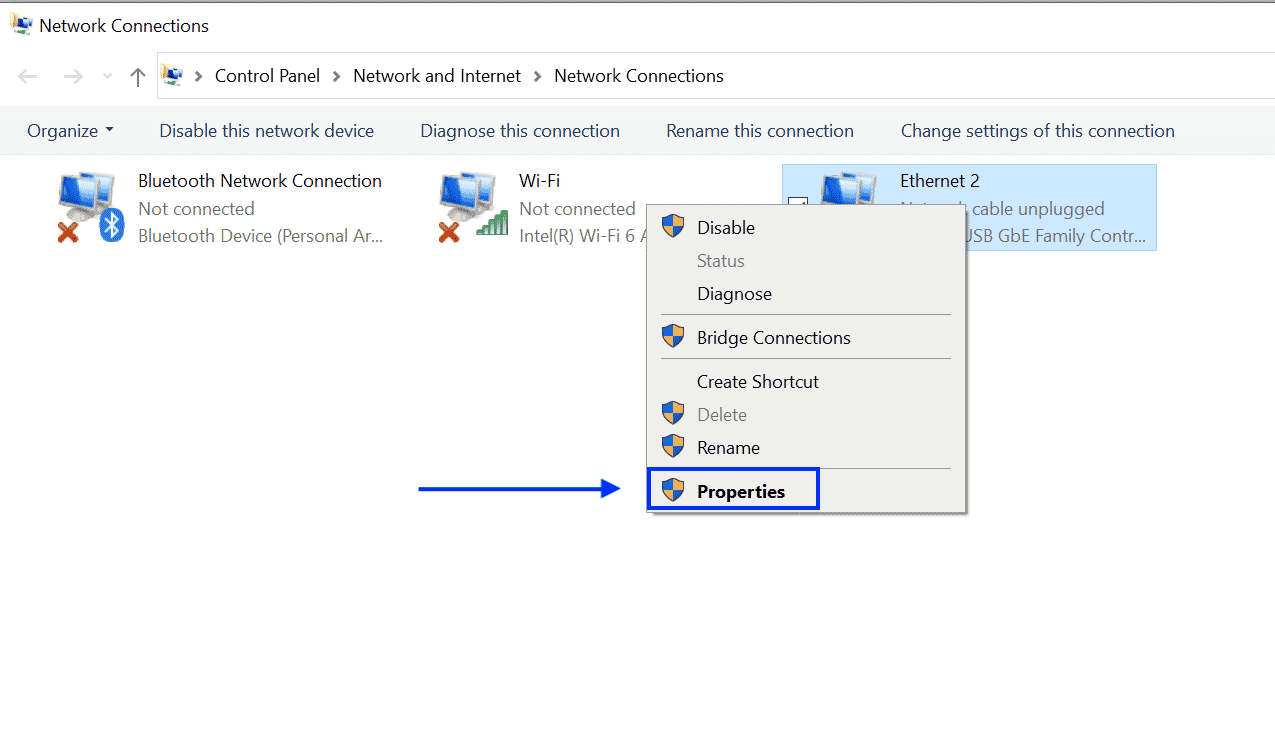
Once you enter the "Change adapter options", find the Ethernet adapter, right-click on it, and select "Properties".
4. Find and select "Internet Protocol Version 4 (TCP/iPv4)" and click on "Properties"
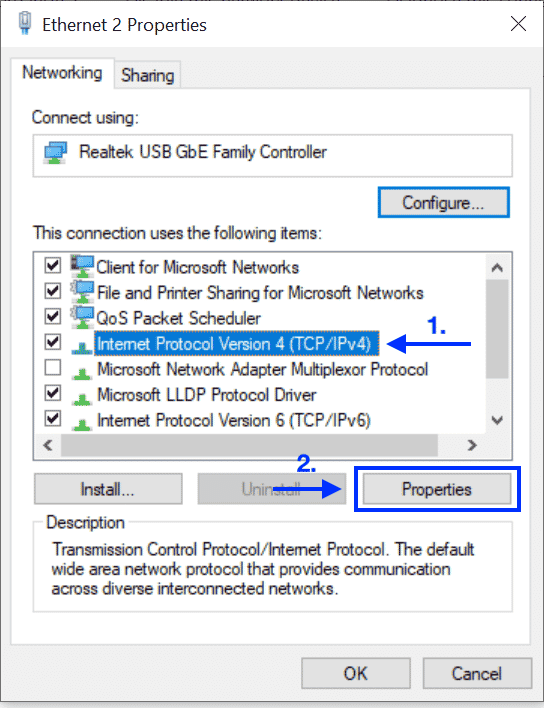
In "Ethernet Properties", find the Internet Protocol Version 4 (TCP/iPv4), click on it, and press "Properties".
5. Select and fill out "Use the following IP addresses"
Once you are there, select "Use the following IP addresses", if not selected, and enter the values as following:
IP address: 192.168.1.x
*Please note that x can be any value between 1 and 249. This can be seen in the example below, where the value of x is the number 2.
Subnet Mask: 255.255.255.0
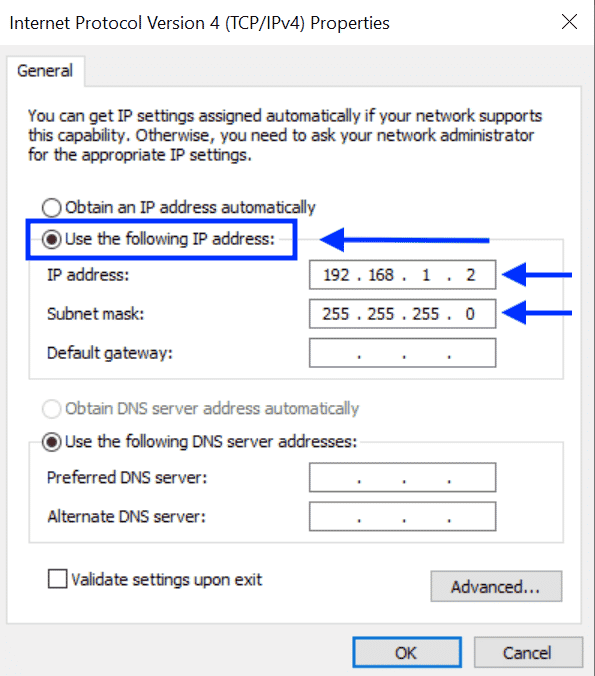
After putting in the values, click on "OK" and close the window.
6. Open your browser to 192.168.1.250
Open up the browser, type in the IP 192.168.1.250 in the URL field and hit enter.
Once this page opens up, you need to log in. The credentials are:
email: root@etrel.com
password: toor
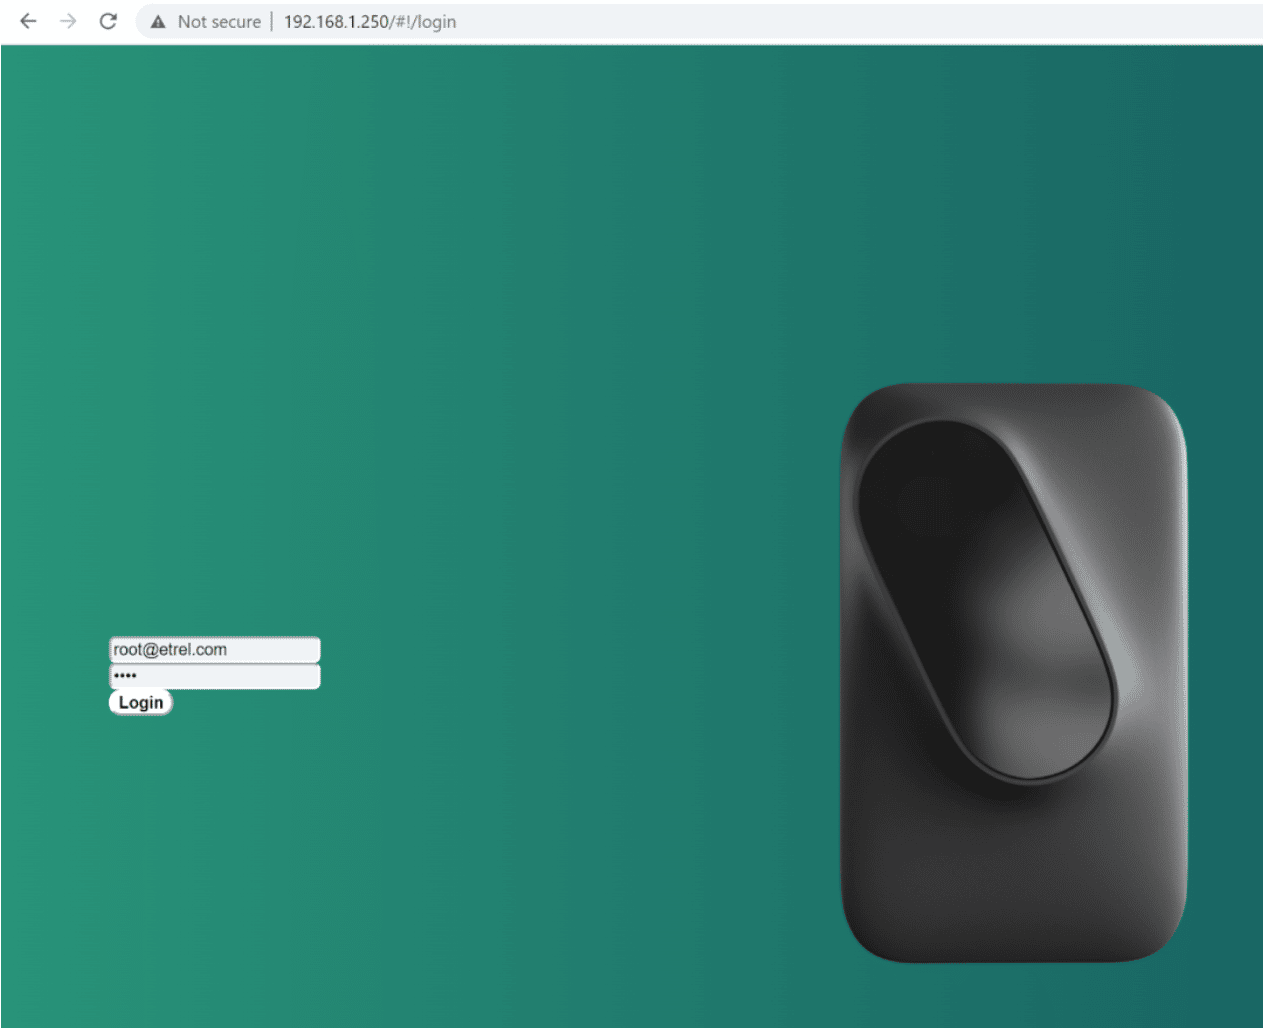
When you click on "Login", you will enter the Web Interface of the charge point.
7. Navigate to "Connectivity"
In the Web Interface press on the menu button on top-left corner and navigate to "Connectivity".
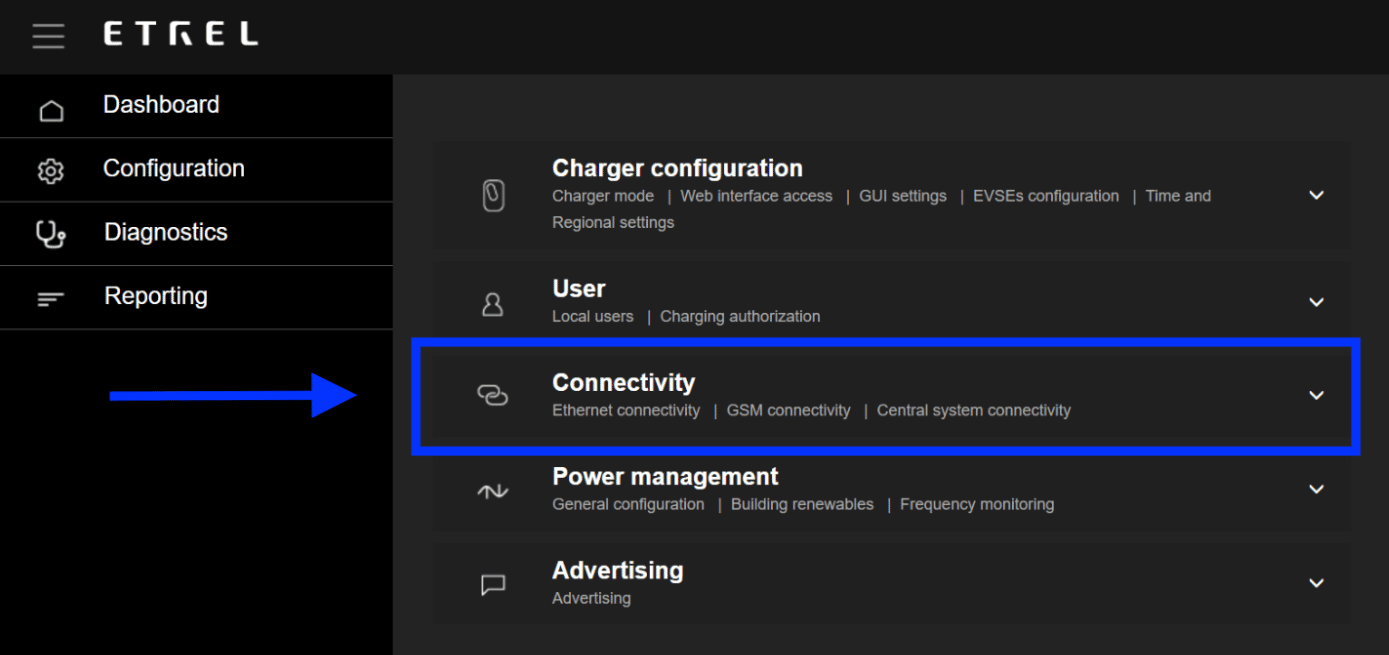
8. Adjust the connectivity settings
Under the "Connectivity" tab, select "Central system connectivity".
In the menu that opens on the right, you need to go to "Central system endpoint URL" field and paste Monta's URL: wss://ocpp.monta.app
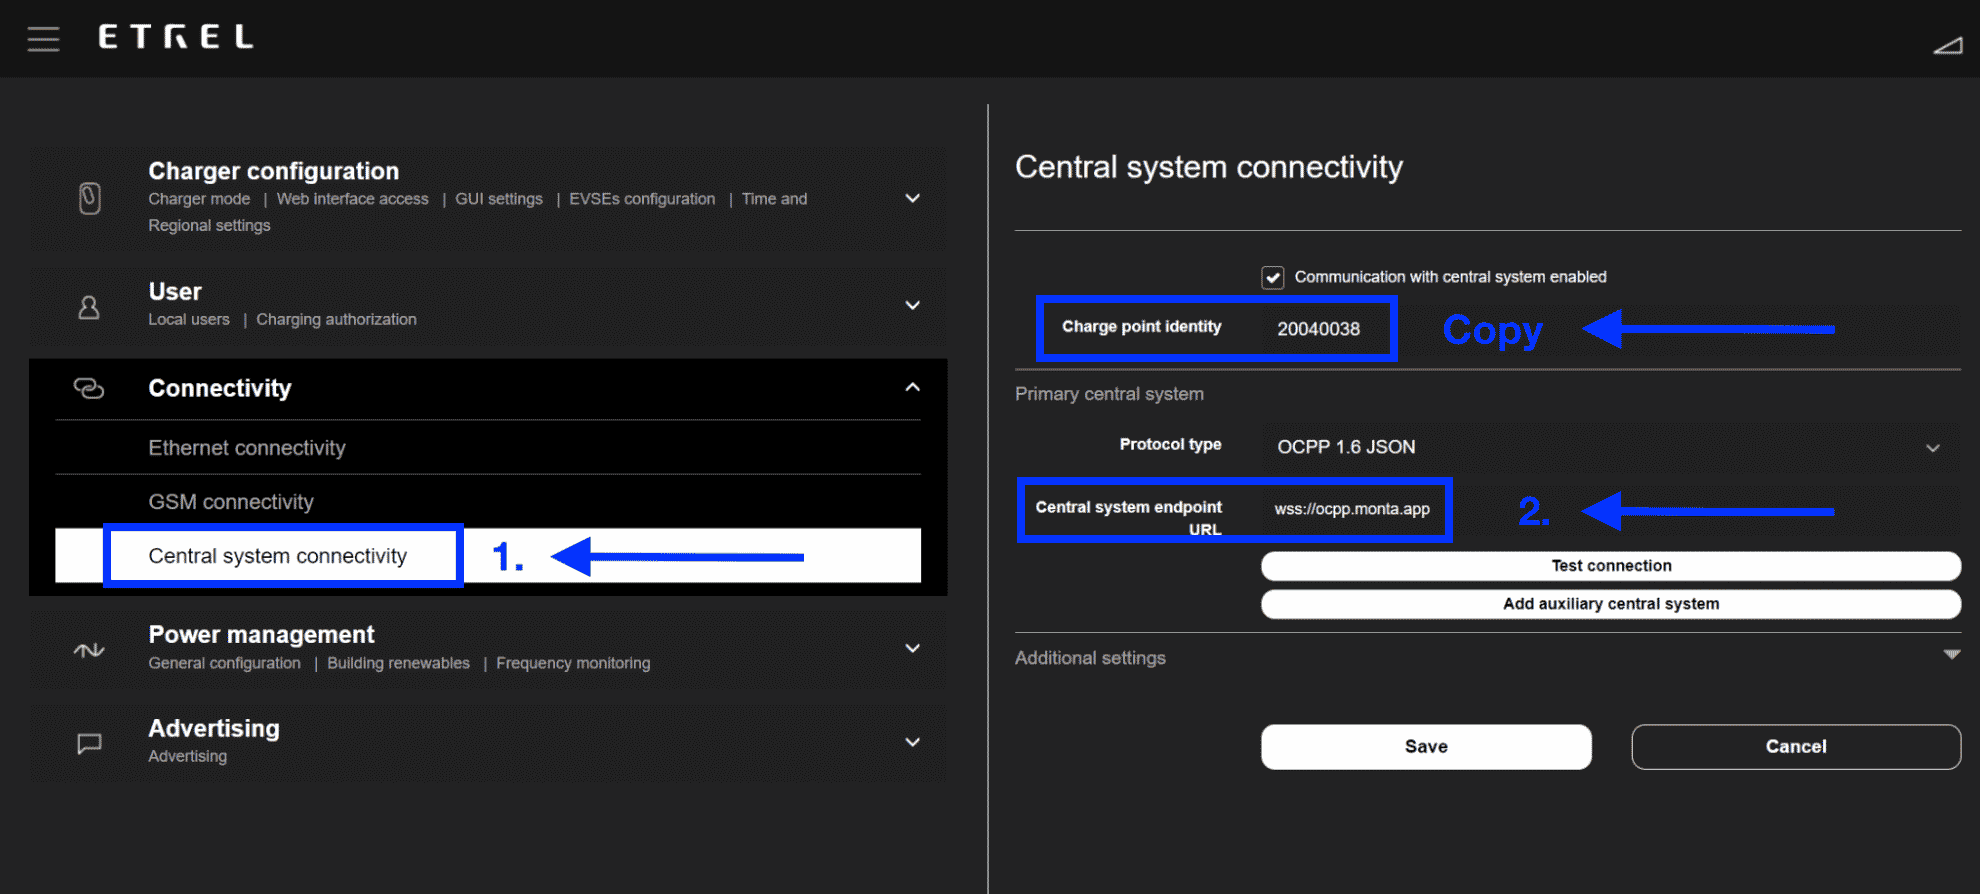
We also recommend to copy the Charge point identity. This is the serial number of your charge point and you will need it later on when you are connecting your charge point to Monta.
9. Adjust the "Ethernet connectivity" settings
Under "Connectivity" select the "Ethernet connectivity" tab.
On the right side, put a check mark on DHCP and DNS in the IPv4 section.
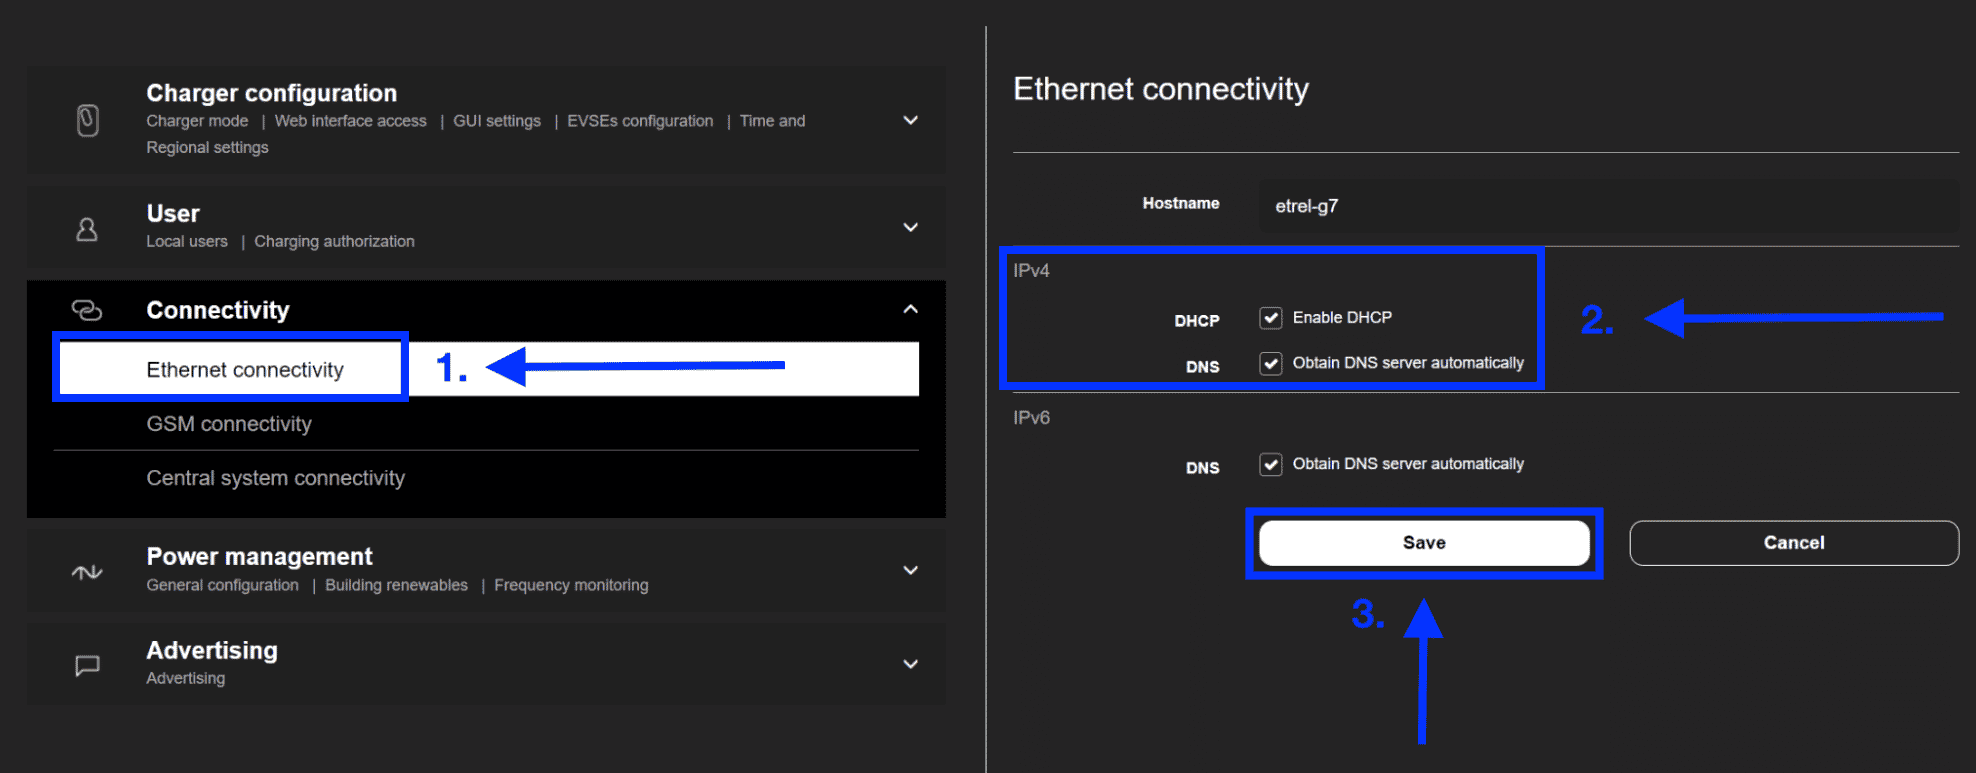
Click on "Save".
If your charge point supports WiFi connectivity you can set it up, instead of Ethernet.
10. Restart the charge point
Now you need to restart the charge point. You can do that in the Web UI.
You can also restart the charge point by pressing the reset button for few seconds on charge point itself, and selecting the ‘’Restart Charger’’ option that appears on the charge point’s screen.
11. Connecting the charge point to your Monta account
Now you need to add and connect your charge point to your Monta account.
You can do this through either Monta Charge or Monta Hub.
