Please note that when you connect your charge point to Monta, we become the operator of the charge point. This means that you need to use Monta to control the charging process.
1. Prerequisites
In order to connect your charge point with Monta, you will need to first install EVBox mobile app:
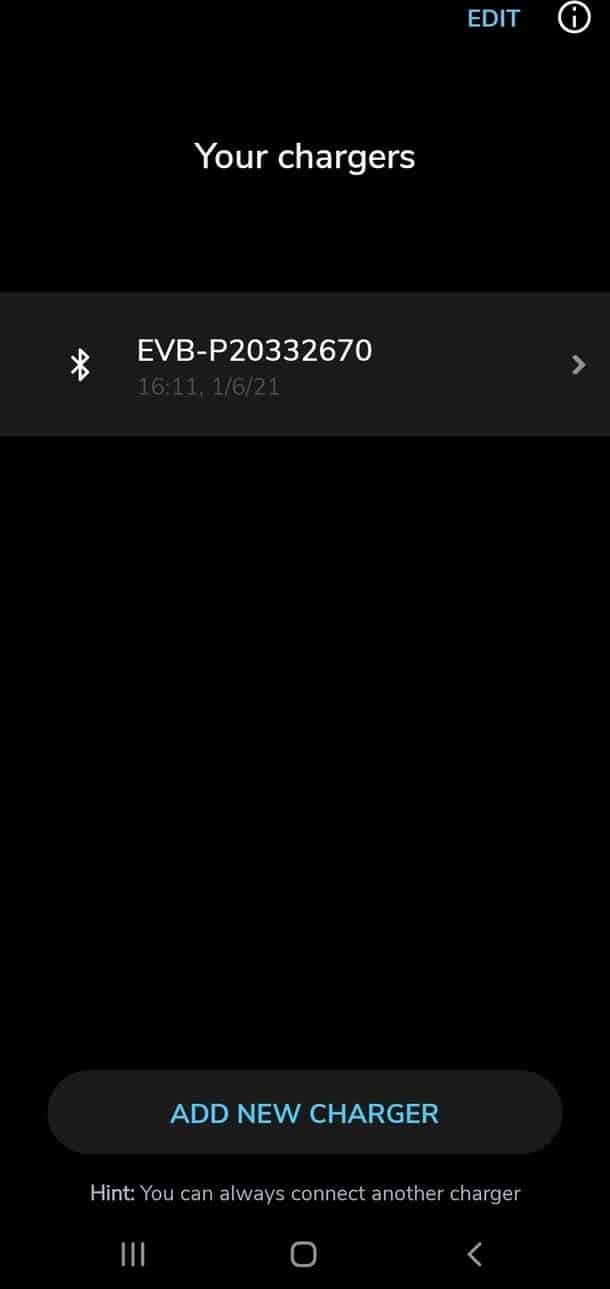
2. Find and connect your charger via Bluetooth
Note: Save the charge point's modem number at this point. You will use it later in the pairing process. It should look something like EVB-XXXXXXXXX.
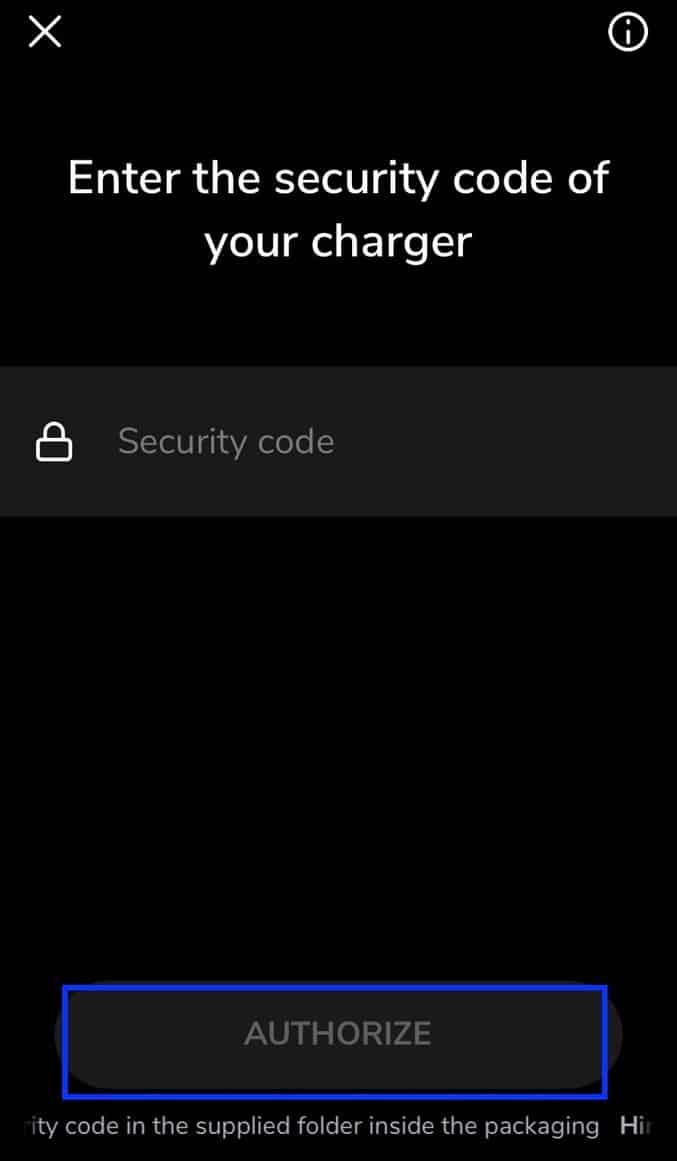
3. Enter security code
Enter the security code of your charge point in order to get EVBox APP authorized with your charge point. Security Code should come with your charge point's installation packaging, typically located on a big cardboard cutout. Enter the code and press "Authorize".
4. Adjust the charge point's access control
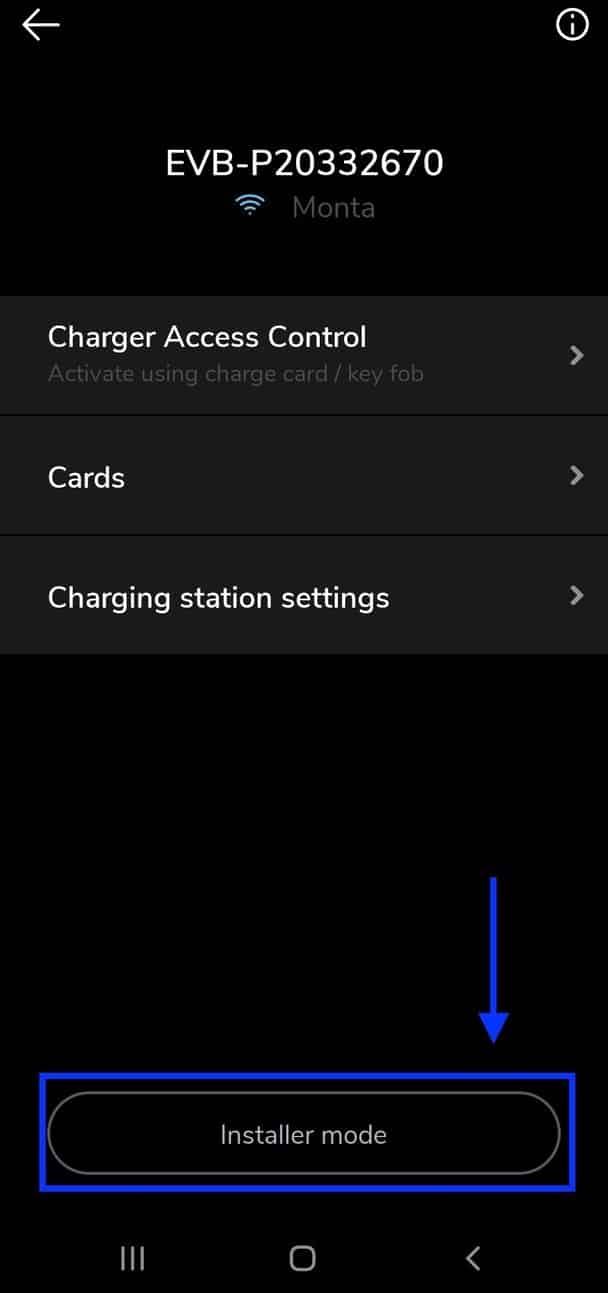
IMPORTANT! If you are planning to share your charge point publicly and EV drivers will pay for their charges via Charge Keys, you need to enable this. Here, in the setting "Charger Access Control", enable Activate using charge fob/key and disable Auto-start. You can watch a more detailed guide about it here.
Once connected to the charge point you will need to head into "Installer Mode". Click the button at the bottom of the screen.
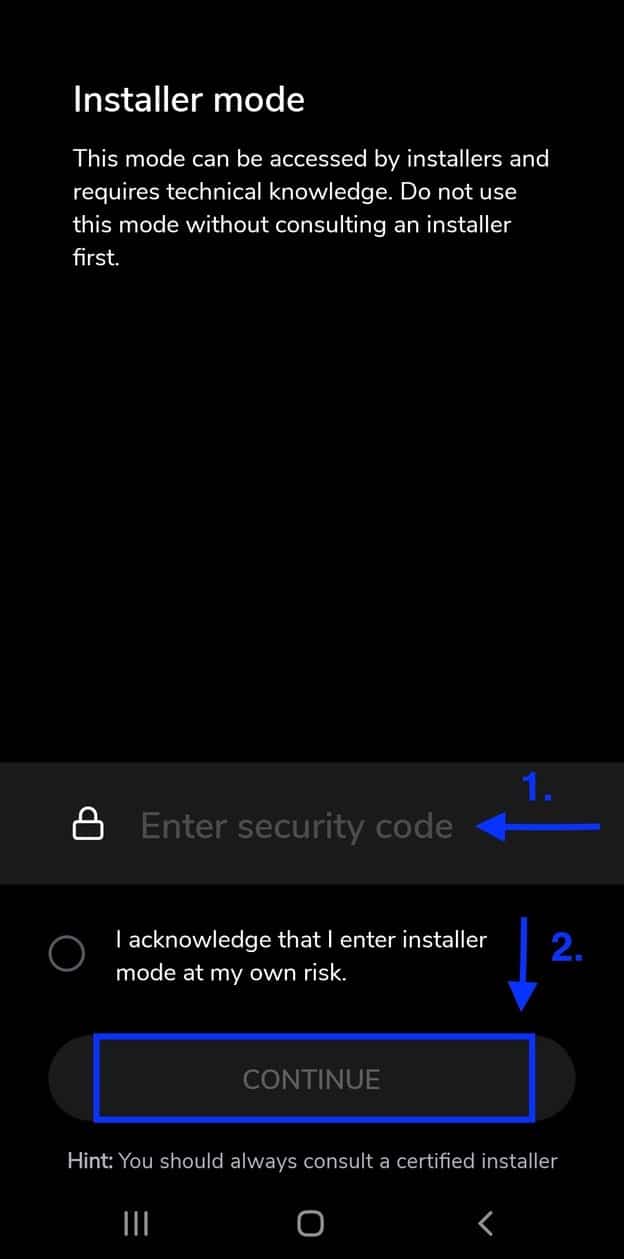
5. Enter security code
Once you arrive to this screen, you will be prompted to enter the security code. This is the same security code that you was required to enter on step 3. Enter the code and click on "Continue".
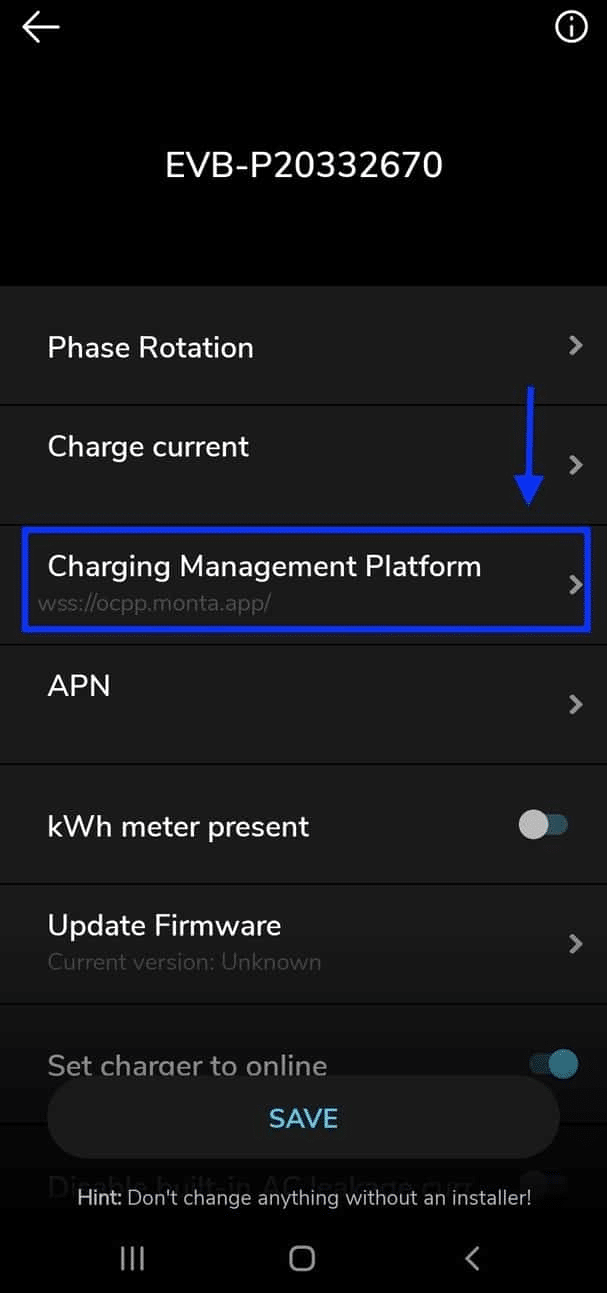
6. Click on "Charging Manager Platform"
After entering Installer mode you will see the menu area where you need to enter so called "Charging Manager Platform" go ahead and click on that button. Note: It might take a moment to load this page.
7. Select "Different Backend URL"
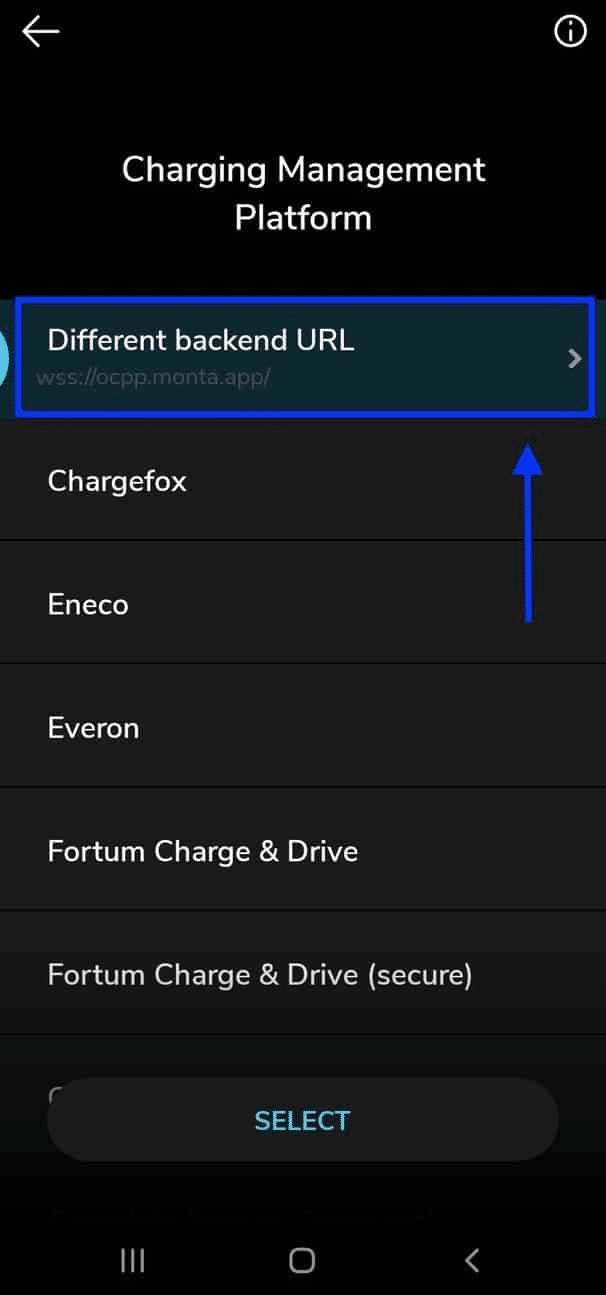
Upon entering the "Charging Manager Platform" section you will be presented with a list of options. Select the first option "Different Backend URL".
8. Enter the Monta server URL and save
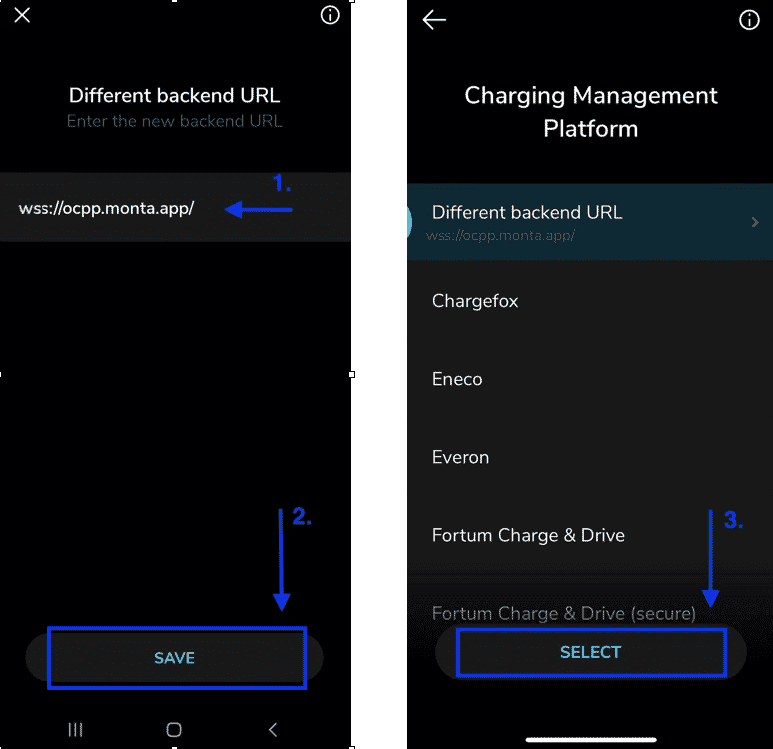
In the "Different Backend URL" you will be able to enter the Monta server URL: wss://ocpp.monta.app/
Once complete, click on "Save" and then "Select".
9. Save & reboot the charge point
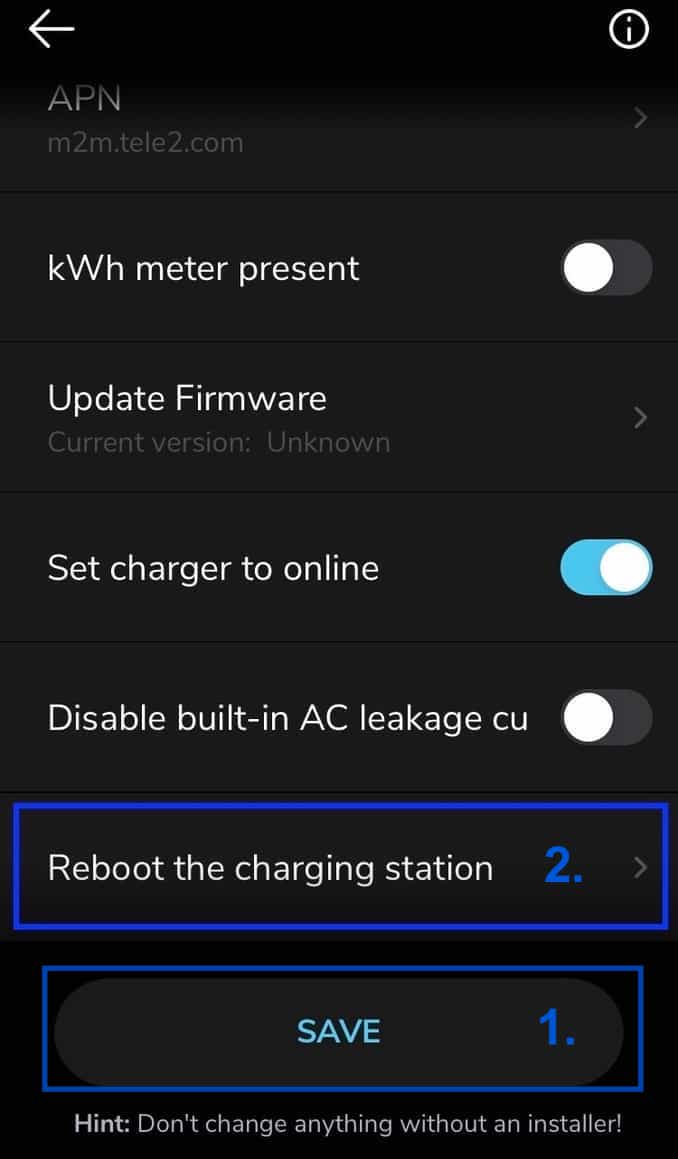
Click on "Save". Wait a few moments.
Click on "Reboot the charging station".
Once these steps are done and your charge point is restarted go ahead and continue the rest of the setup in the Monta app or Monta Portal.
10. Connecting the charge point to your Monta account
Now you need to add and connect your charge point to your Monta account.
You can do this through either Monta Charge or Monta Hub.
