This is a guide that shows how to install Monta on your charge point. If you want to connect your charge point to your Monta account, please follow the steps in the end of the guide.
Please note that when you connect your charge point to Monta, we become the operator of the charge point. This means that you need to use Monta to control the charging process.
1. Prerequisites
First you need to establish a connection between your computer and the charge point. This is done by connecting a GWJ8018 cable for the COM port of the computer to the RJ11 socket (J3 connector) on the electronic board of the charge point.
2. Configure the board of the charge point
The OCPP protocol must be enabled via the DIP-SWITCH (DS1), located on the board of the charge point. Before you configure the board, make sure the charge point is turned off. The correct configuration is:
OCPP
| 1. | ON |
| 2. | OFF |
| 3. | OFF |
| 4. | OFF |
| 5. | ON |
| 6. | ON |
| 7. | OFF |
After you have configured the board, you can power on the charge point.
3. Install the JOINON software
The first configuration option requires the use of the JOINON I-ON_I-CON SOFTWARE and a custom cable. You can get the software from...
The software consists of a set of files. The executable .exe file is the one to be used (the others do not matter). No installation is required to use the software.
Before opening the software, you must:
- Install the DB9/USB drivers;
- Check which COM port the cable is connected to.
4. Open the software file
Open the JOINON I-ON_I-CON SOFTWARE.exe file and select "IONDevice".

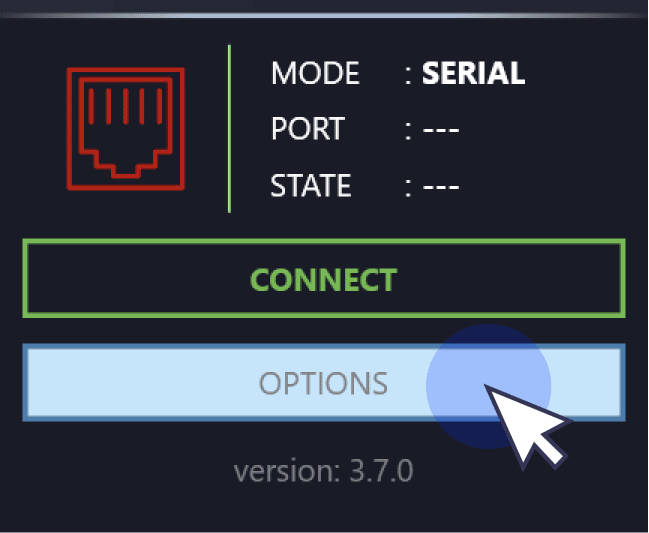
On the next screen, select "Options".
5. Select the COM port and connect
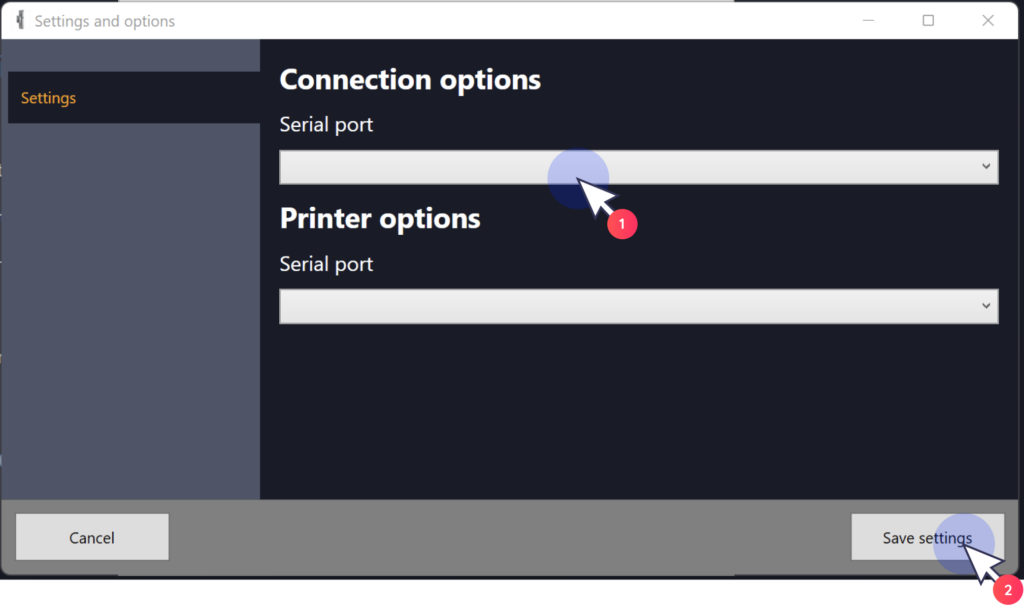
Select the correct COM port you have connected to and press on "Save settings".
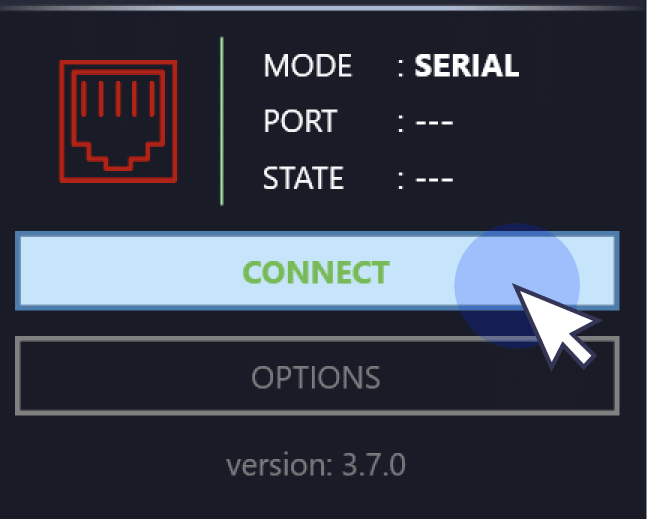
On the next screen, click on "Connect".
6. Sync time and open the configuration page
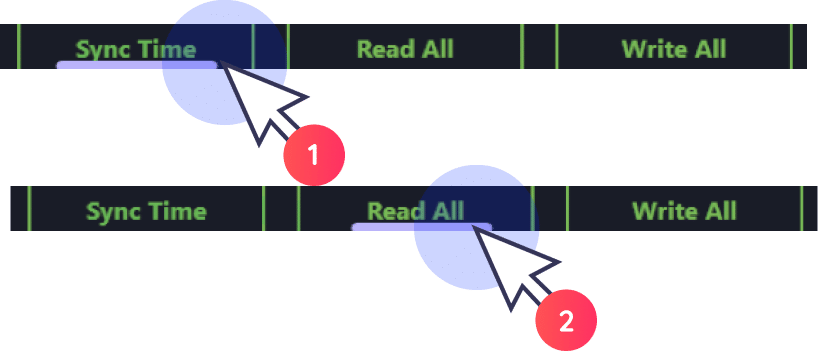
On the top right side of the screen, select the button "Sync time". Then, the field "Current time" will pass from 0 to the current time.
Afterwards, click on the button "Read all" to import charge point configurations.
7. Modify the charge point parameters
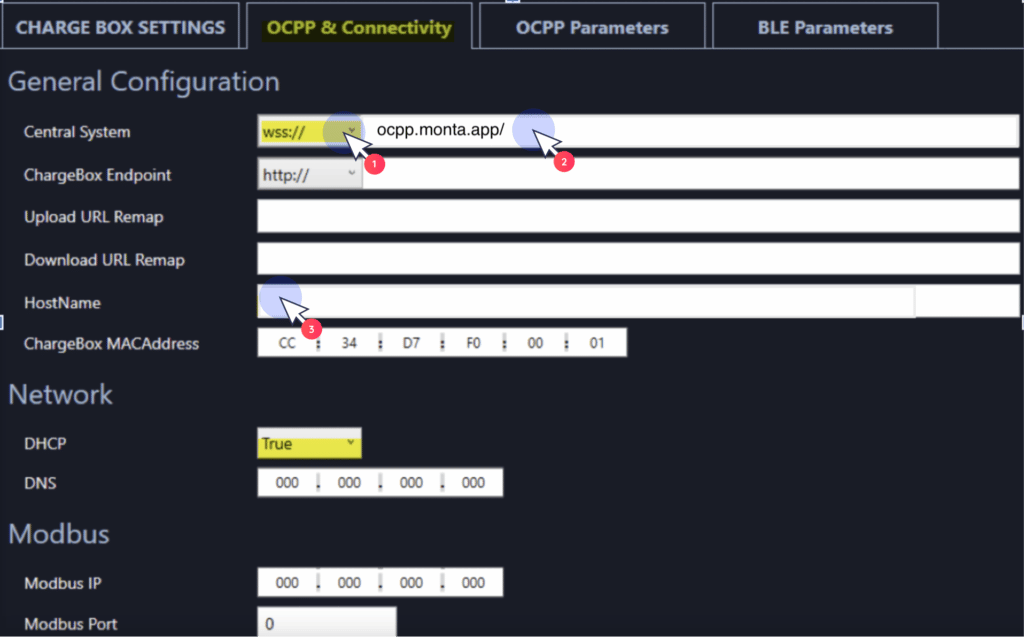
In section "Charge point settings" modify the parameters that are required and move on to "OCPP & Connectivity".
Central system: Select "wss://" from the drop down menu and insert ocpp.monta.app/ in the fied.
HostName: leave blank
DHCP: Select "True", if you are using LAN internet connection
8. Configure OCPP parameters
Copy the value from field "ChargeBox Serial Number" and paste it in "ChargeBox Identity".
Do not make any other changes in the fields there.
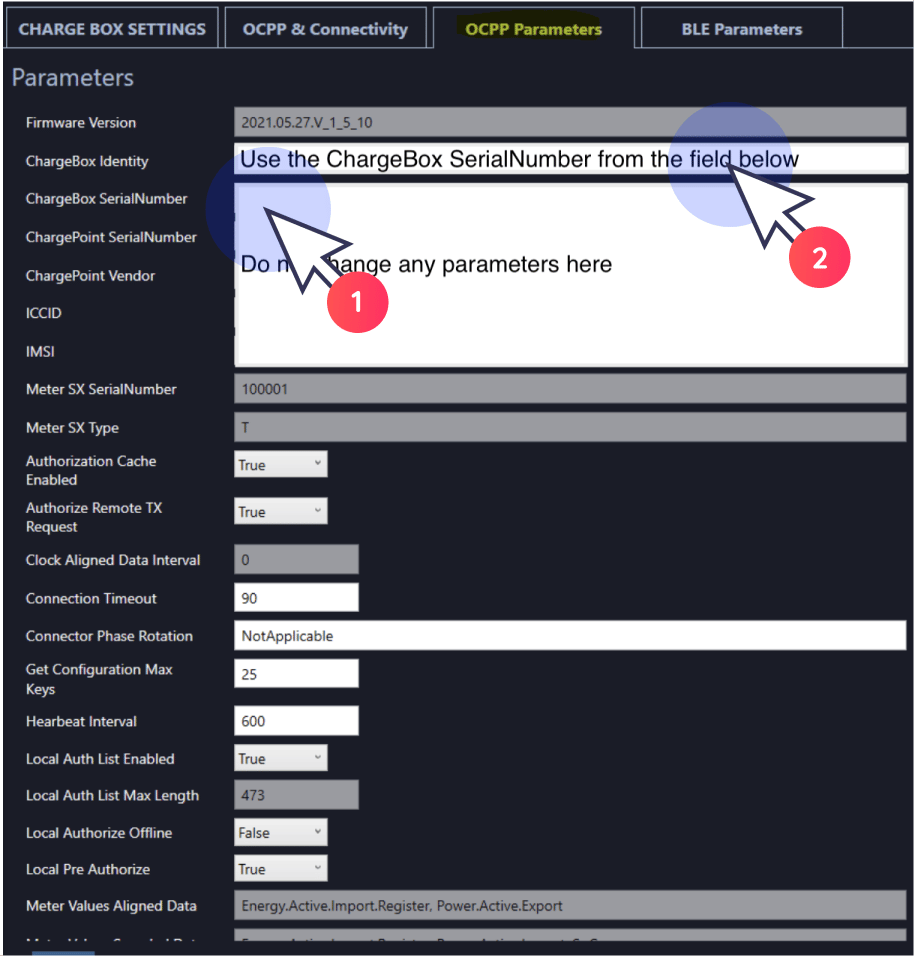
Save the value, because this is the charge point serial number and you will need it later, when you are connecting the charge point to your Monta account via Monta app/ Portal.
9. Finalize the configuration
Now, you need to click on "Write all" to finish the configuration.
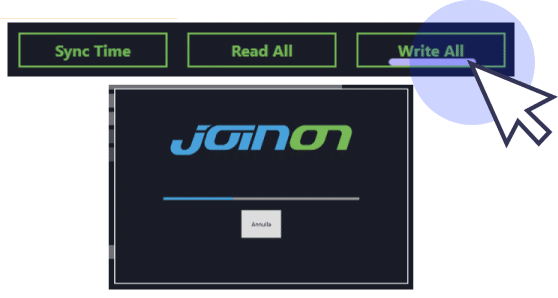
Now reboot the charge point. This should connect your charge point to Monta's backend.
10. Connecting the charge point to your Monta account
Now you need to add and connect your charge point to your Monta account.
You can do this through either Monta Charge or Monta Hub.
