Please note that when you connect your charge point to Monta, we become the operator of the charge point. This means that you need to use Monta to control the charging process.
1. Prerequisites
Before you begin the installation of your charge point there is information you need to retrieve from the configuration label. The configuration label is in a pouch attached to the installation materials. On the label you will find the following information:
Default SSID: This is a series of numbers, which is the wifi name that your charge point creates
Default Hotspot password: This is the password for the wifi that your charge point has created
WebUI default username & WebUI default password: These are the credentials that you need for logging in for the first time to setup the charge point
2. Login to the Web User Interface
The first thing you need to do is to connect your device to the WiFi that your charge point is emitting. To do so, find the WiFi created by your charge point (Default SSID) and insert the password (Default Hotspot password).
There will be an IP address called WLAN Hotspot IP address. On your device, open up a browser and type in the IP address.
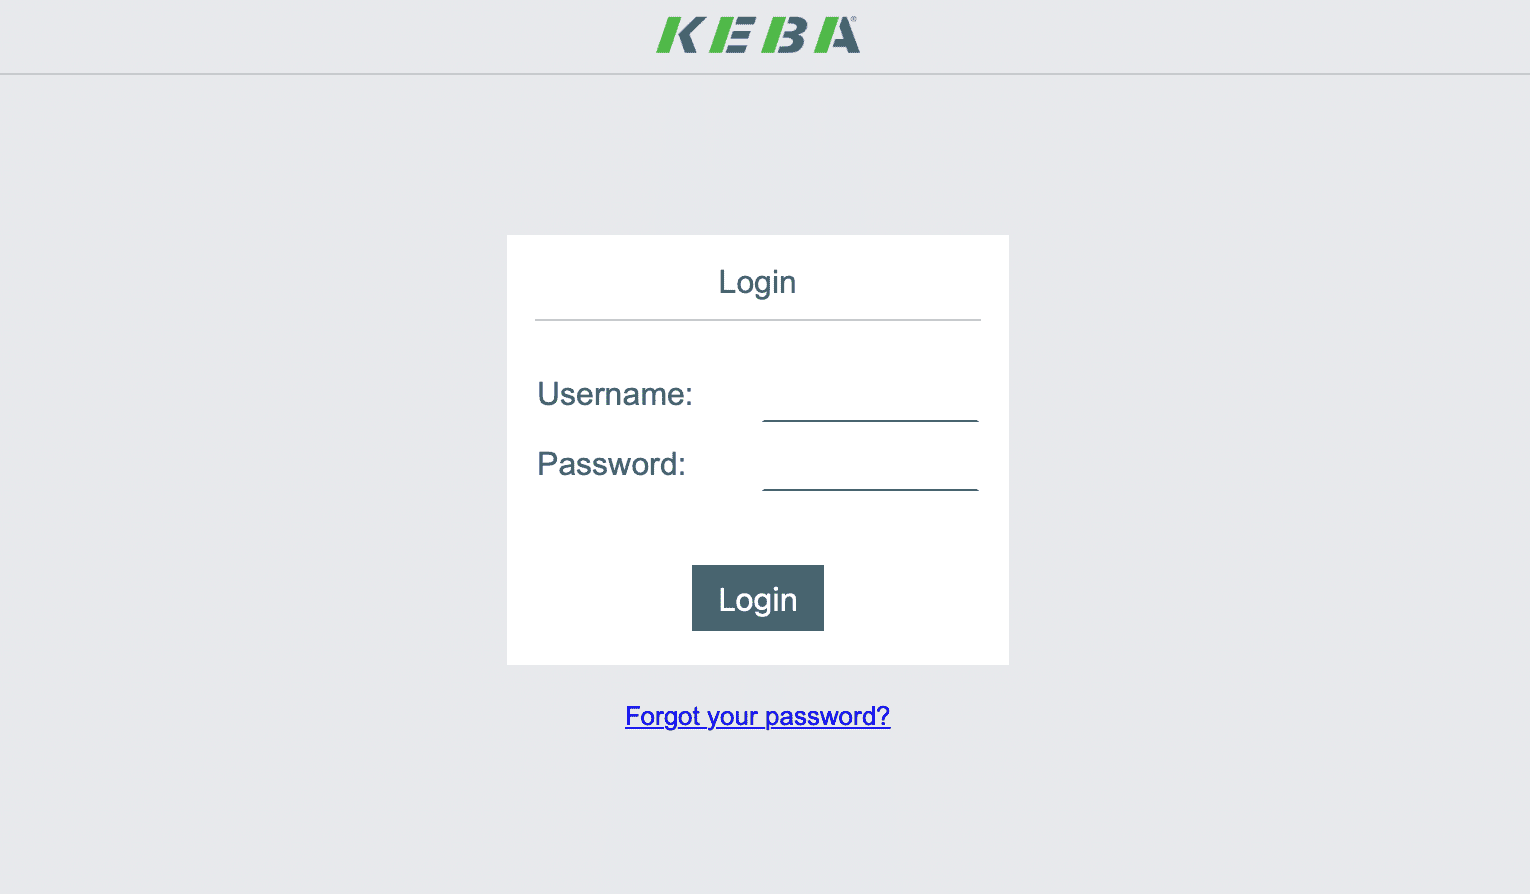
3. Enter the login credentials
Here, you need to use the WebUI default username & WebUI default password that you have retrieved from the configuration label of the charge point.
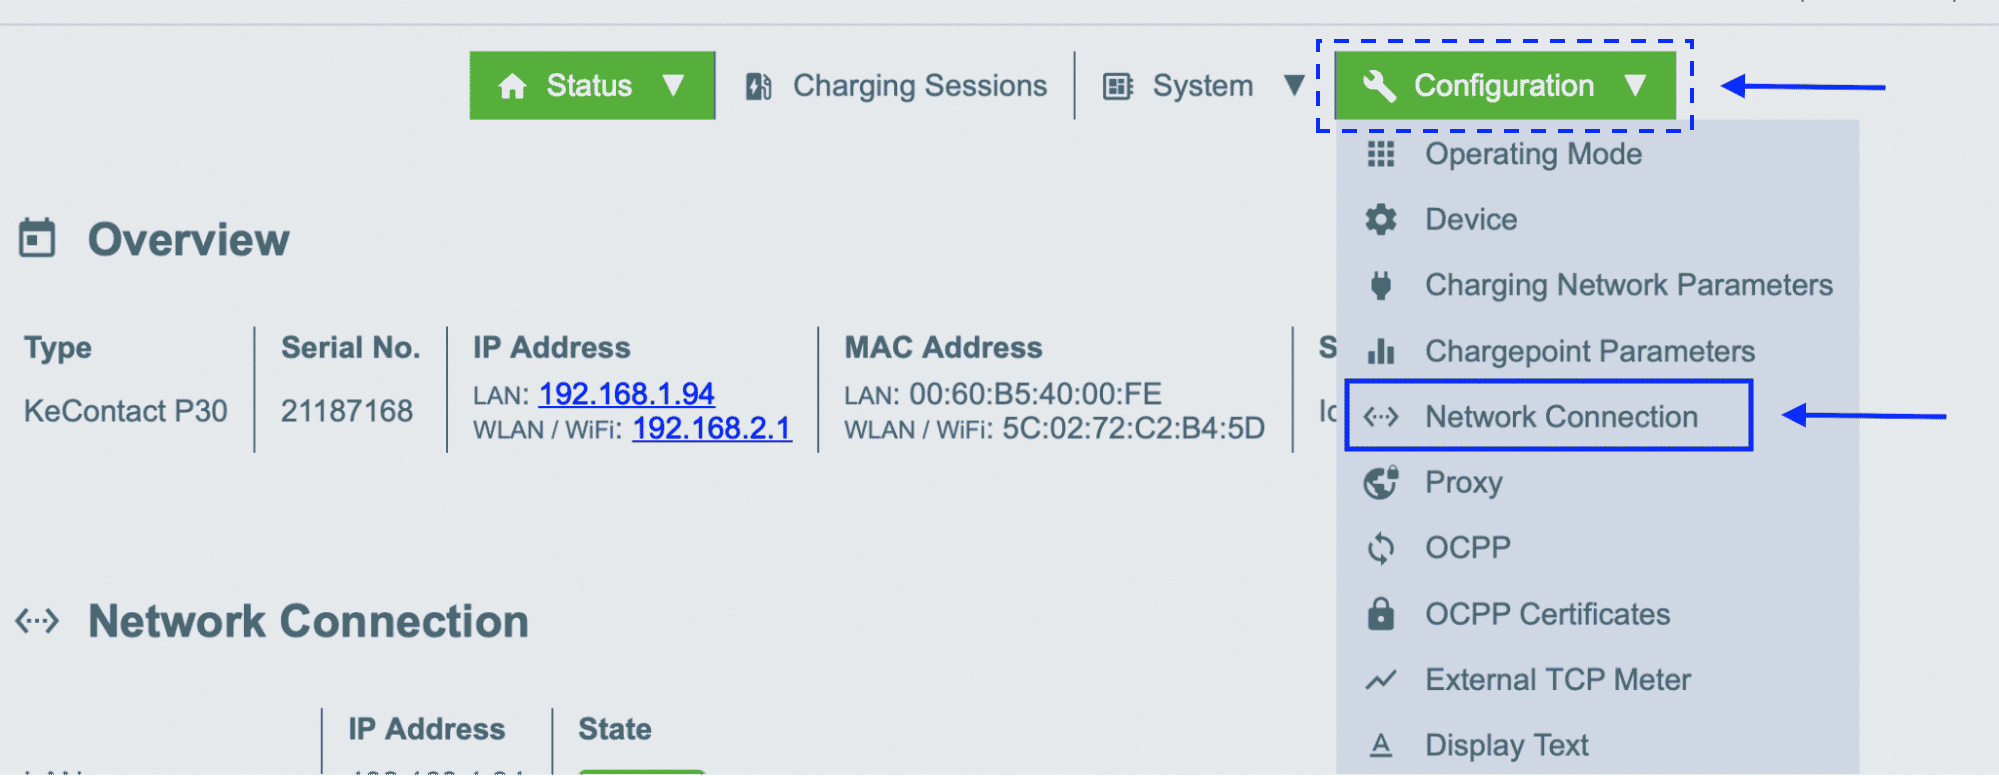
4. Hover over "Configuration" and select "Network connection"
5. Adjust the Network Configuration settings
Once you enter the Network Configuration of the charge point you need to adjust the settings.
Switch the WLAN/WiFi toggle to "ON"
After that you need to press the refresh button next to the "Available Networks" field.
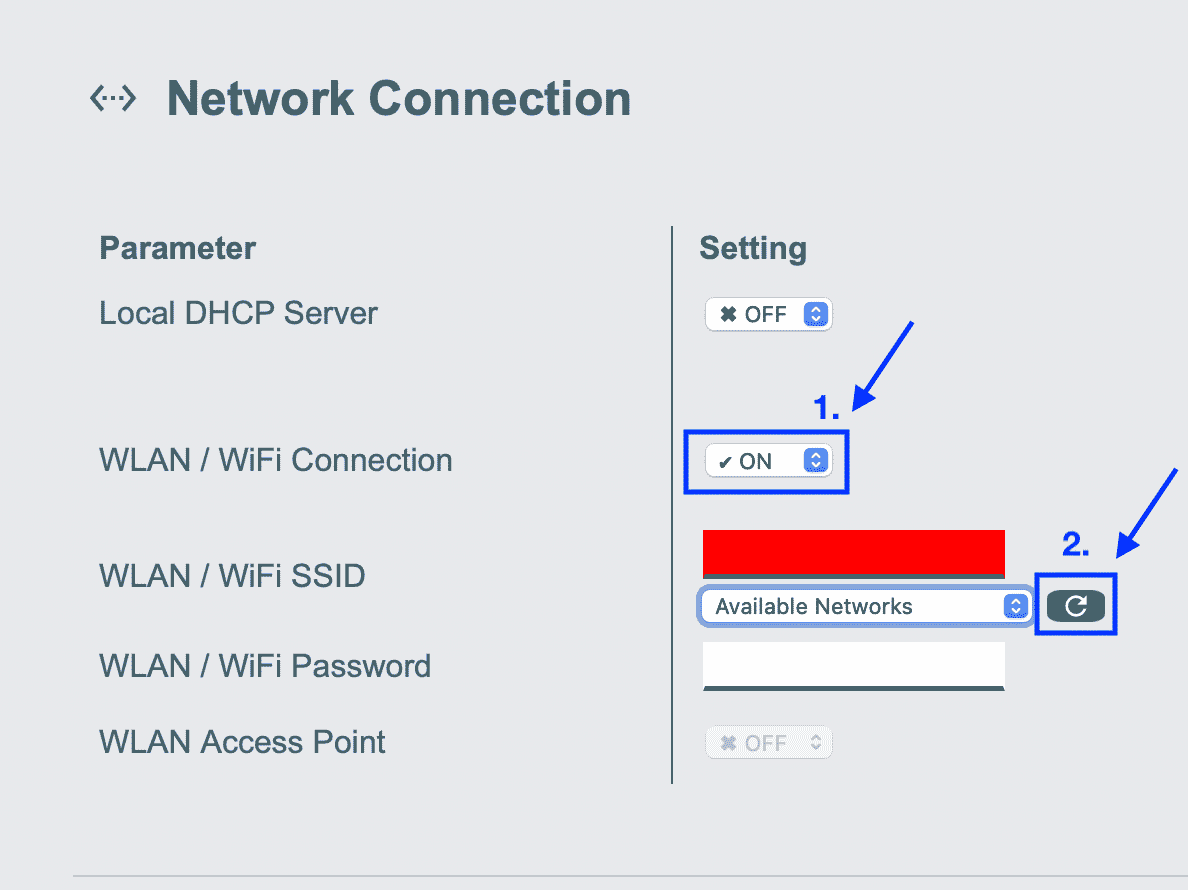
The next step is to put in your own WiFi's details:
WLAN/WiFi SSID: Select your wifi name from the drop down menu
WLAN/WiFi Password: *Your wifi's password*
6. Hover over the configuration button again and select "OCPP"
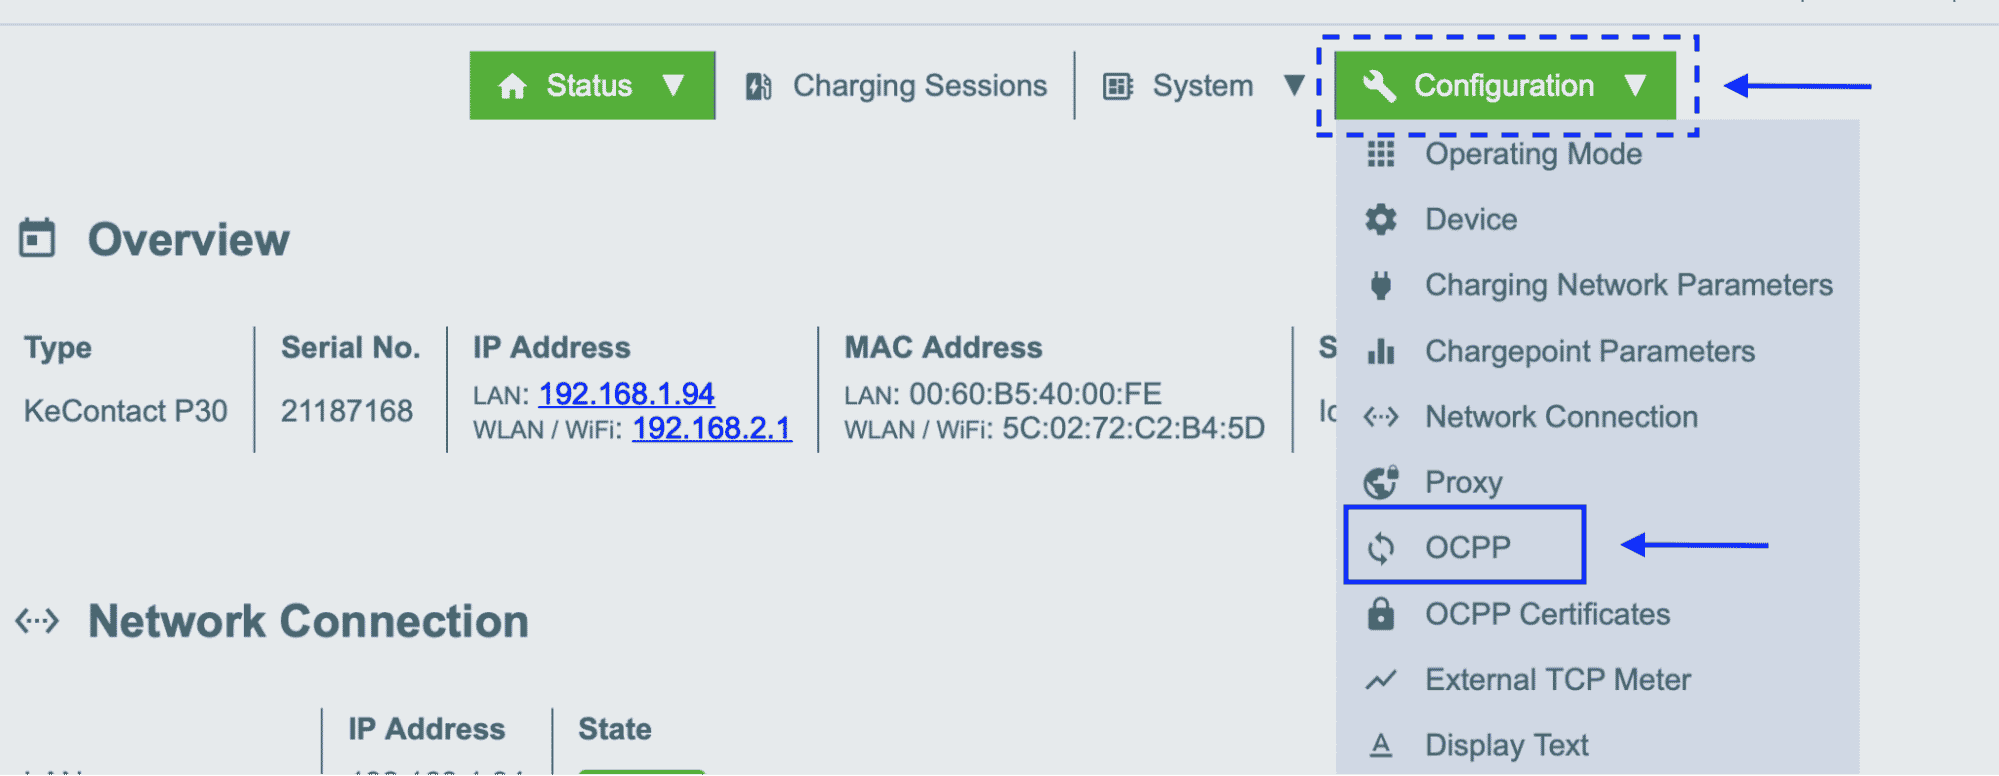
7. Adjust the OCPP Settings
Here are the details that you need to enter:
OCPP Communication type: 1.6 JSON
Central System Hostname: ocpp.monta.app
Centra System Port: 443
Secure Central System Connection: ON
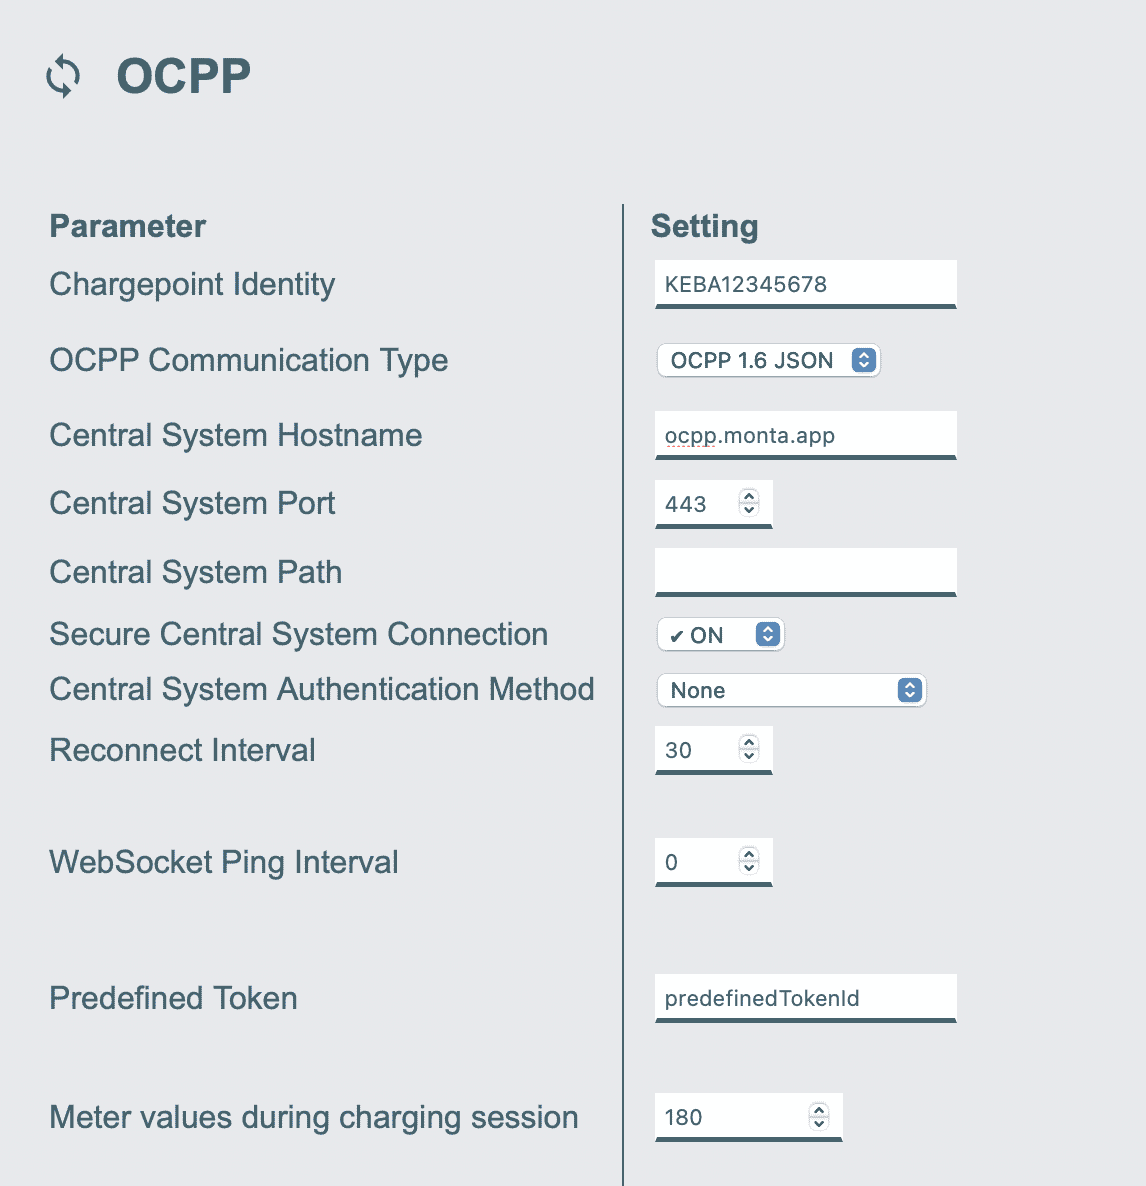
Write down the Charge point Identity, as it will be needed when connecting your charge point to Monta.
If the field is empty, input KEBA followed by the serial number (i.e KEBA12345678)
8. Save and check
Save the made changes and check whether the charge point is connected to OCPP server in the status section.
The charge point may require a reboot if the settings aren't saved.

If your charge point is connected to the OCPP server you can continue connecting it to Monta.
If the charge point still can't connect to Monta, make sure to check the firmware version of the charge point. There is an issue with connecting to backends, that was fixed in 1.16.1 and 1.17.000, so update the firmware version, if the version is lower than these.
9. Connecting the charge point to your Monta account
Now you need to add and connect your charge point to your Monta account.
You can do this through either Monta Charge or Monta Hub.
