Please note that when you connect your charge point to Monta, we become the operator of the charge point. This means that you need to use Monta to control the charging process.
1. Connecting to WebUI
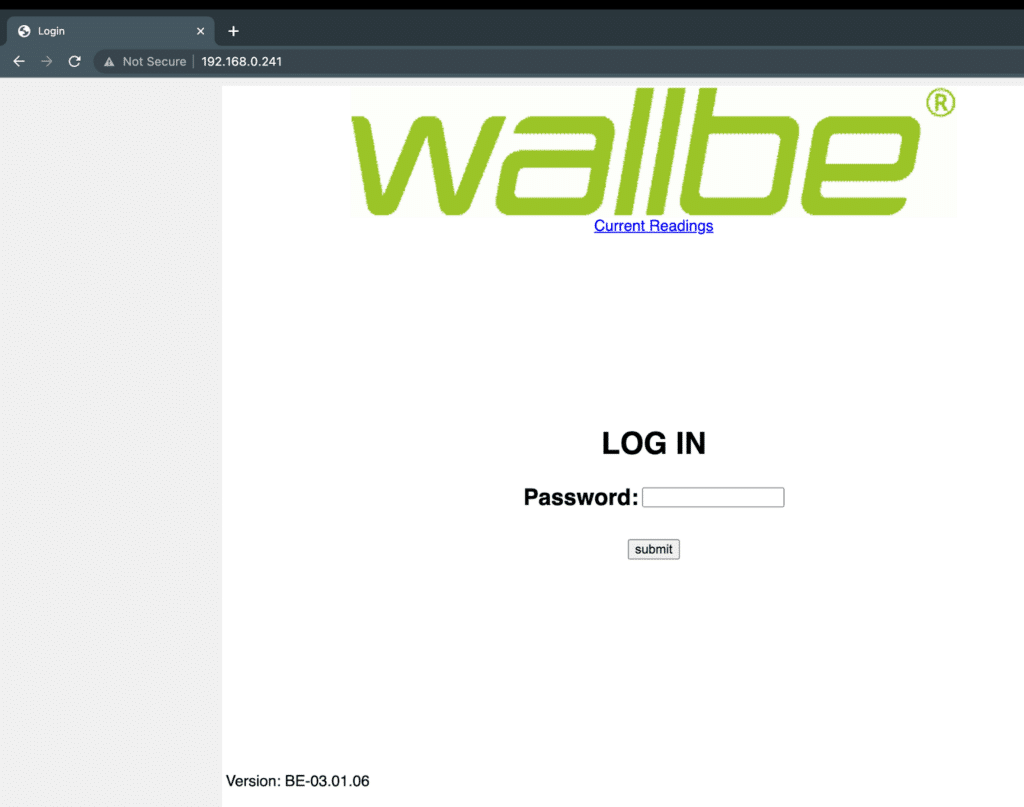
Connect to the unit by opening it, then locate and connect with Ethernet to the charge controller on top of the box, and go to 192.168.0.241. You will see this page.

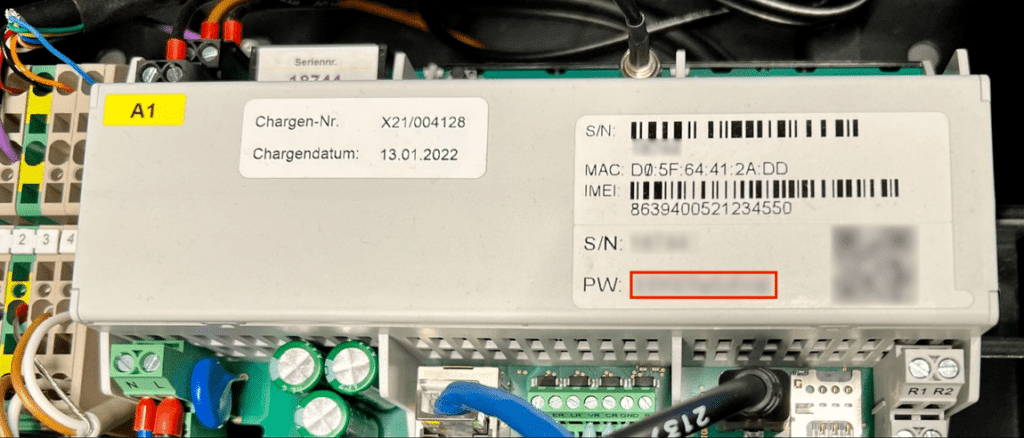
Login with the password, which is located on the charge controller as “PW: XXXXXXXXX”.

You should now be logged in sucesfully!
2. Configuring Network
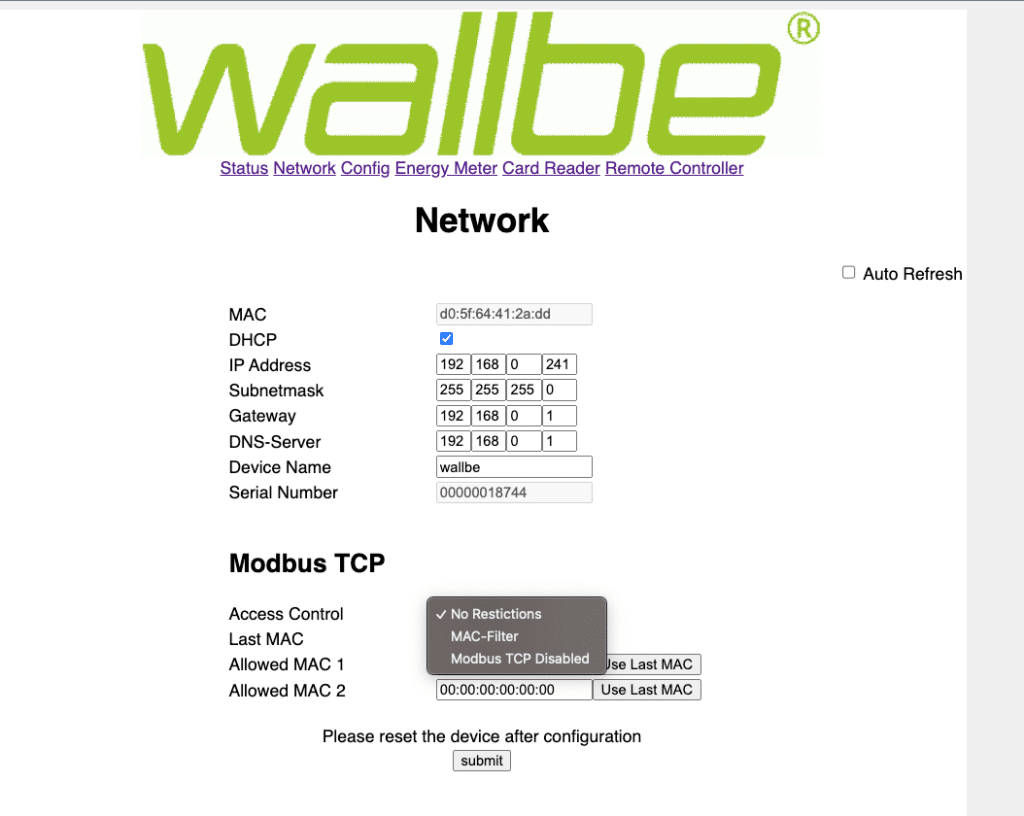
Press the “Network” tab.
Enable DHCP if required in your network environment.
Make sure the “Modbus TCP” access control is set to “No Restrictions”, and press “Submit”.

Scroll down to the bottom and click “Reset”
- Wait a few moments and login again
3. OCPP configuration
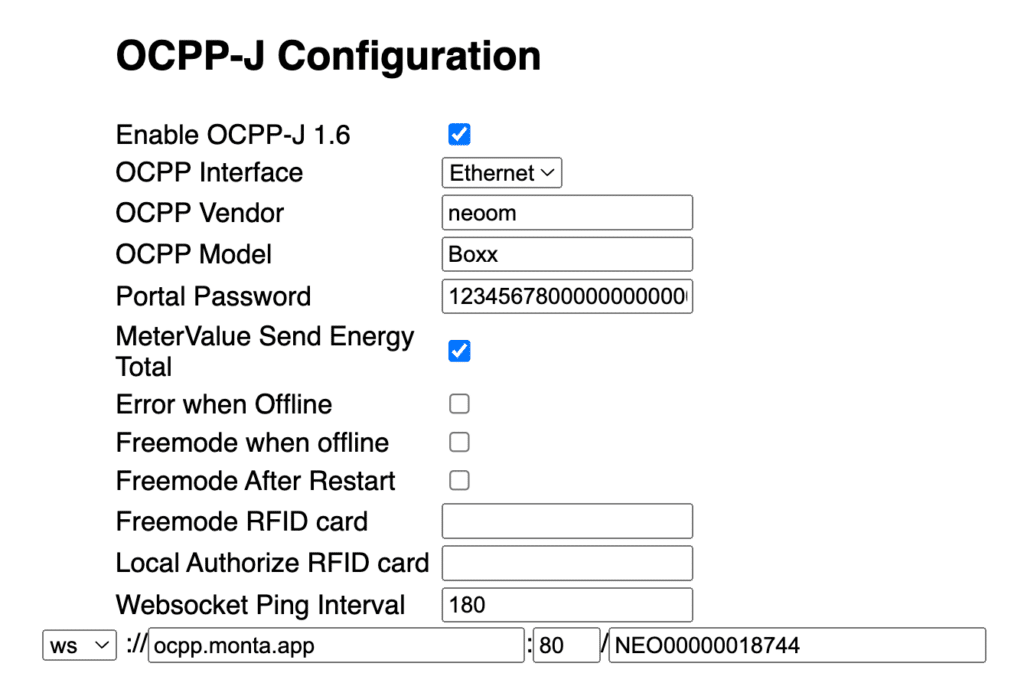
Scroll down to the bottom of the “Network” tab and enter the following:
OCPP Interface - “Ethernet” (if cable) or “Modem” if cellular. (If modem is present please enter SIM settings under “External SIM”)
OCPP Vendor - “neoom”
OCPP Model - “Boxx” (or according to which Neoom you are configurating)
Portal Password - “12345678000000000000”
MeterValue Send Energy Total - Yes
Error when offline - No
Freemode when offline - No
Freemode after Restart- No
Freemode RFID card - *blank*
Local Authorize RFID card - *blank
Websocket Ping Interval - 180
ws://ocpp.monta.app:80/NEO{YourSerial}
The serial can be found under “Status” tab, such as “00000018744”.
Press “Submit”, then “Reset”.

After a brief while, the charge point should now be connected to Monta.
4. Connect the charge point to your Monta Account
Now you need to add and connect your charge point to your Monta account.
You can do this through either Monta Charge or Monta Hub.
