Please note that when you connect your charge point to Monta, we become the operator of the charge point. This means that you need to use Monta to control the charging process.
1. Change your network settings
Here you need to change the network settings of your computer, according to the charge point's local IP.
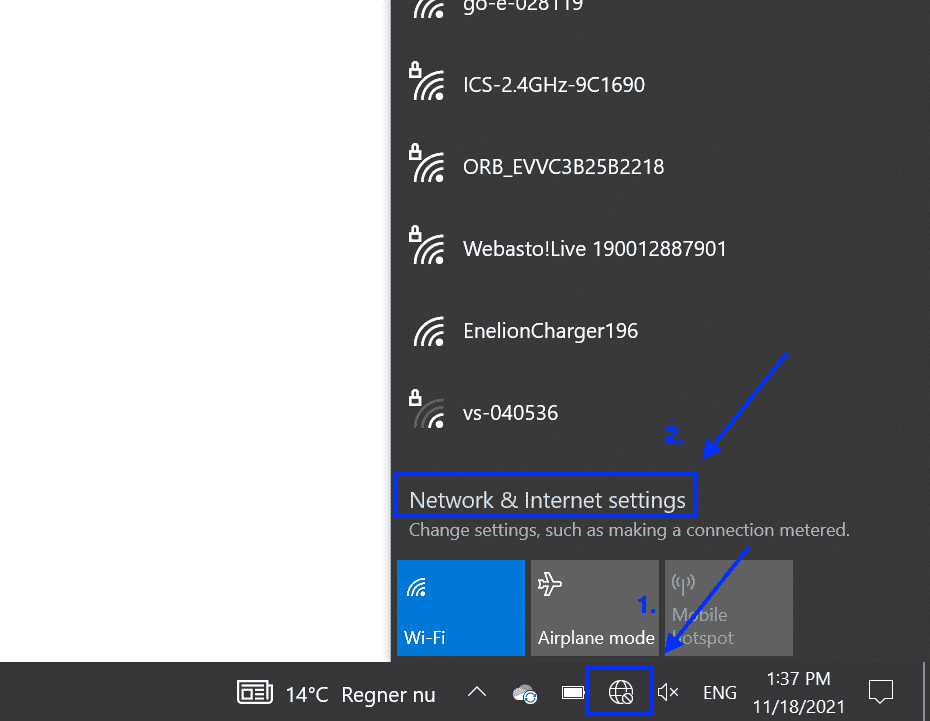
To do so, click on the Internet icon in the bottom-right corner of your computer screen. From there, open the "Network & Internet Settings" of your device.
2. Select "Change adapter options"
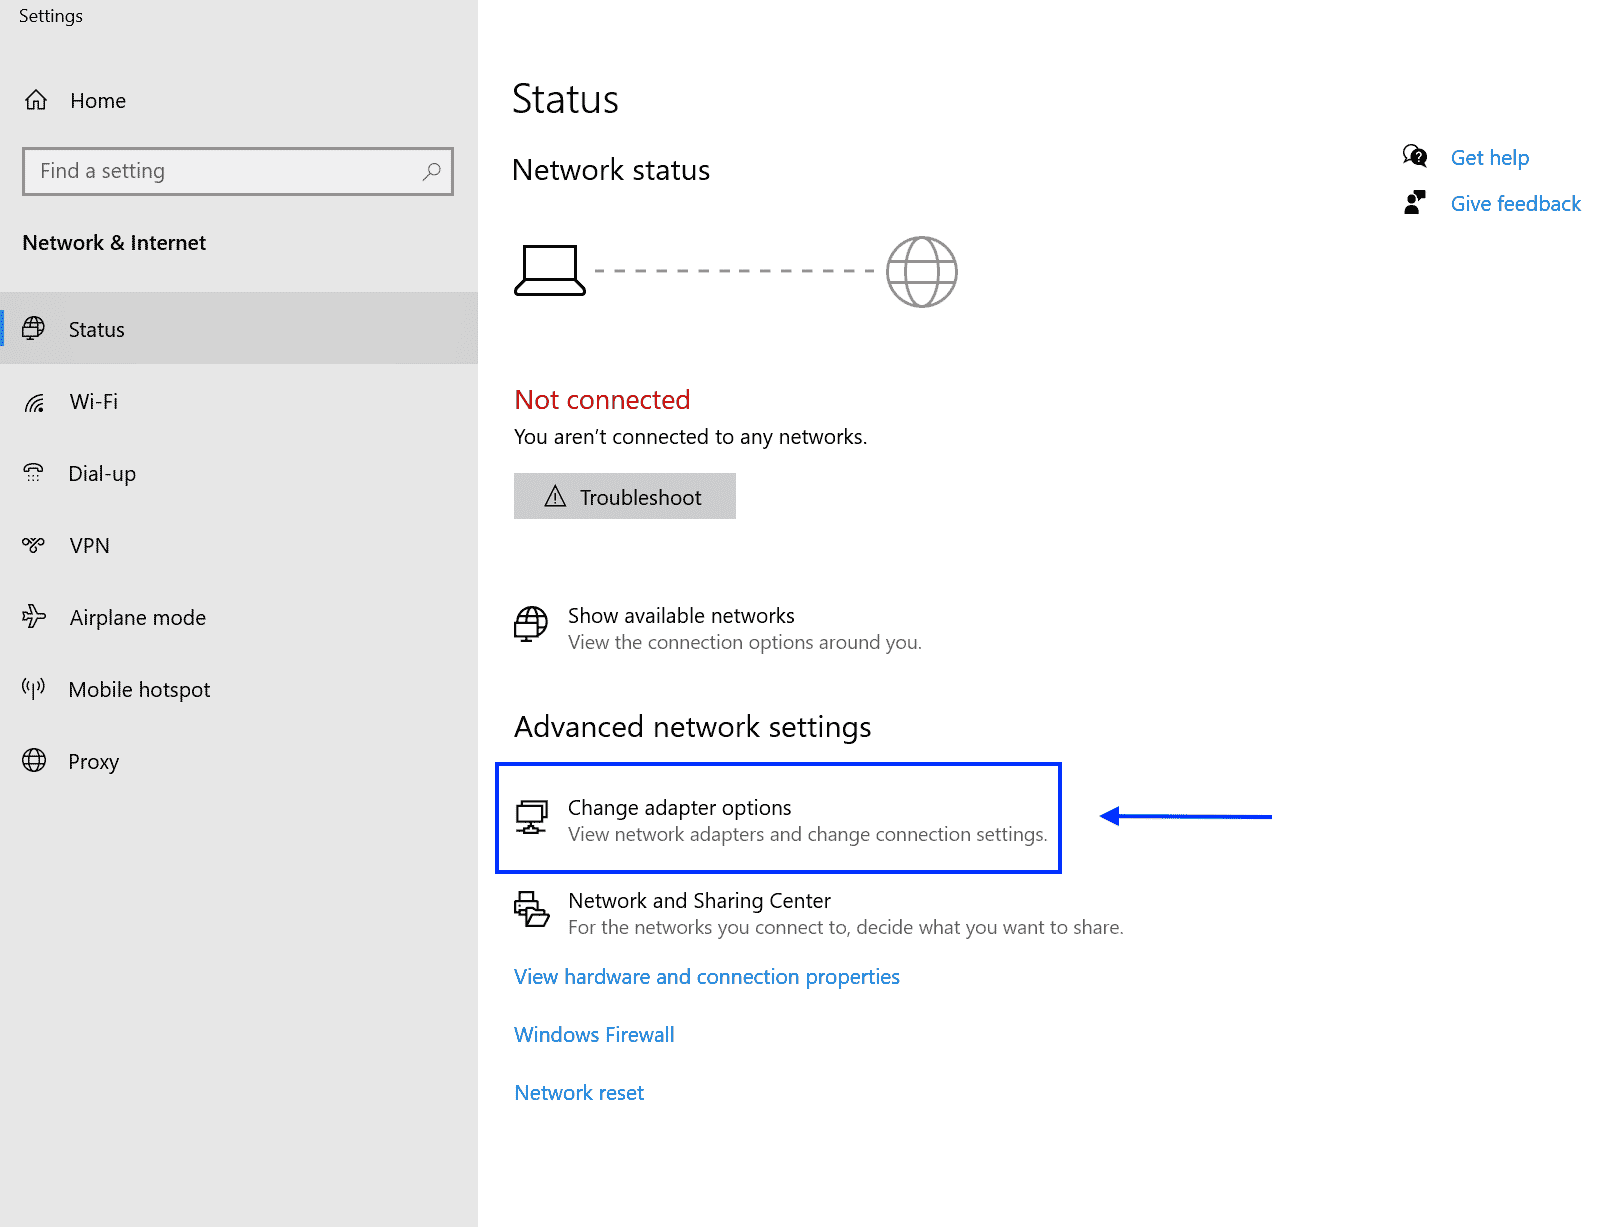
Select "Change adapter options", located in the Advanced networks settings.
3. Right-click on "Ethernet adapter" and select "Properties"
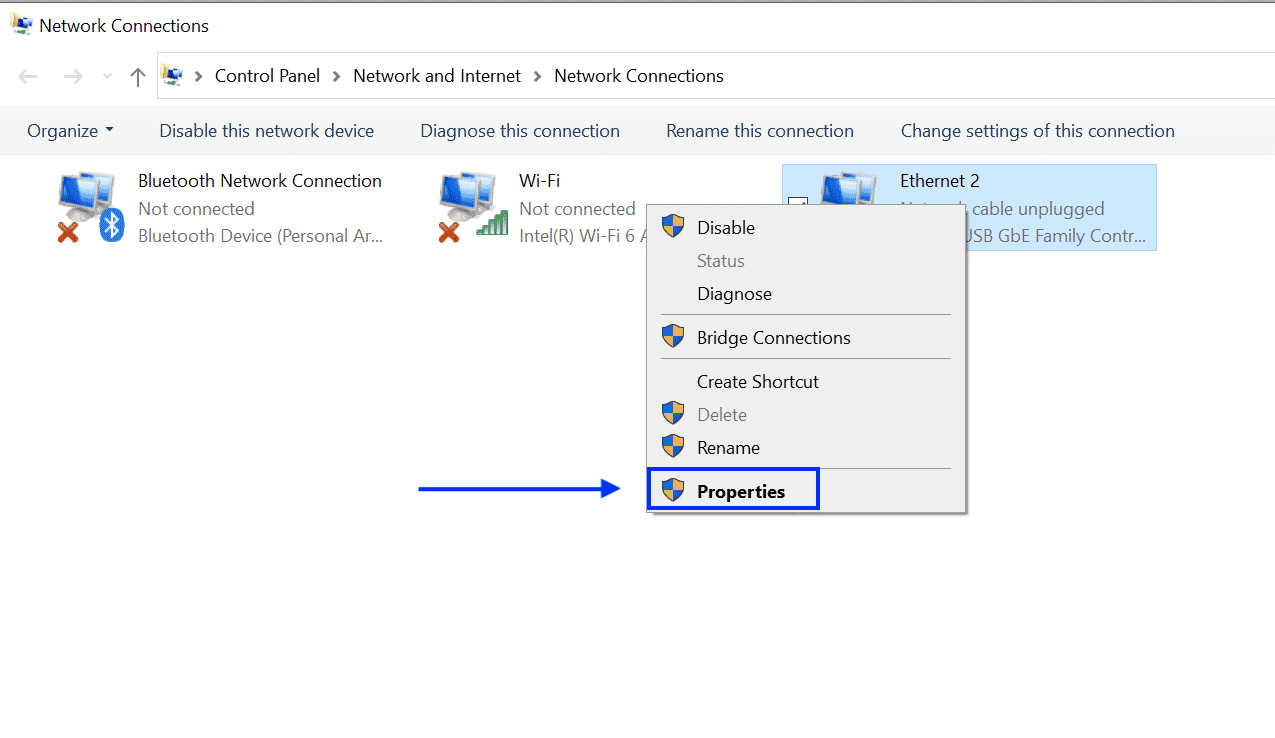
Once you enter the "Change adapter options", find the Ethernet adapter, right-click on it, and select "Properties".
4. Find and select "Internet Protocol Version 4 (TCP/iPv4)" and click on "Properties"
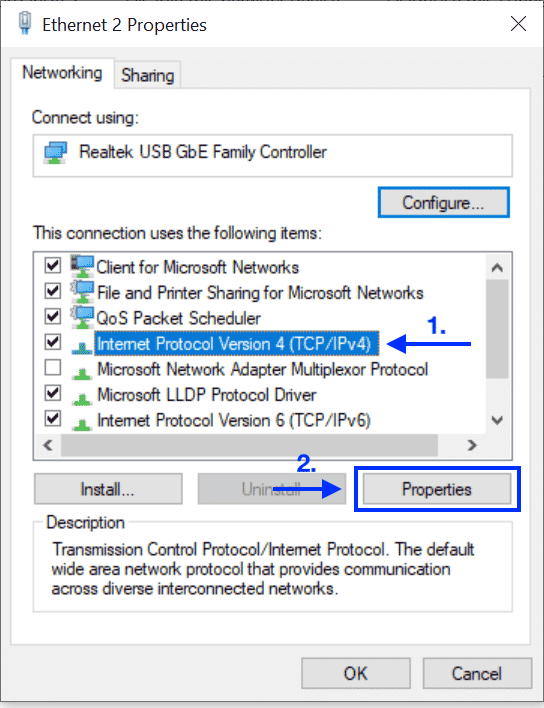
In "Ethernet Properties", find the Internet Protocol Version 4 (TCP/iPv4), click on it, and press "Properties".
5. Select and fill out "Use the following IP addresses"
Once you are there, select "Use the following IP addresses", if not selected, and enter the values as following:
IP address: 192.168.1.x
*Please note that x can be any value between 1 and 255, except 5. This can be seen in the example below, where the value of x is the number 4.
Subnet Mask: 255.255.255.0
Default gateway: 192.168.1.10
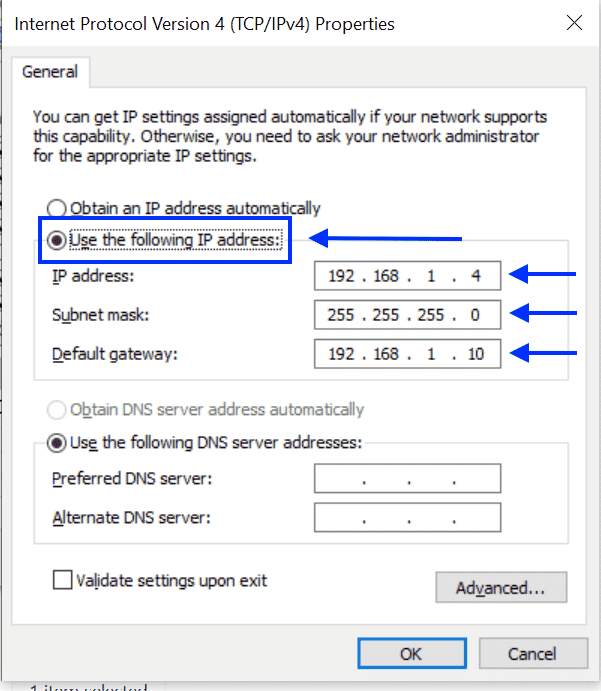
After putting in the values, click on "OK" and close the window.
6. Open your browser to 192.168.1.5:8080
Open up the browser, type in the IP 192.168.1.5:8080 in the URL field and hit enter.
Once this page opens up, you need to log in. The account password is: 12345678

When you click on "Submit", you will enter the Web Interface of the charge point.
7. Adjust the charge point's settings
Enter the following details:
WiFi SSID: Change it to match your WiFi name. Please note that it must be exactly the WiFi's name, including special symbols or spaces if relevant.
Server URL: ws://ocpp.monta.app:80
Authentication Key: Eight times capital F: FFFFFFFF
Charge Mode: 1
WiFi Key: *your WiFi password*
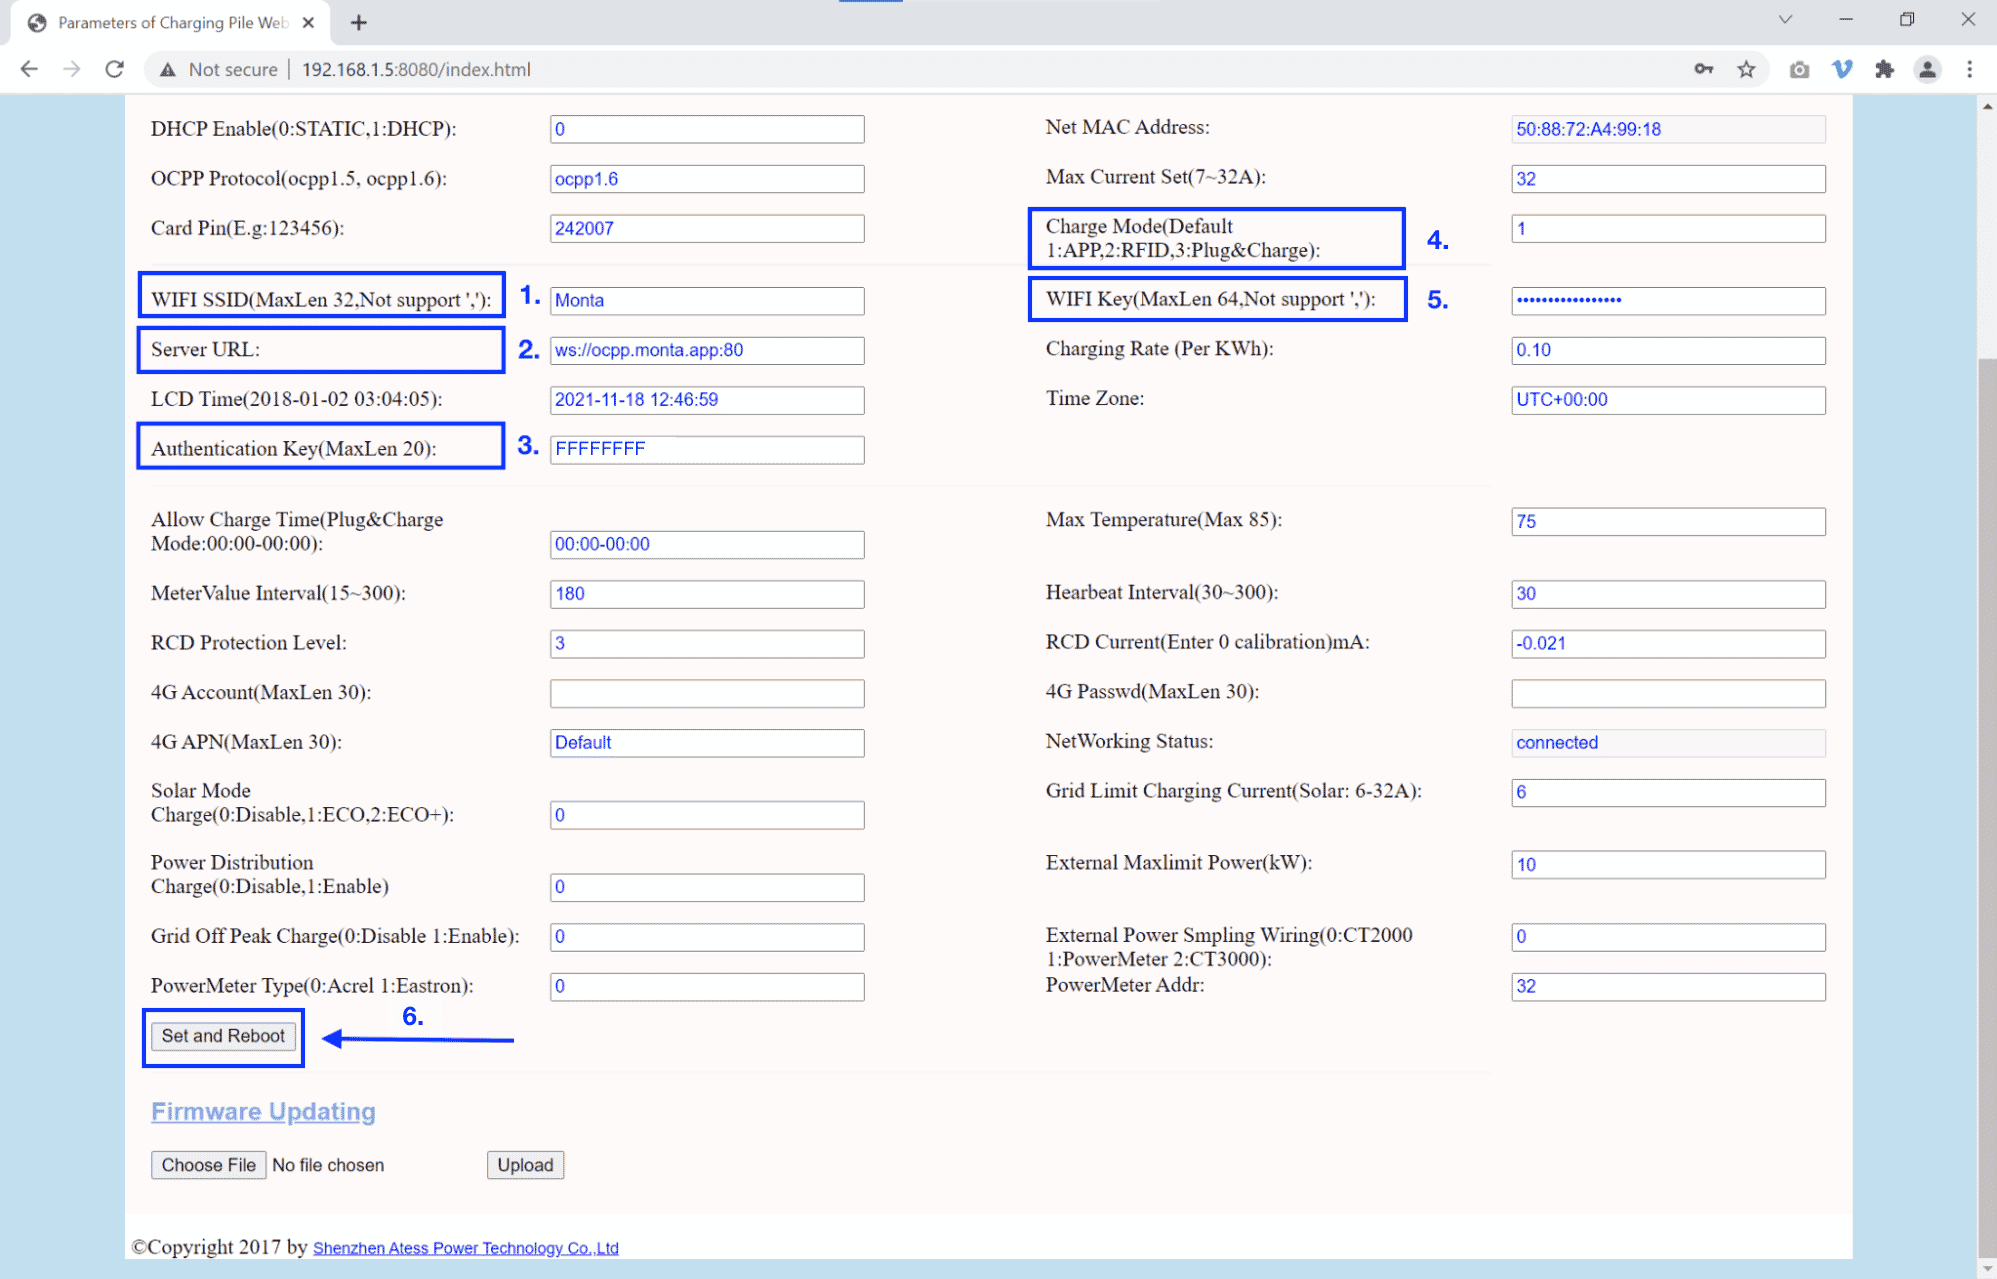
After you have filled out the information, click on "Set and Reboot".
Charge point should reboot now.
Please note: After refreshing, the browser might remove the ":8080" in the address, in which case you need to add it again. 192.168.1.5:8080
The rest of the process takes place in Monta.
8. Connecting the charge point to your Monta account
Now you need to add and connect your charge point to your Monta account.
You can do this through either Monta Charge or Monta Hub.
9. Troubleshooting
If you can not connect the charge point to Monta at the verification step, please try the following:
a. Switch the OCPP url back to ProjectEV [ws://projectevcharger.com:80/ocpp/ws]
b. Check the ProjectEV app
c. If it’s not visible, the charger is not connected to the internet properly.
➡️ In this case, please connect your charge point to the internet and try again.
d. If it’s visible, the problem is the firmware is not compatible with Monta.
➡️ In this case, please contact ProjectEV, so they can update the firmware of your charge point.
e. Some of the ProjectEV models are using ws://ocpp.monta.app as OCPP URL such as EVA-07D and EVA-22D
