Please note that when you connect your charge point to Monta, we become the operator of the charge point. This means that you need to use Monta to control the charging process.
1. Download the Schneider app on your phone
First, you need to download the app "eSetup for Electricians" from Google Play store or Apple Store.
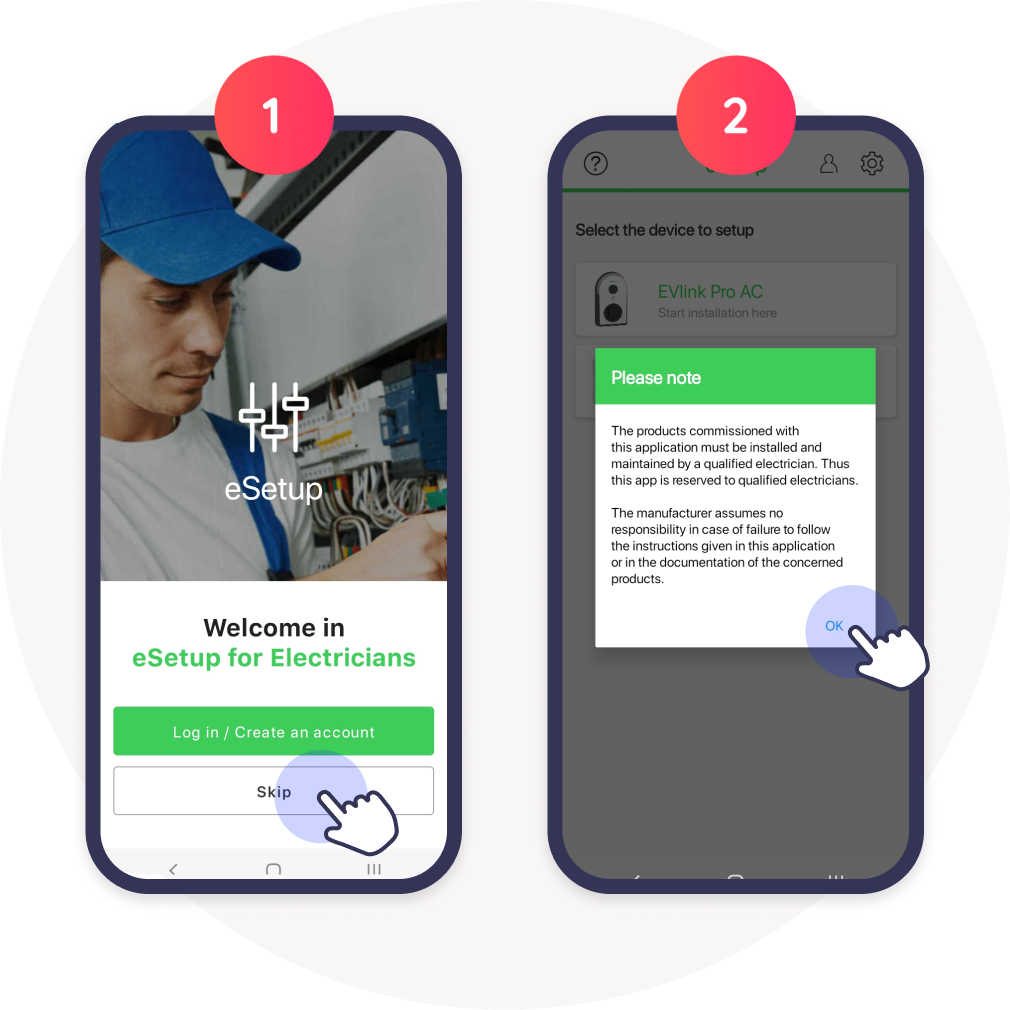
2. Open the app
You can click on "Skip" for the account creation, as it is not necessary for the installation.
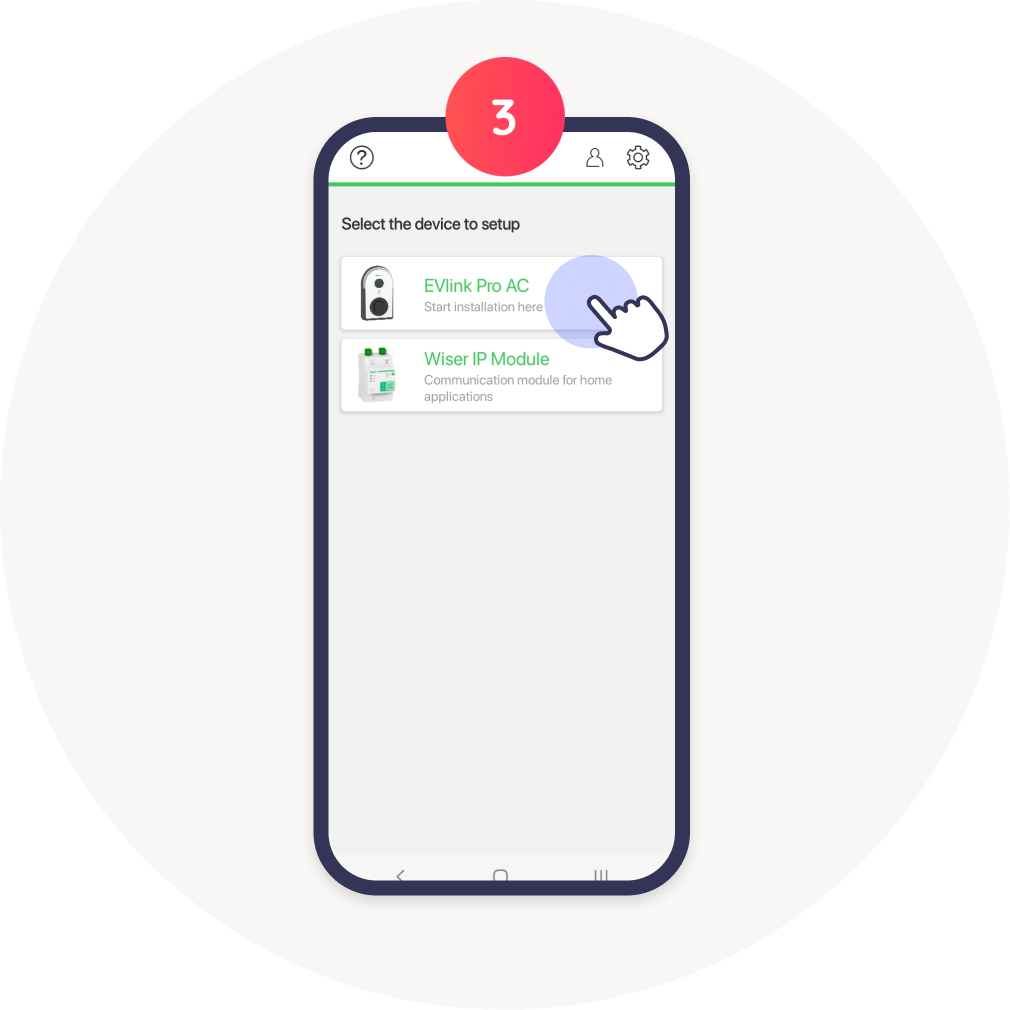
Then, you need to accept this manufacturer note, by clicking on "OK".
On the next screen, select "EVlink Pro AC".
3. Connect to the charge point via Bluetooth
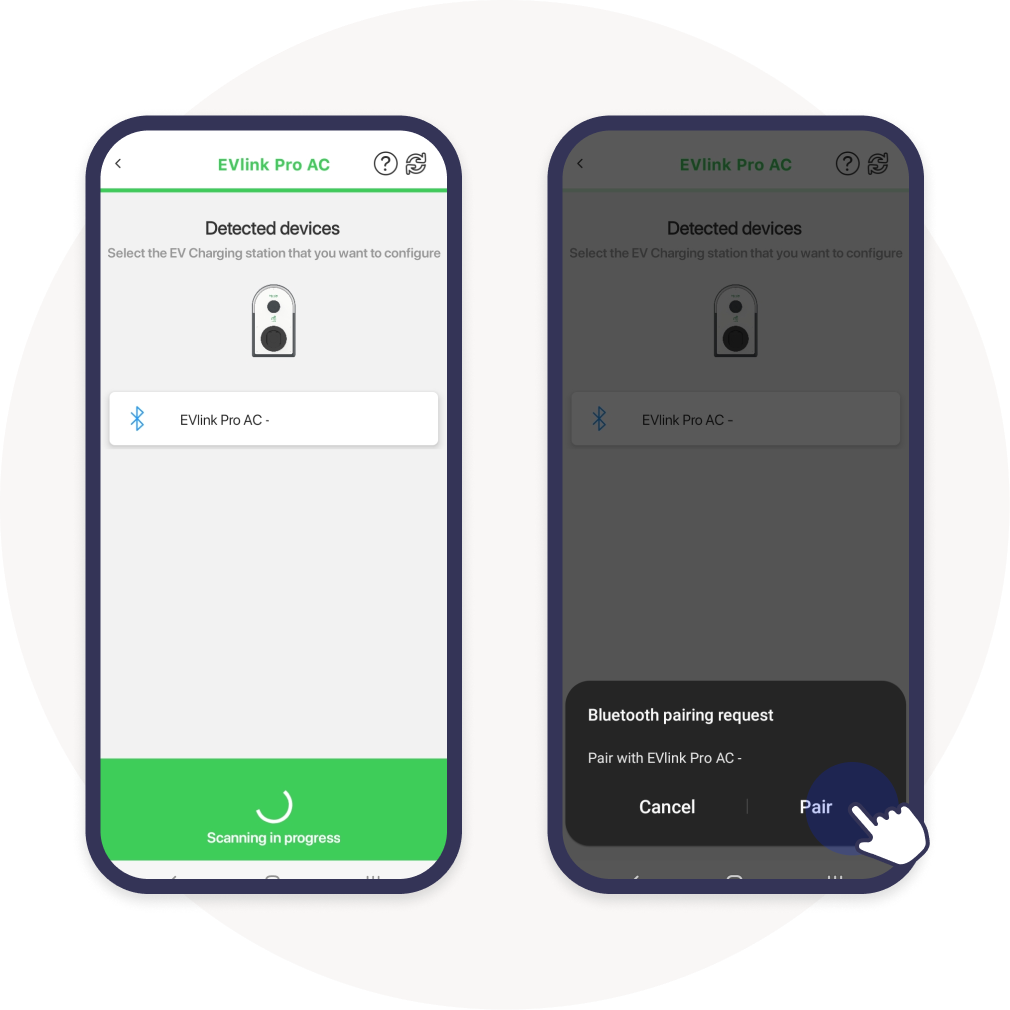
Connect to the device using Bluetooth. The app might ask for permission to enable Bluetooth, search, pair etc. You need to accept to connect to the unit.
Please note that the Bluetooth signal of the charge point stays on only for 2 hours, after first time you power it up. If your phone cannot find the charge point, please follow the troubleshooting steps in the hardware manual of the charge point.
4. Create a pin for the charge point
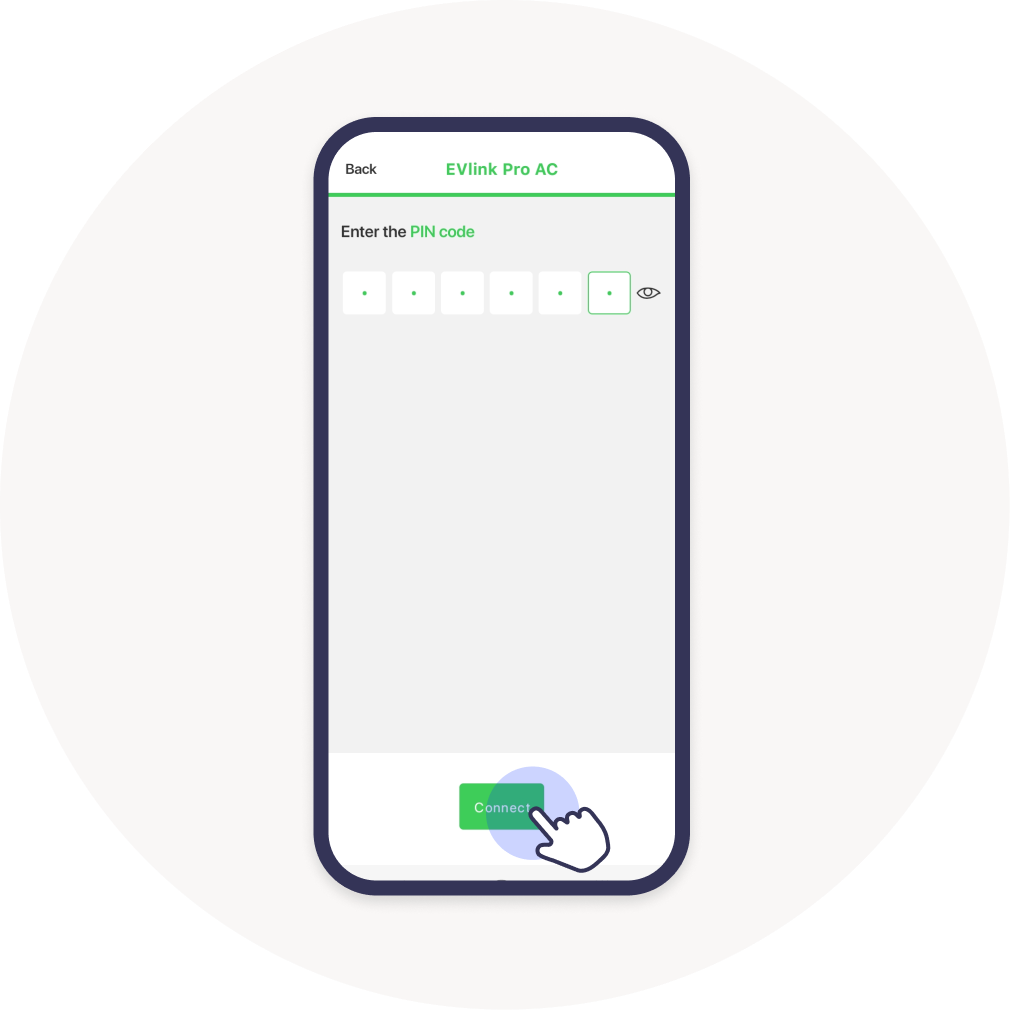
At this stage, you need to create a pin and enter it.
Important! Do not lose this pin!
The recovery of the pin is very hard. If you need to recover a pin, you can find instructions in the charge point manual.
5. Connect the charge point to the Internet
Please note that these units only support wired LAN connections.
Select the "Configuration" tab and click on "Network settings".
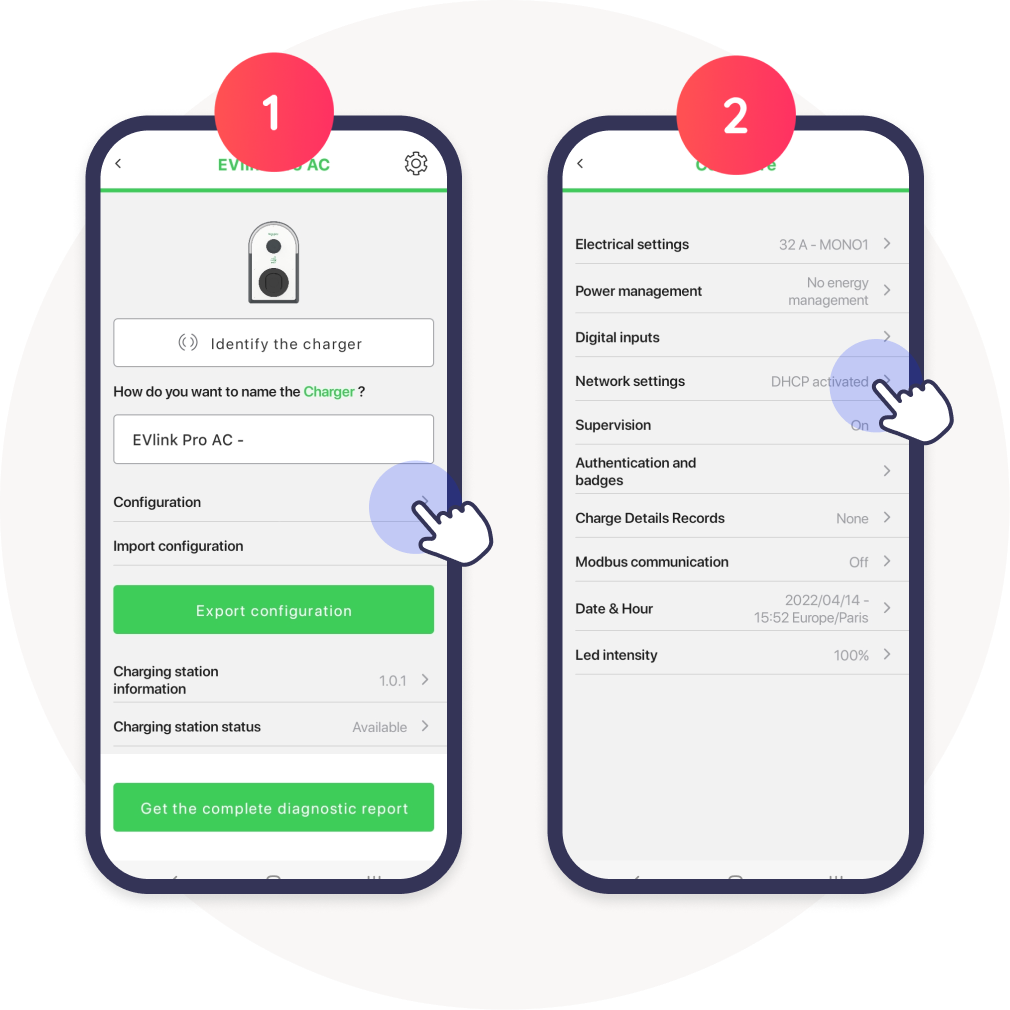
Select the network settings for the installation
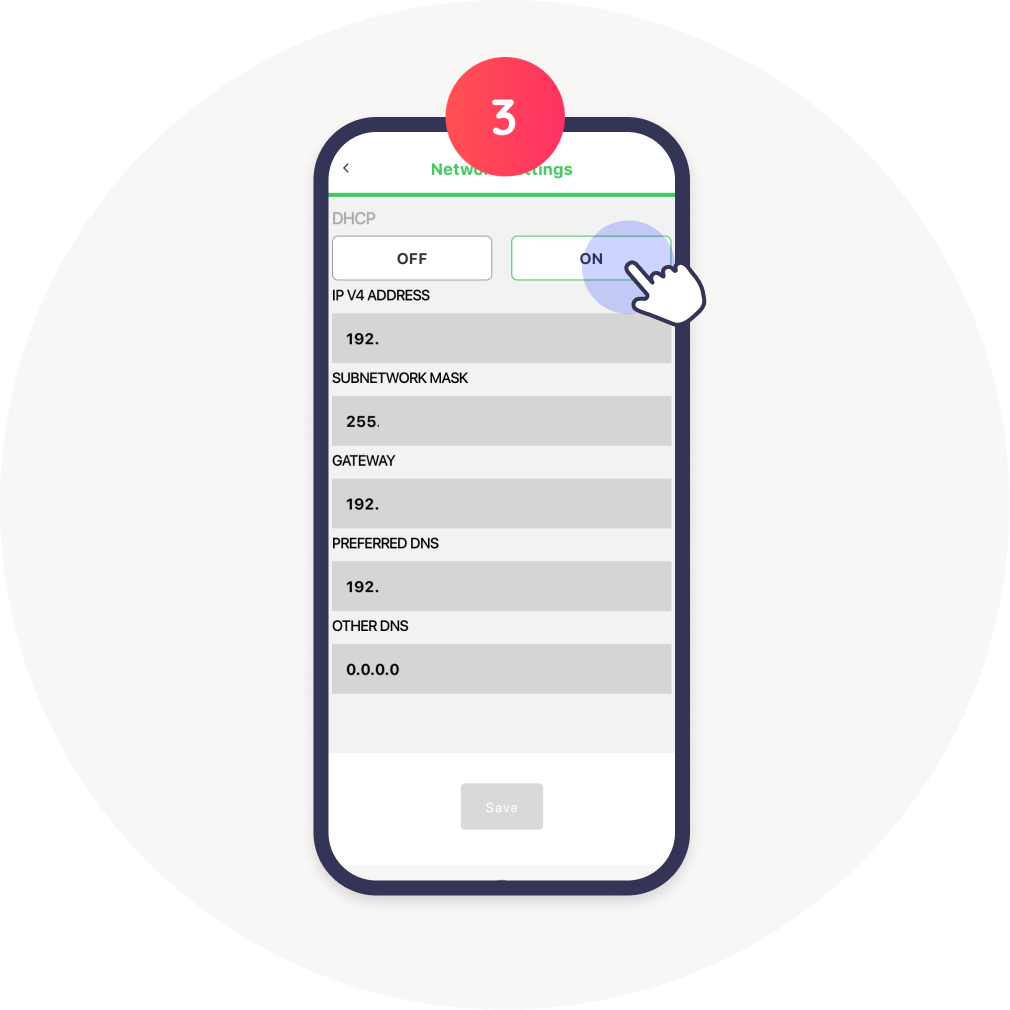
Here, you need to select the correct network settings for your installation. In most cases, it is "DHCP". Make sure it is set to "On". The charge point will then automatically obtain an IP address from the router it is connected to.
Click “Save” if you made any changes.
6. Connect the charge point to the Monta OCPP server
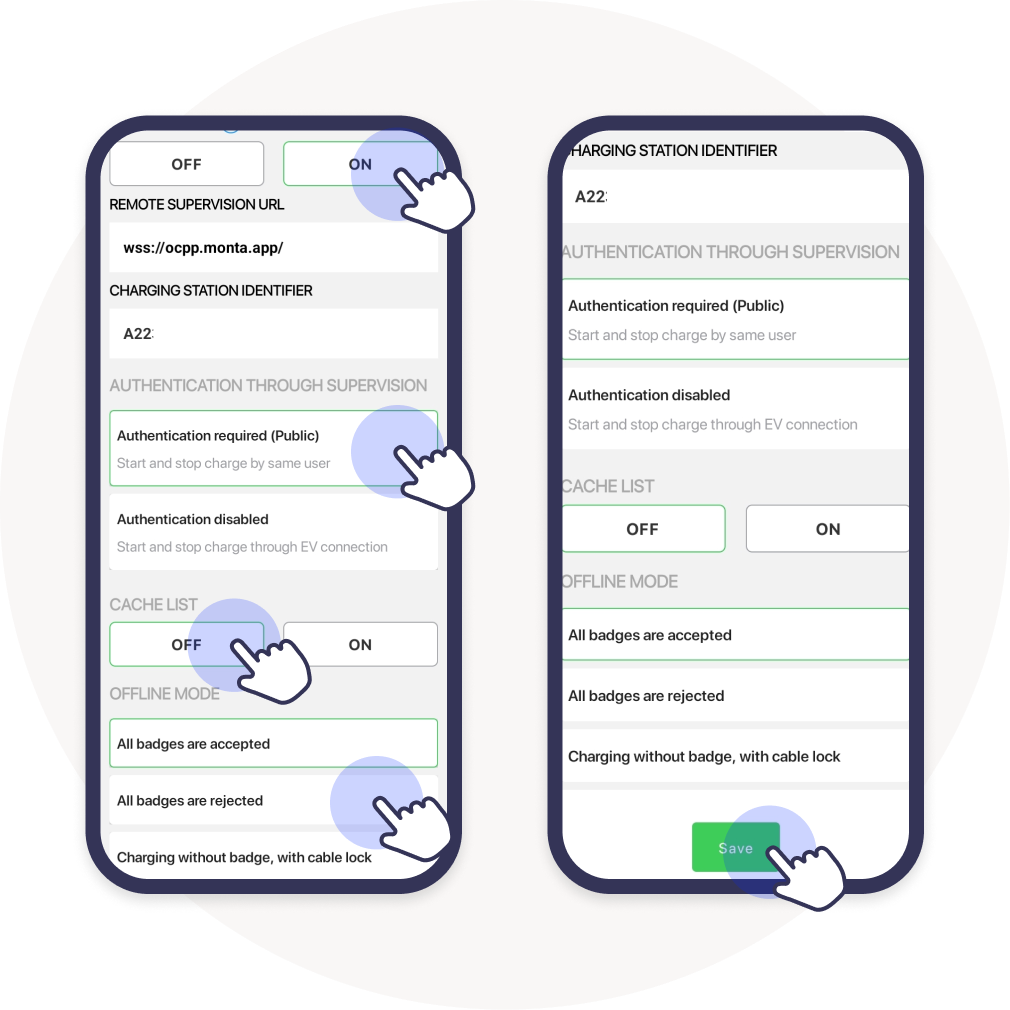
From the main menu, select the “Supervision” tab and set it to "On".
Remote supervision URL: wss://ocpp.monta.app/
Charge Point Identifier: AXXXXXXXXXXX
Please only include the serial number of the charge point, with no extra characters.
Make sure to select "Authentication Required (Public)”.
Cashe list: Off
Offline mode: Here, you can select an offline mode by your choice. To avoid users charging for free if charge point loses connection, set to “All badges are rejected”.
Click on "Save" to conclude the process.
7. Connecting the charge point to your Monta account
Now you need to add and connect your charge point to your Monta account.
You can do this through either Monta Charge or Monta Hub.
