Please note that when you connect your charge point to Monta, we become the operator of the charge point. This means that you need to use Monta to control the charging process.
1. Configuring the charge point
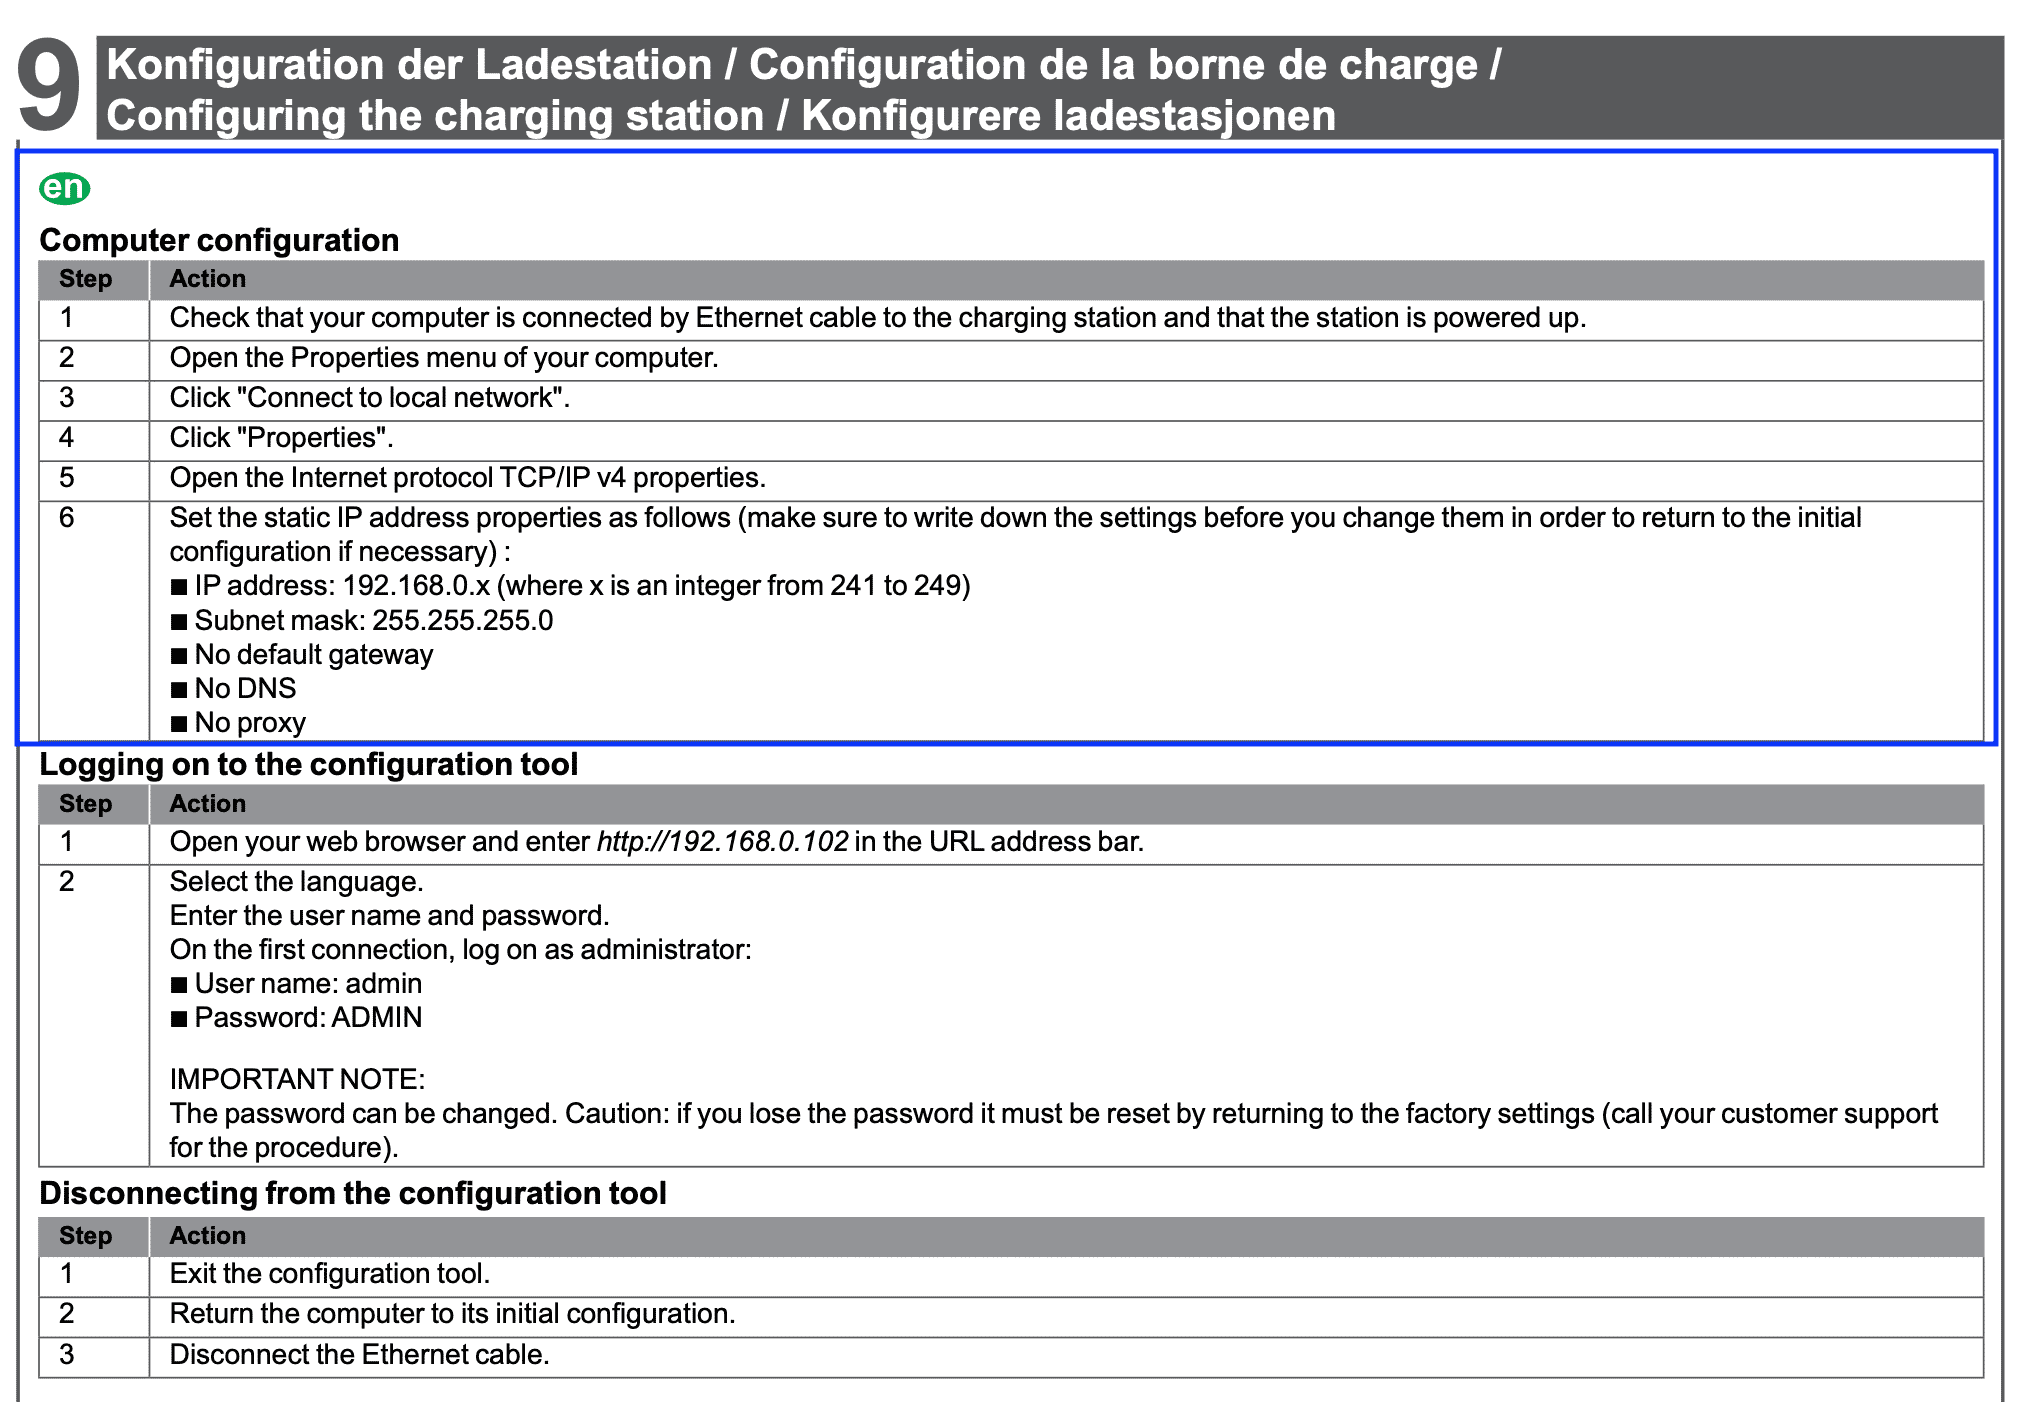
Scan the QR code on your charge point, which will direct you here for a step-by-step guide for Schneider charging box installation. Click on "Documentation" and then "Product Documentation". Scroll down to an instruction sheet and click on: EVlink Smart Wallbox - EVB1A22P - Installation guide. In page 35 you will find all the steps for configuring your charge point.
2. Connect your computer to the charge point by an Ethernet cable
After you have connected your computer with the charge point, set the static IP address properties as follows:

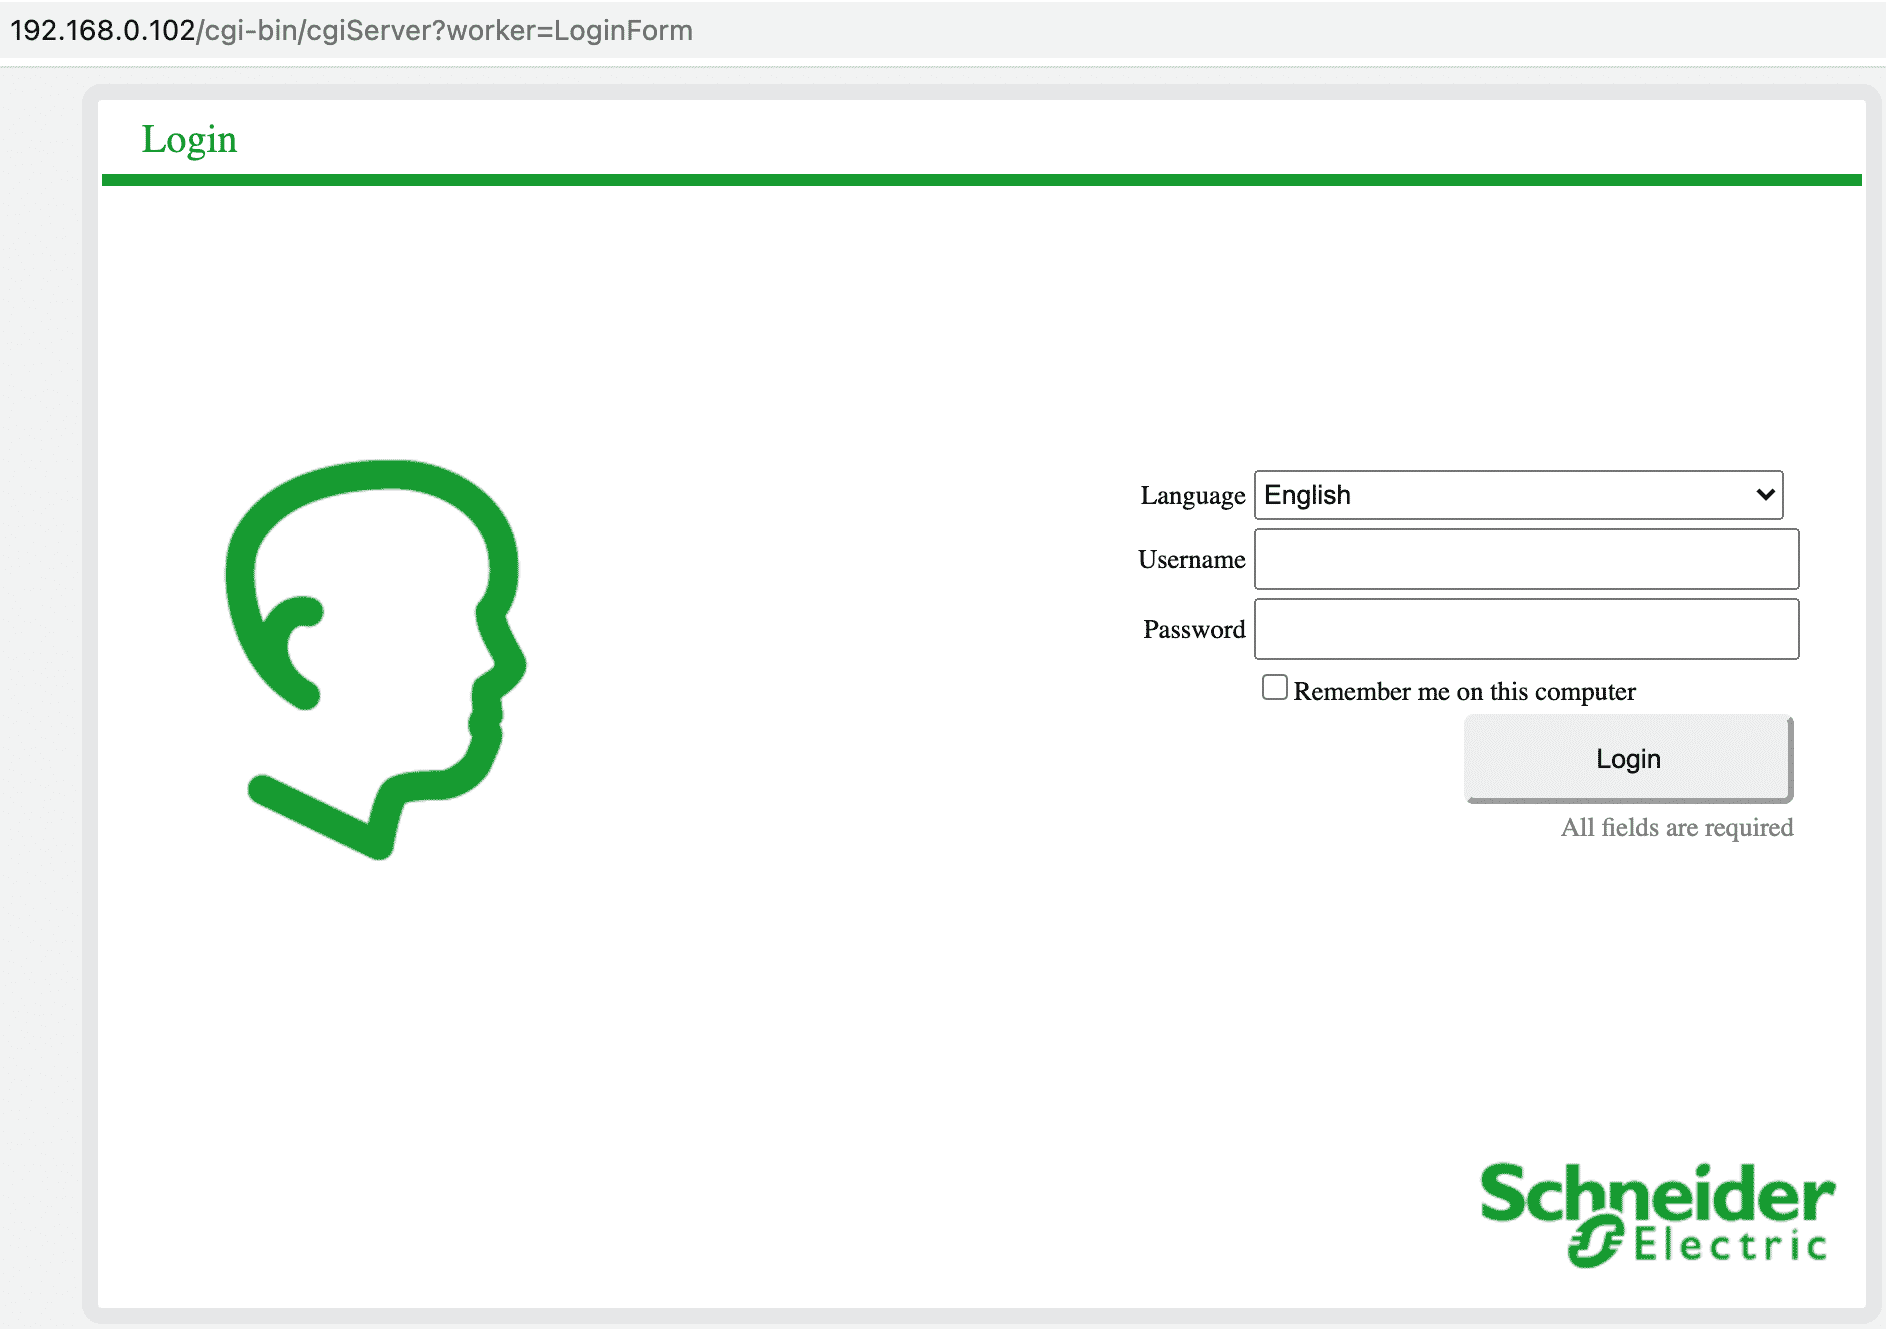
3. Open your browser and enter the URL
Enter the URL http://192.168.0.102 and log on with the following credentials:
-
User name: admin
-
Password: ADMIN

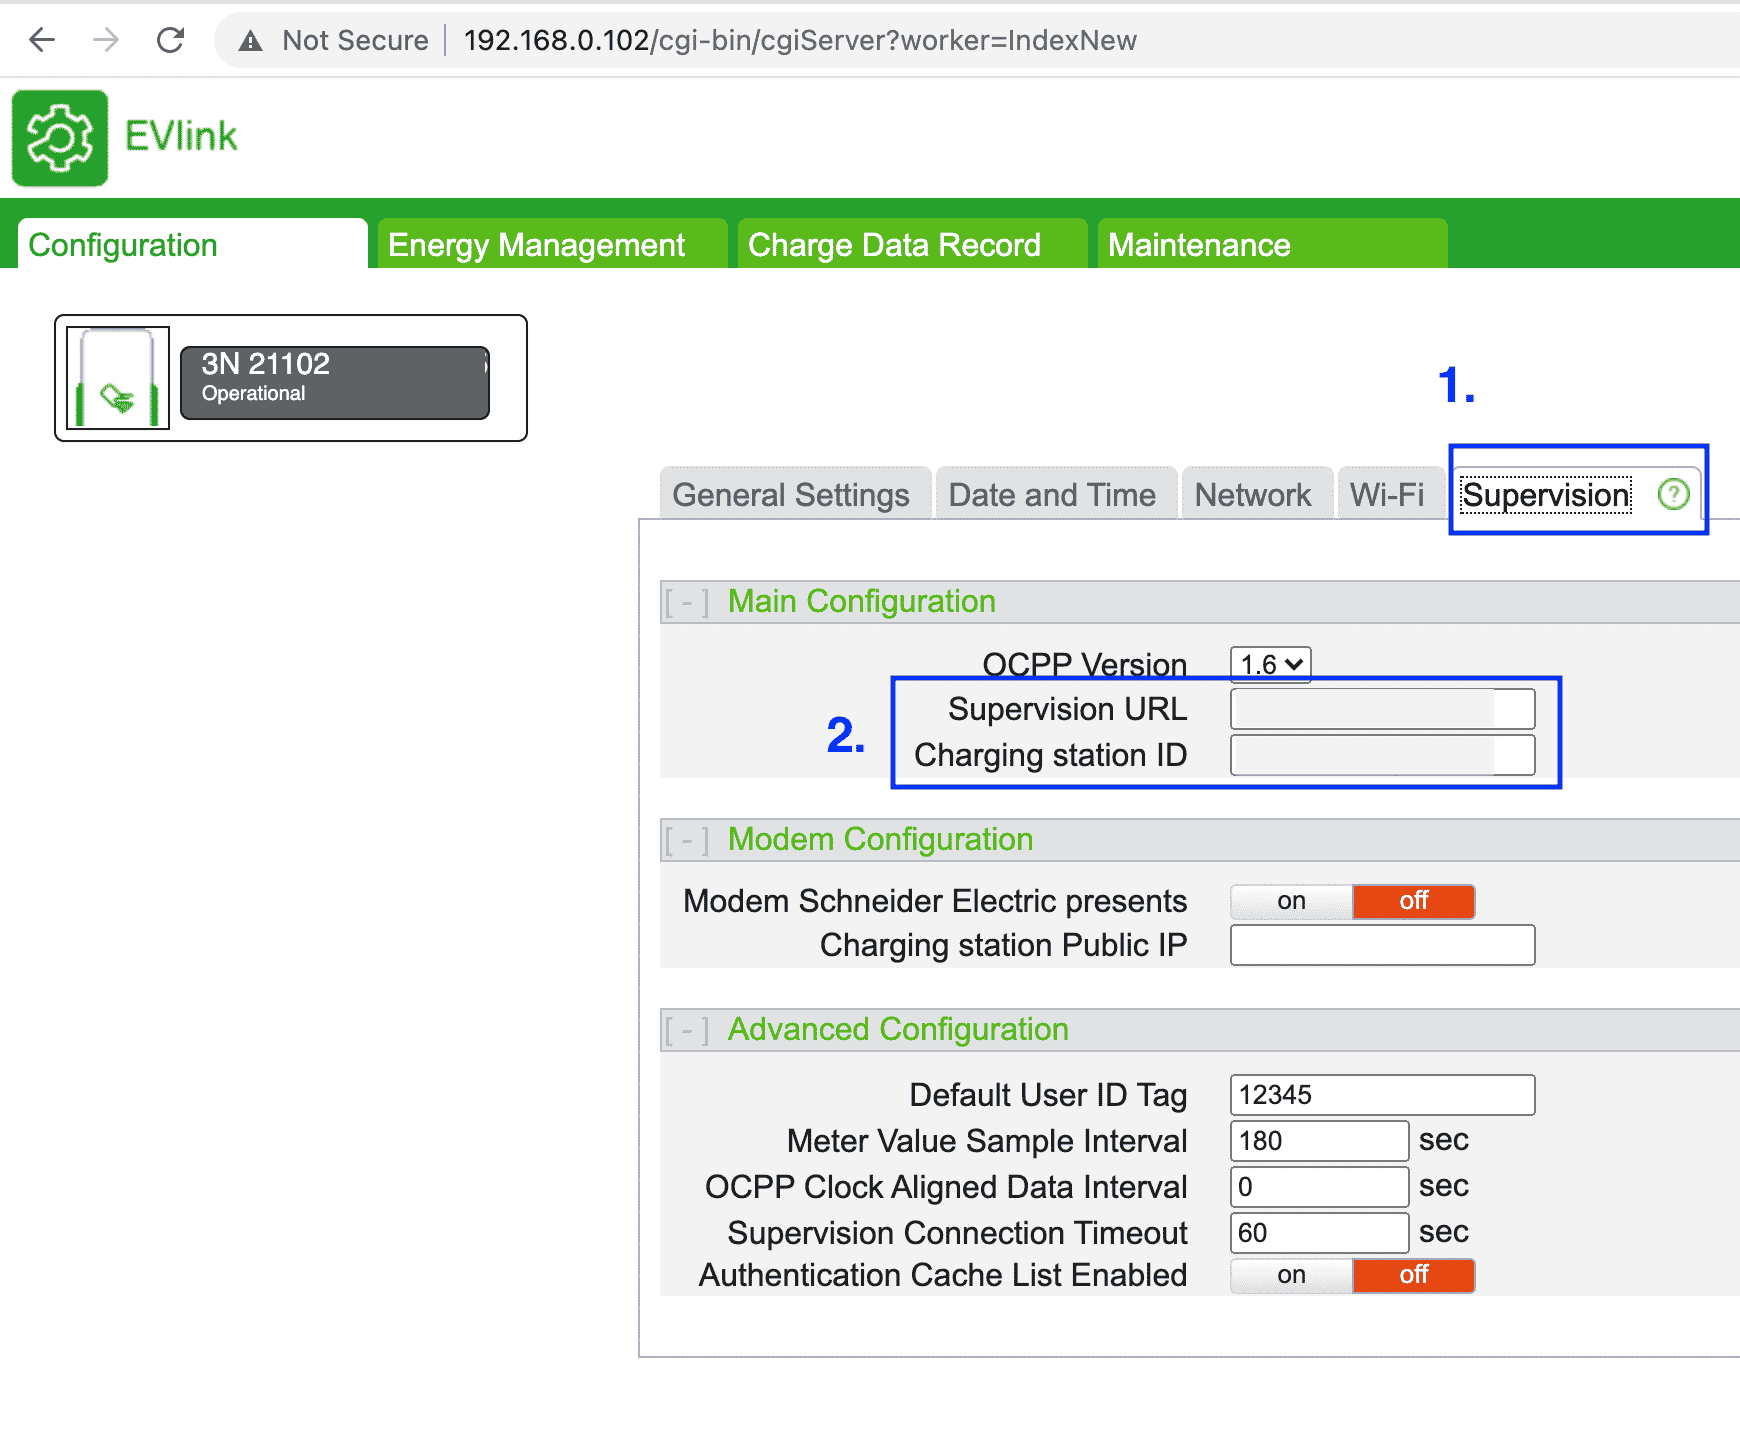
4. Click on "Supervision"
Once you are there, paste Monta server address that you copied earlier to the "Supervision URL": ws://ocpp.monta.app/
Afterwards, insert the serial number of your charge point ("Charging station ID").

5. Make sure your charge point has internet connection
Reboot your charge point and wait 30 seconds and refresh your window.

6. Connecting the charge point to your Monta account
Now you need to add and connect your charge point to your Monta account.
You can do this through either Monta Charge or Monta Hub.
