This is a guide that shows how to install Monta on your charge point. If you want to connect your charge point to your Monta account, please follow the steps in the end of the guide.
Please note that when you connect your charge point to Monta, we become the operator of the charge point. This means that you need to use Monta to control the charging process.
1. Download the BG EV Charging app
Begin by getting the BG EV Charging app on your device.
2. Power on the charge point
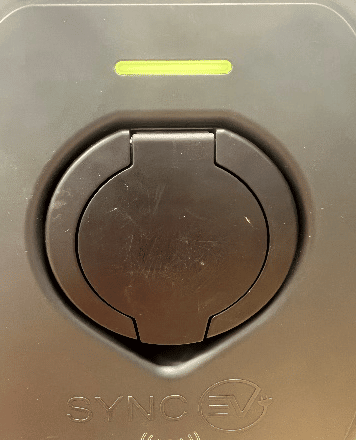
Turn the charge point on and the light indicator will glow in yellow. Then open the BG EV Charging app.
3. Connect to the charge point via Bluetooth
Now you need to connect to the charge point using Bluetooth. There are instructions how to do this on a label, located on the back of the unit.
Select the charge point
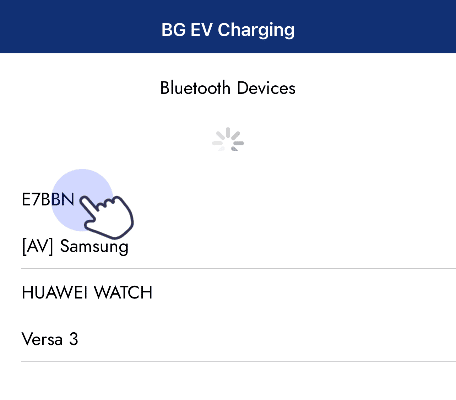
Use the default password
The default password is: 12345678
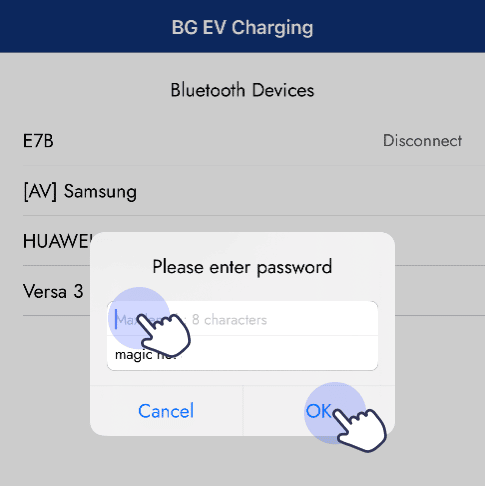
After you have used the default password, you will be prompted to change it. It is recommended to change the password and keep a note of the new password as you will need it to log in for future changes in the configuration of the charge point.
4. Connect the charge point to the internet
Select your desired connection: Wi-Fi / LAN / 4G
Input these details correctly as they are case sensitive.
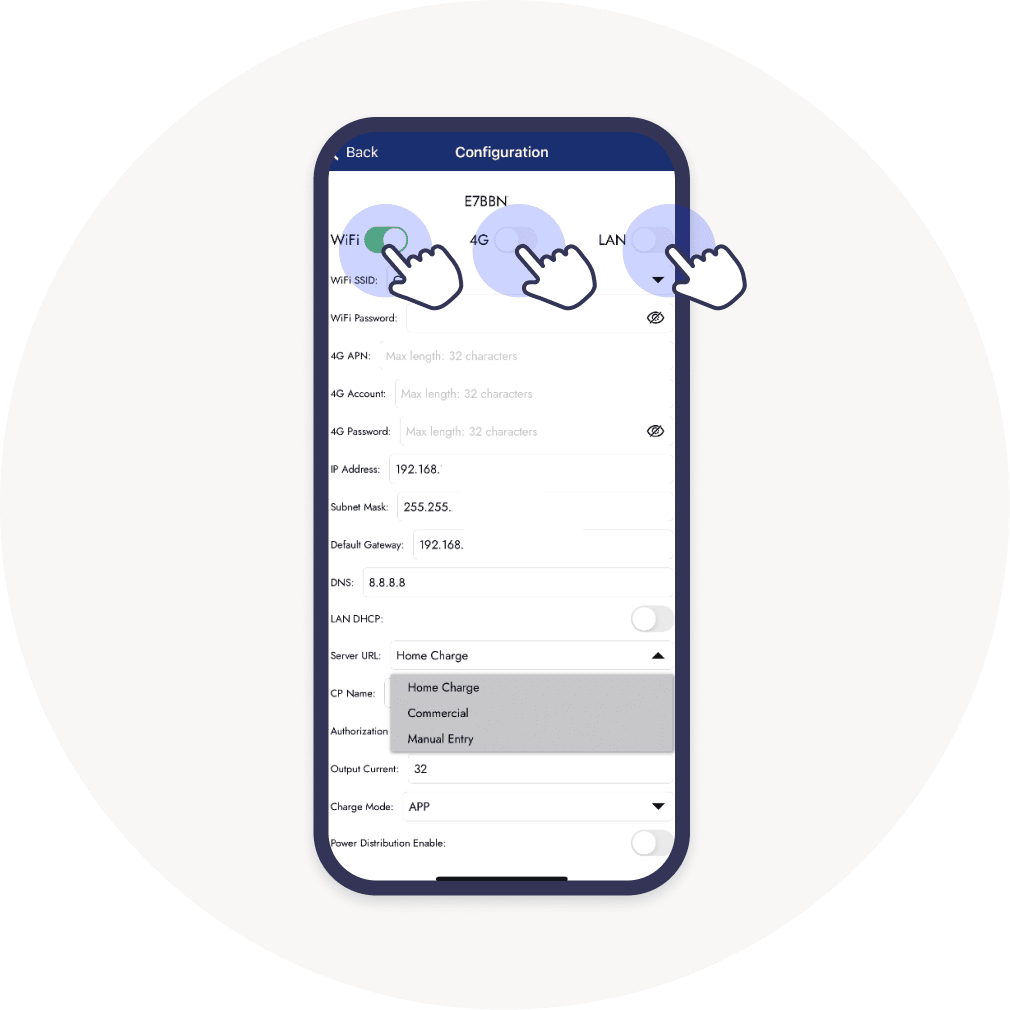
Scroll down to "Server URL" and select "Manual Entry"
Insert the Monta Server URL: ws://ocpp.monta.app
Charge mode: select "APP" from the drop-down menu.
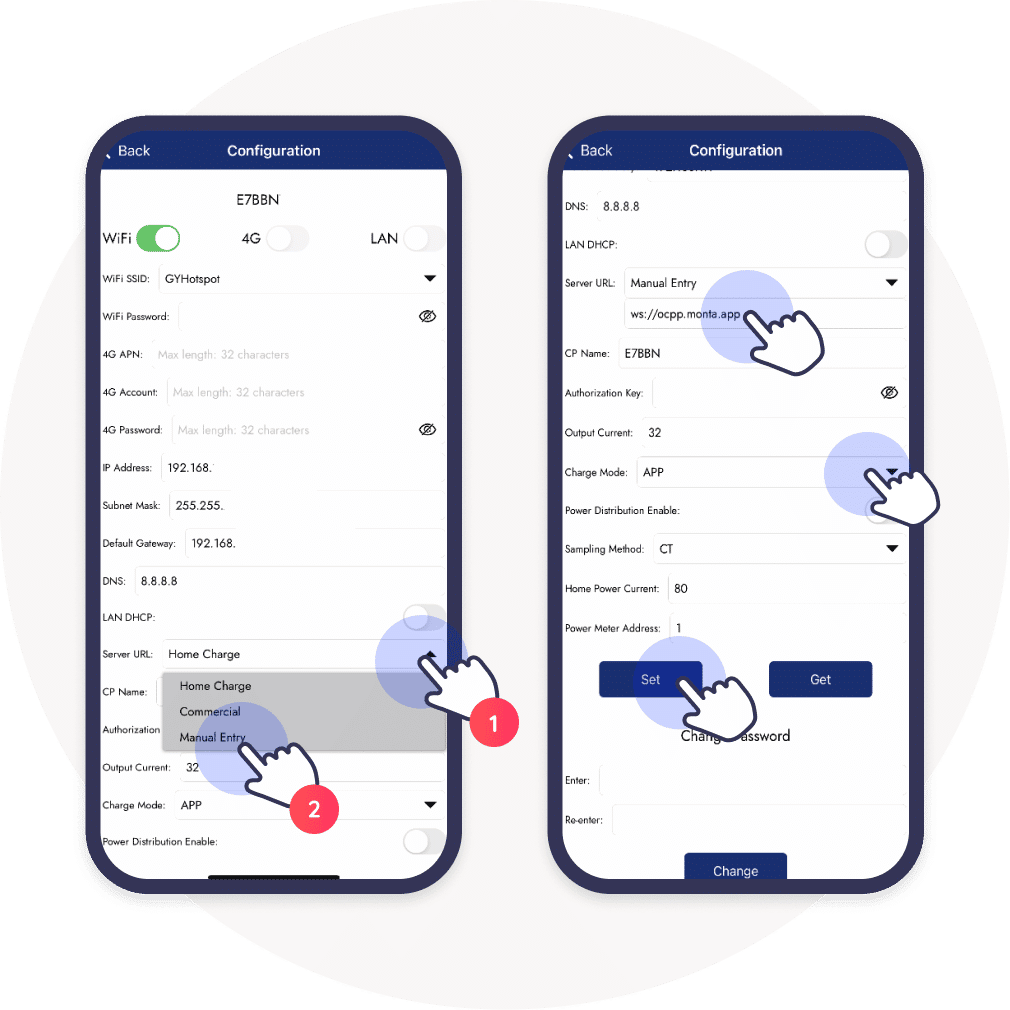
Click on "Set".
5. The charge point will reboot
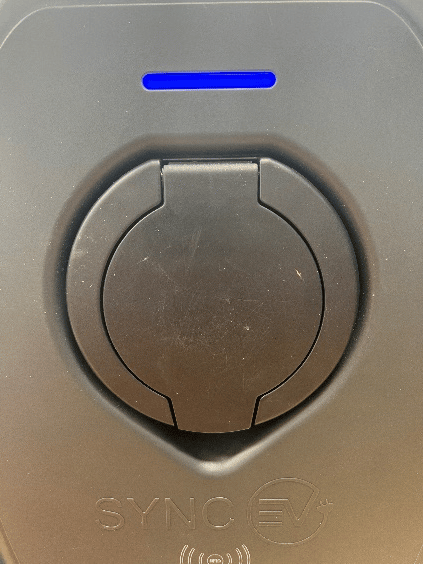
Once the setting has been saved the charge point will reboot, after a short period of time, approx. 5 – 10 minutes. If all the details are correct and there is a connection to the Monta back office the charge indicator will go from permanently Yellow to permanently Blue to confirm the communication is successful.
Other useful light indicators
Flashing Blue = Preparing mode
Green = Charging
Red = Fault
6. Connecting the charge point to your Monta account
Now you need to add and connect your charge point to your Monta account.
You can do this through either Monta Charge or Monta Hub.
