Please note that when you connect your charge point to Monta, we become the operator of the charge point. This means that you need to use Monta to control the charging process.
1. Prerequisites
First, you need to setup the charge point configuration.
You need to have the Webasto manual ready, which you have received together with your charge point. There, you will find all necessary passwords. If it happens that you don't have a manual, it will take around 2 weeks to send a new manual to you.
Webasto LIVE will need internet connection to take full advantage of the charge point's features. Internet connection with your charge point can be obtained via wifi, a network cable or 4G network via a SIM card is also an option (contact Webasto DK if desired).
2. Connect to your charge point
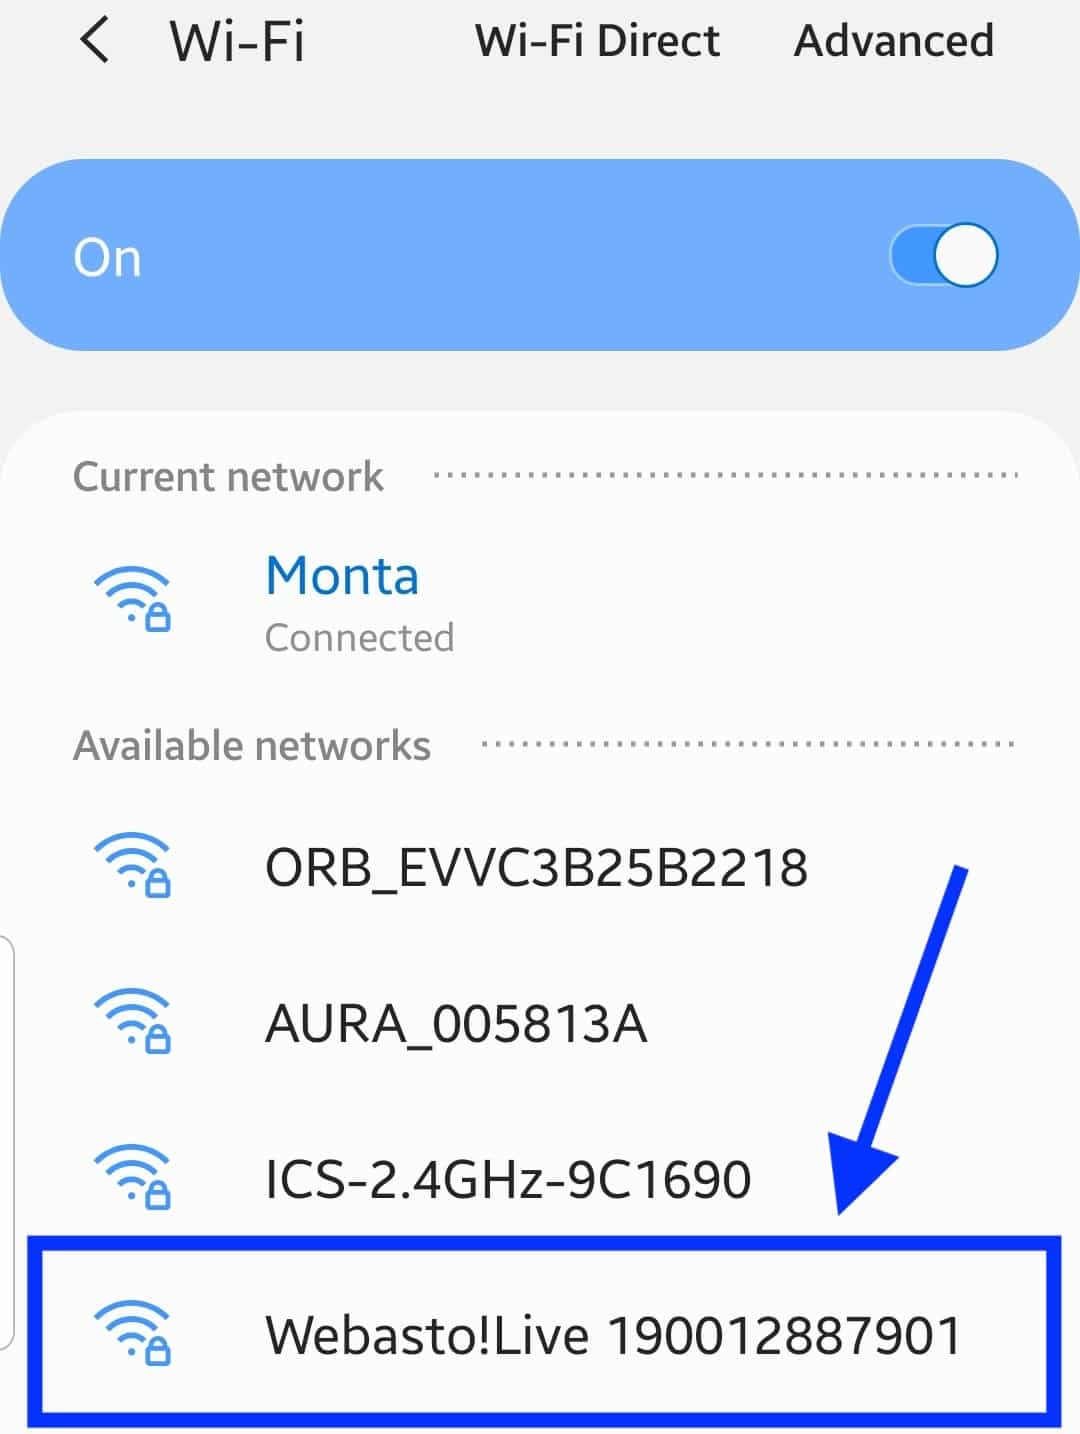
Establish connection with your charge point via wifi or use a cable. Log in to the charge point's hotspot - wifi signal - you will find the password in the manual.
WLAN SSID: Webasto!Live xxxxxxxxxxxx (x would be numbers)
WLAN Password: xxxxxxxxxxxx
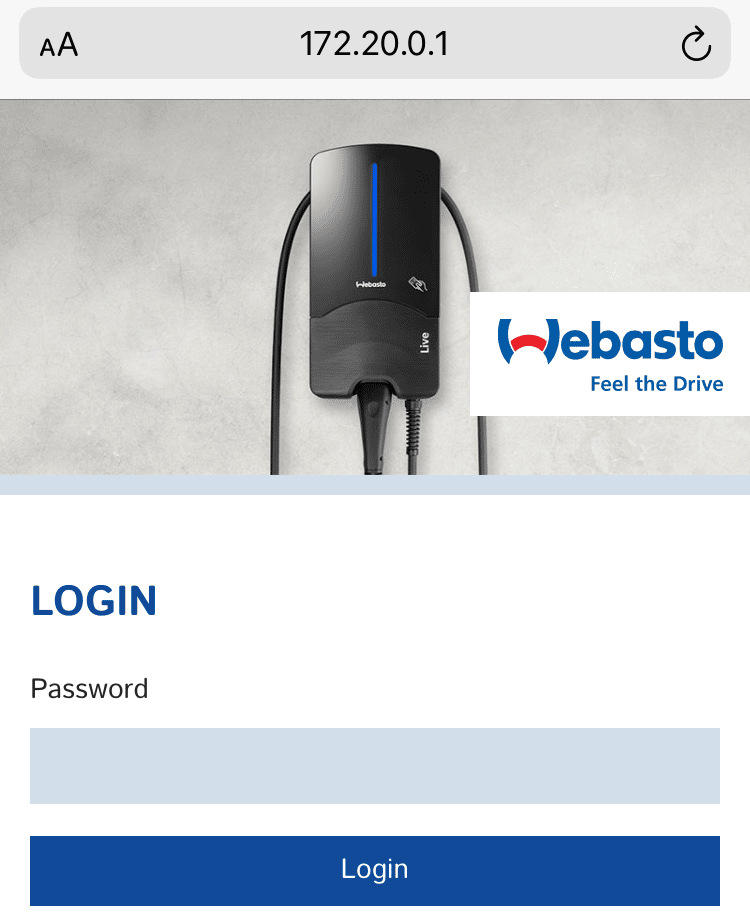
3. Open an internet browser to 172.20.0.1
Enter 172.20.0.1 in a browser's address bar and log in. You will find the password in the manual.
Portal Password: xxxxxxxxxxxx
4. Click on "Network"
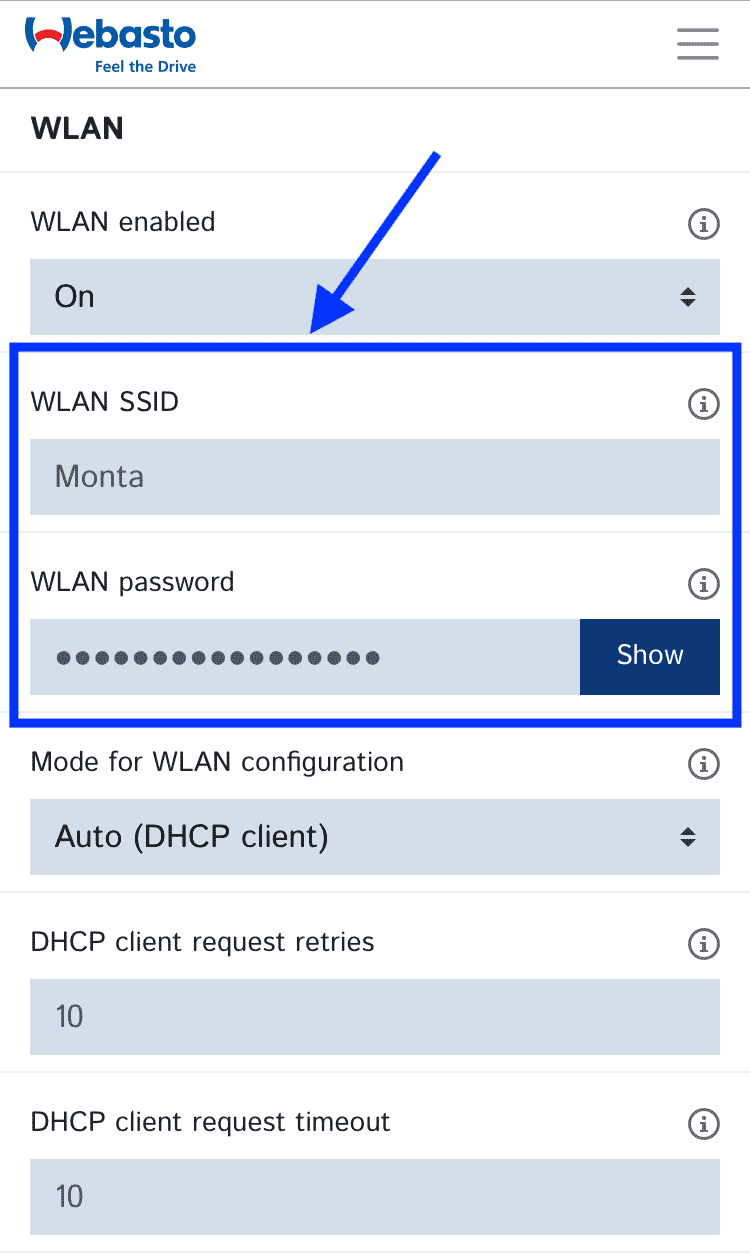
You will have to have wireless internet name and password used in the location.
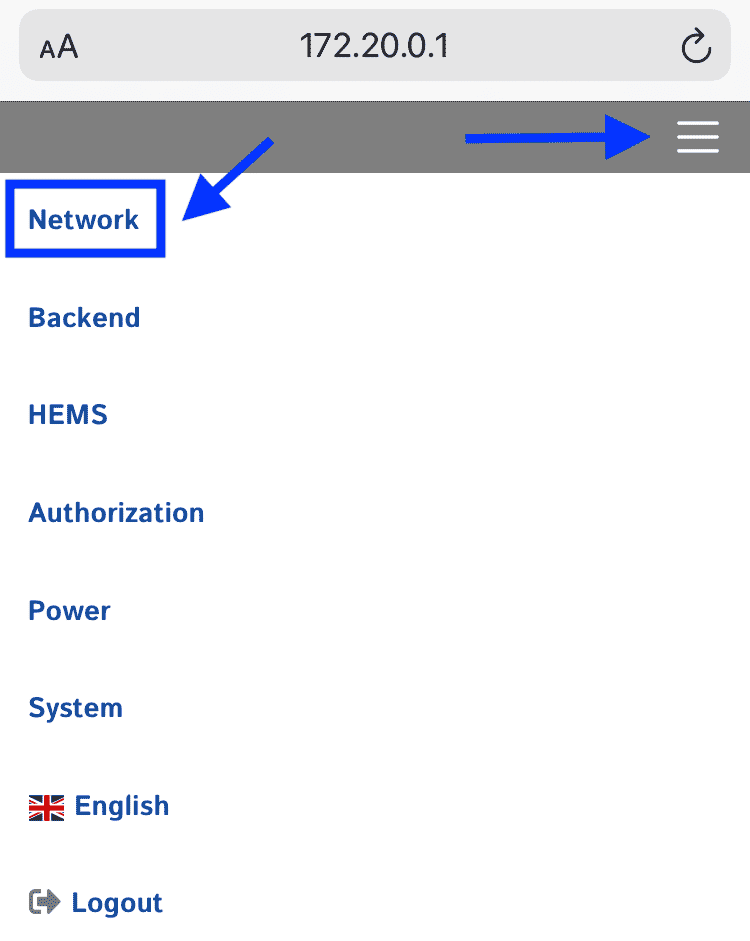
As mentioned earlier you have three possibilities to connect your charge point, via Wifi connected, internet cable or GSM 4 G card. Here, in this guide we are connecting the charge point via wireless internet connection.
Here, enter the name and code used - make sure it is correct!
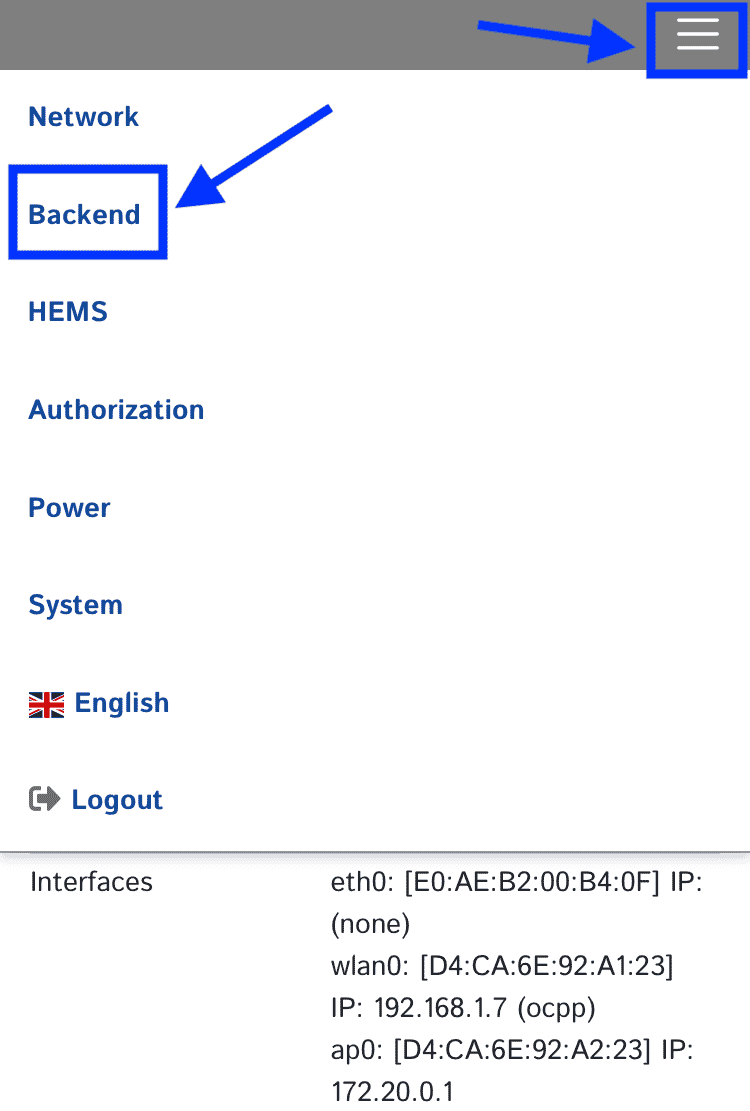
5. Click on "Backend" and fill out information
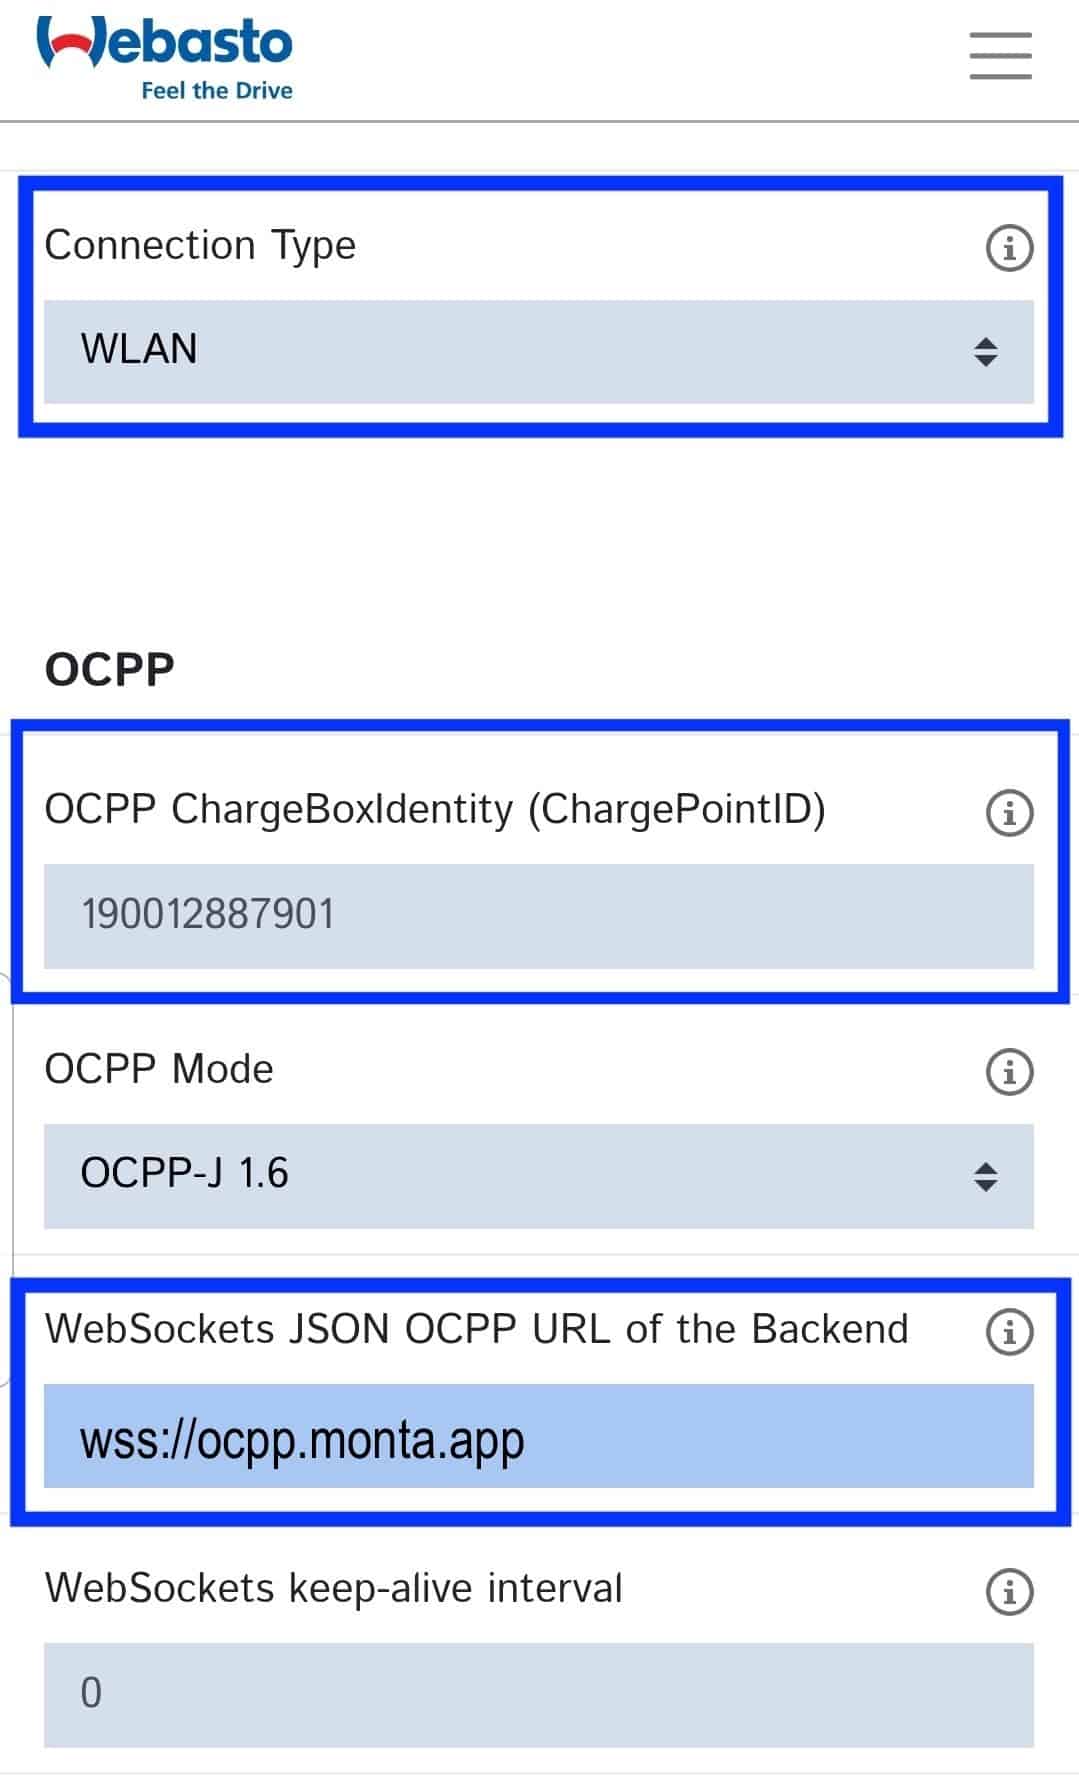
Fill in the following details:
-
Connection type: WLAN
-
OCPP ChargeBoxIdentity (ChargePointID): delete any letters or signs you may see and leave only the numbers.
-
WebSockets JSON OSPP URL of the Backend: wss://ocpp.monta.app/
-
Click "Save"
6. Check the Authorization details
In addition go to Authorization and ensure the Settings are as follow:
Free Charging: Off

If in doubt allow charging: Off

Vehicle connection timeout: 180

Send Authorize for RemoteStart: On

RFID Tag letter case: Uppercase

Enable local whitelist: Off

Local whitelist learning mode: Off

Enable OCPP Whitelist: On
7. Restart the charge point
Now you will be requested to restart the charge charge point.

After restarting, wait for 5min and then continue the connection to Monta.
8. Connecting the charge point to your Monta account
Now you need to add and connect your charge point to your Monta account.
You can do this through either Monta Charge or Monta Hub.
