Integration guide for the Webasto Next charge point. Covers using the Webasto Charger Setup app for initial configuration, accessing the web user interface to set the Open Charge Point Protocol (OCPP) backend URL, and connecting to Monta.
Please note that when you connect your charge point to Monta, we become the operator of the charge point. This means that you need to use Monta to control the charging process.
1. Download the Webasto Charger Setup app
In order to configure your Webasto Next, you need to first download the Webasto Charge Next app from the Play Store or App Store.
2. Login to the app
Open the app and login with the charge point. The credentials that you need are located in the manual that you have received with the charge point.
WLAN SSID name: (charge point serial number)
WLAN key: (password)
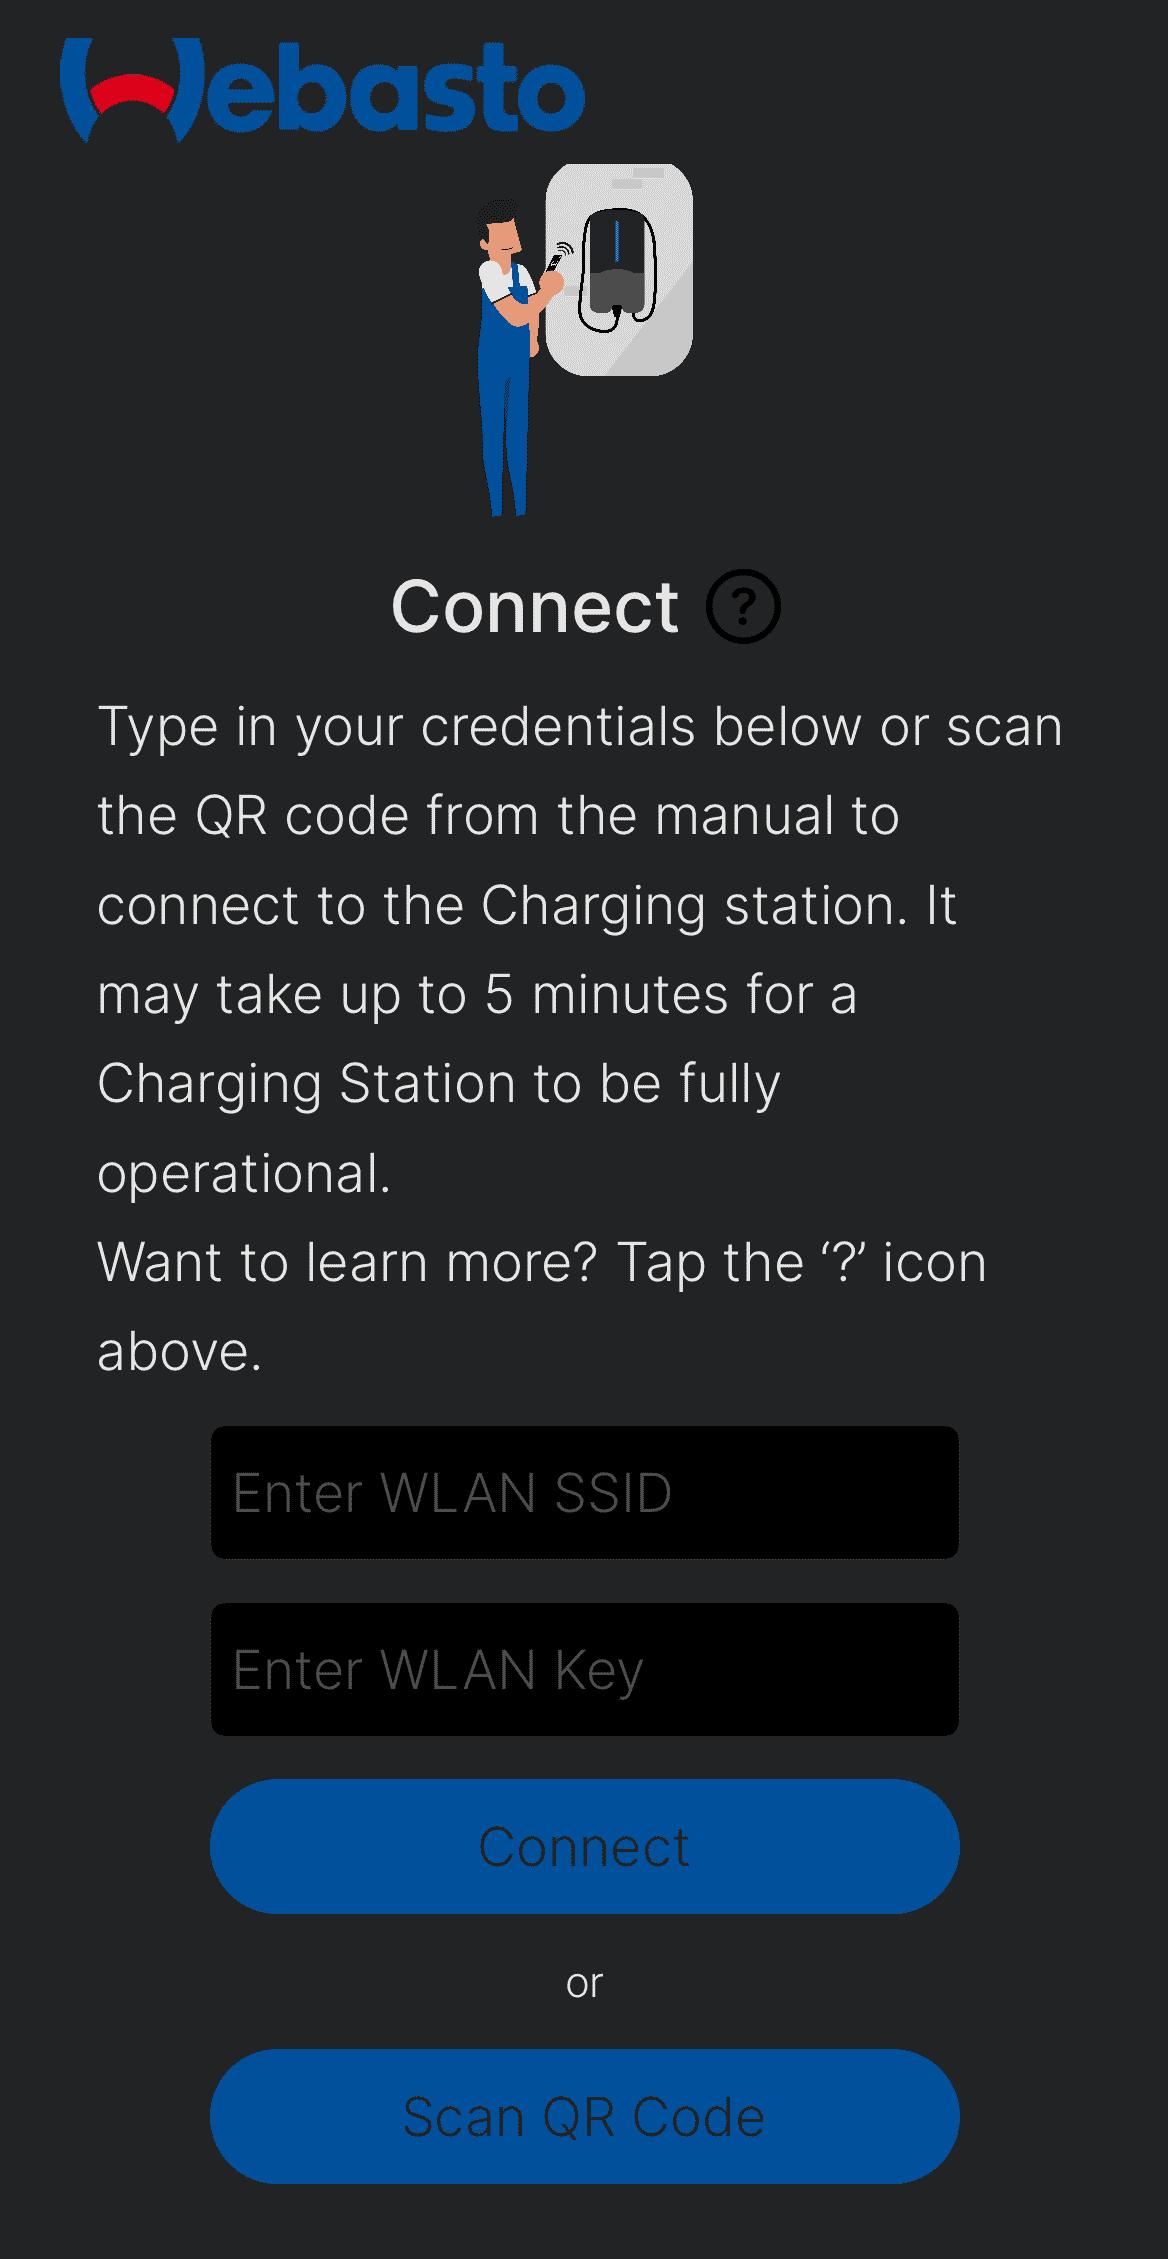
You can manually type in the credentials into the field or you can scan the QR code, located next to the credentials.
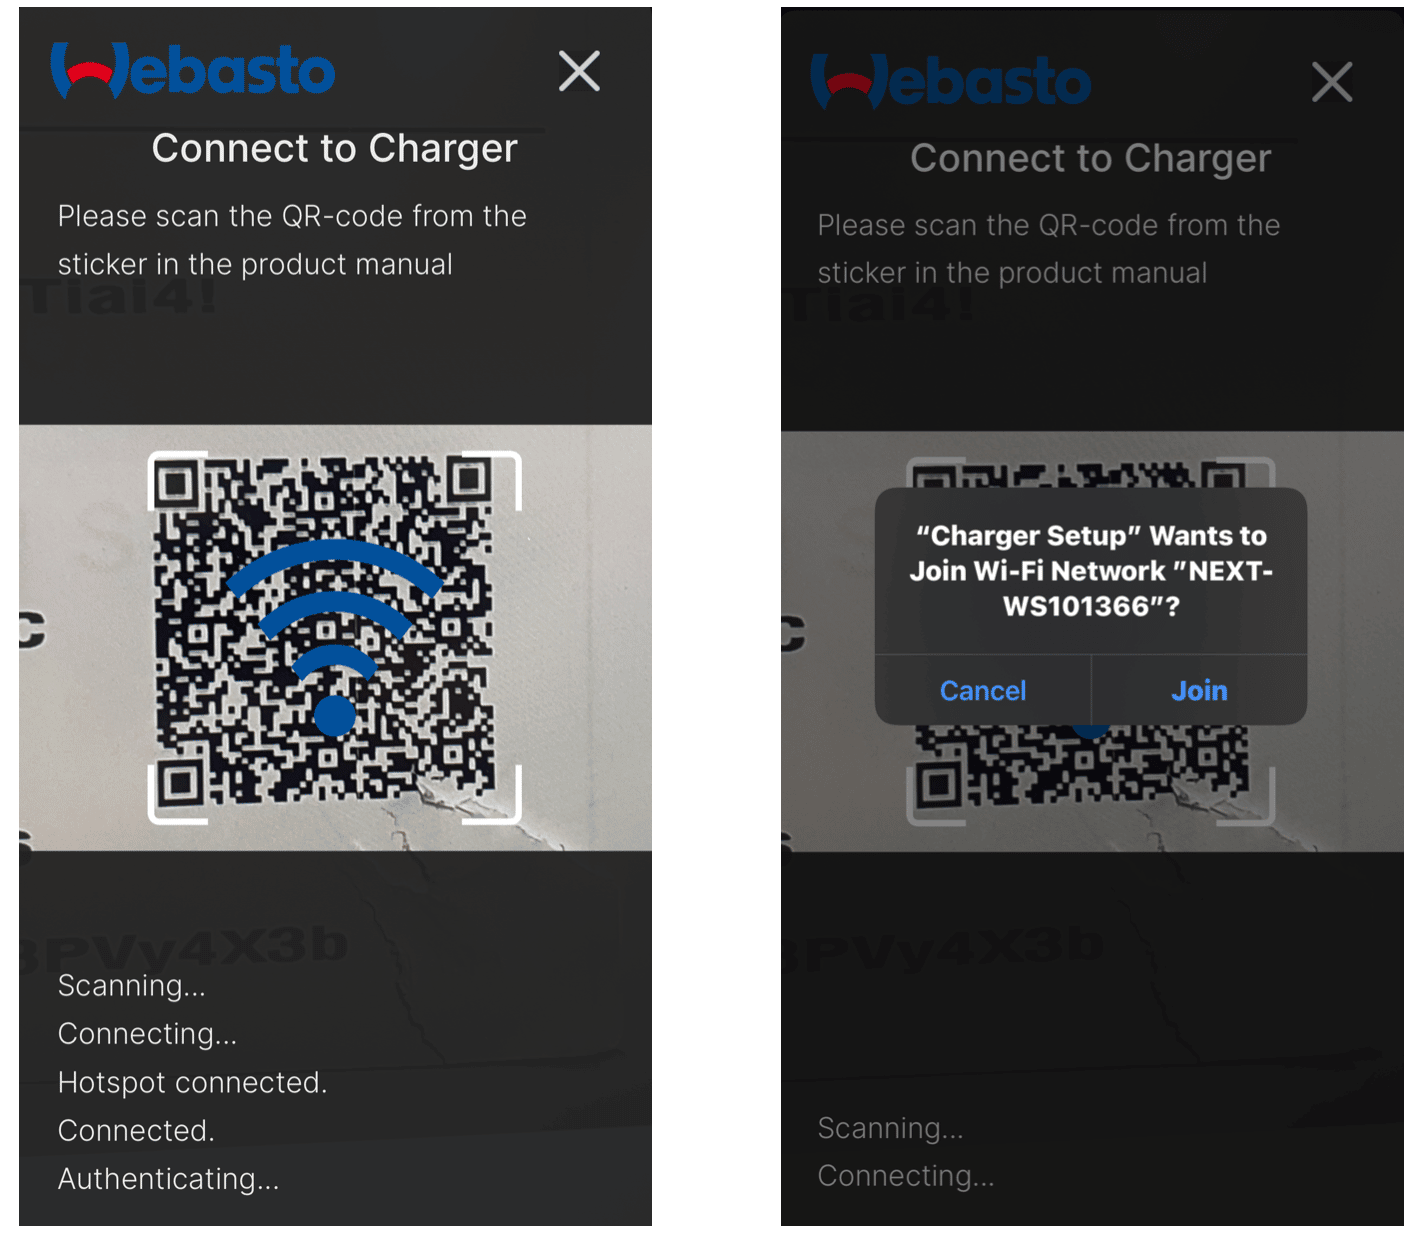
Scanning the QR code
Note: If you want to use the QR, you many need to wait a few minutes after turning on the charge point. Instructions will be displayed on the screen.
Once you have scanned the code and the message to connect has appeared, click on "Join".
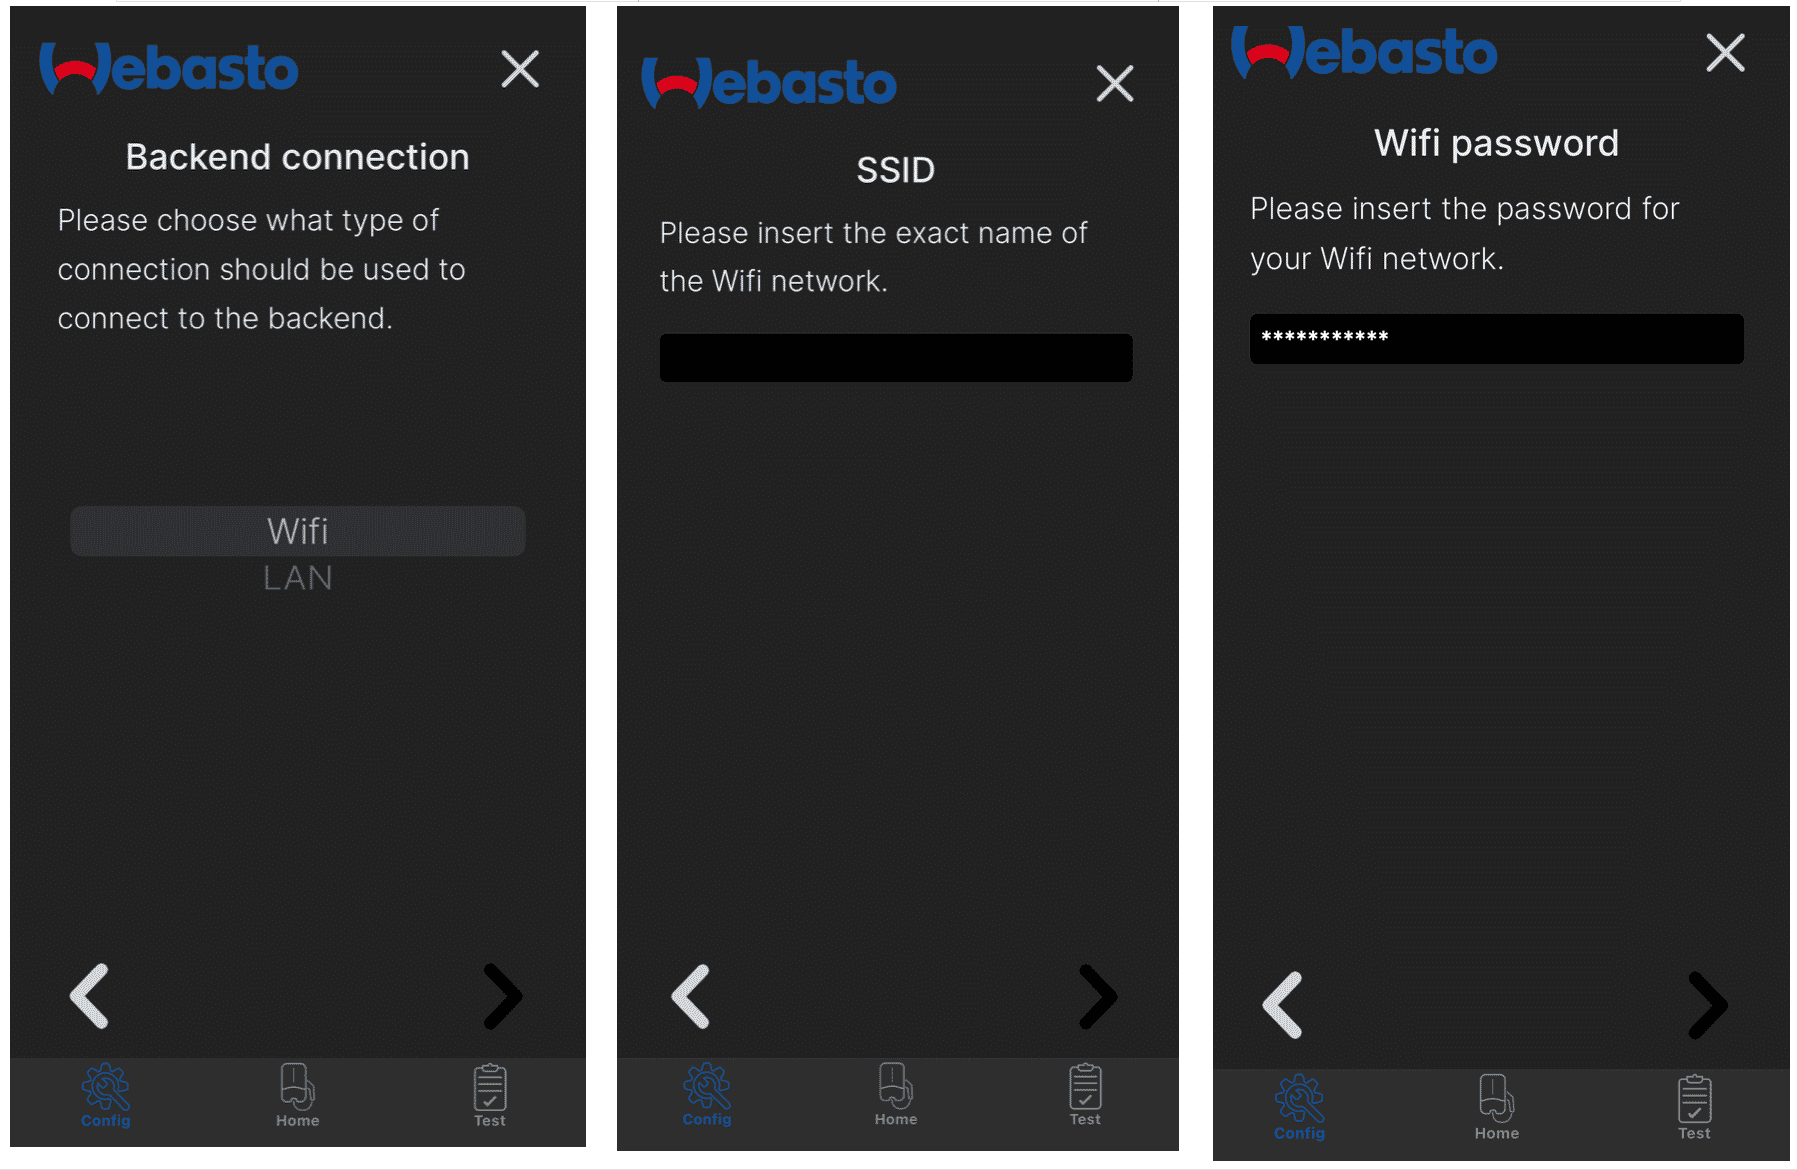
3. Initial Configuration
Once you login, you will be able to configure the charge point. Click on "Initial configuration" and follow the steps on the screen.
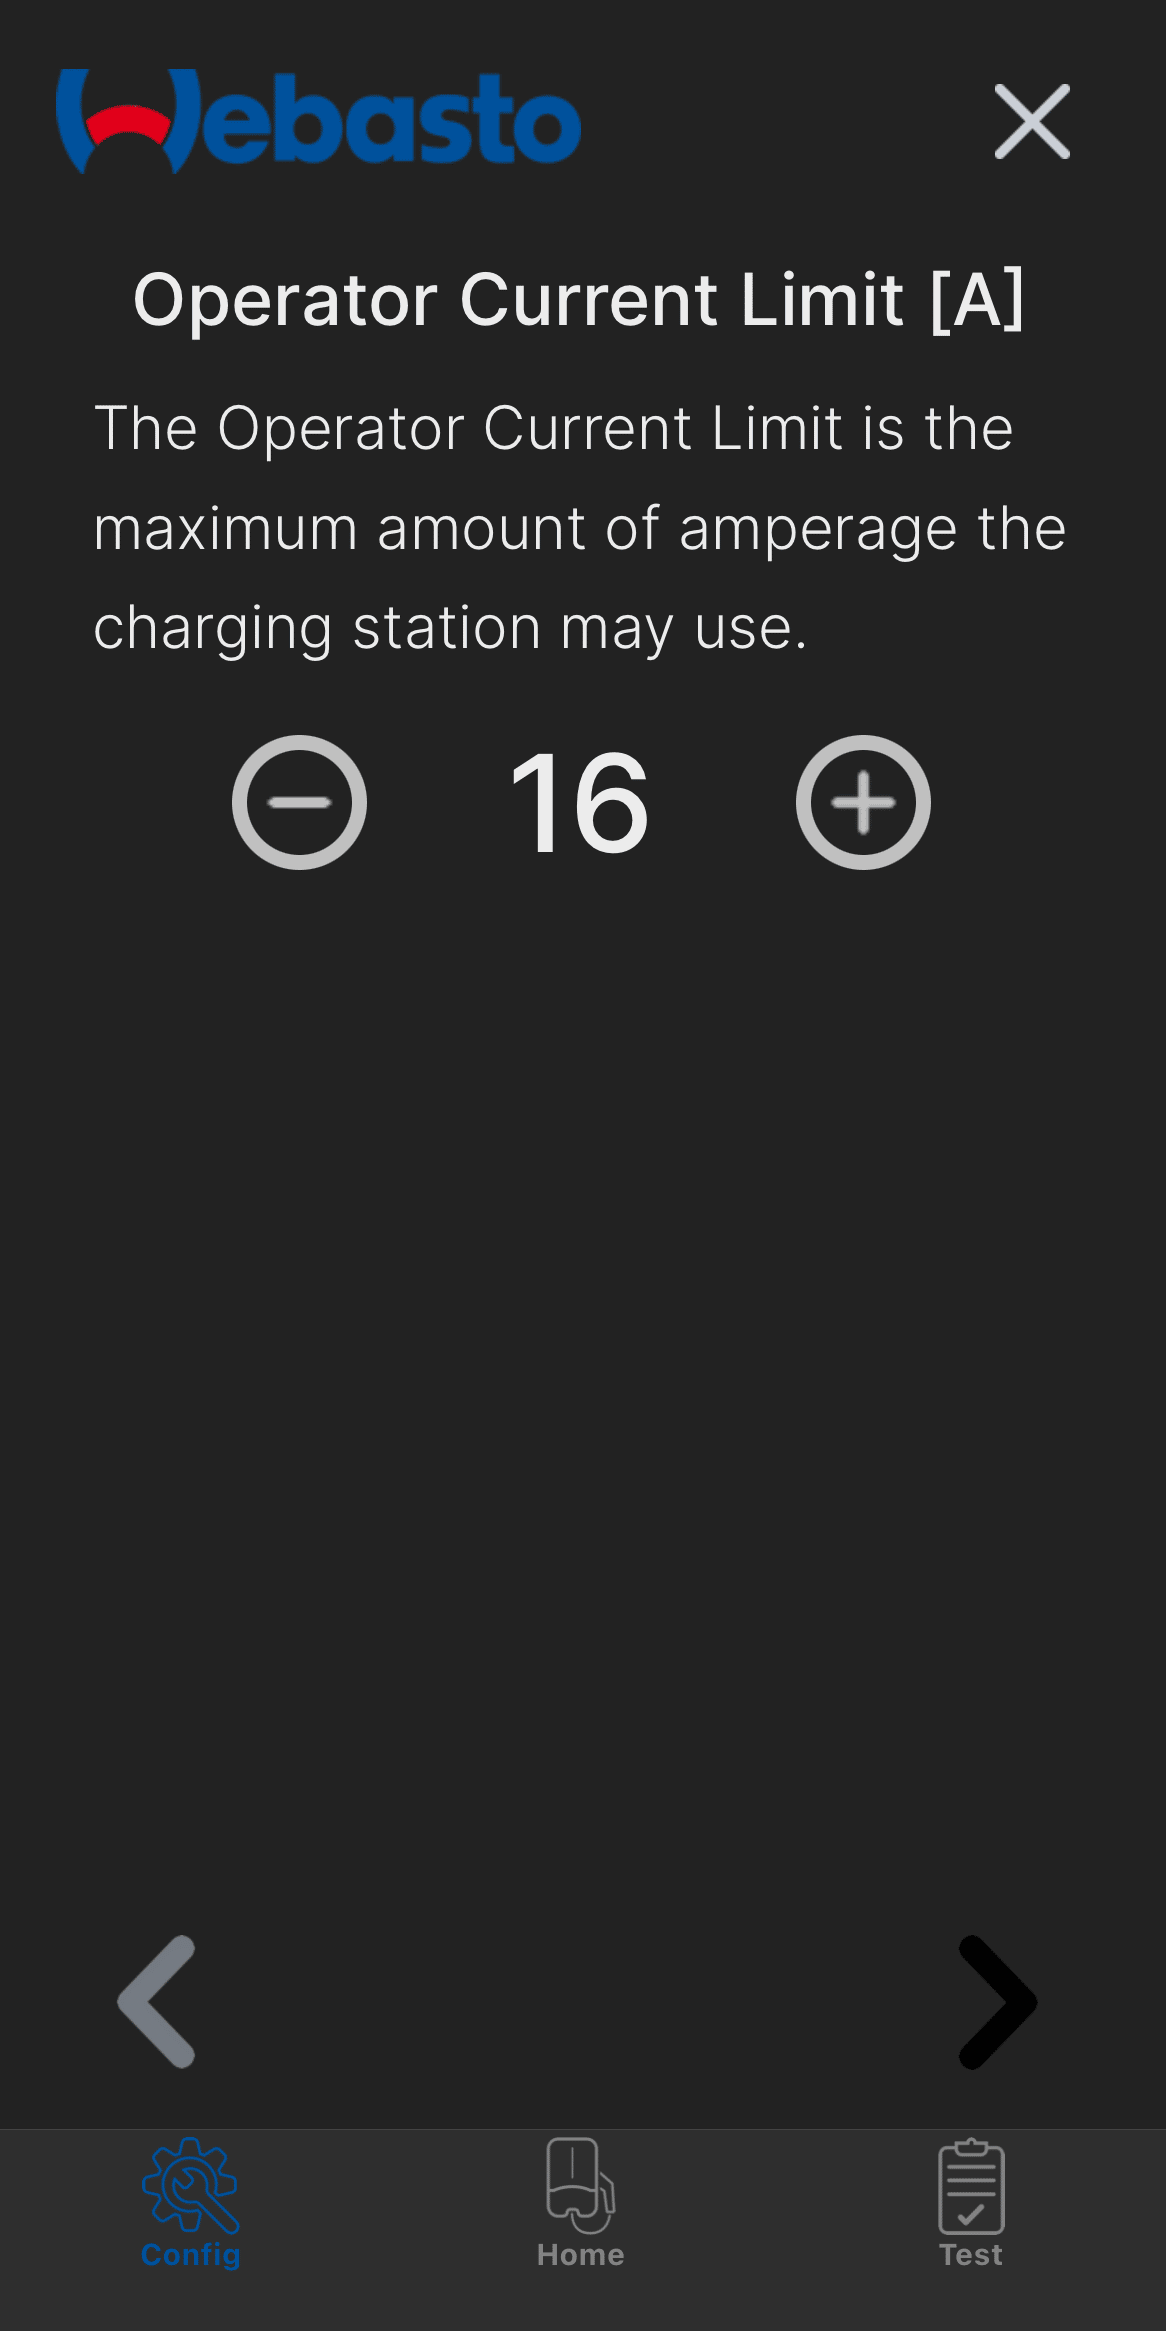
Power settings
Adjust the charge point effect.
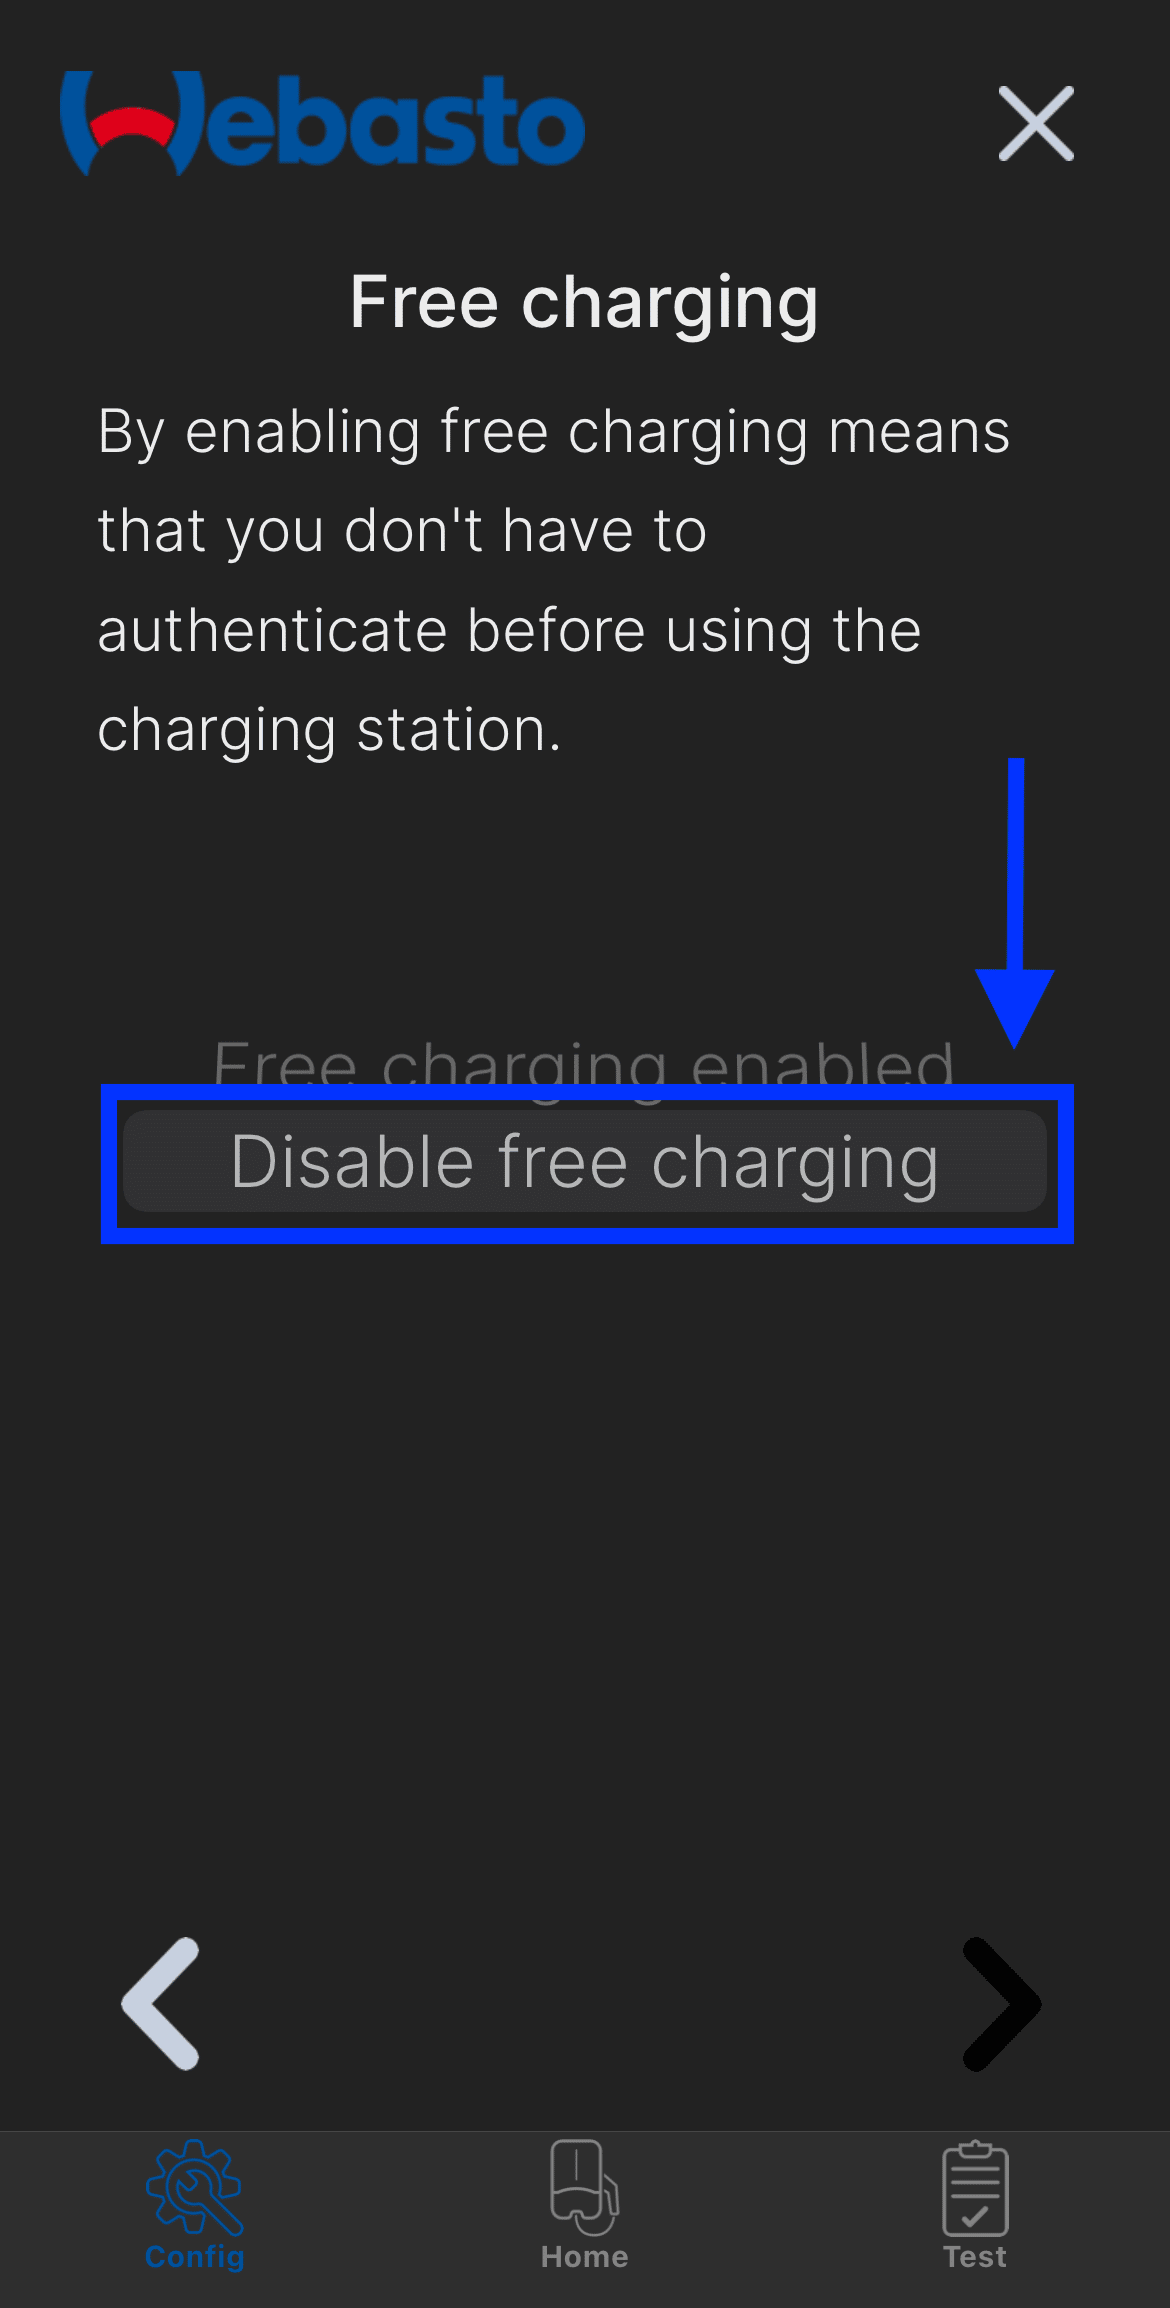
Free charging
Select "Disable free charging" from the menu.
Internet type
Select how to connect your charge point to the internet and enter the related credentials. In this example, we have connected the charge point by Wifi connection.
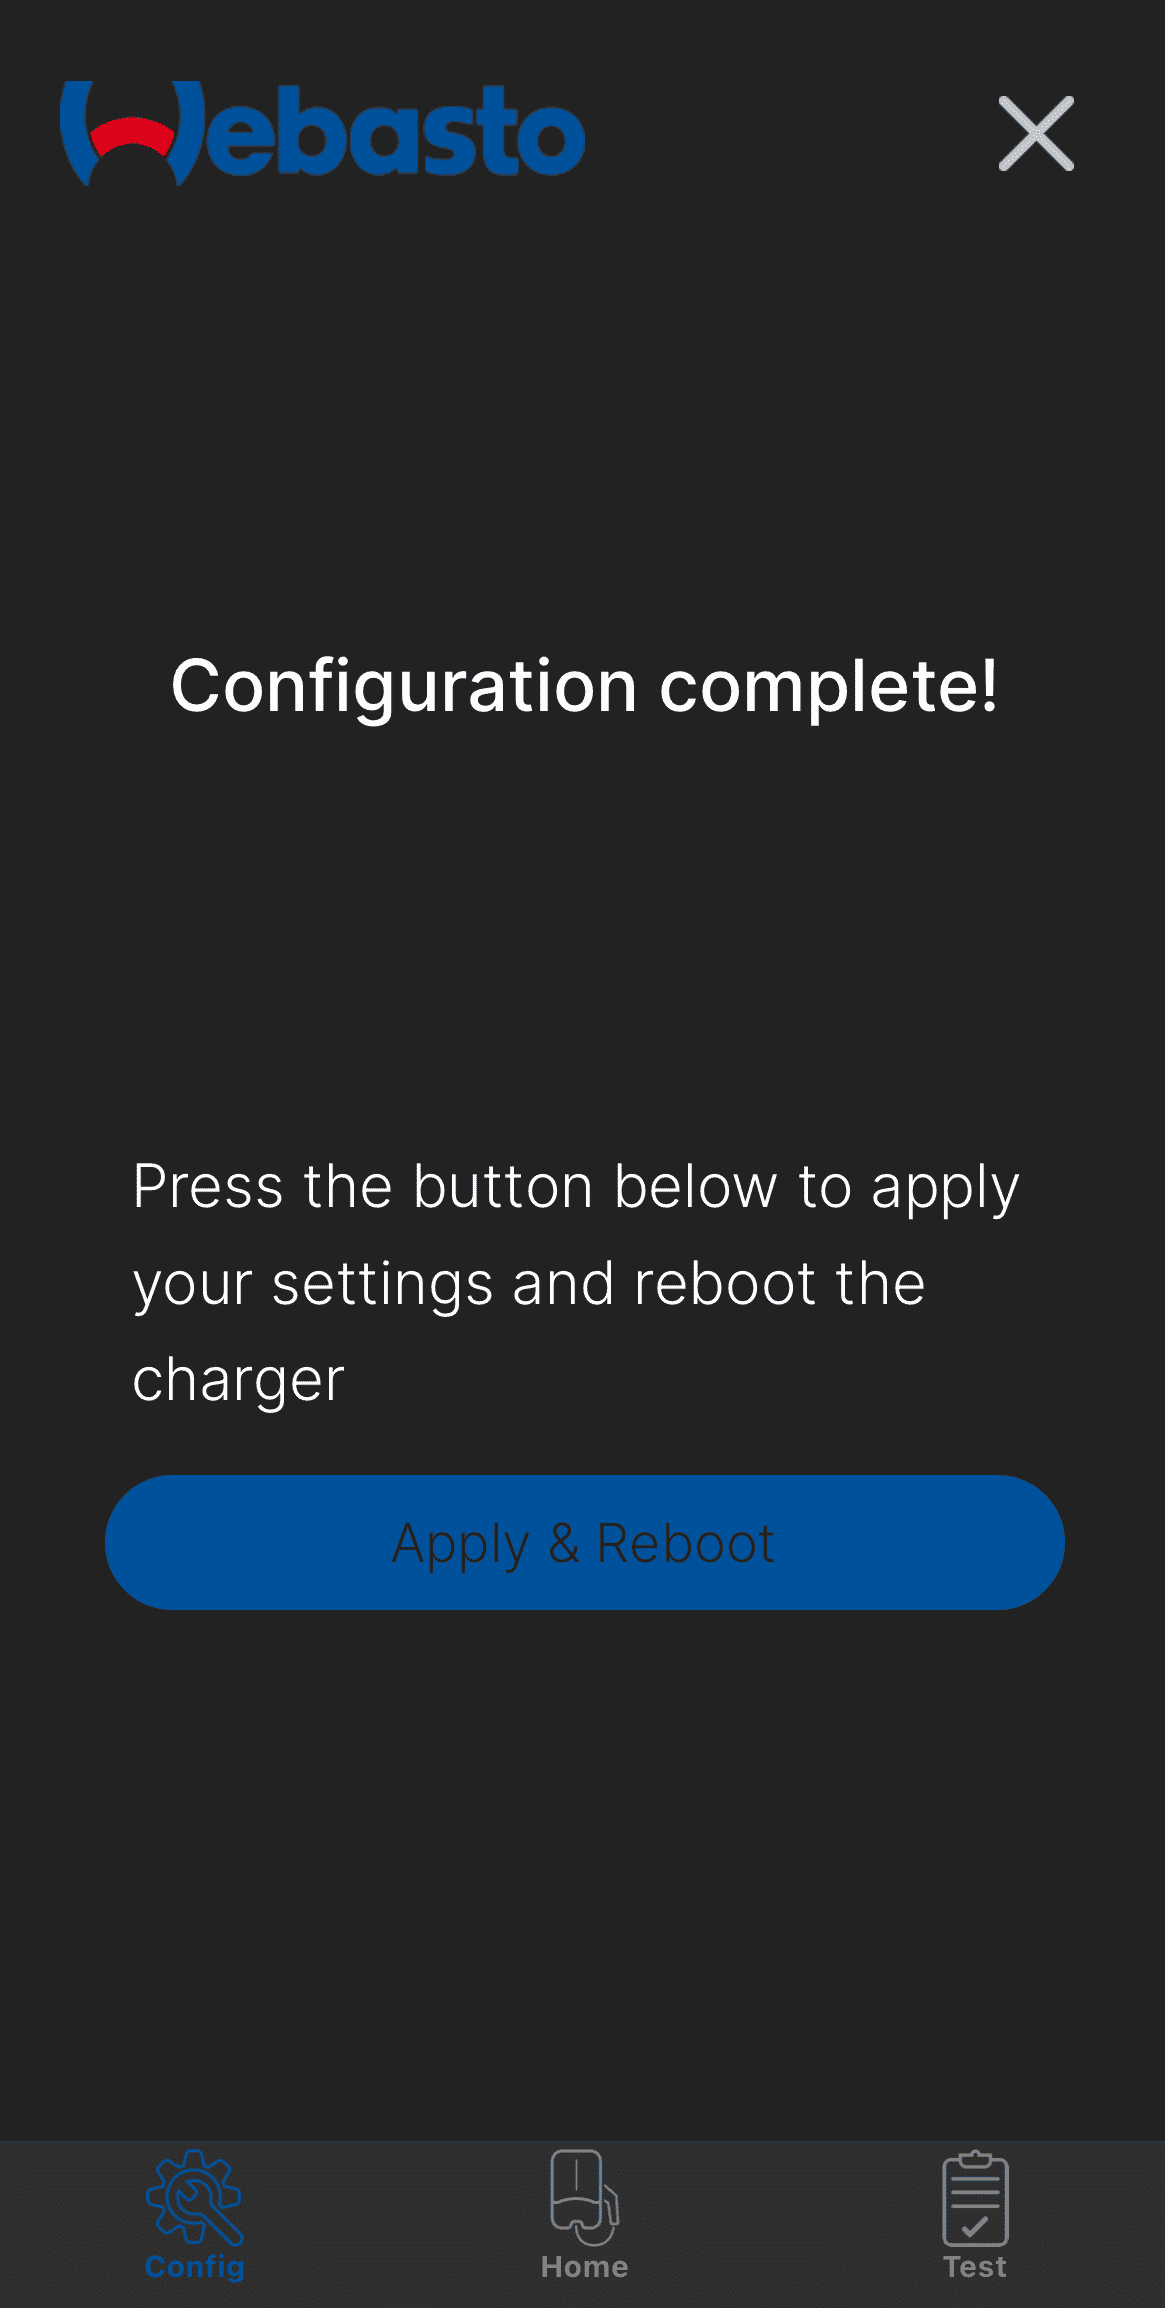
4. Apply and reboot
After you have performed all of the configurations, you will get this screen.
Click on the "Apply and reboot" button to apply the configuration changes and wait for the charge point to reboot.
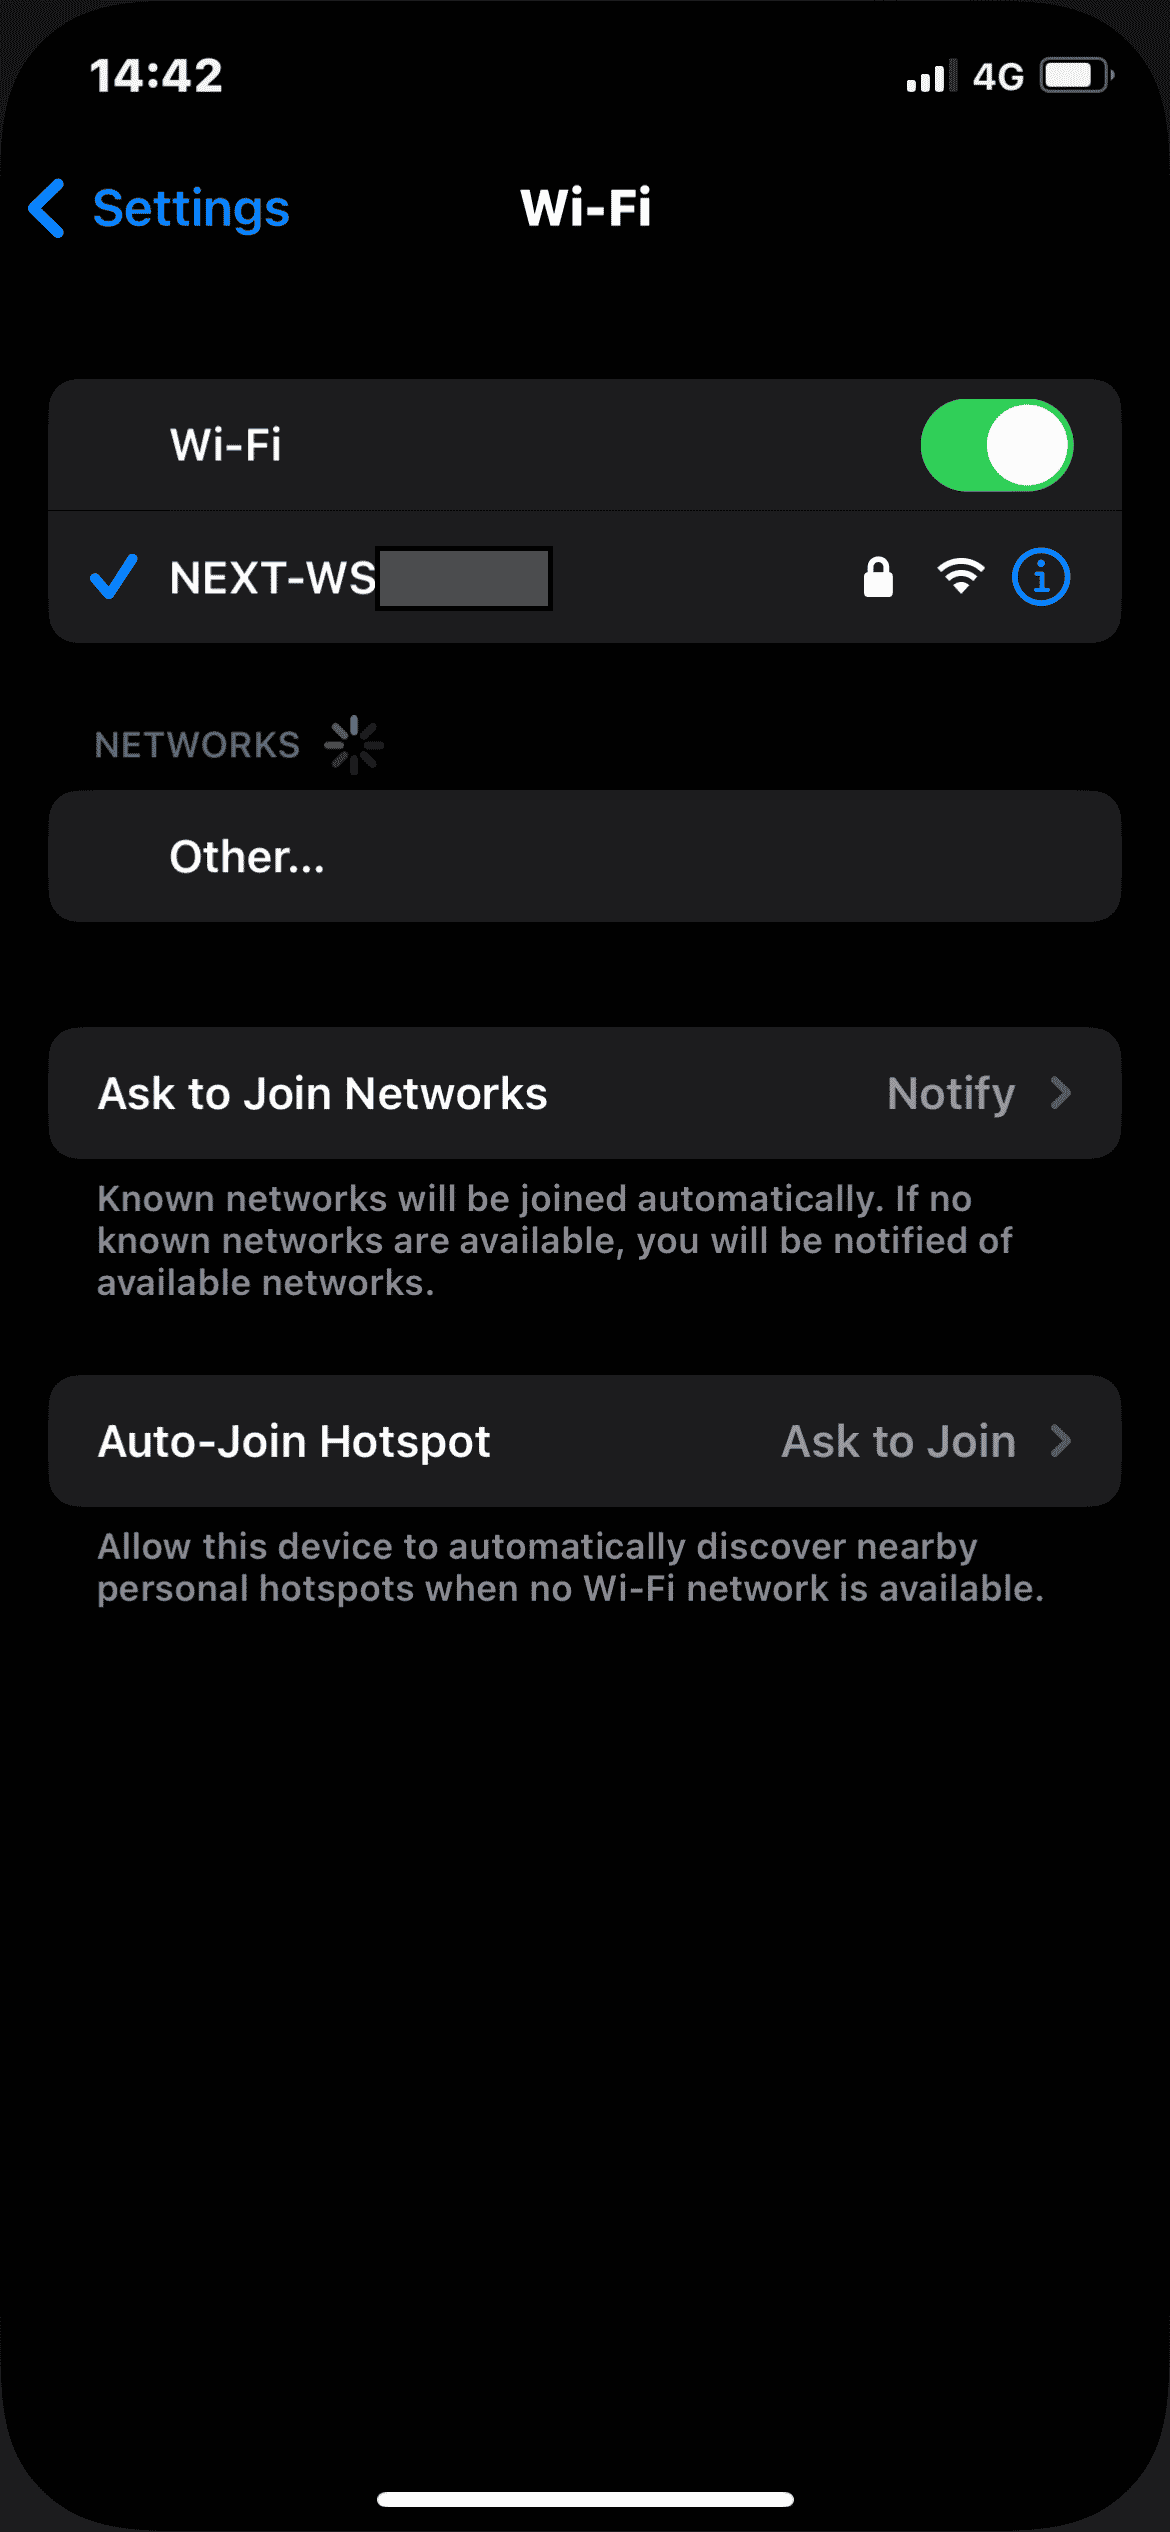
5. Connect to the charge points' hotspot
Open WiFi settings on your mobile device and find WiFi with a name of NEXT-####### and connect to it. For the password, use WLAN Key from the manual used previously.
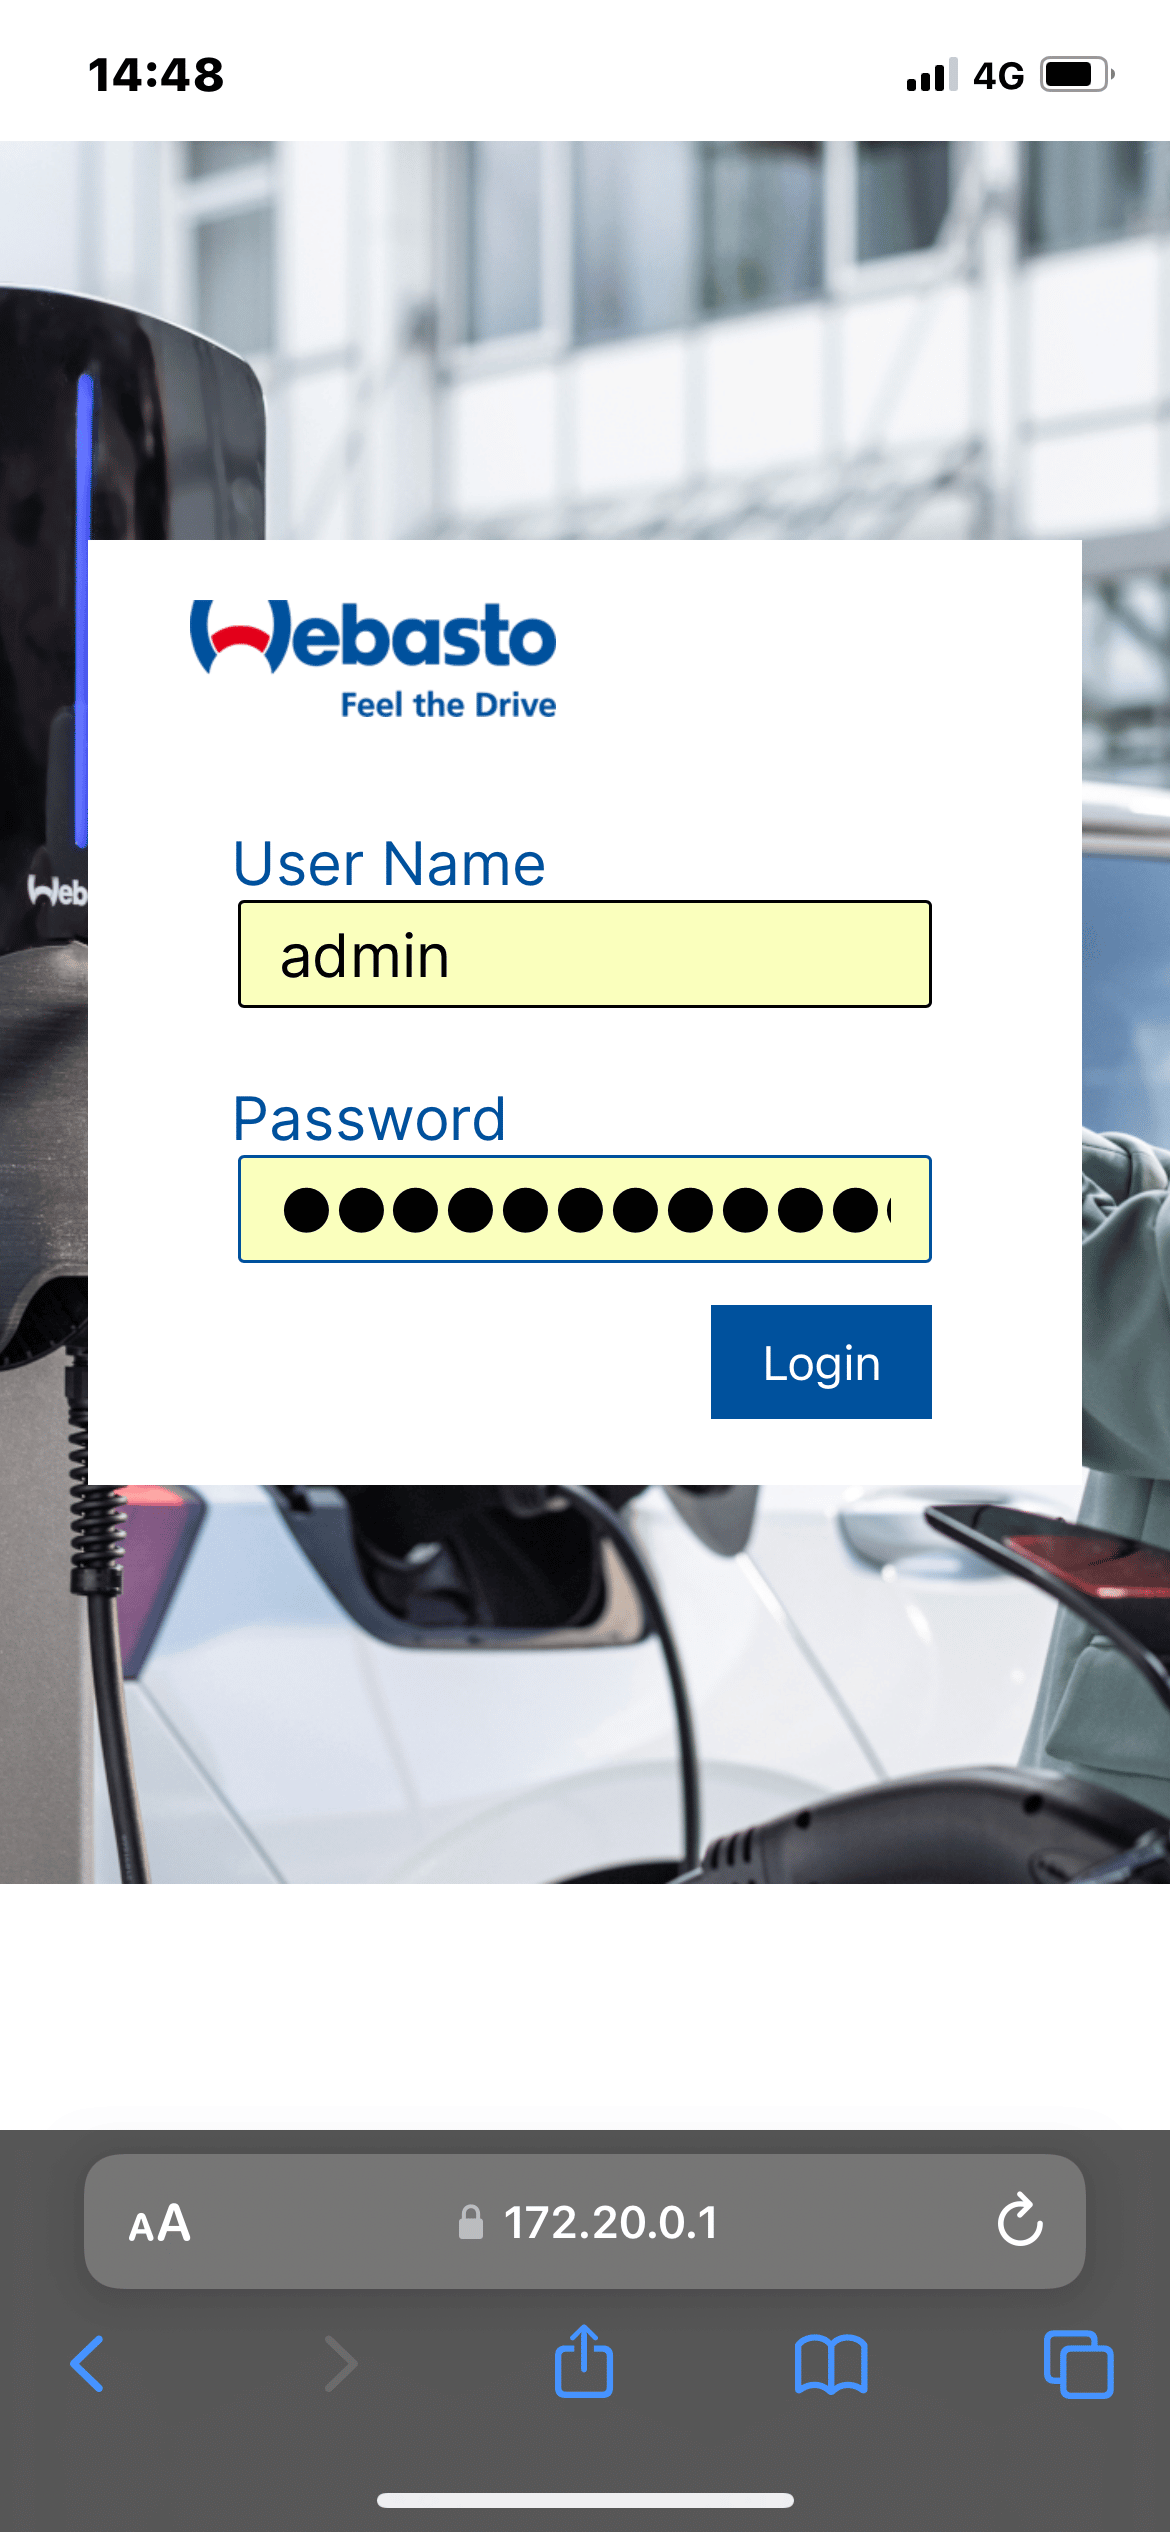
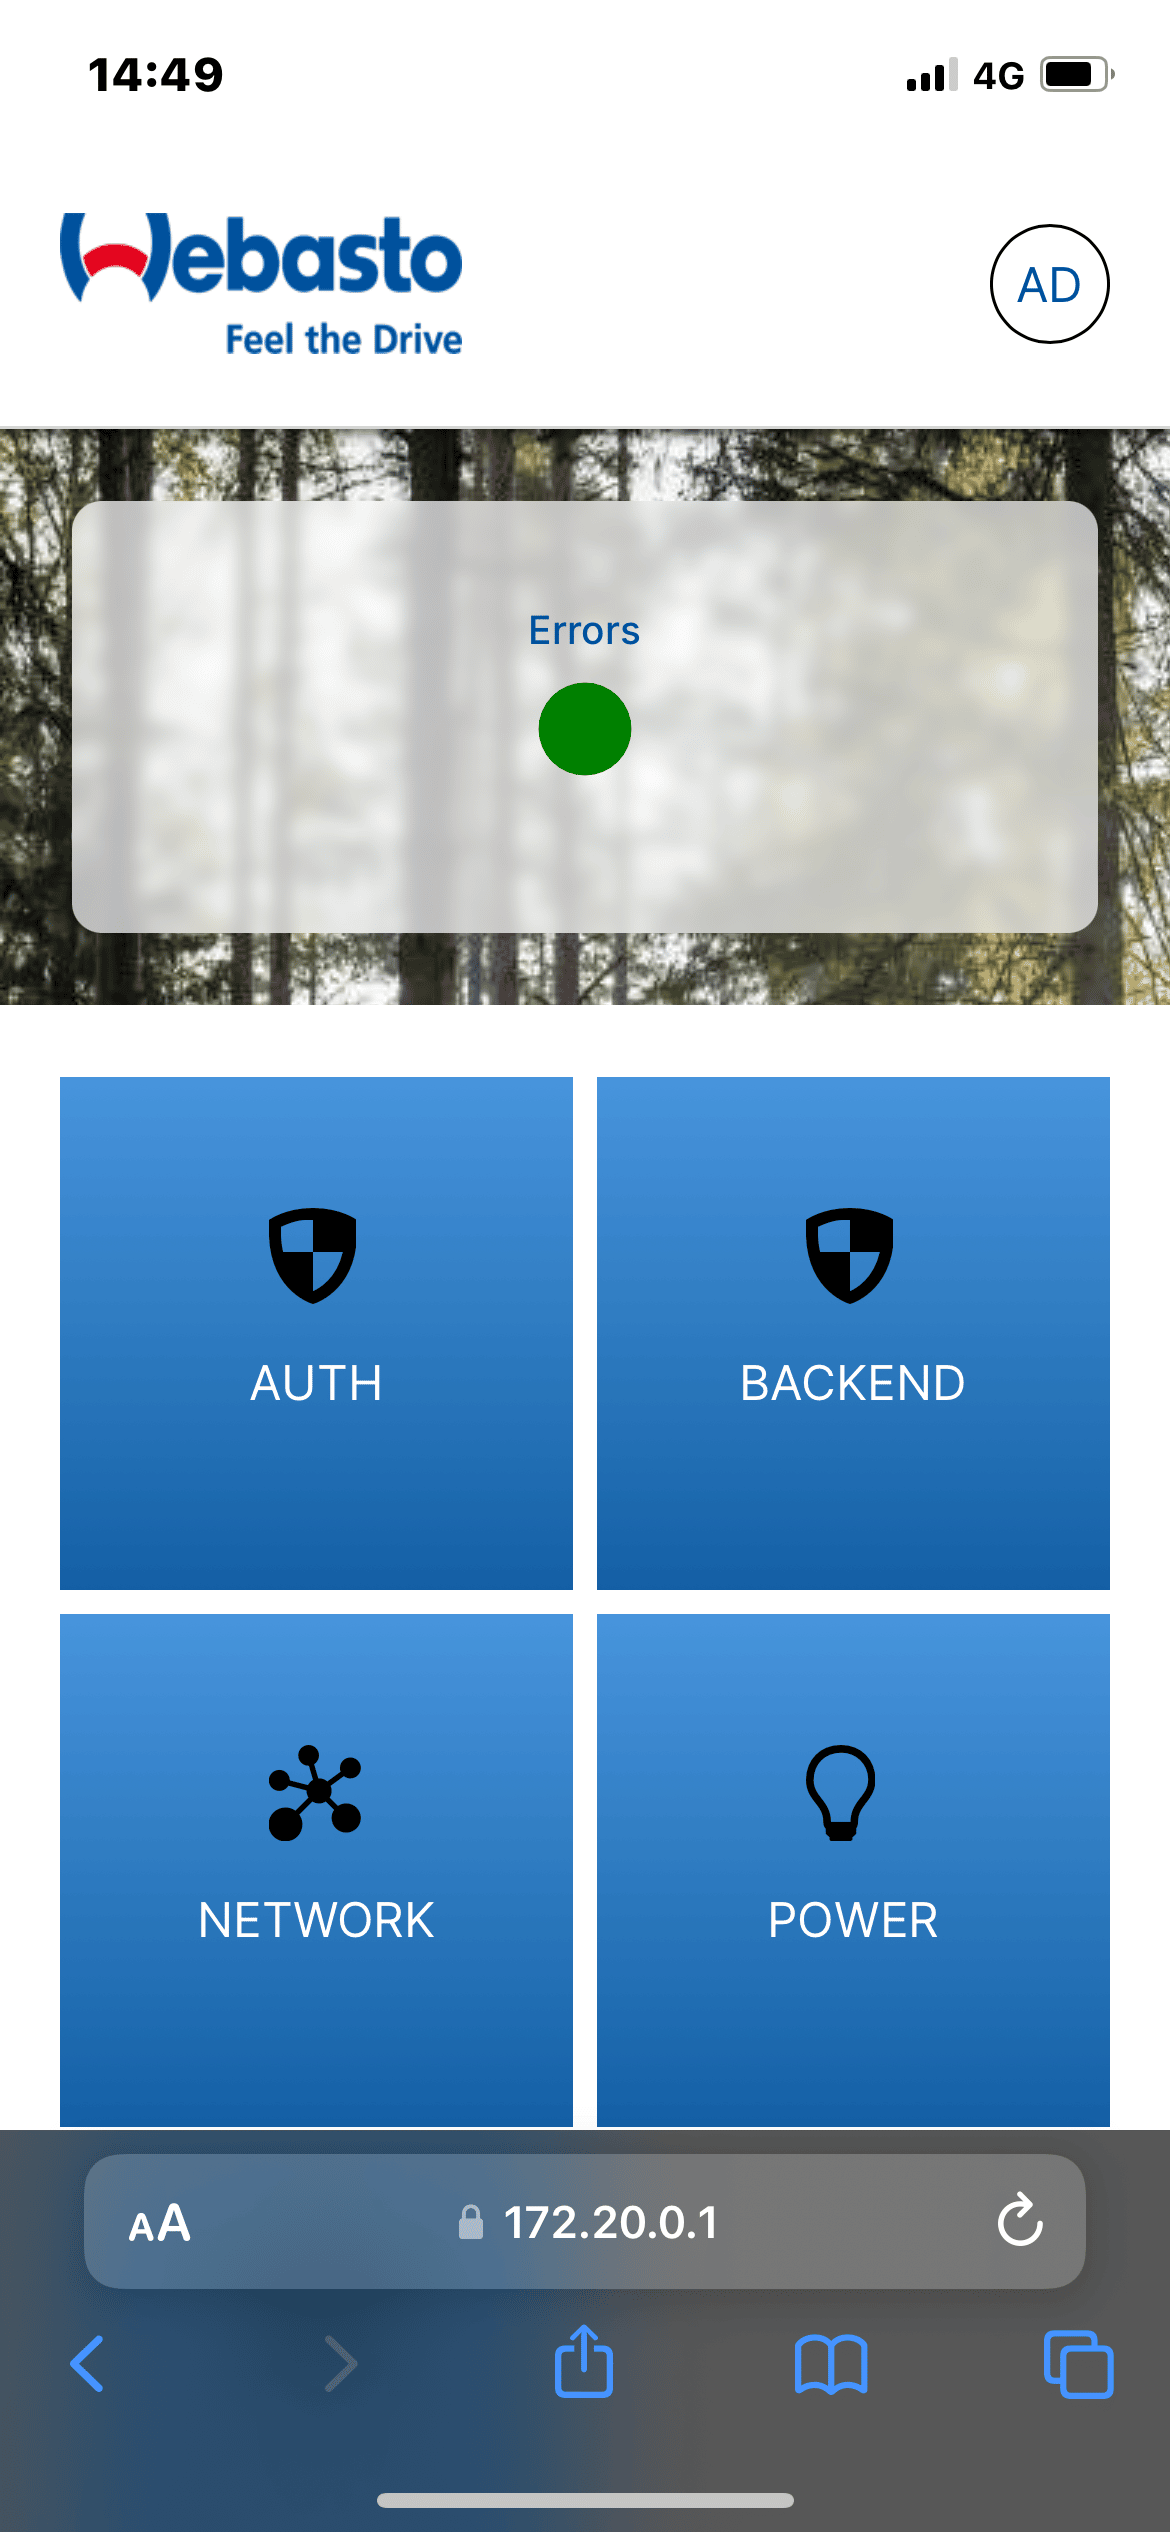
6. Access the Web User Interface
Now open a browser and type in 172.20.0.1 and enter. You might be prompted to a security page preventing from entering the WebUI due to security reasons, you can still access it by pressing "visit this website".

Now you can login using these credentials:
Username: adminPassword: Master Password from the manual
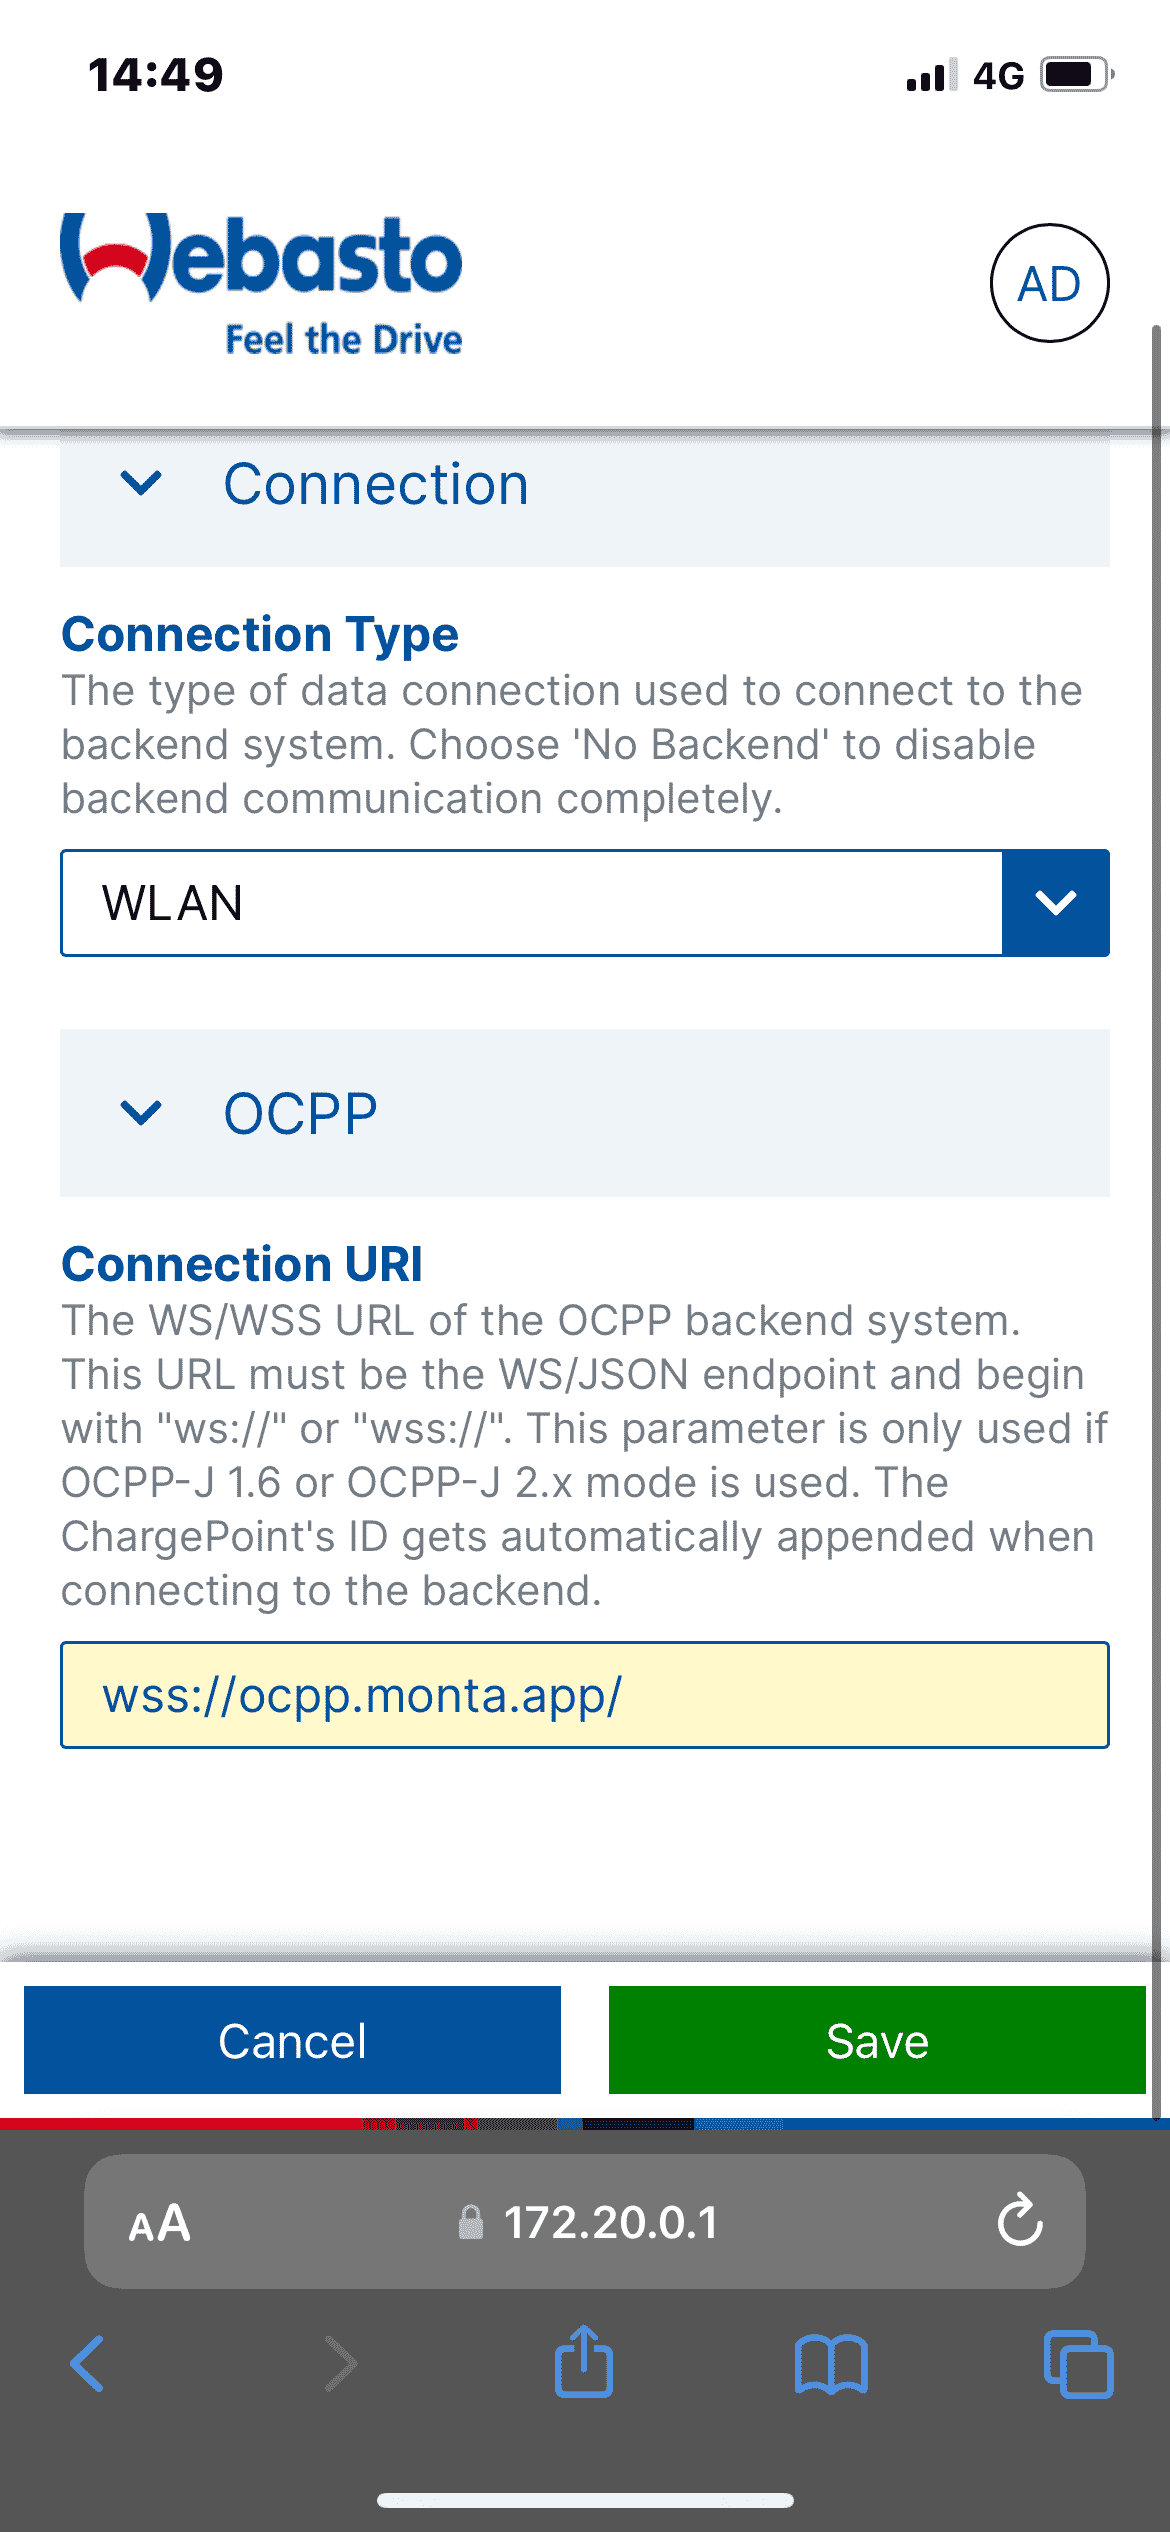
7. Change the Backend settings
Now in the WebUI navigate to "Backend" settings.
Change the following:
Connection type: WLAN Connection URL: wss://ocpp.monta.app/Press "Save"
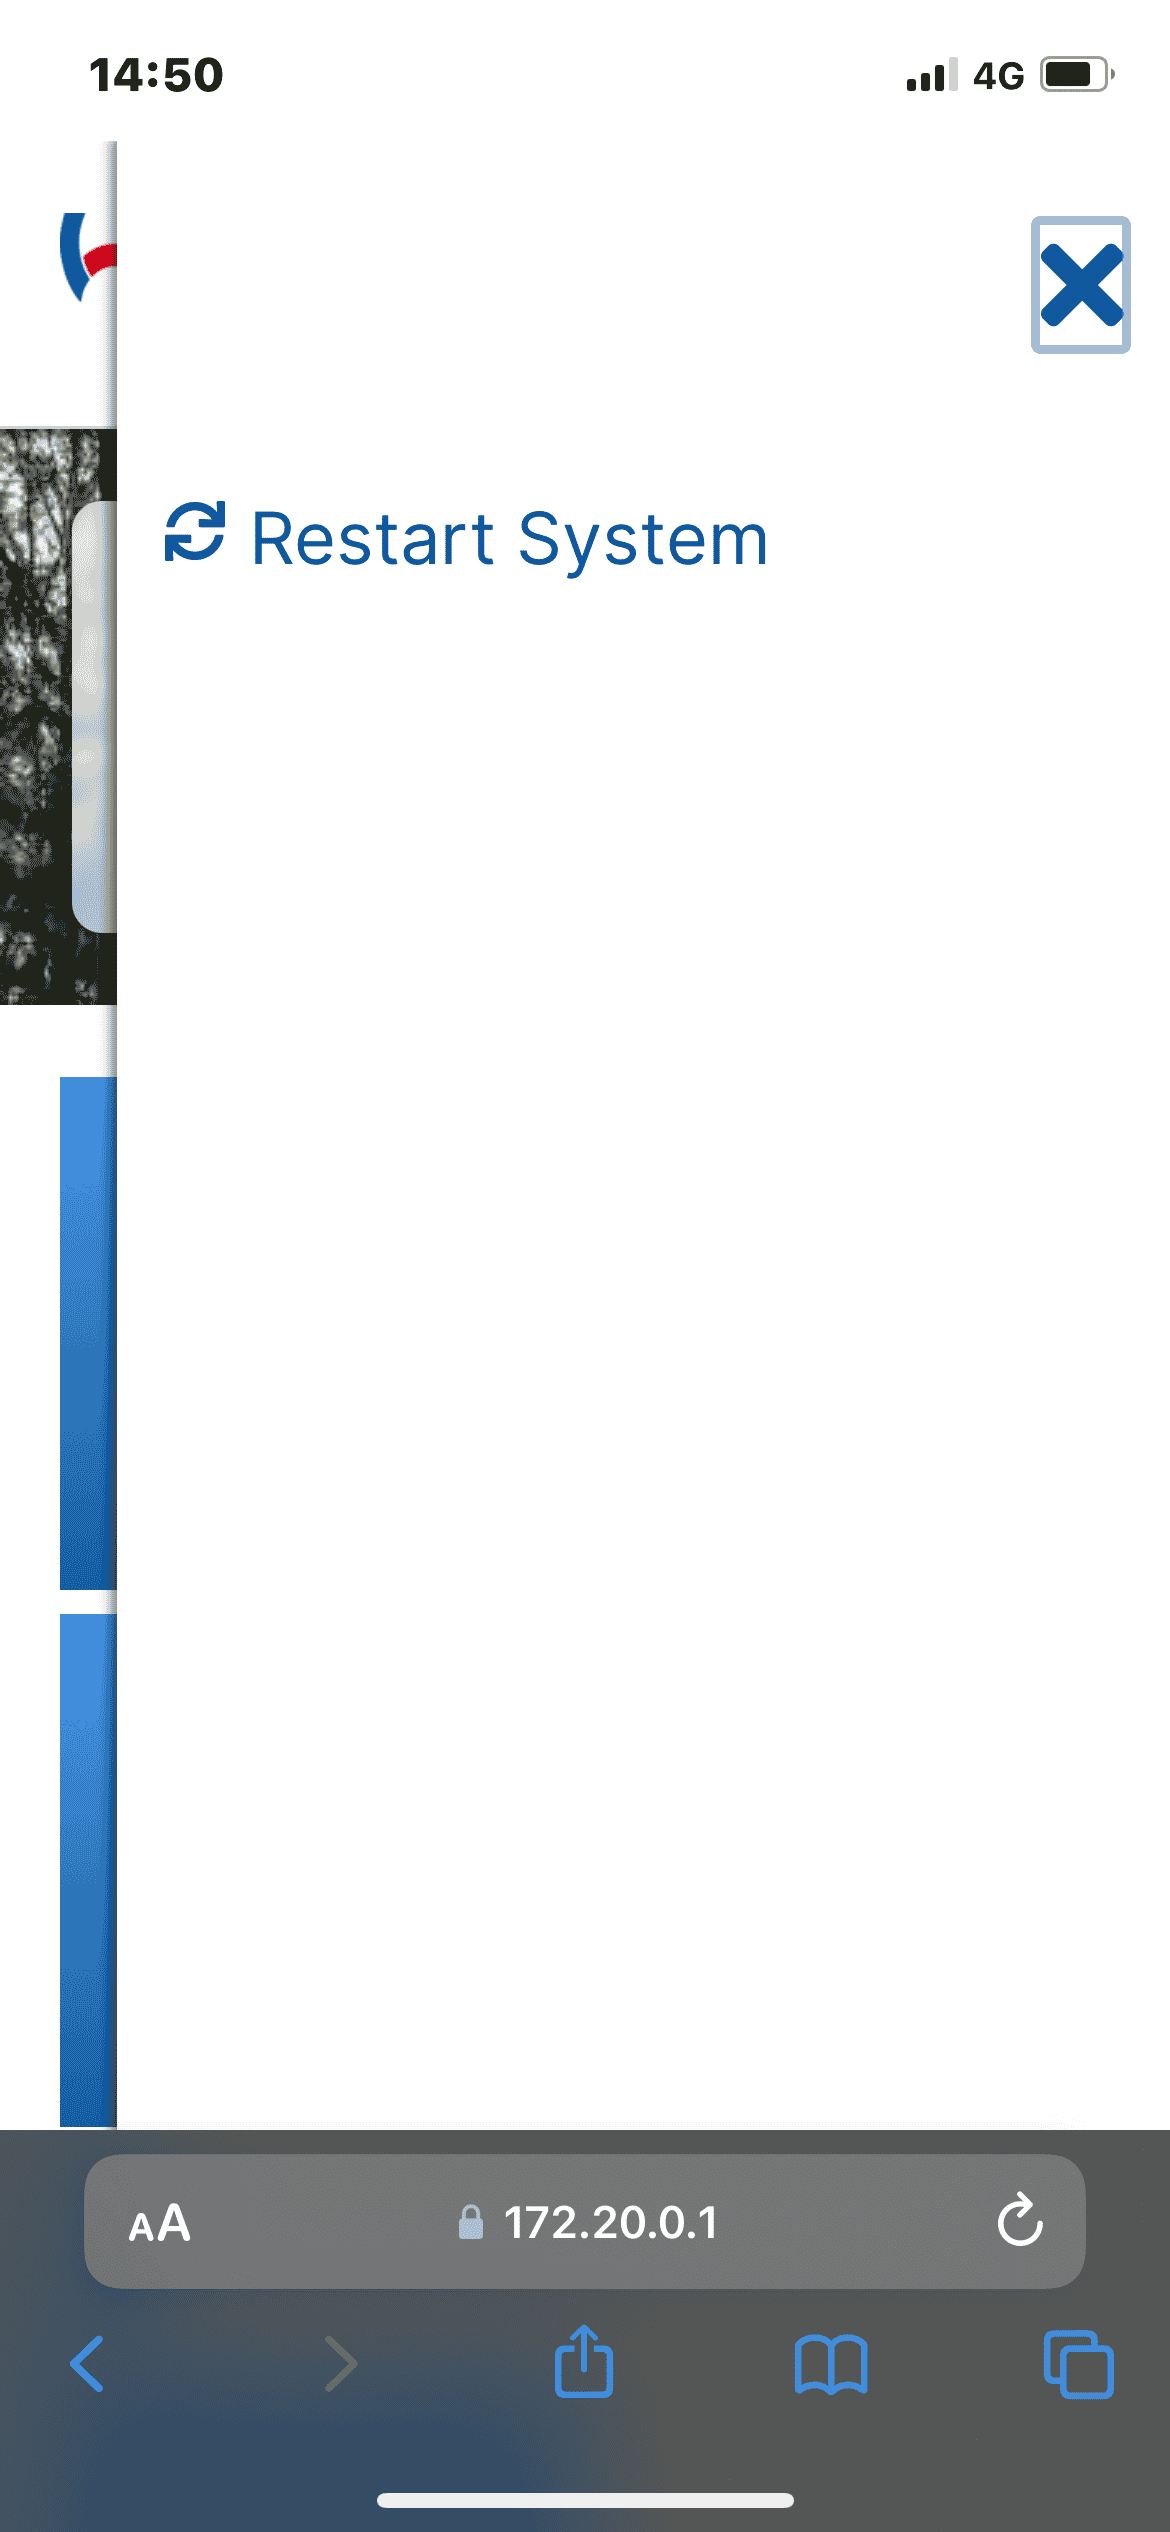
8. Reboot the charge point
Now press on the "AD" icon on the top-right corner and select "Restart System".
9. Connecting your charge point to your Monta account
Now you need to add and connect your charge point to your Monta account.
You can do this through either Monta Charge or Monta Hub.
10. Troubleshooting
If you connect to Monta, but you are not able to charge, your charge point may have an old firmware version.
Please reach out to Webasto and ask them to check on your firmware version and update it, if needed. Contact info: +45 44 52 20 00
You are also welcome to contact Monta support if you need assistance.