This is a guide that shows how to install Monta on your charge point. If you want to connect your charge point to your Monta account, please follow the steps in the end of the guide.
Please note that when you connect your charge point to Monta, we become the operator of the charge point. This means that you need to use Monta to control the charging process.
1. Prerequisites
If your computer runs on Microsoft Windows, download the CCU Drivers from the website. Follow the instructions given on the website.
For Linux, Android and Mac OSX, the USB driver is part of the operating system.
When CCU drivers are installed, it is now possible to configure the controller board of the charge point.
2. Connect the USB cable
Connect the USB cable between the computer and the mini USB port on the controller board.
3. Open your browser to http://192.168.7.2
Open the web browser and log into the local web interface at http://192.168.7.2
Username: ccu
Password: ccu
4. Access the "Configuration" section and enable "Advanced settings"
Once you are inside, select the "Configuration" section from the left side menu.
After this, click on the "Setup" tab from the top menu and slide the "Advanced settings" toggle.

5. Select the "Interface" tab
Open the "Interface" tab from the top menu.
From the drop down "WAN" menu select "Wired". Then, click and open the "Wired" subsection.

6. Configure the charge point's internet connection
From drop down "Configuration Method" menu, select "DHCP".
If DHCP is not supported by your router, enter the network settings manually.

After you make this setting, click on "Save".
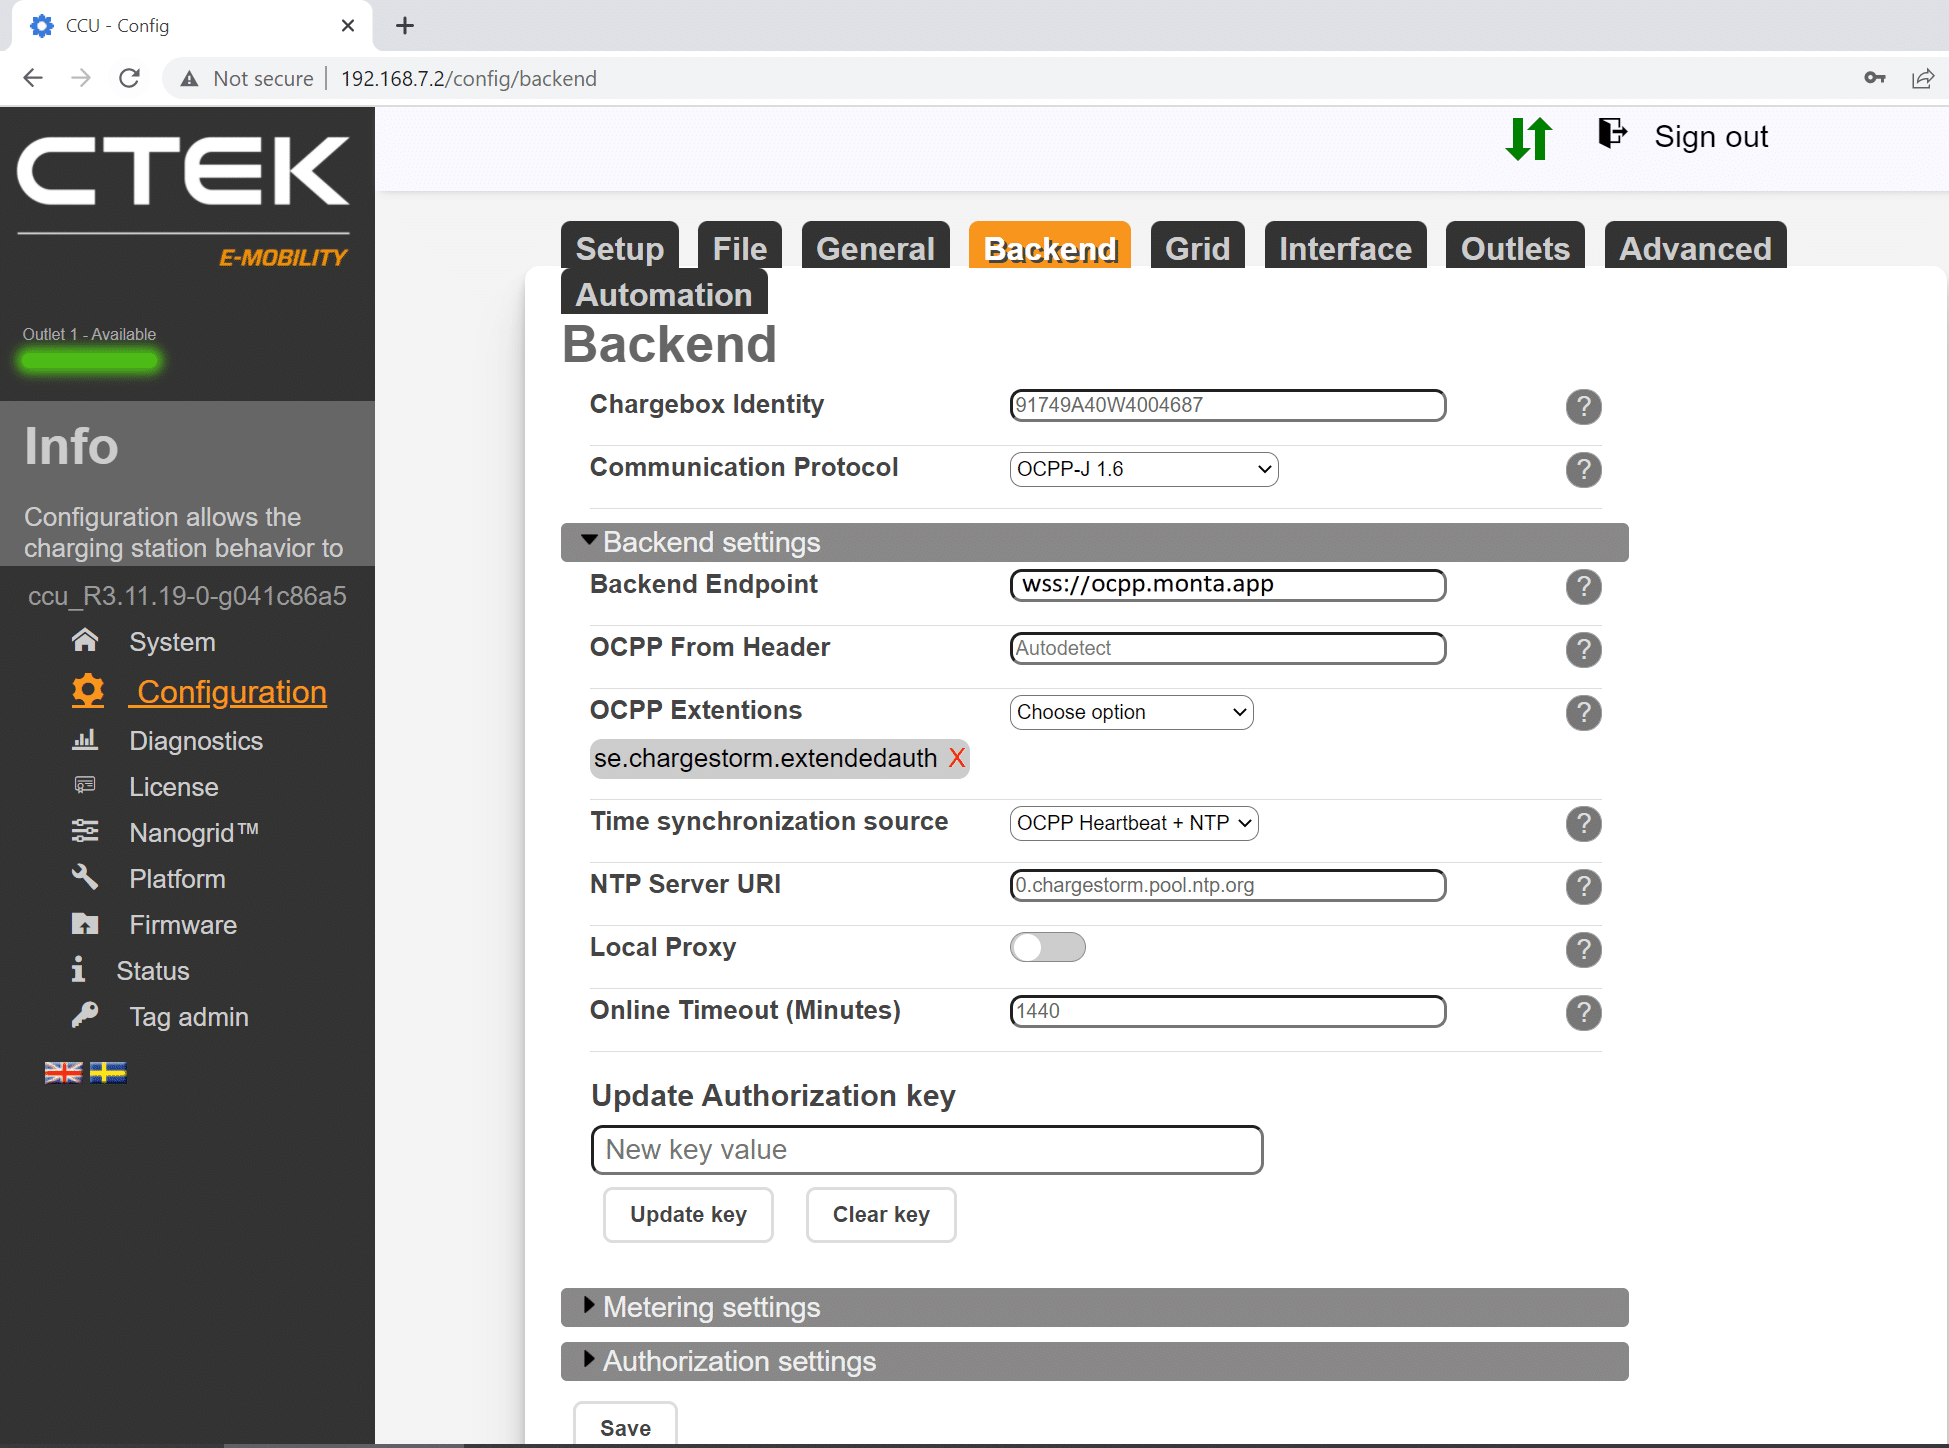
7. Backend configuration
Navigate to the 'Backend" tab
Make sure NOT to edit ‘Chargebox Identity’
For ‘Communication Protocol’ choose OCPP-J 1.6
‘Backend Endpoint’ - wss://ocpp.monta.app

8. Open the "Authorization settings"
Open ‘Authorization settings’ sub-tab and make sure these are the settings:
In "Authorization settings", make sure that the charge point has the correct settings, as shown in the screenshot bellow.

Stop transaction on invalid ID - On
Authorization Cache - Off
Authorize Remote Tx Requests - On
Allow Offline Tx For Unknown Id - Off
Local Authorize Offline - On
Local Pre Authorize - Off
Allow Offline Tx Without Id - Off
Local Authentication List - On
Make sure to click on "Save".
9. Enable RFID lock
Navigate to the "General" tab on top. Make sure that RFID lock is enabled.
This is mandatory for the Monta connection to work.

Click on "Save".
10. Confirm authentication mode
Now navigate to "Outlets" and make sure that Authentication Mode is "RFID".
If you see "Open", please open the drop-down menu and select "RFID" and click "Save".

11. Reset the charge point
Once you save all changes, click on the "Reset" button in the pop-up window that appears on top of the screen.

12. Check the "Status" section
Open the "Status" section from the left side menu.
Check to see if "Backend connection" and "WAN connection" are established.

13. Connecting the charge point to your Monta account
Now you need to add and connect your charge point to your Monta account.
CTEK UK
CTEK is Powered by Monta in the UK.
Powered by Monta is an easy to follow flow, which Monta has developed with an exclusive set of manufacturers.
If you have purchased your CTEK in the UK, click here to read how you can use the flow via your phone.
CTEK International
You can do this through either Monta Charge or Monta Hub.
