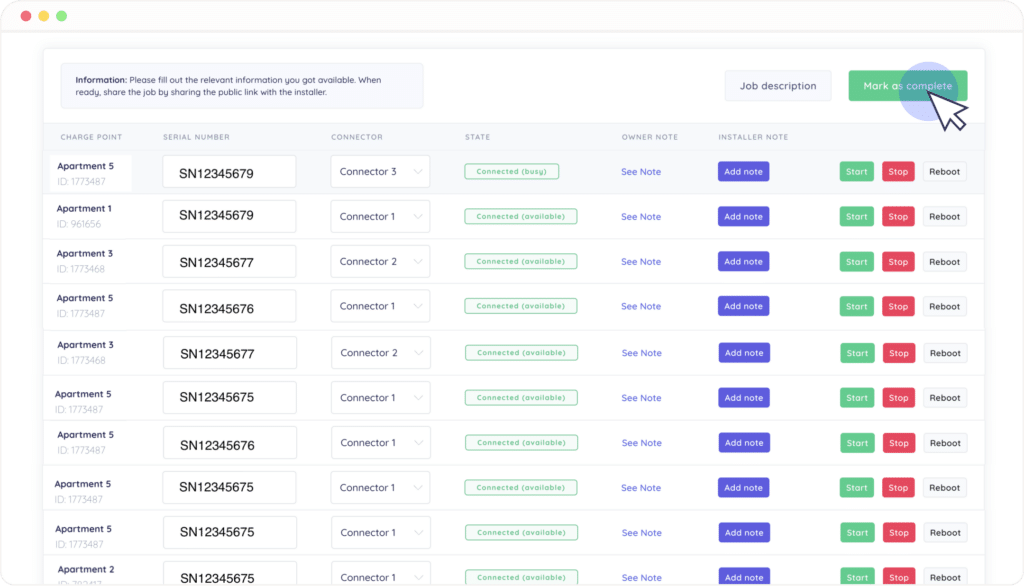
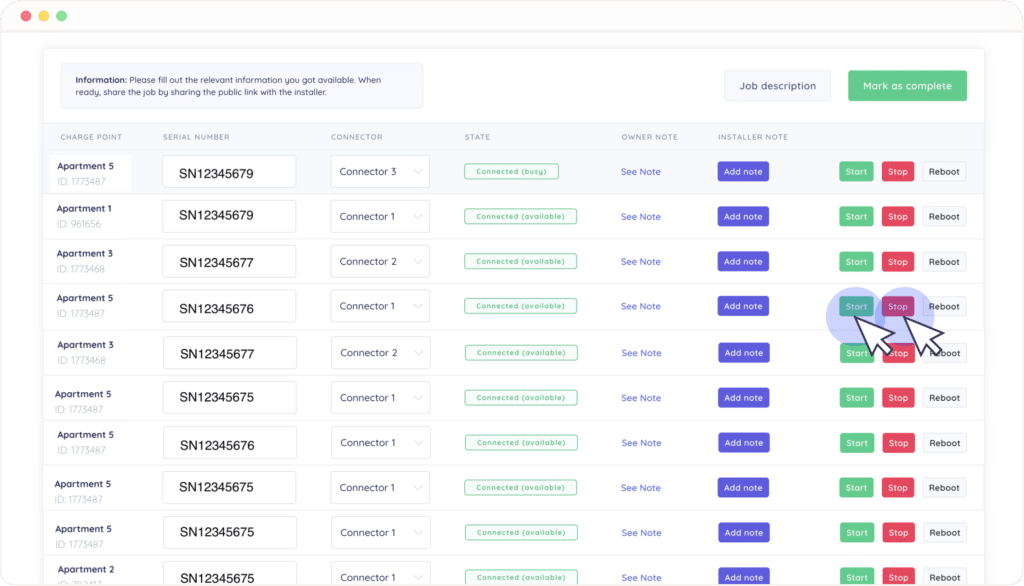
The public installer page represents a group of charge points that you’d like to connect to Monta. You can use this page to match charge point placeholders with their corresponding sockets, serial numbers and connector positions, check the connection of the sockets, and test if charging works!
1. Open the installer job link
If you are an installer, who needs to install charge points on a site, you might have received a link that will help you manage the process.
Open the installer job link and make sure that you have already correctly configured the listed charge points on the site. Please note that if the hardware's OCPP settings have not been correctly adjusted then a connection will not be established with our servers.
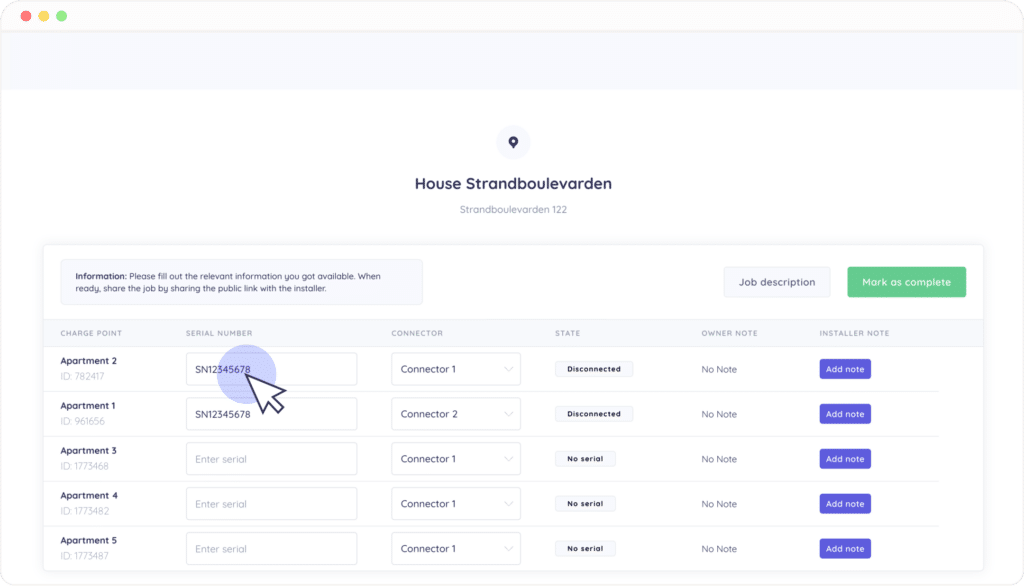
2. Enter the serial number of the unit
Begin by filling in the serial number of the charge point. In Monta each connector is registered separately as a charge point. If there is a charge point with two connectors, then just insert the same serial number.
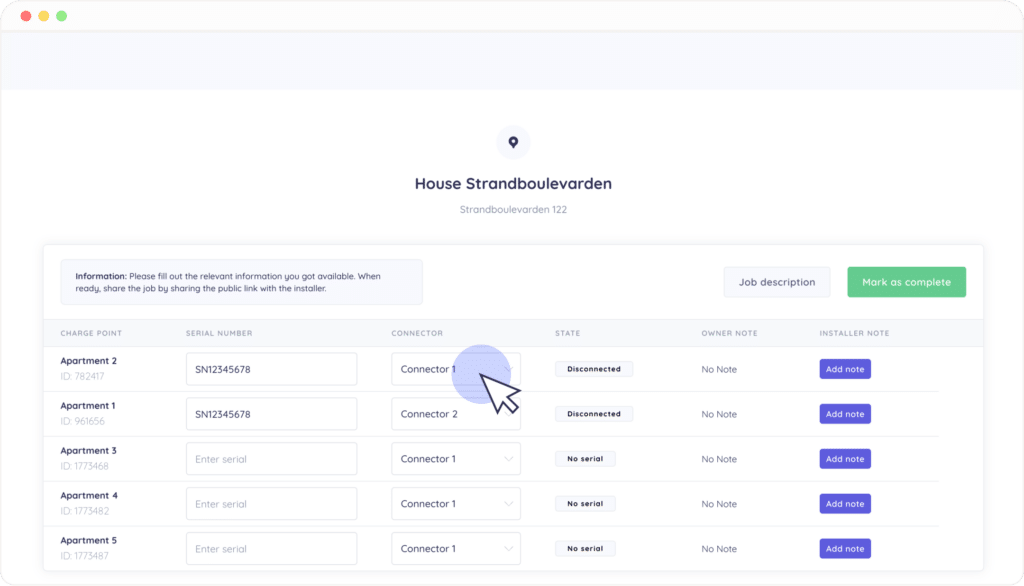
3. Select the connector position
State which is the connector position of this charge point.
4. Check the connector state
Once the charge point is connected, it will show as "Connected" in green.
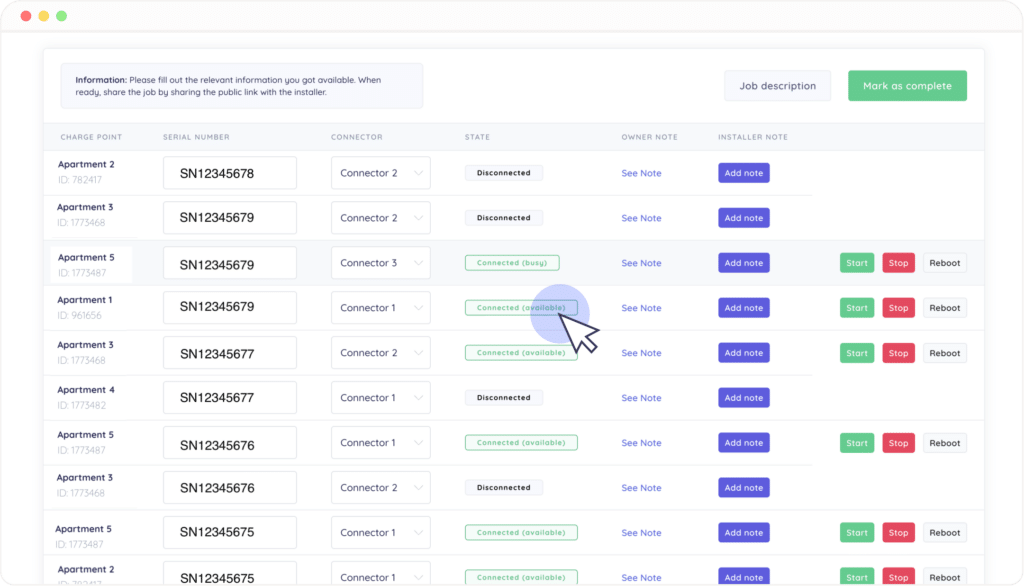
5. Test the connected charge point
Now, you can test the charge point with the "Start" and "Stop" commands that appear on the screen.
6. Click on "Mark as complete"
An installer job is considered complete when:
- All connectors are in state "Connected"
- You have tested to starting and stopping each of the connectors.
If there is anything significant you want to pass on as information to the charge point owner, you can click on the button "Add note", next to the charge point.
Now, you can click on the button "Mark as complete".
