Before you can connect a Payter terminal make sure that you have activated it with Payter. Here is a guide for this.
In the current guide you will learn how to add and configure your Payter terminal, so you can apply it to the charge points, ready to use.
1. Add the Payter Terminal in your Team
- Open a Team and click on Team Wallet
- Click on Wallet actions and select Add payment terminal
- Select Payter payment terminal
- Select a Merchant
- Monta is selected as a Merchant by default
- If you need to set up a different Merchant, read more here (Credentials).
- Enter the serial number
- Click on Connect
- If you are not able to verify the serial number, please check your MyPayter portal or contact Payter for assistance.
2. Configure and test the Terminal
Now that the Terminal has been created, you need to configure it to make sure that it works.
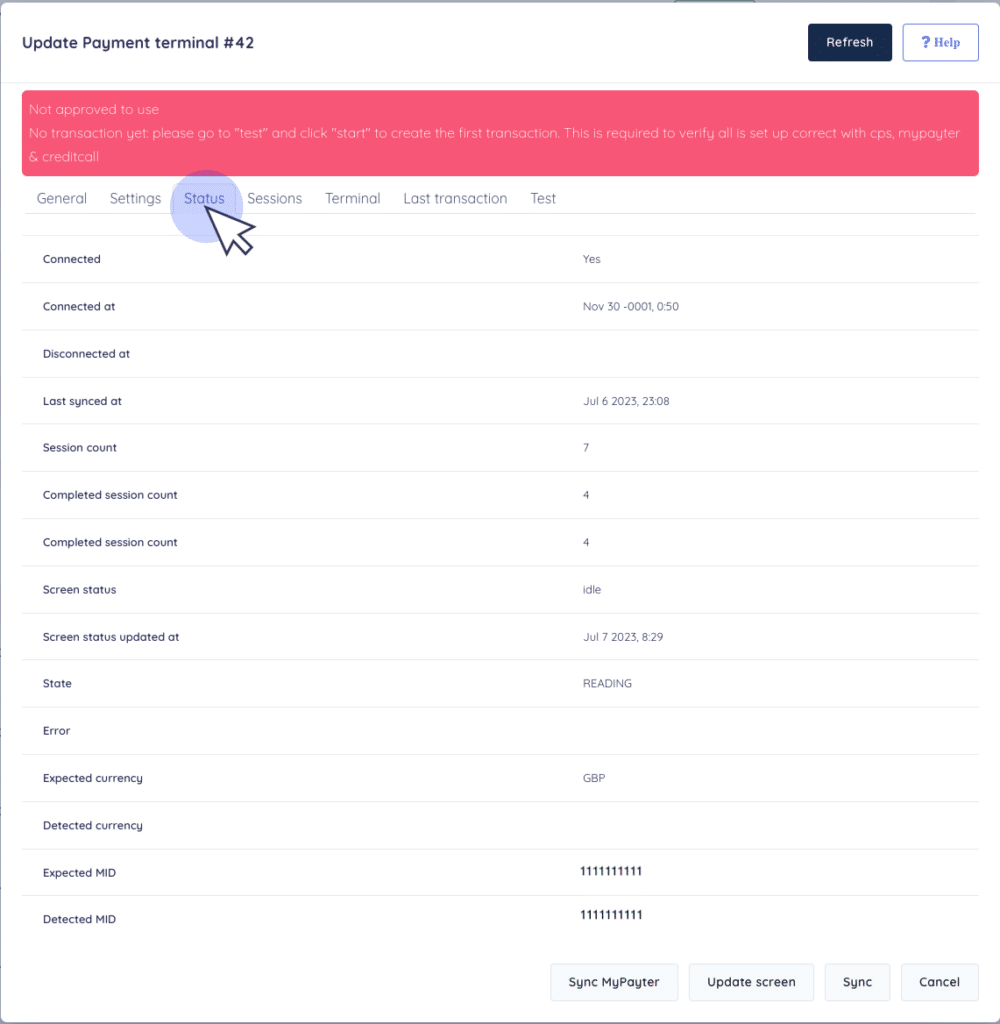
Check the status of the Terminal
On the page, click on the "Status" tab.
On this page, you can see if the currency and MID is matching correctly.
Perform a test
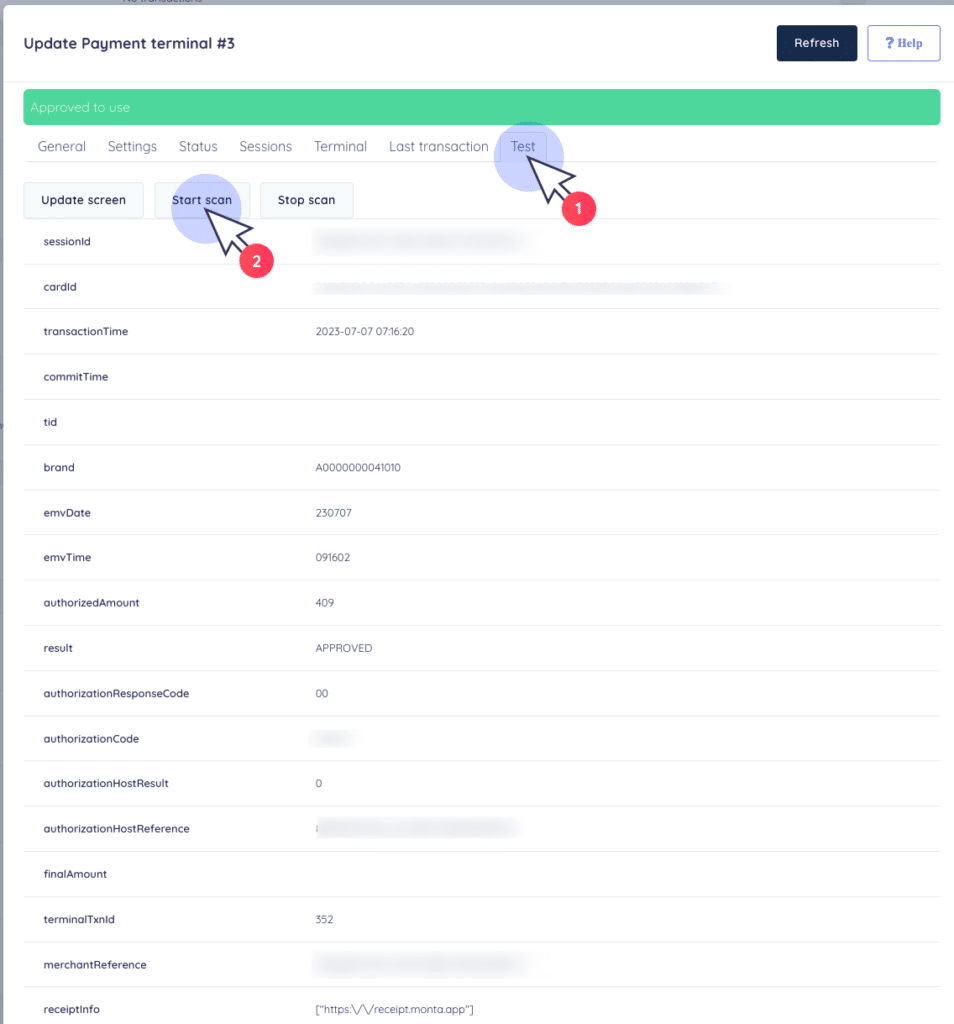
Perform a test transaction, so the Monta system can verify the Terminal details. Click on the Test tab on top of the screen.
Click on Start Scan and tap a credit card on the device.
Monta will make authorize 1 EUR/GBP/DKK/SEK/NOK and cancel it to verify that currency is setup correct.
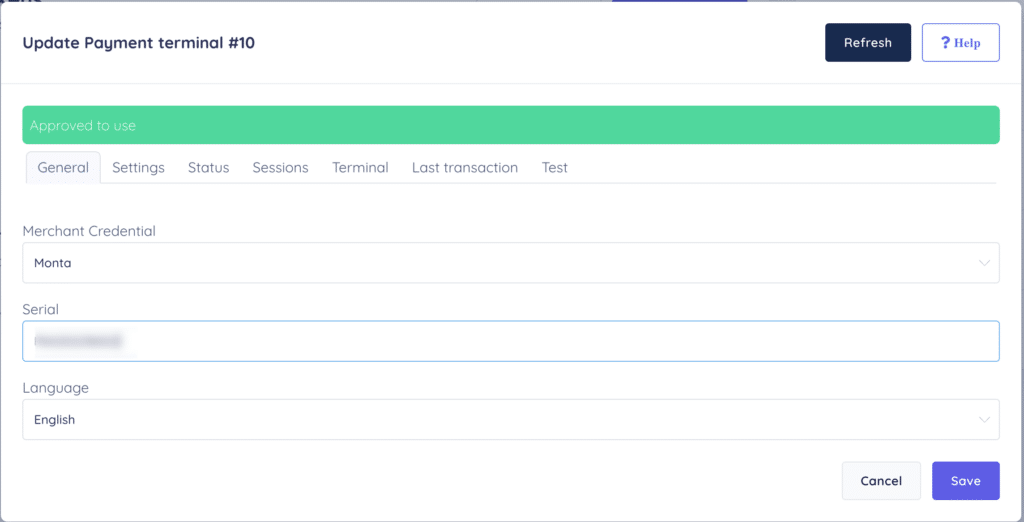
Terminal is active
Now your terminal is ready to be applied to your charge points!
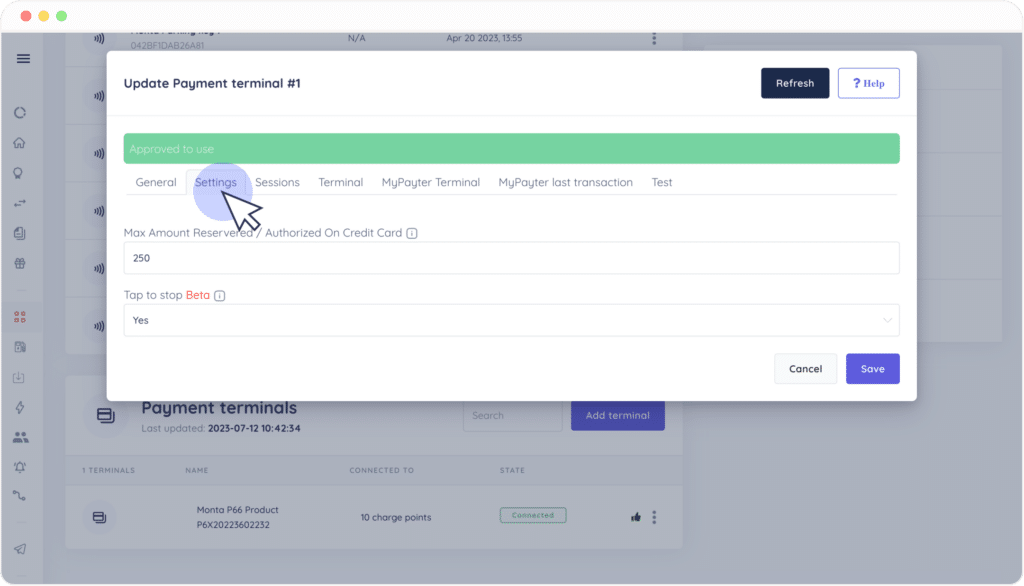
Set a maximum reservation amount
You can set a maximum amount of money to reserve when a charge is started. Click on Settings.
For Denmark, we strongly recommend to set a 250 DKK maximum reservation.
3. Apply to charge points
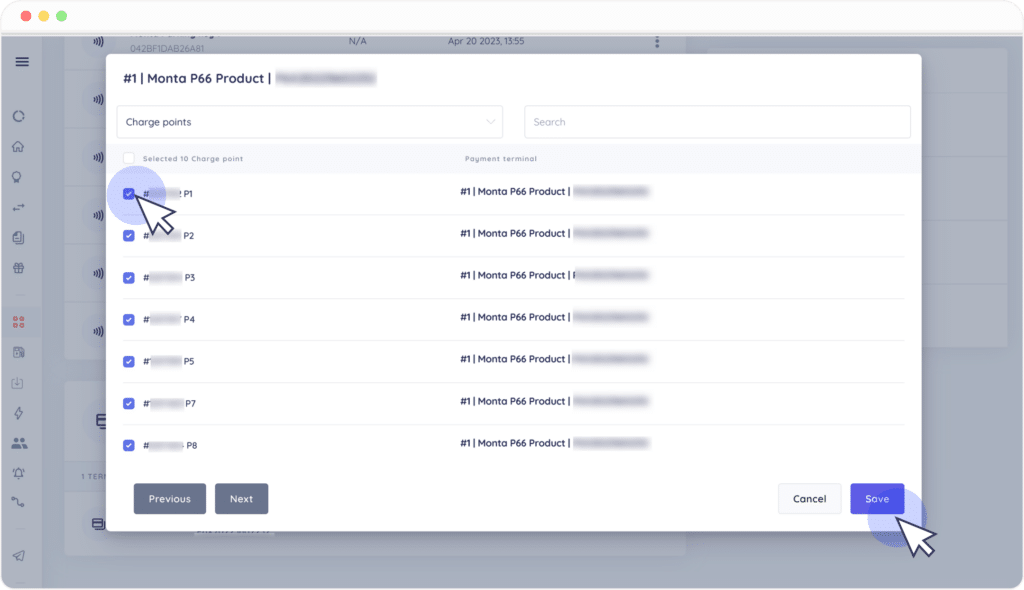
Now, you can select which charge points will be connected to this payment terminal.
Click on the three dot action button and select "Apply to".
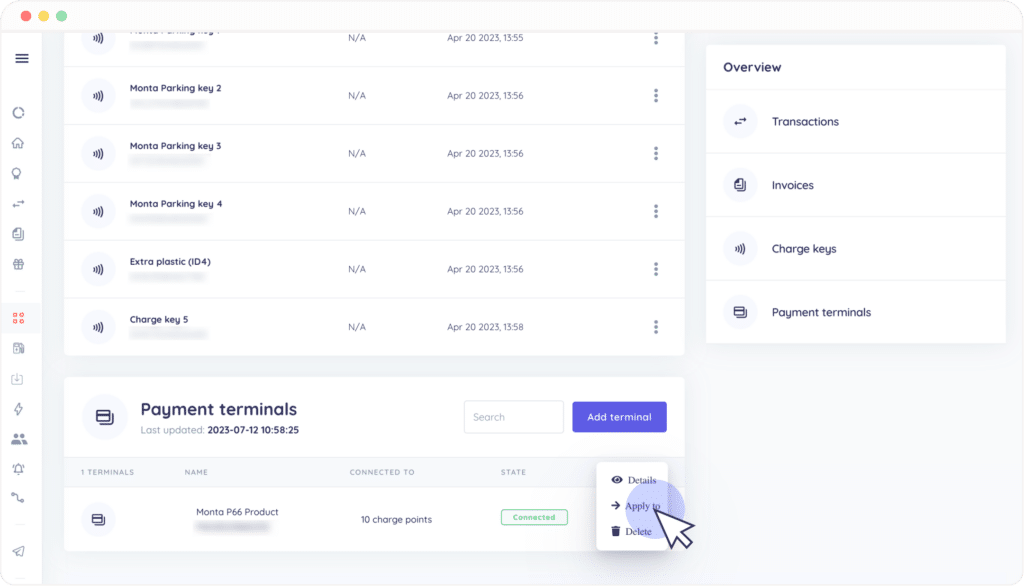
Select the charge points and click "Save".
