This guide focuses on how to create the Load Management (previously known as Load Balancing) setup in Monta Hub and Monta Control. For a comprehensive explanation of the different components of Load Management, you can read here.
Create a Team-level Load Management Group
If the charge points are set up within one team in Monta, you should create a Load Management Group on a team level. You can have multiple groups within a team.
- Open the Team, where your charge points are located
- Select Charge Points tab
- Navigate to Load Management (the page will take you to Monta Control)
- Click on + Create
Create an Operator-wide Load Management Group
If you want to select charge points, that are set-up in different teams, then you need to access the Load Management section. This is useful for scenarios where you want to handle access pricing or something at a team level, but the charge points are in one location and therefore need to be load managed together.
- Open Charging points from the left-side menu
- Click on Load Management
- Click on + Create
Fill in available amps and power distribution
- Navigate to the Configure section
- Name the Load Management Group
- Fill in Total amps available - The amps available per phase for both charging and the building
- Select a type of Power distribution
- Equal share = Power is distributed equally among all charging cars on a site
- First come, first served = Cars are prioritized by order of starting the charge
Add an external meter
In order to set Dynamic Load Management, you need set up and external meter, connect it to Monta, and add it to the Load Management Group. Monta currently supports Perific and ABB ModBus.
- Toggle on the External Meter and select the type
- Select the correct placement
- Including charge points = Meter measures building + charge points being used
- Excluding charge points = Meter measures only how many amps the building is using
- Input a Dynamic buffer
- A safety buffer to ensure that we are not exceeding the total capacity when the building’s consumption changes. Recommended value is the highest expected increase in the building’s consumption within one minute.
- Input Backup charging limit
- Number of amps to use, if the meter cannot communicate current consumption to Monta.
- Click on Save changes.
Create a Sub-group
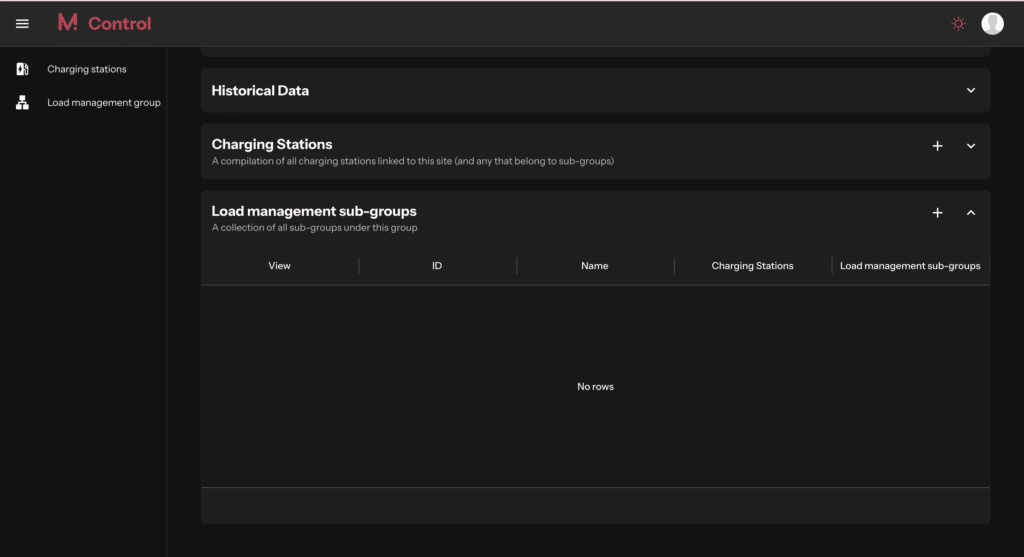
You can also create a Sub-group, which represents a subset of charge points, sharing the same available amps on the site. To create a Sub-group, click on + button in the Load management sub-groups section.
You can only add an external meter to the main group, not to a Sub-group.

Add or remove charge points
- Open Charging points from the left-side menu
- Click on Load Management
- Select the Load Management Group that you would to add the charge points in
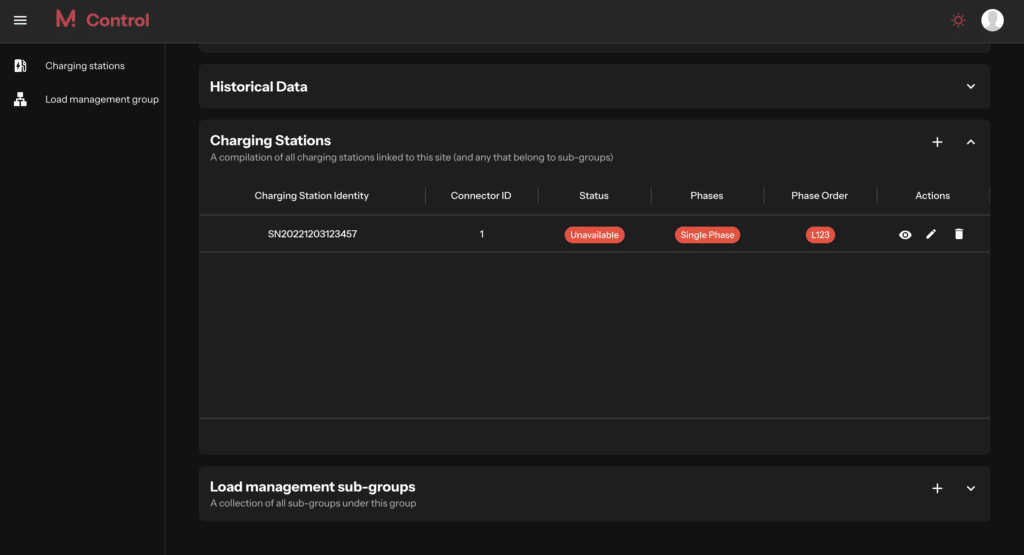
- Scroll down to Charging Stations section and click on the + button
- Use search bar to find charge points by address or serial number
- Add the charge point/s
- Selecting a charge point will automatically add it to the Load Management Groups
- A charge point can belong to one Group at a time
- Selecting a charge point with more than one connector will automatically add all connectors to the Group
- Some chargers might not be supported; therefore, check them on our supported charge point list to see if they support load balancing.
Advanced settings
Once the charge point is added, you will be able to see the following information:
State - See if the charge point is Available, Busy or Unavailable.
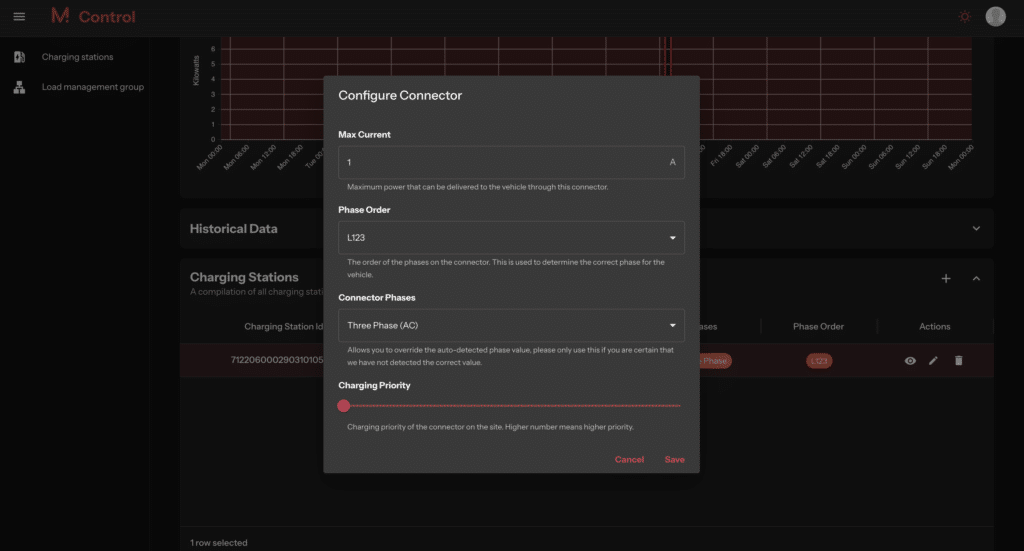
Phase order - This is the order of the phases on the charge point. It is important that it is setup correctly. You can consult the electrician who has connected the wiring on the charge point to confirm the order. It is used for phase rotation.
Max Amps - The maximum amount of Amps that will be available for the charge point.
Prioritize - If you select to prioritize a charge point, this will be applied when distributing the current among the charge points in use.
Connector Phases - We automatically detect the phases, but in some cases, it might be required to overwrite the phases. Possible values to select: Auto Detect, Single Phase (AC), Single Phase (AC - Split Phase), Three Phase (AC), DC
You can click on the pen icon to see more settings.


Remember to click "Save".
Setup Scheduled Load Management
This setup ensures less power is available during peak hours and shifts energy to time slots where more is available, such as during the night.
- In the Load Management section, click on ‘Load Management’ and in the Load Management Groups section, click on Create new group.
- Choose a name for the group, select the available amps, and determine the load management method: equal share or first-come-first-served..
Whatever you choose here will not impact the configuration of Scheduled Load Management. - Add your selected charge points by following the 5th step in this guide.
- Ensure less power is available during peak hours and shift energy to time slots where more is available, such as during the night.
- Choose a name for the group, select the available amps, and determine the load management method: equal share or first-come-first-served..
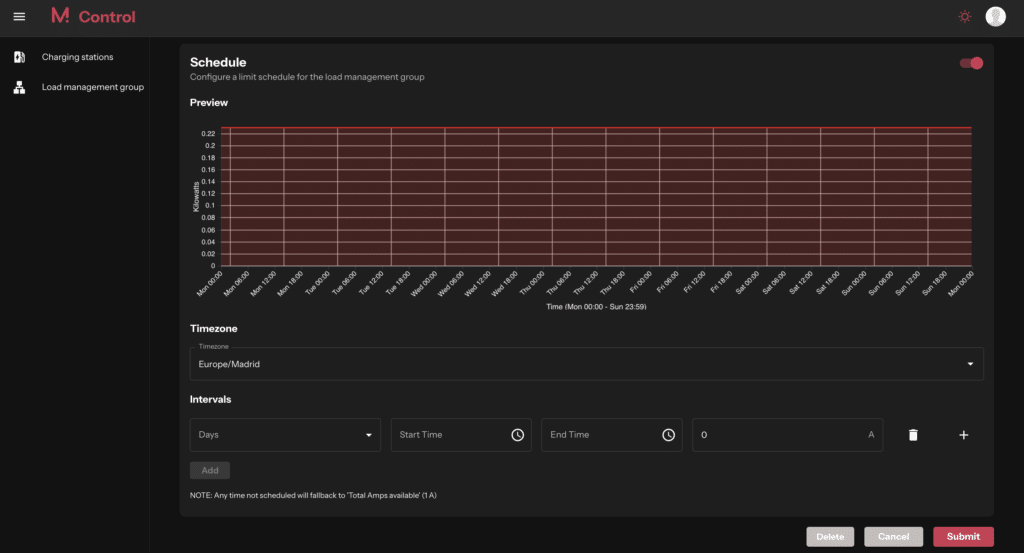
- After configuring the Load Management Group, scroll sown on the page to the Schedule section.
- Toggle on the Schedule option to enable this feature. From here, you can define specific time periods during which the defined Amp limit will be taken into account.
- To create a schedule, select the desired days of the week from the dropdown menu.
- Set the time range for the schedule by specifying the start and end times.
- Enter the desired amp value for the selected time period.
- Click Submit to save the configuration.
Notes:
- Any time not scheduled will default to the total available amps for the site.
- When setting up the load management group and selecting the max amps, ensure that the value is a whole number. For example, fractional ampere values like 61.6A are not supported; the system will round down and allocate 61A instead. This means you must manually input 61 in the Max Amps field.
- If there is a sudden increase in used power on the site due to the schedules we recommend creating a few short schedules to ramp up the available current in steps.
- Gradual ramp-up is only necessary for very large sites with a significant number of Charge Points. For most setups, this approach will not be required.

